|
|||
|
|
~ The bLog Home ~ |
||
| Click here to continue with the August logs from August 16-31. | |||
TUESDAY, AUGUST 15, 2006 |
|||
 Yup--you
guessed it. I couldn't stand it, so first thing this morning I
quickly sanded the log wall behind where the kitchen cabinets would
go. I didn't go to town on the area, but I gave it a quick
once-over to clean it up a bit. I did this for me.
Silly, I know. Yup--you
guessed it. I couldn't stand it, so first thing this morning I
quickly sanded the log wall behind where the kitchen cabinets would
go. I didn't go to town on the area, but I gave it a quick
once-over to clean it up a bit. I did this for me.
Silly, I know. |
|||
|
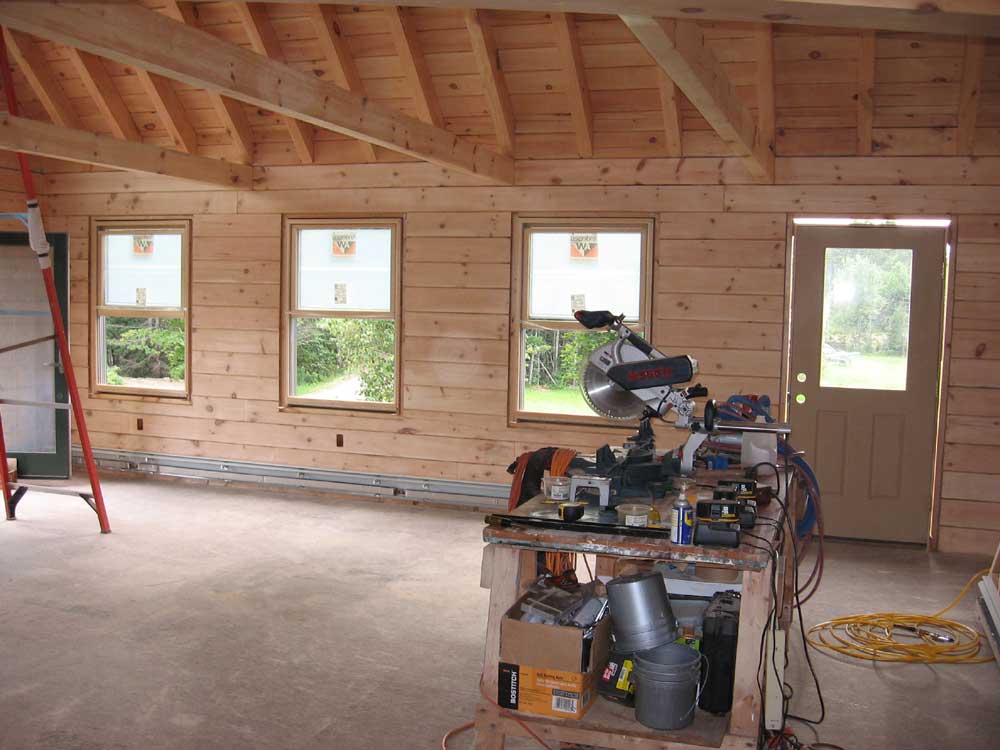
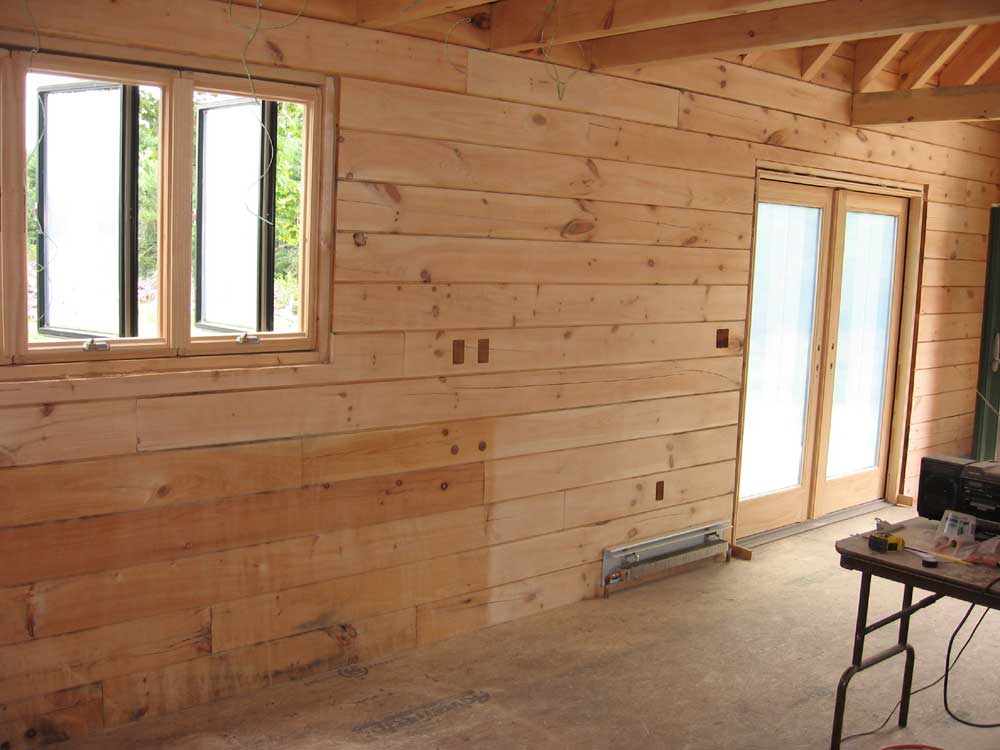
With that done, I cleaned the great room again, and then tacked off the walls to remove any final dust. Then, I spent the morning applying two coats of poly to the front and back log walls in the great room. I was pleased with how the logs looked with the finish--rich and warm. It was nice to look around the room and see a more or less completed project (minus flooring, trim, etc...). |
|||
|
|
|||
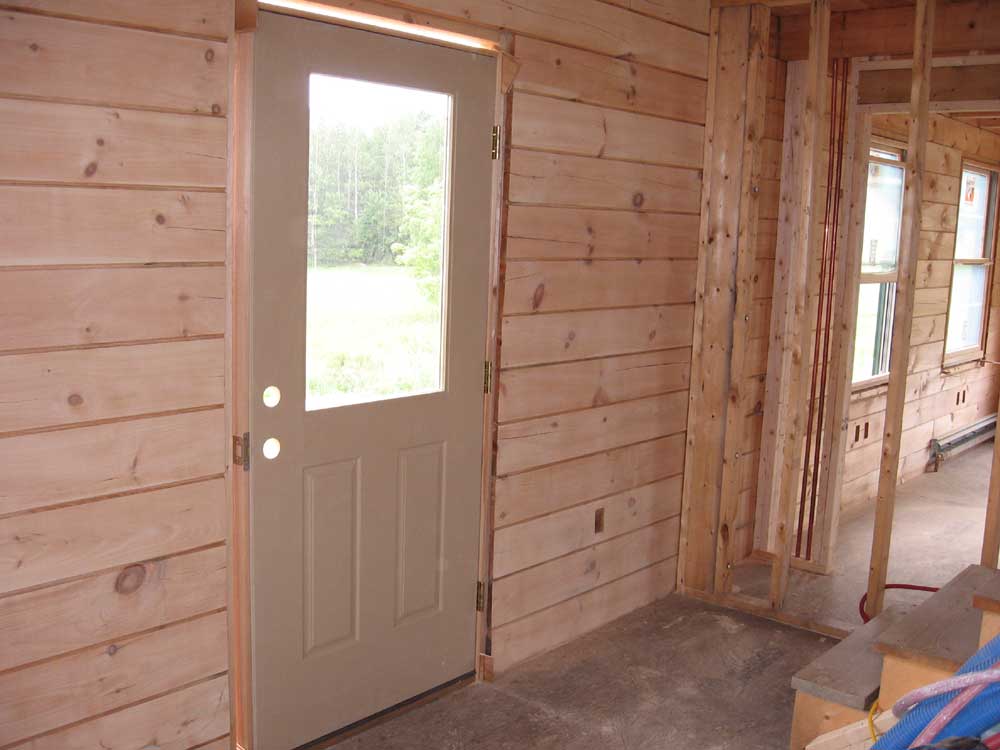
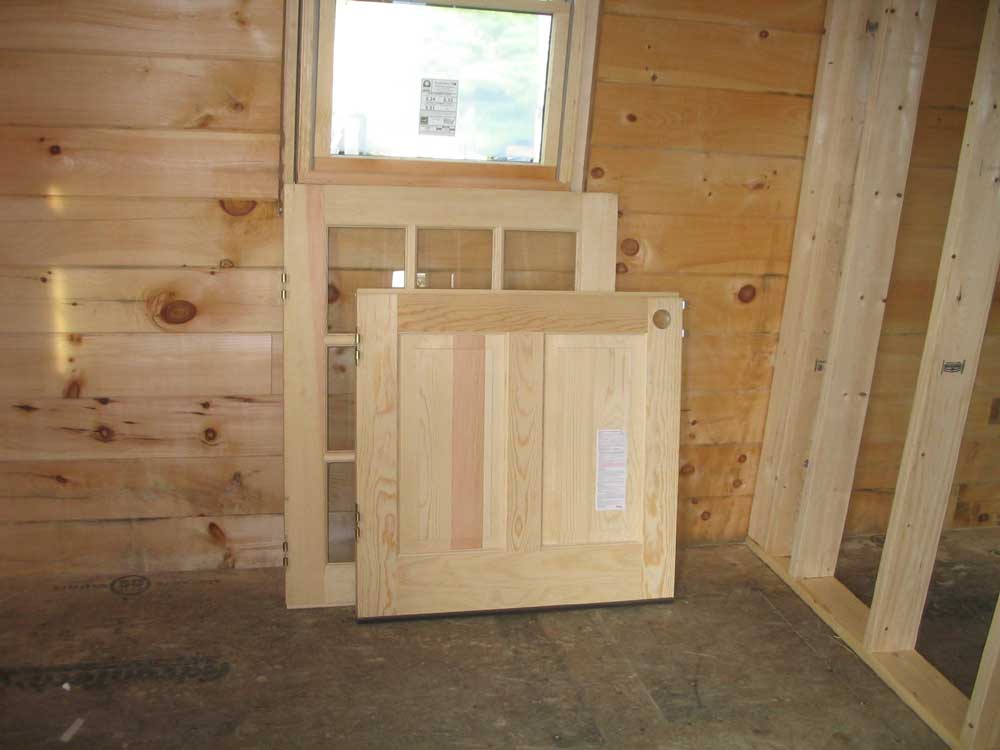
 I
also lightly sanded the Dutch door and taped off the window panes,
then applied two coats of the interior poly to the inside surface.
Now, I have to get some exterior primer and paint and take care of
the exterior side, as well as all the edges, before I can hang the
door. I
also lightly sanded the Dutch door and taped off the window panes,
then applied two coats of the interior poly to the inside surface.
Now, I have to get some exterior primer and paint and take care of
the exterior side, as well as all the edges, before I can hang the
door. |
|||
|
In the afternoon, I began by taking some measurements of the kitchen area--to the center of the window opening, and to the log post from various walls--so that we could plan our kitchen design. We had an appointment on Friday morning to get the design and order sorted out. With a 6-8 week lead time, we were none too early on this project. The kitchen will certainly be ready for the cabinets well before they actually arrive, and I can put them in at once so that we can get measured for the countertop as soon as possible. |
|||
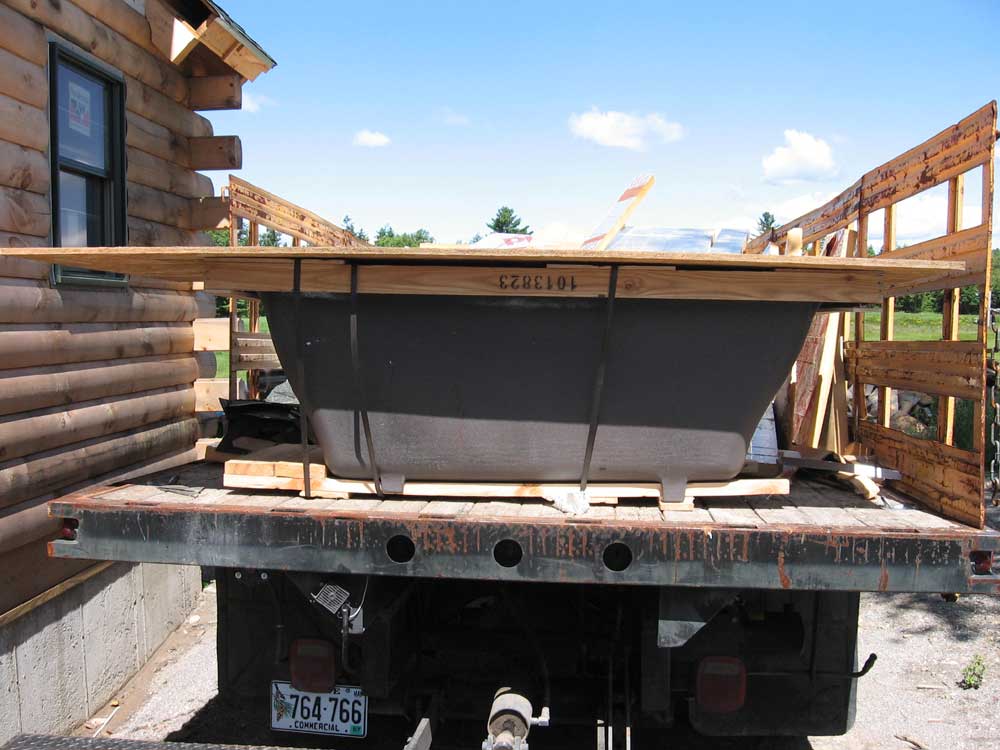
 The
truck from Moose Creek was due tomorrow with some 4x8 beams that I
needed for the truss in the great room, so I prepared for the
hopeful eventuality of lifting the bathtub into the upstairs
bathroom by adding some angled pieces leading down from the window
opening, on which I hoped we could "skid" the tub down once it was
lifted up. Hopefully this will get taken care of tomorrow. The
truck from Moose Creek was due tomorrow with some 4x8 beams that I
needed for the truss in the great room, so I prepared for the
hopeful eventuality of lifting the bathtub into the upstairs
bathroom by adding some angled pieces leading down from the window
opening, on which I hoped we could "skid" the tub down once it was
lifted up. Hopefully this will get taken care of tomorrow. |
|||
 Afterwards,
I had to go back to sanding. I began in the downstairs bath,
but had to move out when the heating guys filled the heat system
with water and a significant leak occurred in the upstairs bathroom,
right over my head. I was sanding away and suddenly was
getting wet--weird, since I didn't know they were filling the
system, and I was in my own little world in my sanding garb.
So I moved next door and sanded the pantry wall. Afterwards,
I had to go back to sanding. I began in the downstairs bath,
but had to move out when the heating guys filled the heat system
with water and a significant leak occurred in the upstairs bathroom,
right over my head. I was sanding away and suddenly was
getting wet--weird, since I didn't know they were filling the
system, and I was in my own little world in my sanding garb.
So I moved next door and sanded the pantry wall. |
|||
 Later,
I returned and continued sanding in the bathroom, though I didn't
get both walls finished since I ended up going over some of the
heating plant with Jim Brann late in the day. They didn't
quite finish up today, so they'll be back tomorrow. They did
manage to pump out the K1 and replace it with #2 oil, so they took
my oil truck away. ( I added a picture of the truck to
yesterday's log for posterity.) Later,
I returned and continued sanding in the bathroom, though I didn't
get both walls finished since I ended up going over some of the
heating plant with Jim Brann late in the day. They didn't
quite finish up today, so they'll be back tomorrow. They did
manage to pump out the K1 and replace it with #2 oil, so they took
my oil truck away. ( I added a picture of the truck to
yesterday's log for posterity.) |
|||
MONDAY, AUGUST 14, 2006 |
|||
|
I began the day very early, and headed
the hour to Brunswick to Lowe's to buy some white pipe and supplies
for the DWV system. I like to get to the store when they open
at 6 because I have the place pretty much to myself. When I
found myself inspecting the dizzying array of pipe fittings, though,
I realized that I had no clue what I was doing or what I truly
needed. The next hour was a blind mission collecting
various fittings--4 of this one, 6 of that one, this size, that
size...holy moly. I filled a cart with fittings, and another
cart with 10' sections of pipe in 4 different sizes. At least
I had some stuff to start; I'd just have to figure out the holes in
my strategy later, once I got going. By the end of the day, my initial plan seemed as if it might have changed significantly, so I might end up returning everything I bought anyway. |
|||
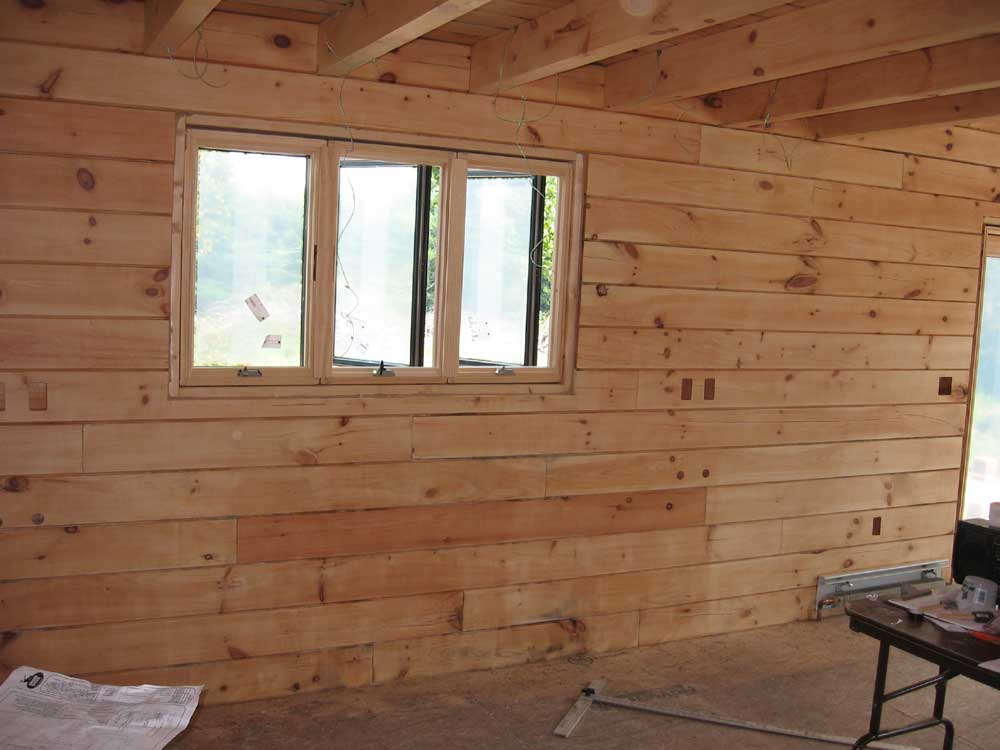
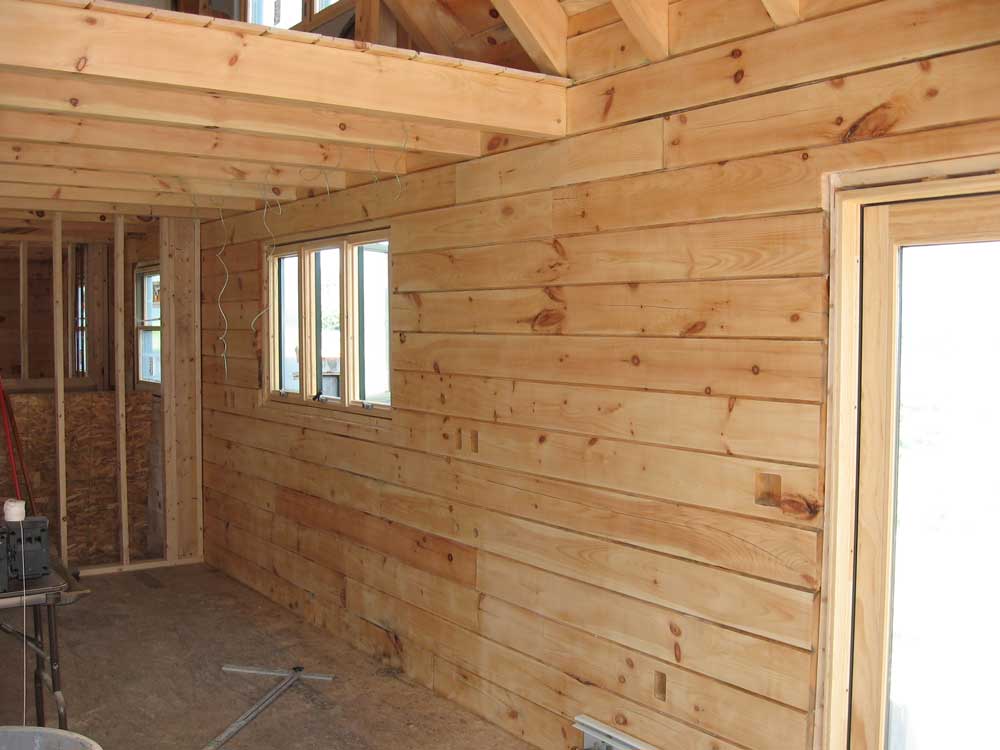
 Back
at the house, I ignored the plumbing and set to work with sander in
hand once more--this time on the log wall at the back of the house,
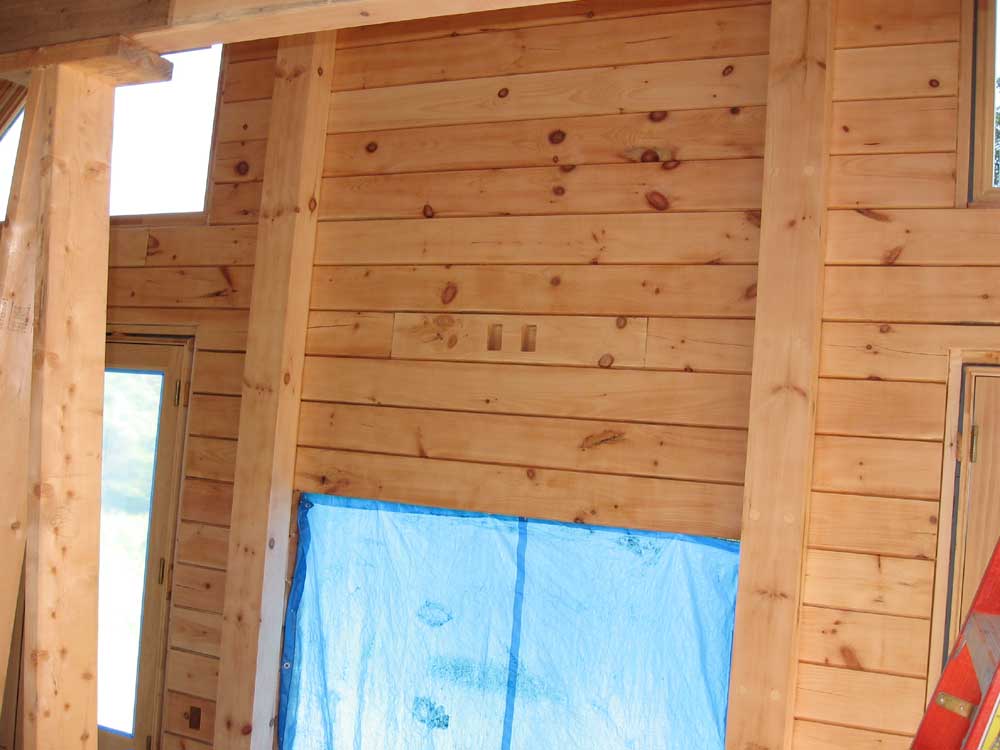
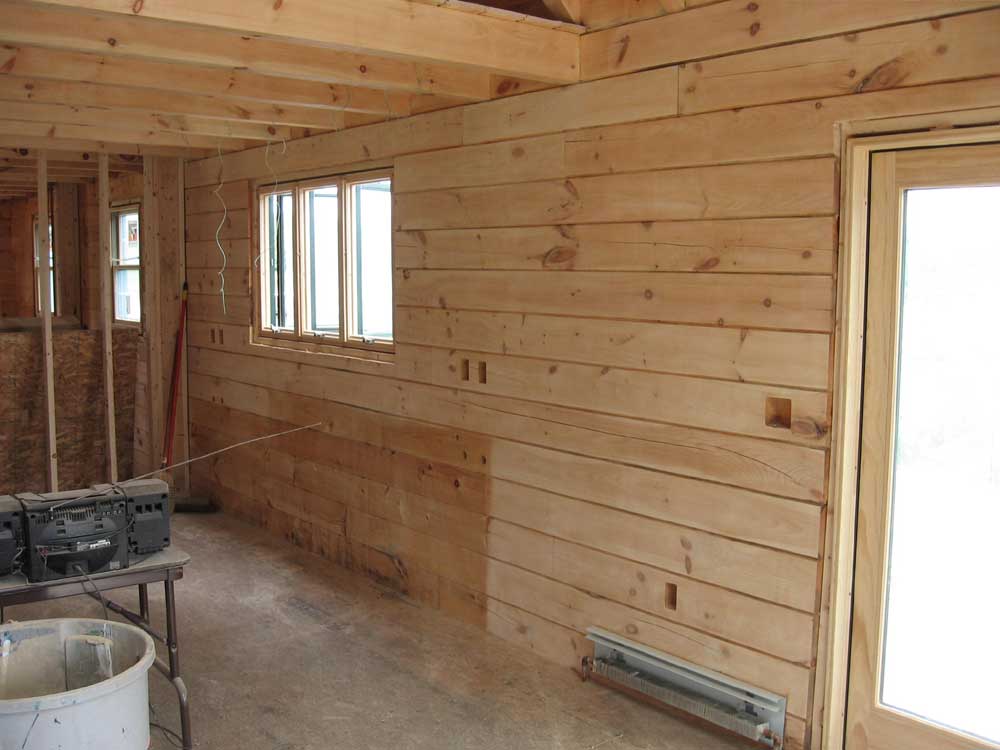
in the kitchen and dining areas. I sanded the entire wall with
80 grit, then went back over again with my finish sander and 120
grit. I left a large section of the wall untouched where it
would eventually be hidden by the kitchen cabinets, not seeing the
point in sanding these logs since they'd never be seen. The
unsanded areas provided a nice contrast with the clean, newly sanded
logs to show what a difference the sanding makes. Back
at the house, I ignored the plumbing and set to work with sander in
hand once more--this time on the log wall at the back of the house,
in the kitchen and dining areas. I sanded the entire wall with
80 grit, then went back over again with my finish sander and 120
grit. I left a large section of the wall untouched where it
would eventually be hidden by the kitchen cabinets, not seeing the
point in sanding these logs since they'd never be seen. The
unsanded areas provided a nice contrast with the clean, newly sanded
logs to show what a difference the sanding makes. |
|||
 Just
looking at this, however, was starting to bother me by the end of
the day, and I began to seriously consider just sanding this area as
well so that I don't have to look at it till the cabinets go in in
several weeks' time--and so that I need not explain why that area is
unsanded. But that would be a waste of time and resources,
wouldn't it. Just
looking at this, however, was starting to bother me by the end of
the day, and I began to seriously consider just sanding this area as
well so that I don't have to look at it till the cabinets go in in
several weeks' time--and so that I need not explain why that area is
unsanded. But that would be a waste of time and resources,
wouldn't it. |
|||
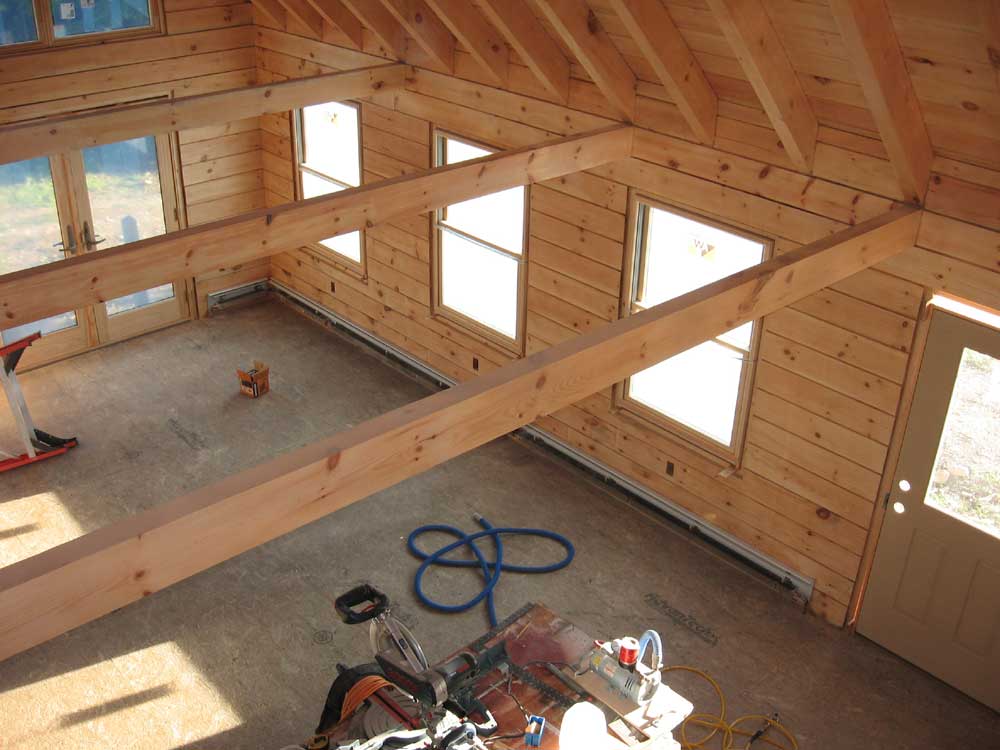
 In
the afternoon, I repeated the process on the front wall in the great
room, completing the sanding in the great room once and for all.
I was pleased with how the logs looked, and even more pleased to be
closing in so rapidly on the end of sanding purgatory. All
that remained were the log walls in the pantry (small), downstairs
bath (two walls) and Heidi's office (lots of windows). Another
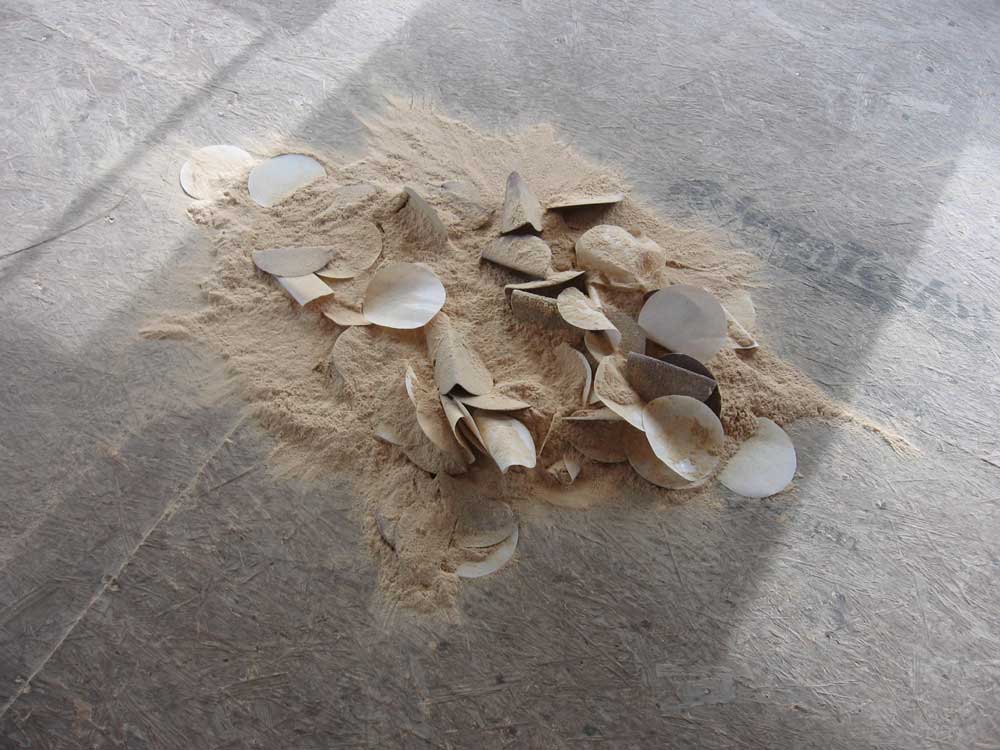
couple days should see the end of sanding, period. In
the afternoon, I repeated the process on the front wall in the great
room, completing the sanding in the great room once and for all.
I was pleased with how the logs looked, and even more pleased to be
closing in so rapidly on the end of sanding purgatory. All
that remained were the log walls in the pantry (small), downstairs
bath (two walls) and Heidi's office (lots of windows). Another
couple days should see the end of sanding, period.The pile of sanding dust and discs from the front wall was impressive in scale. |
|||
|
|
|||
|
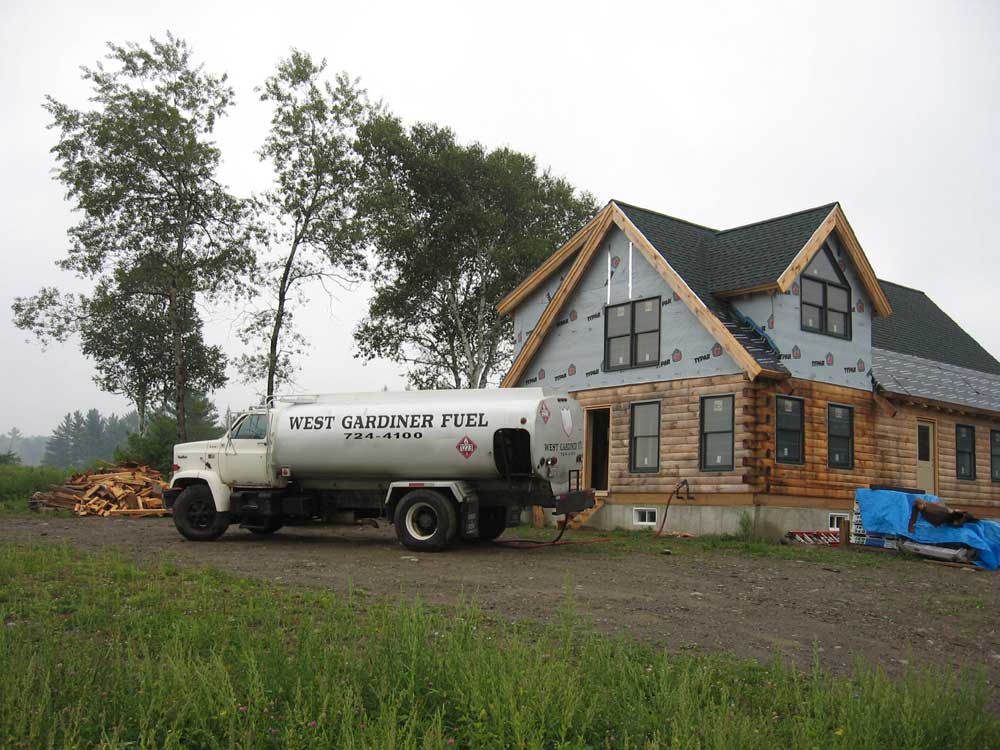
In the afternoon, the oil truck from West Gardiner Fuel (the company, owned by Jim Brann, that is doing my heating and did the system in the shop as well) arrived to fill my new 330 gallon oil tank. The truck was piloted by Jim's dad, "Bunny", an old warhorse about whom I had heard much talk but had never met. I liked him. In fact, Bunny was the first person Bob Emery worked for, more than 30 years ago, and who taught Bob everything he knows, essentially. See, everyone who's been involved with my house is somehow connected. The whole West Gardiner thing is a very tight community.
It turned out that somehow Bunny filled my tank 3/4 full with K1 rather than #2 oil. I'm not sure how, but the truck must be a double pumper (two tanks for two fuels). The burner would burn K1, so no harm would come, but they planned to pump the fuel back out and replace it with #2. Since they didn't have a transfer pump on hand, they simply left the oil truck, keys in place, where it was for the night--kind of a funny circumstance. I love this area! Try that in the suburbs or metropolis. |
|||
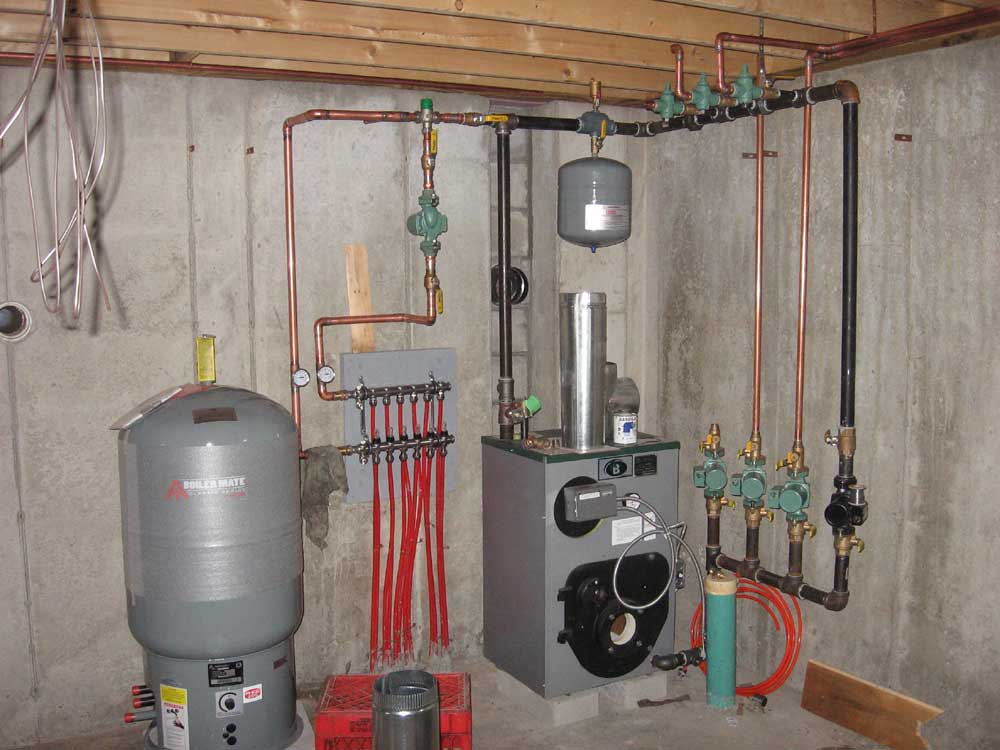 They
didn't finish up the boiler piping today, but made good progress.
I was pleased with the appearance of the system--a reason why I
don't mind some of the trials and tribulations of dealing with these
guys. When the work is competent, and the personalities
interesting and friendly, it's easy to put up with some unusual work
ethics and slow progress. And it's good to have a good heat
guy on your side if you have an emergency on some cold winter's
night. They
didn't finish up the boiler piping today, but made good progress.
I was pleased with the appearance of the system--a reason why I
don't mind some of the trials and tribulations of dealing with these
guys. When the work is competent, and the personalities
interesting and friendly, it's easy to put up with some unusual work
ethics and slow progress. And it's good to have a good heat
guy on your side if you have an emergency on some cold winter's
night. |
|||
SUNDAY, AUGUST 13, 2006 |
|||
|
It was sort of like a day off today.
I didn't attack any big projects, but I was busy all day long and
took care of several things. Mostly, I reveled in not needing
to sand a ceiling today. I'll likely start sanding the log
walls tomorrow. I spent part of the morning trying to figure out roughly how I might run the drain, waste, and vent pipes (the "white pipe"). The mechanics of such a system are extremely straightforward, but the codes are unnecessarily complicated by inane requirements. The open nature of the log and joist construction further complicated things. After some time, I decided I had enough of an idea so that at least I could buy the materials; I planned to just buy more of everything than I might need, hoping to then have what was required on hand. I had spent several days hemming and hawing over whether I should apply a third coat of poly to the window sashes and frames. I had done one window with a third coat as a test bed, and there was a slight difference in the quality of the finish as a result--but probably not enough to make it worth several more hours at this point. The tape had been on a week, and it was time to decide whether to sand and refinish one more time or not. I removed the tape. I did decide to apply a third coat to the three French doors, since there was so much exposed wood and I felt the improvement might be worthwhile. So I sanded these lightly with 220, and applied a final coat of polyurethane. Later in the day, I removed the tape from the doors too. |
|||
|
While I waited for the poly to dry, I decided to tackle the bathtub--or at least one step in the process. A couple weeks ago, the cast iron soaking tub Heidi wanted for the master bath had arrived, and I picked it up with my "new" yellow rack truck (with handy hydraulic lift gate) and stored it in the shop for a while. The tub weighs 450 lb, making getting it into the house a puzzling chore. The last time he was here, I asked the driver from Moose Creek whether he'd entertain using the boom truck to lift the tub through the missing back window in the bathroom. He seemed open to the idea, assuming he had time and that everything was ready for him. I decided today to load the tub back into my yellow truck and move it up to the house, where I'd store it somewhere so that it'd be ready the next time the boom truck was on site. The tub is on wooden skids, so it's easy enough to drag around alone.
|
|||
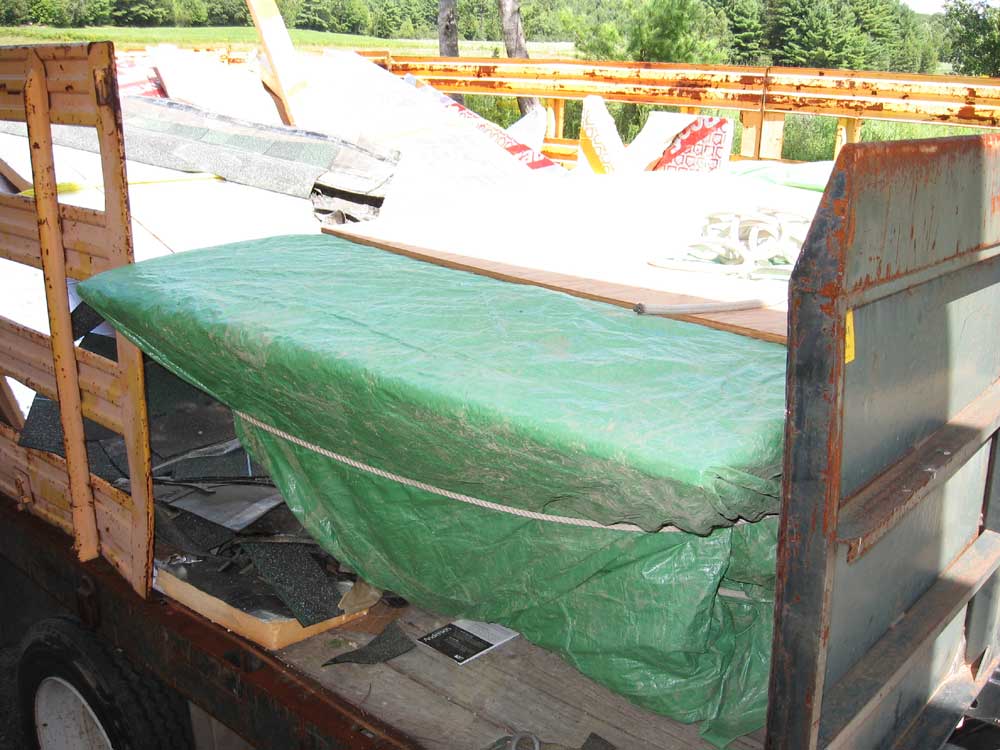 Finally,
I could move the tub, and loaded it onto the liftgate and then into
the back of the truck, after which I drove the truck up to the
house. Eventually, I decided to just leave the tub in the
truck for now, where it would be away from the dirt and more easily
moved if some need should arise. The tub already had a wooden
frame and shipping cover, and over this I placed a sheet of scrap
roof sheathing, covering everything with a double or quadruple
thickness of tarp, which I tied securely. Finally,
I could move the tub, and loaded it onto the liftgate and then into
the back of the truck, after which I drove the truck up to the
house. Eventually, I decided to just leave the tub in the
truck for now, where it would be away from the dirt and more easily
moved if some need should arise. The tub already had a wooden
frame and shipping cover, and over this I placed a sheet of scrap
roof sheathing, covering everything with a double or quadruple
thickness of tarp, which I tied securely. |
|||
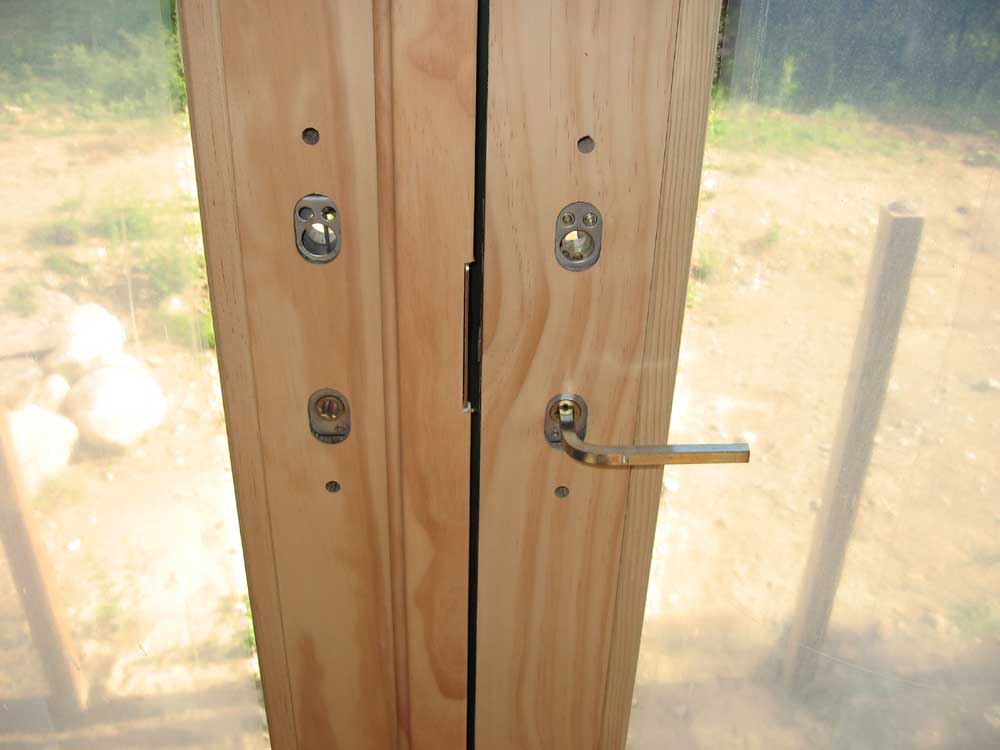 I
did a few things outside during the afternoon, but late in the
afternoon I decided to install the door hardware on the French
doors. I had been using the temporary handle that comes with
the doors, but with the finishing complete (and the finishing on the
logs above the doors) I thought it would be OK to put on the real
hardware. I
did a few things outside during the afternoon, but late in the
afternoon I decided to install the door hardware on the French
doors. I had been using the temporary handle that comes with
the doors, but with the finishing complete (and the finishing on the
logs above the doors) I thought it would be OK to put on the real
hardware. |
|||
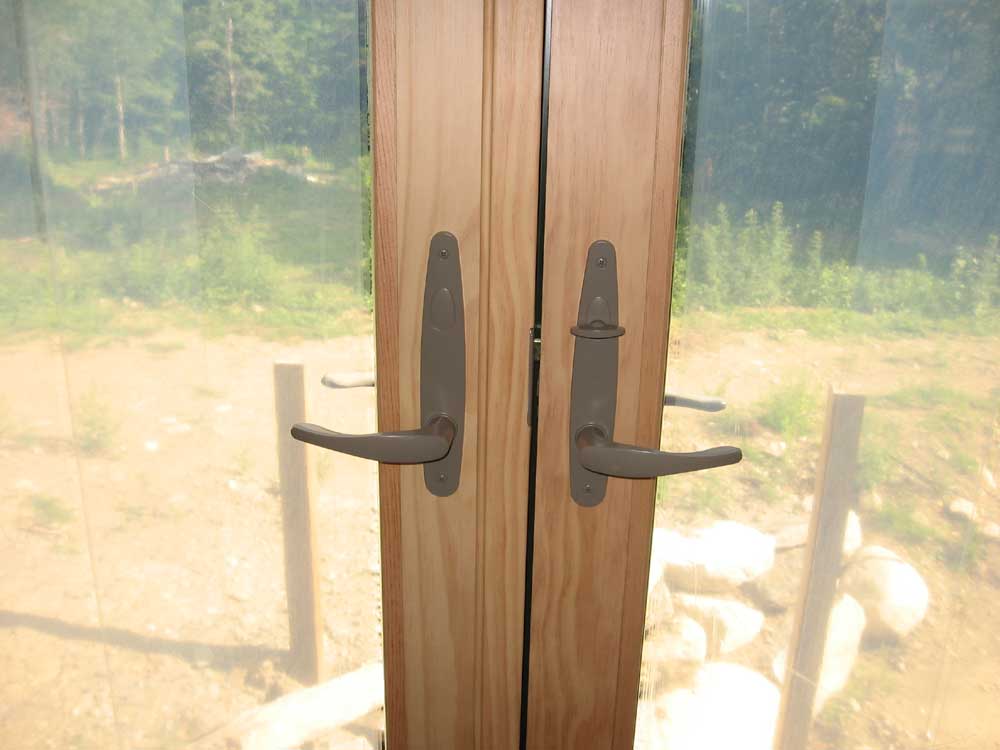 I
installed the hardware, which was easy enough, particularly since I
had already installed a set on the single door downstairs in the
basement. The new hardware---just the basic standard
version---was an improvement over the temporary. I
installed the hardware, which was easy enough, particularly since I
had already installed a set on the single door downstairs in the
basement. The new hardware---just the basic standard
version---was an improvement over the temporary. |
|||
SATURDAY, AUGUST 12, 2006 |
|||
 I
got right to work this morning sanding the ceiling in Heidi's
office. Sanding the entire ceiling took just under 4 hours
with no breaks. It was tiring, but it was done. I
got right to work this morning sanding the ceiling in Heidi's
office. Sanding the entire ceiling took just under 4 hours
with no breaks. It was tiring, but it was done.After cleaning up and a lunch break, I got to work on the polyurethane. This turned out to be the messiest afternoon on record for the polyurethane, for some reason. |
|||
|
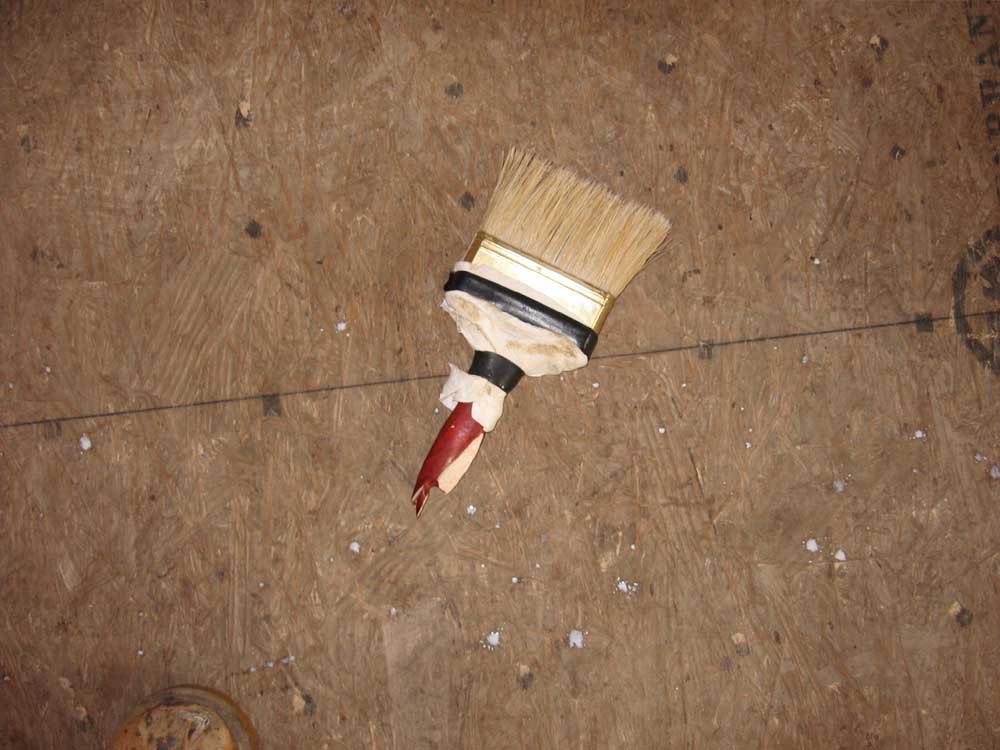
The first coat took about 2 hours, and
the brush made a drippy mess, although I thwarted it rather
successfully by taping some paper rags around the handle to stop the
runs from covering my hand. The last thing I wanted to really do was go right back and start the second coat, but the prospect of having the job done outweighed the temporary discomfort. Usually, the second coat tends to be easier to apply, and therefore less messy.
|
|||
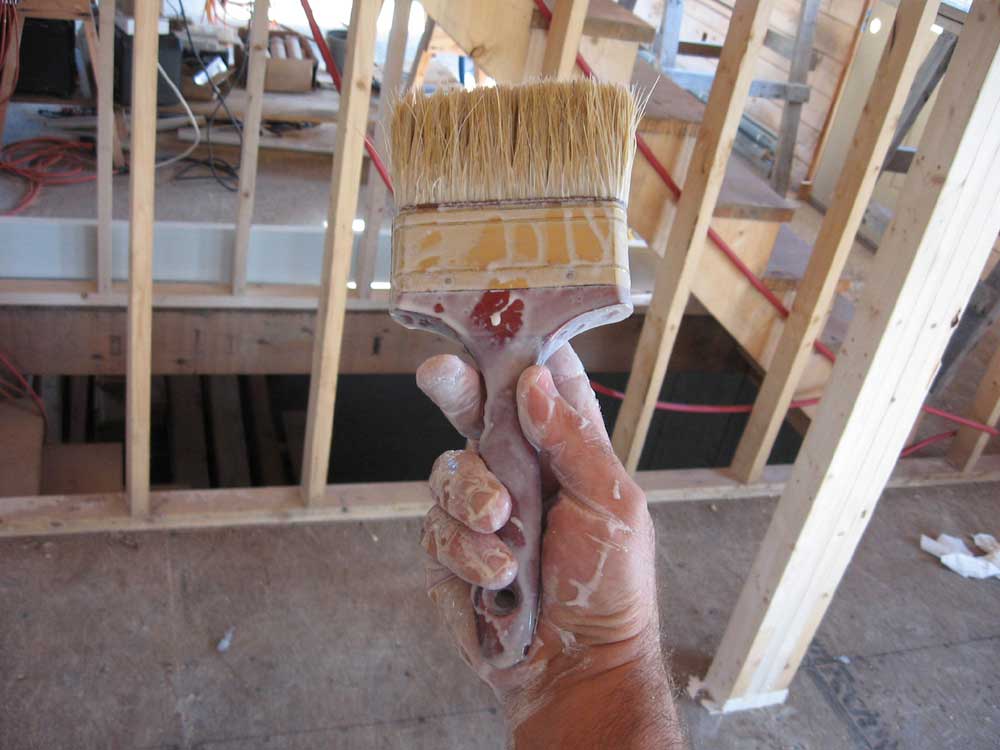 I
retrieved the other brushes, promptly remembering why I had
semi-retired them to the pile under the workbench. I chose one
of the brushes that seemed to be less horrible than the other, and
got back to work. Instantly, I was covered in drippy
polyurethane, but I determined to stick it out and show the brush
who was boss. I
retrieved the other brushes, promptly remembering why I had
semi-retired them to the pile under the workbench. I chose one
of the brushes that seemed to be less horrible than the other, and
got back to work. Instantly, I was covered in drippy
polyurethane, but I determined to stick it out and show the brush
who was boss.Somehow, I managed to finish the ceiling, despite having a brush stuck to my hand and an arm that could barely bend from all the dried polyurethane on it. |
|||
 But
I didn't care: this was THE LAST CEILING IN THE HOUSE, and I
didn't have to concern myself with these petty discomforts any
longer. I'm not sure if I've mentioned it or not before, but
the sanding and finishing of the ceilings really hasn't been all
that much fun. I was pretty glad to be done with the last one.
It took the entire day, but I didn't have to do it again. But
I didn't care: this was THE LAST CEILING IN THE HOUSE, and I
didn't have to concern myself with these petty discomforts any
longer. I'm not sure if I've mentioned it or not before, but
the sanding and finishing of the ceilings really hasn't been all
that much fun. I was pretty glad to be done with the last one.
It took the entire day, but I didn't have to do it again.Oh, there's still plenty of sanding and finishing left; I have most of the log walls remaining. But those are easy by comparison. The flat ceilings of the first floor proved to be the most physically demanding of all, with the need to hold the sander flat overhead and the propensity for the finish to run out of the inverted brush. The angled ceilings upstairs, while challenging to reach and frustrating to work on because of the limited access, were actually a bit easier to sand and finish thanks to the angle. |
|||
But it's all in the past now. Finally. It was just over 4 weeks ago that I started the sanding process; during that time, of course, I worked on many other projects as well, but an abundant portion was dedicated to sanding and finishing. The sanding work remaining seems insignificant by comparison now, and I can easily accomplish it with minimal pain. |
|||
FRIDAY, AUGUST 11, 2006 |
|||
 I
spent most of the morning polyurethaning the areas that I sanded
yesterday: the lower half of the log gable wall (except for
about 7 or 8 of the lowest courses) and the wall stiffeners, and the
three ceiling ties in the great room. I applied two coats, as
usual, and this completed the work in these areas. I
spent most of the morning polyurethaning the areas that I sanded
yesterday: the lower half of the log gable wall (except for
about 7 or 8 of the lowest courses) and the wall stiffeners, and the
three ceiling ties in the great room. I applied two coats, as
usual, and this completed the work in these areas. |
|||
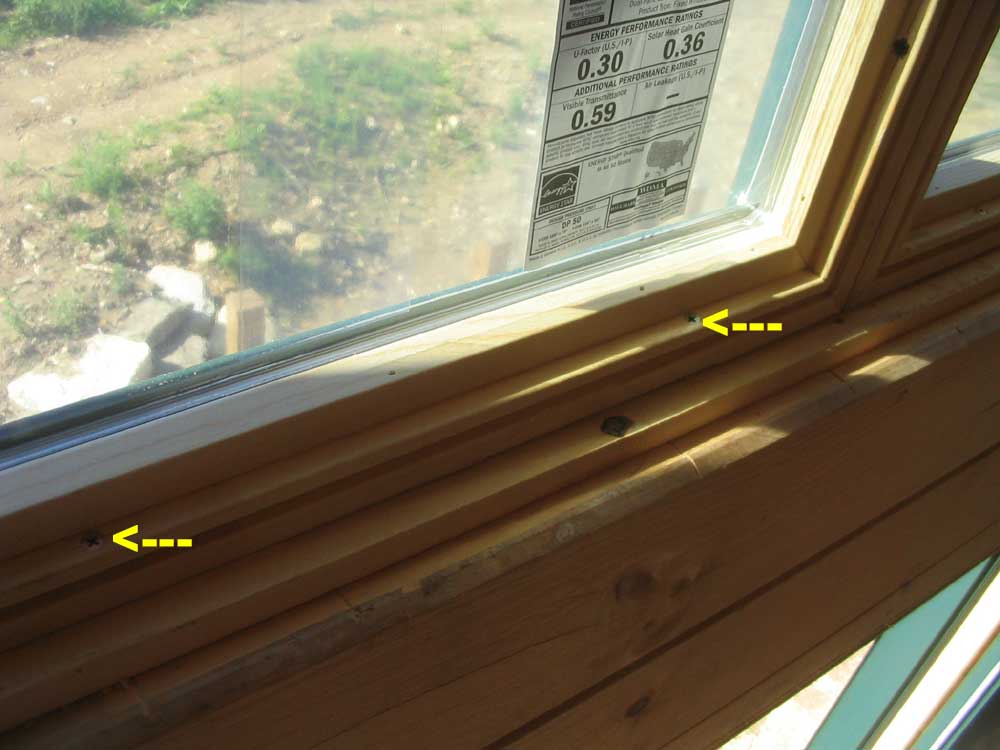
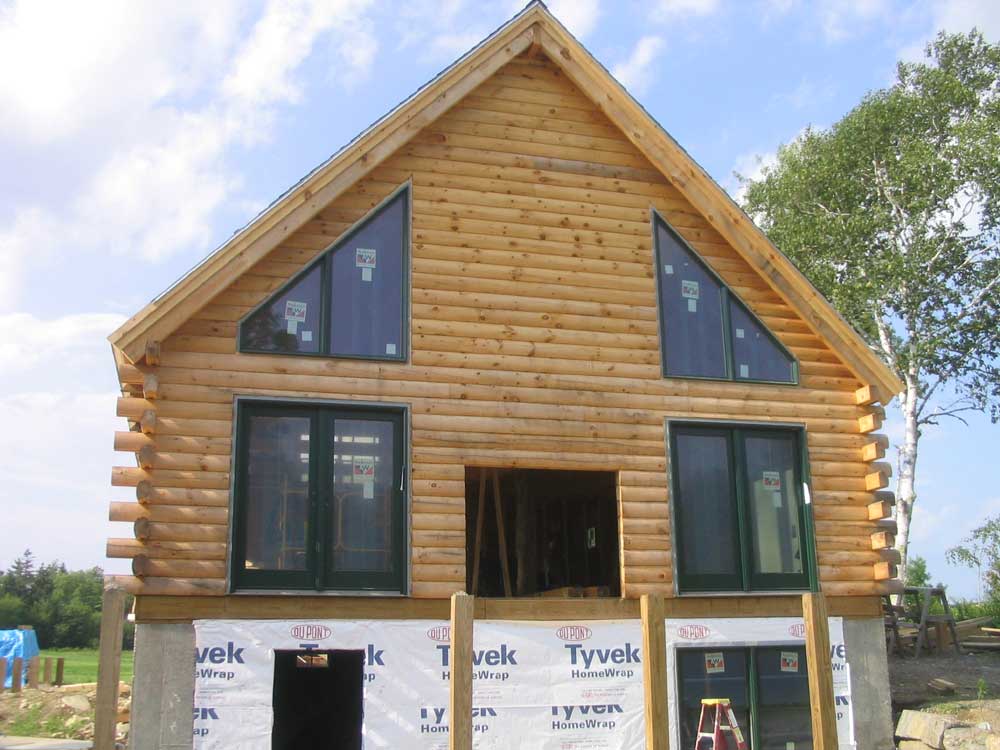
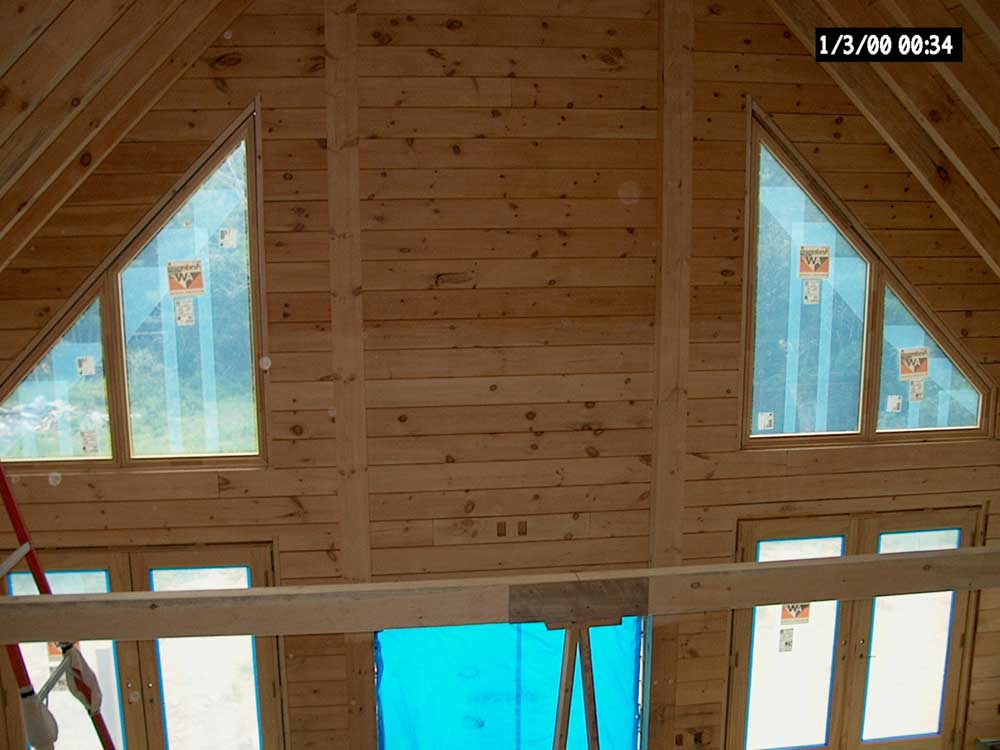
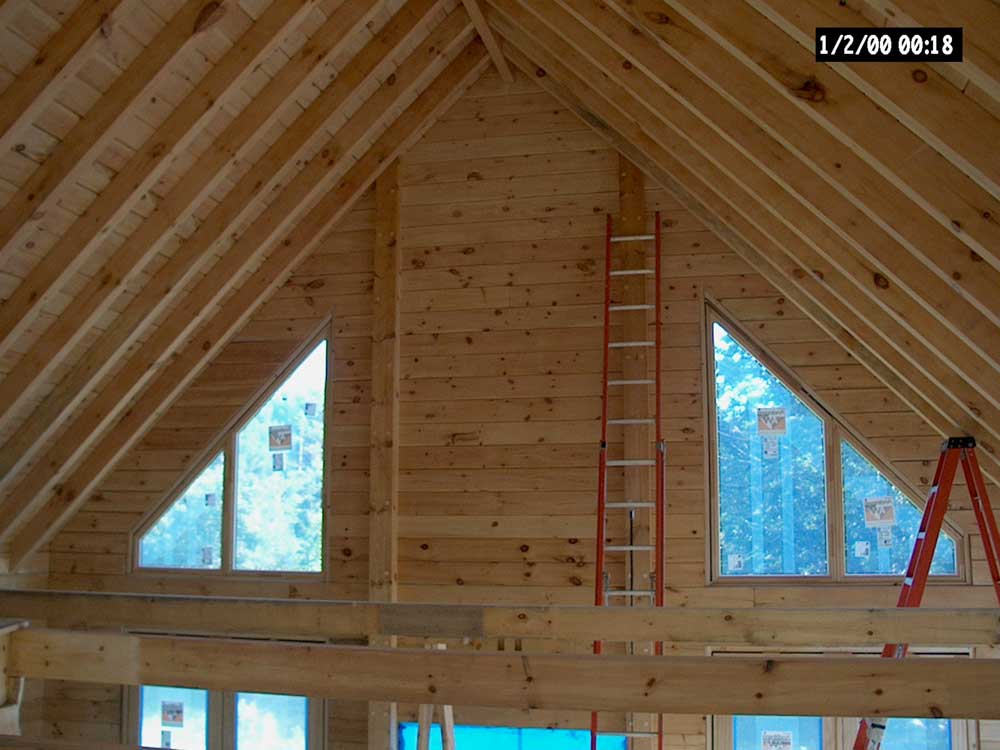
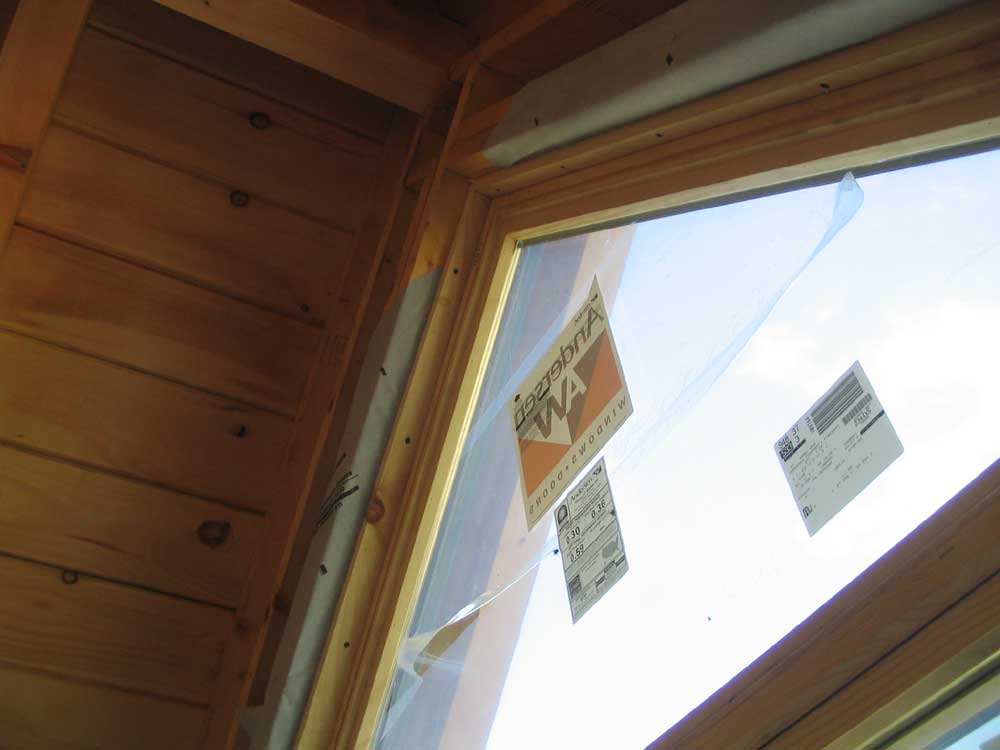
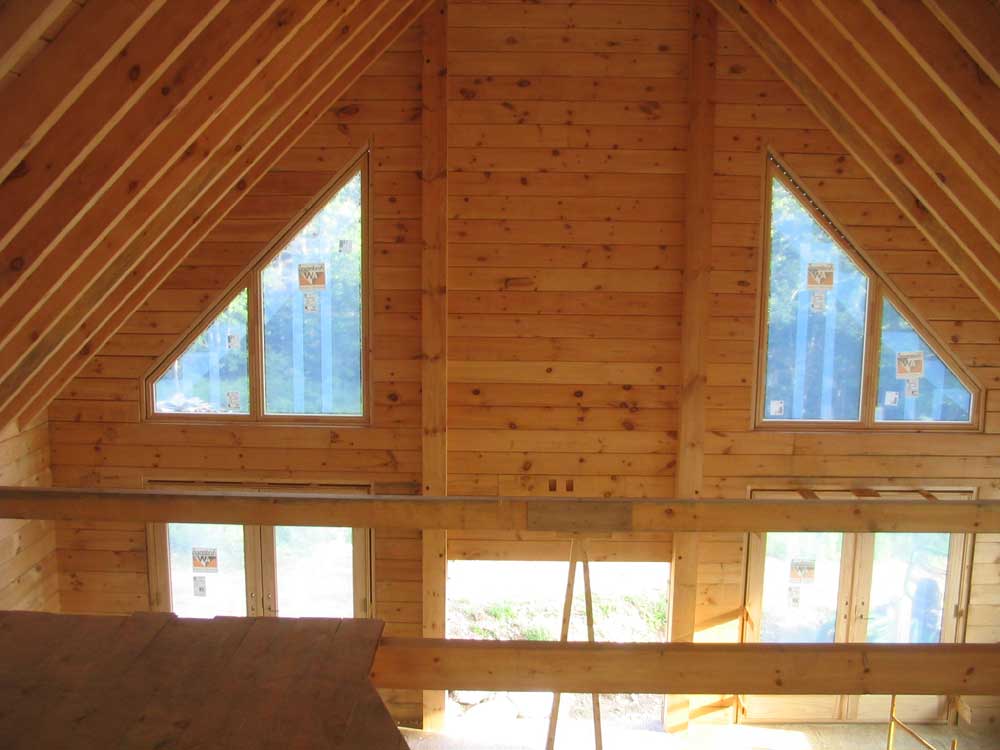
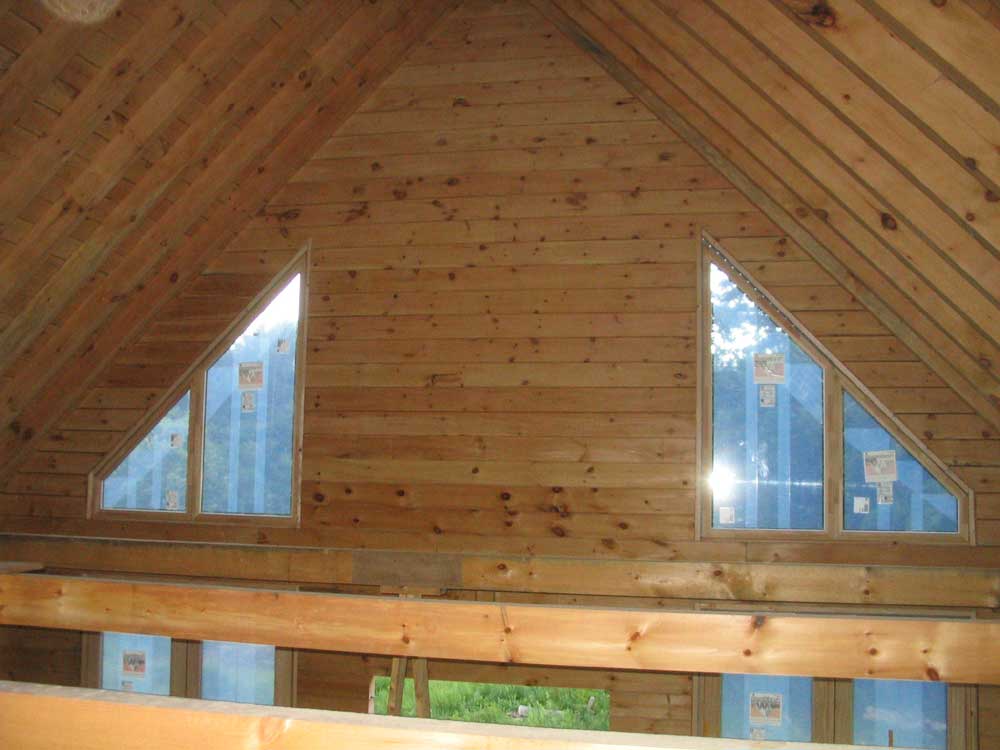
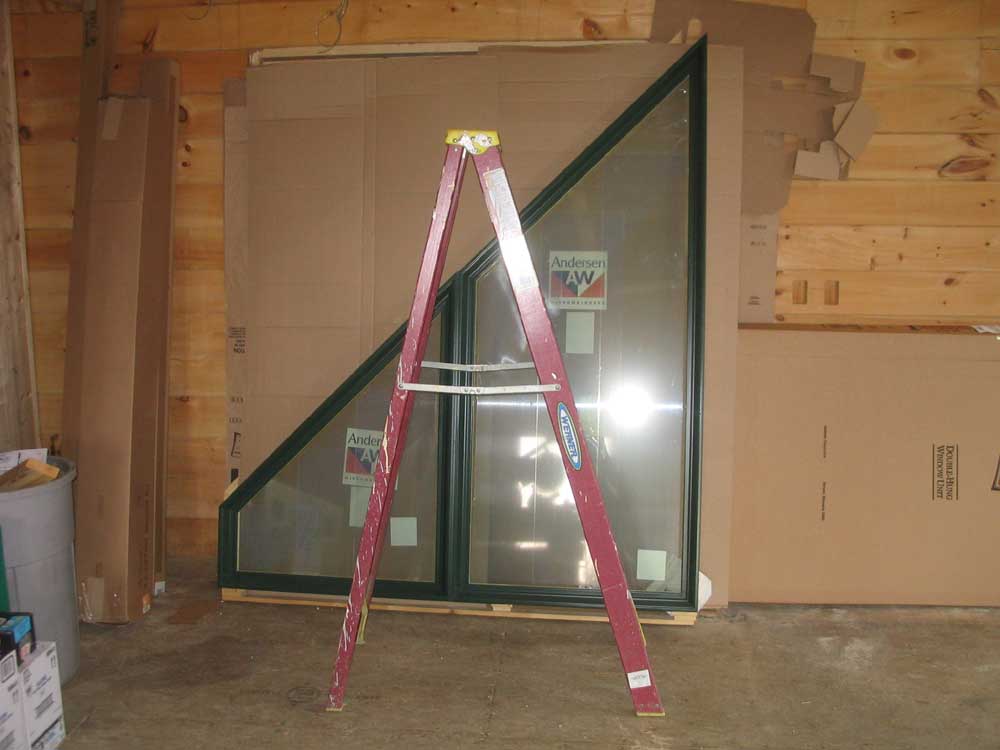
 Next,
I decided to mask off and apply polyurethane to the two trapezoid
windows, which I hadn't done during my window blitz earlier in the
week. Once I had the tape on, I applied two coats of polyurethane;
in the sunlight, the poly dried quickly enough that I could apply
the first coat to both windows, and then return to the first window
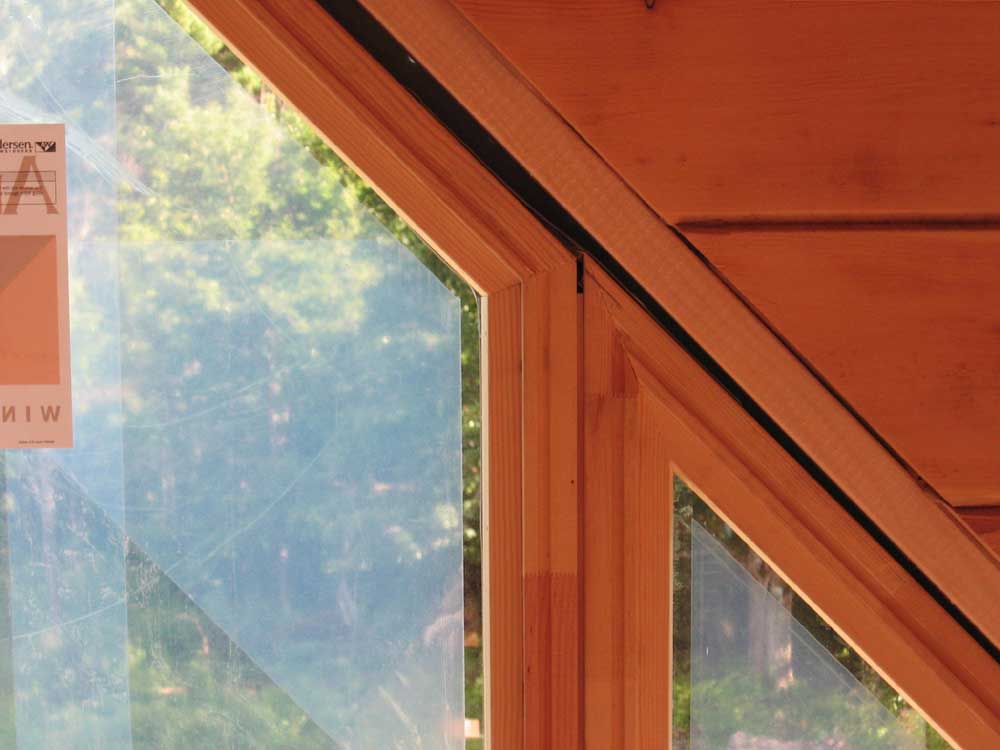
for the second coat immediately. While I was up there, I
snapped a picture of the misalignment of the two halves of the
window that was in large part responsible for our troubles during
installation; the misalignment would surely cause issues with the
trim later on, too. I planned to contact both Andersen and
Moose Creek about this on an informational basis, as I felt the
window construction was not on par with expectations and the price
paid for these custom windows. Next,
I decided to mask off and apply polyurethane to the two trapezoid
windows, which I hadn't done during my window blitz earlier in the
week. Once I had the tape on, I applied two coats of polyurethane;
in the sunlight, the poly dried quickly enough that I could apply
the first coat to both windows, and then return to the first window
for the second coat immediately. While I was up there, I
snapped a picture of the misalignment of the two halves of the
window that was in large part responsible for our troubles during
installation; the misalignment would surely cause issues with the
trim later on, too. I planned to contact both Andersen and
Moose Creek about this on an informational basis, as I felt the
window construction was not on par with expectations and the price
paid for these custom windows. |
|||
 Before
breaking for lunch, I set up some staging beneath the small section
of the great room ceiling--in the front corner next to the front
door, in way of the staircase--that I had not previously sanded or
finished because the larger staging never fit conveniently.
After lunch, I sanded these areas--three rafter bays, about 7 or 8
board widths up from the wall. Before
breaking for lunch, I set up some staging beneath the small section
of the great room ceiling--in the front corner next to the front
door, in way of the staircase--that I had not previously sanded or
finished because the larger staging never fit conveniently.
After lunch, I sanded these areas--three rafter bays, about 7 or 8
board widths up from the wall. |
|||
 With
that done, I finished up the sanding on the log gable wall--the
final log rows from the floor to the bottom of the fireplace
opening. Then, after cleaning up the mess, I applied two coats
of poly to all these areas, finally completing--legitimately--the
log gable wall once and for all. This consumed the afternoon,
though I did set up my sanding equipment in Heidi's office for the
next morning. With
that done, I finished up the sanding on the log gable wall--the
final log rows from the floor to the bottom of the fireplace
opening. Then, after cleaning up the mess, I applied two coats
of poly to all these areas, finally completing--legitimately--the
log gable wall once and for all. This consumed the afternoon,
though I did set up my sanding equipment in Heidi's office for the
next morning. |
|||
|
|
|||
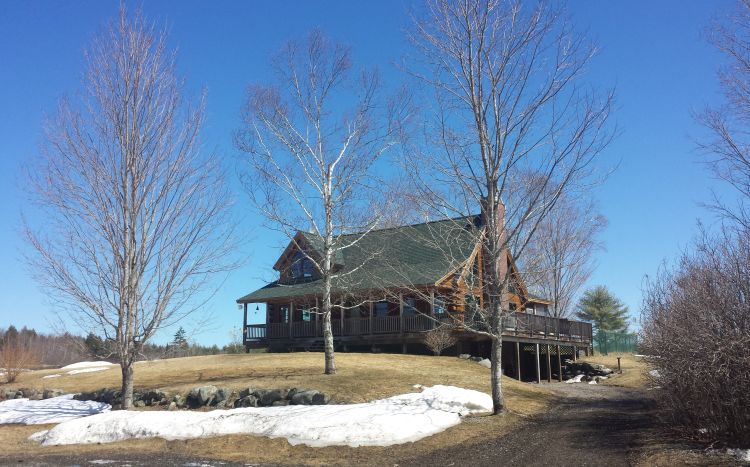
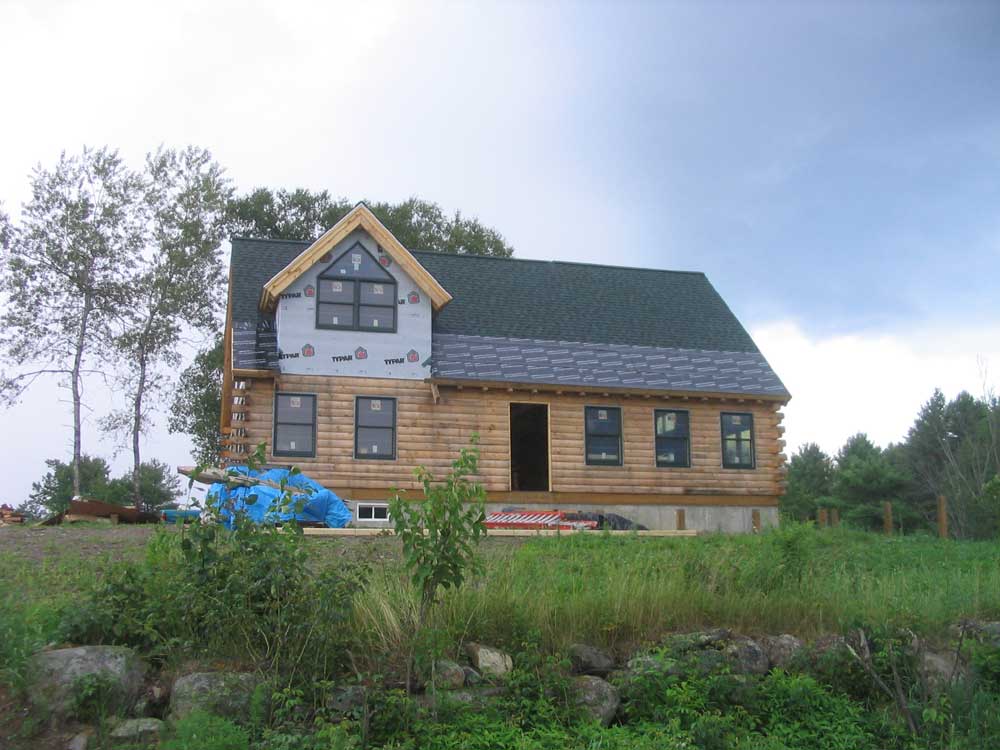
 Shortly
after heading down after work, we had some interesting showers and
thunderstorms which created this nice double rainbow up behind the
house. Shortly
after heading down after work, we had some interesting showers and
thunderstorms which created this nice double rainbow up behind the
house.What about the progress on the heating plant, you may ask? Well, there's nothing to photograph. Tim and Jim showed up at 11 or so--they had to deliver oil in the morning, apparently--and made incremental progress on the system. By the time they left at 4, all the copper pipe and soldering for both first and second floor heat was complete, and all the remaining work should be on the boiler piping in the basement. Dare I hope that they put in a full day on Monday and finish the job up? As I've said before, I don't really care how long it takes, but I can't start my plumbing till they're done (or at least I choose not to), and I am ready to go on that next week. With luck, they'll be all done on Monday. |
|||
THURSDAY, AUGUST 10, 2006 |
|||
|
First, an apology in advance:
you'll note that the pictures from yesterday and today are of
noticeably lower quality and resolution than normal. I found
an old spare digital camera--2 generations ago--and have been using
that until my new camera arrives, but the photo quality is much
lower. And please ignore the annoying (and incorrect) date
stamp in the corners.
I got right into the swing of things up at the top of the extension ladder, where I sanded the top portion of the two wall stiffeners. Once I had the top half sanded--down to a point on the wall where I had previously polyurethaned the logs--I cleaned the stiffeners and applied the usual two coats of polyurethane. |
|||
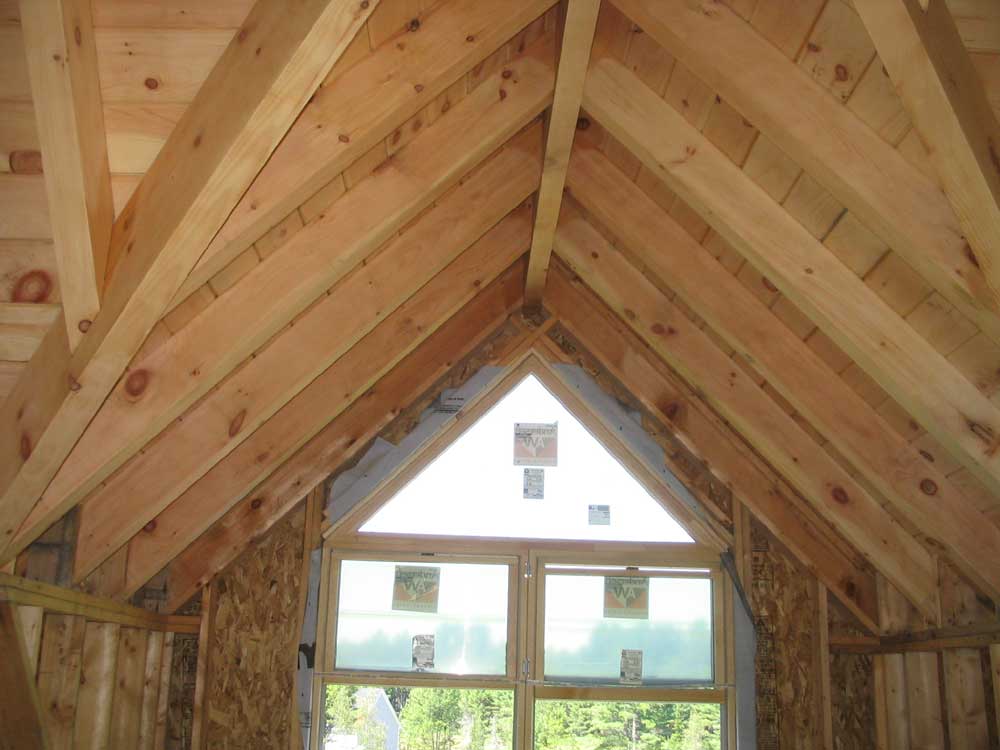
|
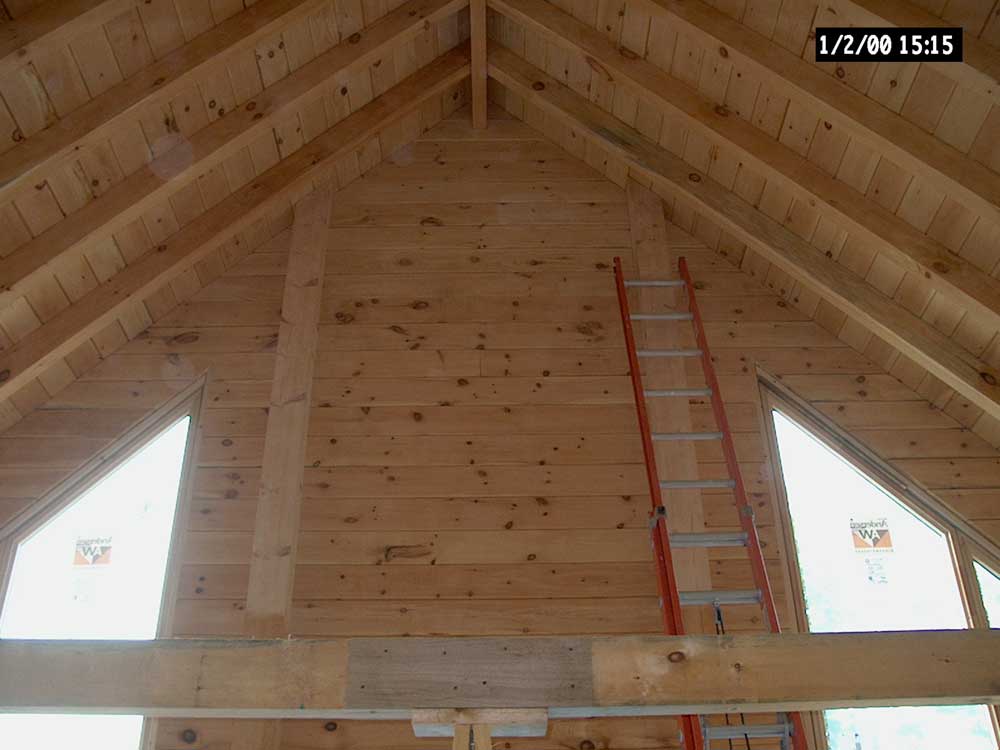
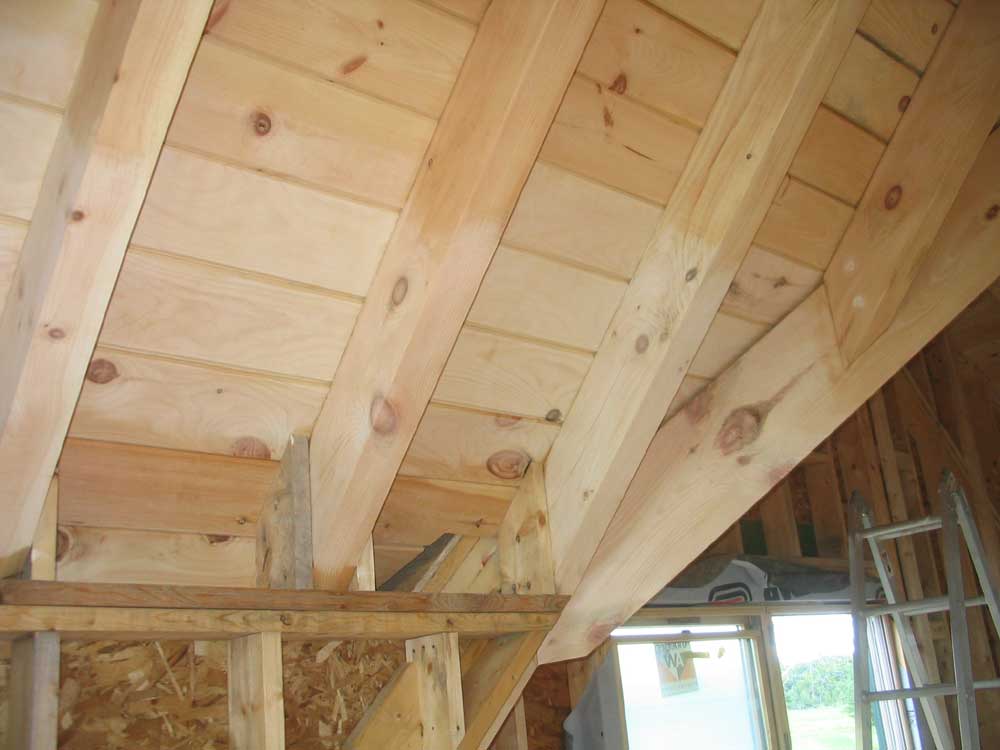
With the worst part out of the way, I cleared out the ladders and then prepared to sand the ceiling ties in the great room. These three timbers were badly weathered from their long exposure before the building was roofed, but I knew they'd clean up nicely with some sanding. |
|||
 I
sanded all three ceiling ties, which took an amazingly long time,
partly because of the length of the pieces (especially the one
nearest the gable end that will eventually become the lower chord of
a fink truss) and partly because they were so weathered. But
after my usual sanding with 80 and 120 grits, they positively glowed
with cleanliness. I
sanded all three ceiling ties, which took an amazingly long time,
partly because of the length of the pieces (especially the one
nearest the gable end that will eventually become the lower chord of
a fink truss) and partly because they were so weathered. But
after my usual sanding with 80 and 120 grits, they positively glowed
with cleanliness. |
|||
 It
was a sanding kind of day, so I continued by sanding the logs in the
gable end, beginning nearly halfway up the wall where I had left off
some time ago when I was still working on the great room ceiling.
I also sanded the wall stiffeners as I came down, working off some
wooden staging that normally belongs in my boat shop. It
was a sanding kind of day, so I continued by sanding the logs in the
gable end, beginning nearly halfway up the wall where I had left off
some time ago when I was still working on the great room ceiling.
I also sanded the wall stiffeners as I came down, working off some
wooden staging that normally belongs in my boat shop. |
|||
 I
sanded all the way to the corners, and nearly to the floor, leaving
6 or 7 log courses nearer floor level to sand a little later from
the floor. This is quite a bit of sanding! The floor was
littered with used sanding discs (50 estimated) and the static-y
plastic that covers their adhesive backs. I
sanded all the way to the corners, and nearly to the floor, leaving
6 or 7 log courses nearer floor level to sand a little later from
the floor. This is quite a bit of sanding! The floor was
littered with used sanding discs (50 estimated) and the static-y
plastic that covers their adhesive backs.The sanding took all day, and I quit at regular time so that I could take care of a few other chores that needed doing--like updating these logs! Tomorrow, I'll apply the poly to the wood that I sanded today, and then who knows what the day will bring. My new camera arrived this afternoon, so the pictures should be better tomorrow. For camera people: I got a Canon Powershot A530, which is the closest thing to the old Canon Powershot A70 that I had before, and liked very much--so much that I had two of them in a row. Sadly, it's discontinued. |
|||
 It
was another slow day for heat. Tim showed up alone around
10:30, followed by Jim, the owner, at lunchtime--at which time they
promptly went on lunch break for an hour. The two of them
managed to rearrange some of the heat registers upstairs and connect
some of the copper piping for the second floor during the afternoon.
Tomorrow, they should get the boiler piped up and running...maybe. It
was another slow day for heat. Tim showed up alone around
10:30, followed by Jim, the owner, at lunchtime--at which time they
promptly went on lunch break for an hour. The two of them
managed to rearrange some of the heat registers upstairs and connect
some of the copper piping for the second floor during the afternoon.
Tomorrow, they should get the boiler piped up and running...maybe. |
|||
WEDNESDAY, AUGUST 9, 2006 |
|||
First, an apology in advance:
you'll note that the pictures from today and tomorrow are of
noticeably lower quality and resolution than normal. I found
an old spare digital camera--2 generations ago--and have been using
that until my new camera arrives, but the photo quality is much
lower. And please ignore the annoying (and incorrect) date
stamp in the corners.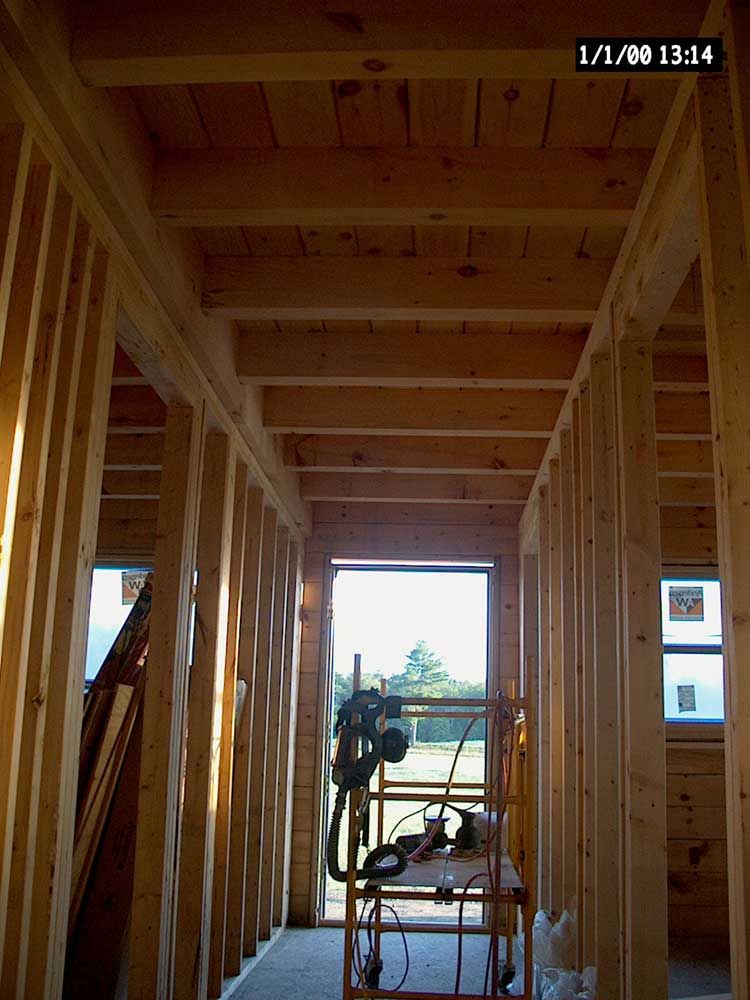 I
got another early start today, and continued sanding in the hallway
where I had left off. It was downright chilly and I needed a
sweatshirt. I
got another early start today, and continued sanding in the hallway
where I had left off. It was downright chilly and I needed a
sweatshirt.
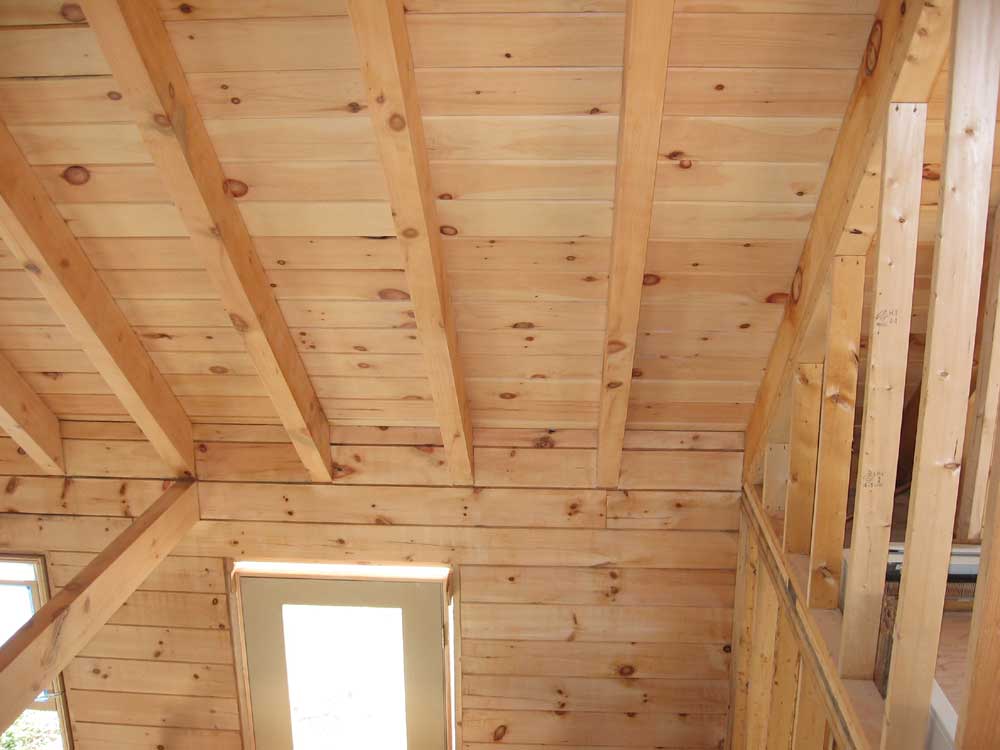
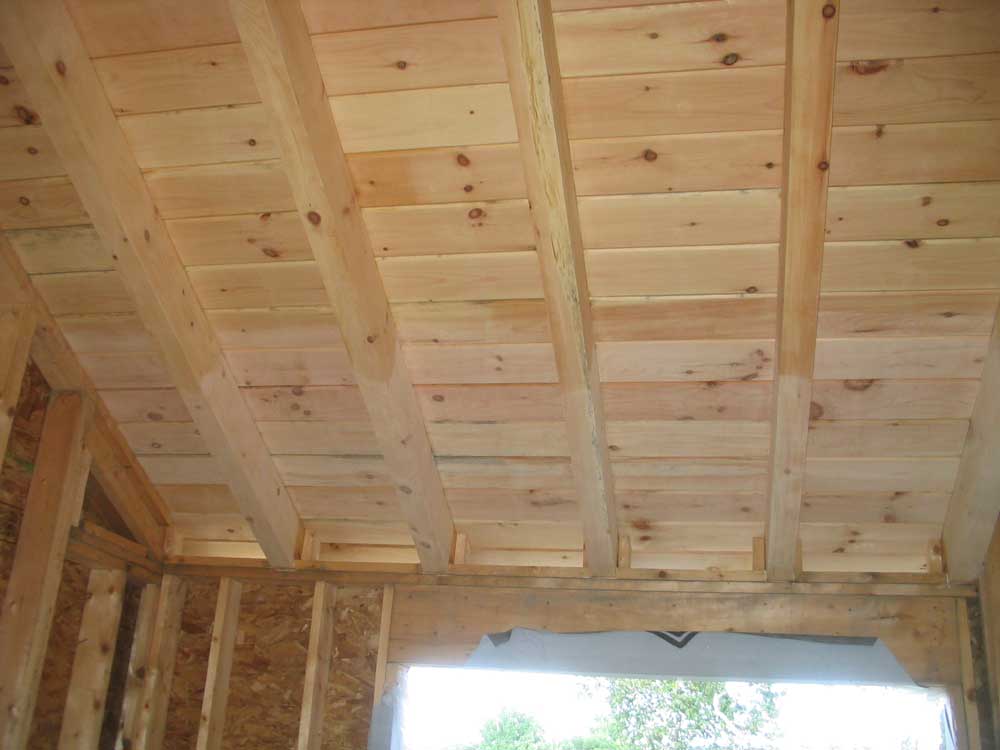
I finished sanding in the hallway, and then moved on to the large carrying beams that support the loft--the outer faces, which are focal points of the great room. I sanded these clean with 80 grit, but then sanded them again with a different sander and 120 grit paper for a somewhat finer finish on these important pieces--a step I planned to take on all the log walls and other highly visible pieces from now on. |
|||
 The
beams cleaned up nicely, returning to their clear, bright white, and
the sanding was much easier since it wasn't overhead. Once I
was done with the sanding, I cleaned everything up and then applied
two coats of poly to the hallway ceiling and the loft beams, one
after the other. The
beams cleaned up nicely, returning to their clear, bright white, and
the sanding was much easier since it wasn't overhead. Once I
was done with the sanding, I cleaned everything up and then applied
two coats of poly to the hallway ceiling and the loft beams, one
after the other. |
|||
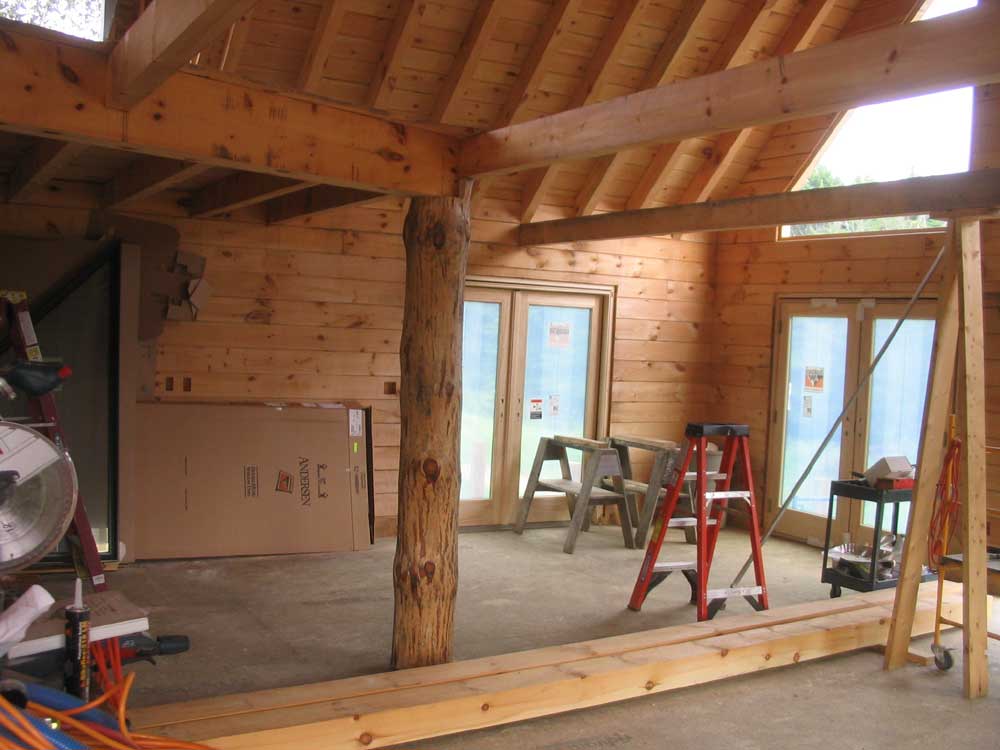
 Once
the poly dried, I turned my attention to the log post at the corner
of the loft. The post was quite weathered and sappy, which
gummed up sanding discs quickly. Sanding the entire post took
quite a long time, but it cleaned up nicely. I worked to make
the post very smooth, so that it might cry out to be touched.
As before, I sanded first with 80 grit, then switched to a finish
sander and 120 grit. When the sanding was complete, I applied
two coats of poly. Later, I planned to lightly sand the second
coat and apply a third, hoping for a very smooth surface. Once
the poly dried, I turned my attention to the log post at the corner
of the loft. The post was quite weathered and sappy, which
gummed up sanding discs quickly. Sanding the entire post took
quite a long time, but it cleaned up nicely. I worked to make
the post very smooth, so that it might cry out to be touched.
As before, I sanded first with 80 grit, then switched to a finish
sander and 120 grit. When the sanding was complete, I applied
two coats of poly. Later, I planned to lightly sand the second
coat and apply a third, hoping for a very smooth surface. |
|||
|
|
|||
 Towards
the end of the day, some materials I needed arrived: 8" lags
and washers, and 1-1/2" pine plugs. Now I could finish
installing the fasteners in the wall stiffeners on the log gable,
which I did: first boring the hole for the plug, then
installing the lags with my impact gun, and finally gluing the plugs
in place. I used first my 12' stepladder, and then a 24'
extension ladder to reach the top, and finished up just in time to
clean up for the day. Towards
the end of the day, some materials I needed arrived: 8" lags
and washers, and 1-1/2" pine plugs. Now I could finish
installing the fasteners in the wall stiffeners on the log gable,
which I did: first boring the hole for the plug, then
installing the lags with my impact gun, and finally gluing the plugs
in place. I used first my 12' stepladder, and then a 24'
extension ladder to reach the top, and finished up just in time to
clean up for the day. |
|||
 The
heat guys were around most of the day, though their work day is
pretty relaxed...showing up around 9-9:30 and leaving by 4.
But they do nice work, and what do I care if it takes them a week?
It's a fixed price. They worked on the piping for the
downstairs baseboards, cutting, installing, and sweating the pipes
needed. Pictures of this are pretty boring. The
heat guys were around most of the day, though their work day is
pretty relaxed...showing up around 9-9:30 and leaving by 4.
But they do nice work, and what do I care if it takes them a week?
It's a fixed price. They worked on the piping for the
downstairs baseboards, cutting, installing, and sweating the pipes
needed. Pictures of this are pretty boring. |
|||
TUESDAY, AUGUST 8, 2006 |
|||
|
True to my word, I arrived at 0600 and
got right to work on the sanding where I left off last night.
It was a beautiful, crisp morning with a great northwest breeze, so
it was nearly pleasant (ha!). I sanded the rest of the kitchen
ceiling, working steadily, and was astonished to find that it was
0845 when I finished. I was glad I got that early start.
There was no sign of the heat guys. After cleaning up the copious amounts of dust and blowing off the joists and ceiling boards, I proceeded to apply the first coat of polyurethane. I really need some decent brushes or something, because on the overhead the finish would just roll right out of the brush, running down over the ferule, handle, and my hand and arm. There was just no way to avoid it; this was the messiest yet, perhaps because there was no angle whatsoever to the ceiling. After a while, I gave up fighting it and just let the mess be what it was--which was substantial. I finished up the first coat in time for an early lunch, which I deserved because of my early start. The heat guys--Jim, Tim, and Joe--arrived as I was beginning lunch, loaded to the hilt with the materials for the heating system--boiler, hot water heater, oil tank, and all the rest. During the afternoon, after spending some time discussing the heat installation with Jim Brann, I applied the second coat of poly to the kitchen ceiling. Again, this took at least a couple hours and made a huge drippy mess of the brush and everything beneath it. I plan to break out my last new brush tomorrow and see if that does any better. Jim, Tim, and Joe left around 4, and I took the opportunity to get some more sanding in before I collapsed. I started on the hallway ceiling, one of the last two spaces that required sanding (along with Heidi's office ceiling). Of course, the log walls remain, but the ceilings are the worst part. I managed to get more than halfway down the hall before fatigue set in and the need to release my poor dogs arose, so I quit right at 6. I expected another early start in the morning. |
|||
MONDAY, AUGUST 7, 2006 |
|||
|
I spent most of the day working on the
windows, amazingly. I began upstairs, where I applied the
first coat of polyurethane to the window sashes and frames.
The first coat takes the longest since it soaks into the wood and
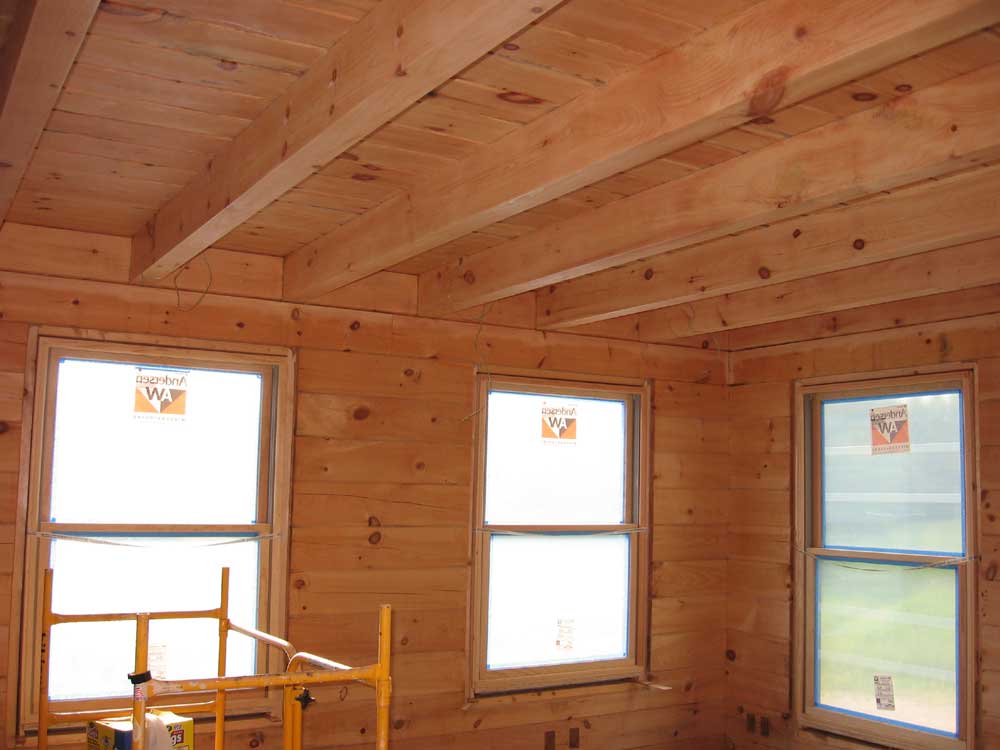
the brush drags and needs frequent replenishing. When I finished that up, I lightly sanded the first coat on the downstairs windows and doors and then applied a second coat, which I hoped would be the final coat. 2 coats is sufficient in terms of protection, but for these windows and for other areas closer to the floor, I wanted to ensure a pleasing look and tactile feel to any wooden surfaces. Afterwards, I repeated the process on the second floor, applying the second coat of finish after lightly sanding. It's amazing how much of the day this ate up...but then again there are a lot of windows in this house! |
|||
|
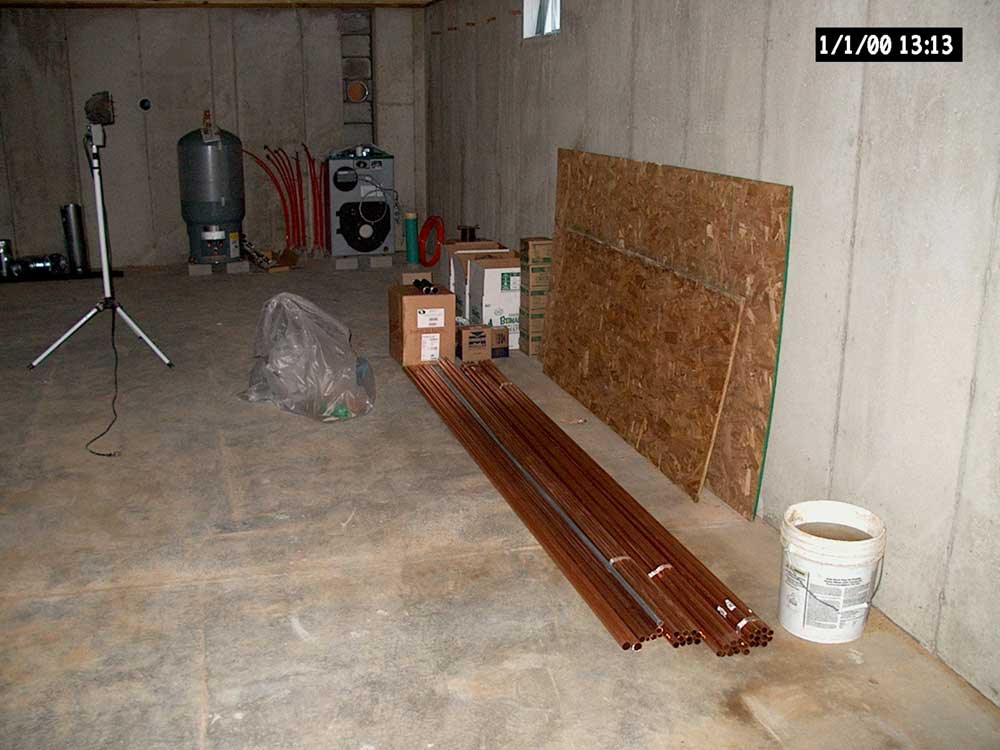
Bob was on site today to prepare the lower part of the boiler chimney for the scheduled boiler installation, which I had thought was to begin today but I heard through the grapevine that the boys would be out tomorrow instead. No problem for me, though I wondered why I had to hear it from Bob and not directly. Bob installed the flue, thimble, and concrete block in the foundation bumpout for the boiler, bringing it up to the level of the opening outside. This was all that was required at this point, but he hoped to work on the exterior, exposed brick portion soon. |
|||
|
Once I finished with the windows, I prepared to begin sanding ceilings again---this time in the kitchen area. It took a while to set up the tools and materials, after which I began the sanding process. The beams were badly stained in many areas from leakage through from he second floor for the long period of time when the roof was incomplete, but they cleaned up very nicely--it just took a lot of time and many sanding discs. I worked away at it row by row, and completed several rows before it was time to quit for the day. I felt like I should have worked later, but I justified my early-ish quitting time (5:45) by promising to arrive at 6 the next morning and continue the sanding, partly to extend my work time and partly to try and get the sanding done before the boiler boys arrived. My camera, which I'd been eking along on its 9th set of last legs, finally decided to give up the ghost today. I couldn't immediately find my spares, so I'm afraid I have no pictures...not that there's much to show anyway. A new camera is on its way soon, so it won't be overly inconvenient and with my plans for the week you won't be missing out on much of excitement anyway. |
|||
SUNDAY, AUGUST 6, 2006 |
|||
 I
began the day upstairs, and applied two coats of polyurethane to the
ceiling areas that I sanded yesterday. It took over an hour to
get the first coat on all areas, which meant that the finish was dry
enough to start over again with the second coat as soon as I was
finished--kind of like the Golden Gate bridge. Here are more
boring pictures of my ceiling...you've seen way too many of these,
and they don't really show the overall effect, but I can't just
write text without including photos, too! I
began the day upstairs, and applied two coats of polyurethane to the
ceiling areas that I sanded yesterday. It took over an hour to
get the first coat on all areas, which meant that the finish was dry
enough to start over again with the second coat as soon as I was
finished--kind of like the Golden Gate bridge. Here are more
boring pictures of my ceiling...you've seen way too many of these,
and they don't really show the overall effect, but I can't just
write text without including photos, too! |
|||
|
|
|||
 It
seems like I'm forgetting something else that I did in the interim,
but all I can remember is spending the afternoon masking off all the
windows and doors, cleaning off any fingerprints and dirt, and
applying a coat of polyurethane to the interior window and door
frames. This seems like a strange thing to be doing at this
stage, with so much else to be done on the house, but the windows
and doors all have beautiful clear pine interiors, and the raw wood
needed to be protected against staining, discoloration, and damage
during the rest of construction. In the worst case scenario, the
unsealed wood might even begin to distort (wood sealed on only one
side, like the windows and doors, can move unevenly and create odd
warping or other movement). Taking care of this step now would
save potentially a lot of work later, and it had to be done
sometime. It
seems like I'm forgetting something else that I did in the interim,
but all I can remember is spending the afternoon masking off all the
windows and doors, cleaning off any fingerprints and dirt, and
applying a coat of polyurethane to the interior window and door
frames. This seems like a strange thing to be doing at this
stage, with so much else to be done on the house, but the windows
and doors all have beautiful clear pine interiors, and the raw wood
needed to be protected against staining, discoloration, and damage
during the rest of construction. In the worst case scenario, the
unsealed wood might even begin to distort (wood sealed on only one
side, like the windows and doors, can move unevenly and create odd
warping or other movement). Taking care of this step now would
save potentially a lot of work later, and it had to be done
sometime. |
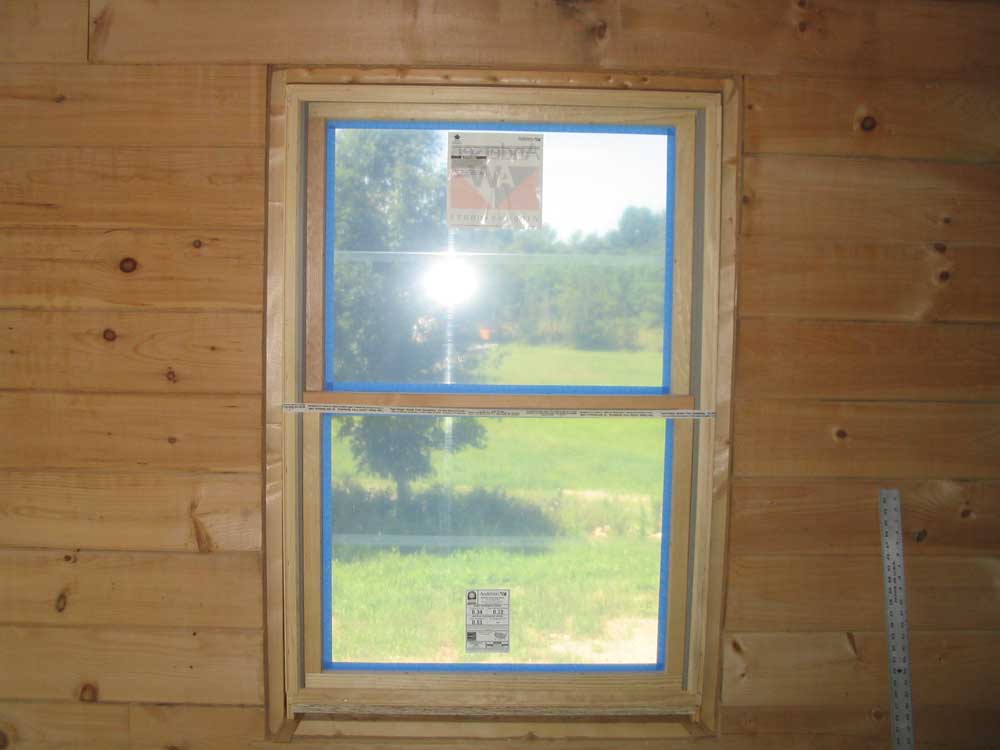
|||
 I
managed to tape all the windows, filling the small gap between the
window frames and the protective plastic on the glass, but
polyurethane took longer than expected, and it was all I could do to
finish one coat on the downstairs windows. I'll finish the
upstairs tomorrow, and probably work on a second coat downstairs. I
managed to tape all the windows, filling the small gap between the
window frames and the protective plastic on the glass, but
polyurethane took longer than expected, and it was all I could do to
finish one coat on the downstairs windows. I'll finish the
upstairs tomorrow, and probably work on a second coat downstairs. |
|||
SATURDAY, AUGUST 5, 2006 |
|||
|
Today wasn't a day of incredible
visual progress, but all the chores I attacked contributed towards
the eventual completion of the house. It's all got to get done
sometime, after all, and some days it's necessary to handle the
small-item punch lists.
I used some brass screws left over from the doors' installation, and secured six into each of the two window bottoms, predrilling holes through the jamb and then installing the screws flush. The brass heads were attractive enough, and besides, they would never be visible since the windows were so high up in the wall. Therefore, I didn't worry about hiding the heads, though I did evenly space the screws in each jamb. |
|||
 As
exciting as that project was, I then moved onto even more
interesting things: installing some blocking inside one of the
trapezoid windows, and also the triangular window in the front
dormer. Because the rough openings in each case were a little
larger (at least in part) than they apparently needed to be, the
gaps in these areas were a bit too wide to allow proper securing of
the nailing flange from outside. So I added 3/4" strips of
wood, working from inside, into the gaps, and secured the blocks
with screws and silicone. (Yes, boat people, I uttered the
dreaded "S" word...but it works well for houses.) As
exciting as that project was, I then moved onto even more
interesting things: installing some blocking inside one of the
trapezoid windows, and also the triangular window in the front
dormer. Because the rough openings in each case were a little
larger (at least in part) than they apparently needed to be, the
gaps in these areas were a bit too wide to allow proper securing of
the nailing flange from outside. So I added 3/4" strips of
wood, working from inside, into the gaps, and secured the blocks
with screws and silicone. (Yes, boat people, I uttered the
dreaded "S" word...but it works well for houses.) |
|||
 Next,
I installed more lag bolts in the 6x8 wall stiffeners on the log
gable wall. I knew I didn't have enough to complete the job
(more are on order and due here Monday), but I thought I'd go ahead
and install what I could. I ended up nearly halfway up on each
post, with two bolts in each location. Then, I glued pine
plugs into the holes to hide them. (Sorry...no picture of this right
now, apparently!) Next,
I installed more lag bolts in the 6x8 wall stiffeners on the log
gable wall. I knew I didn't have enough to complete the job
(more are on order and due here Monday), but I thought I'd go ahead
and install what I could. I ended up nearly halfway up on each
post, with two bolts in each location. Then, I glued pine
plugs into the holes to hide them. (Sorry...no picture of this right
now, apparently!)While I had the glue and plugs out, I went upstairs and plugged the bolt holes in the valley rafters and other dormer framing. |
|||
 In
the afternoon, I couldn't find any way to postpone it any longer:
it was time to sand again. Upstairs, I had stopped my sanding
short of the bottom of the ceiling (where it intersects the wall)
when I couldn't reach conveniently from the staging. Now, I
used my small rolling staging to stand and reach these unfinished
areas, and sanded all the remaining areas--the two sides of the
front dormer and the remainder of the main front roof, the bathroom
ceiling, and the closet ceiling. This brought me to the end of
the day; I planned to apply the polyurethane tomorrow. In
the afternoon, I couldn't find any way to postpone it any longer:
it was time to sand again. Upstairs, I had stopped my sanding
short of the bottom of the ceiling (where it intersects the wall)
when I couldn't reach conveniently from the staging. Now, I
used my small rolling staging to stand and reach these unfinished
areas, and sanded all the remaining areas--the two sides of the
front dormer and the remainder of the main front roof, the bathroom
ceiling, and the closet ceiling. This brought me to the end of
the day; I planned to apply the polyurethane tomorrow. |
|||
|
|
|||
FRIDAY, AUGUST 4, 2006 |
|||
|
A couple days ago, I talked to the
heat guys to let them know what the status of the house was and find
out when they might want to come back and do their rough ins for the
baseboards and such. They wanted to come early next week, so
before then there were a couple interior tasks I needed to take care
of.
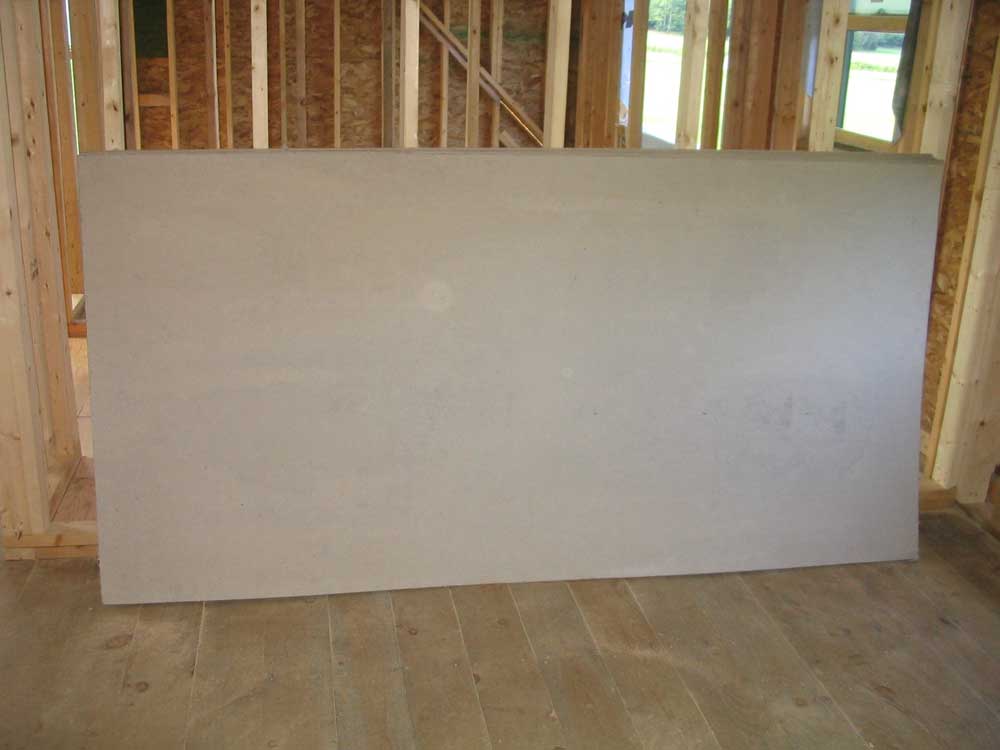
To eliminate this, the hardwood will eventually get installed over a 1/2" layer of Homosote, a sound-deadening material that is sort of cardboard-y or recycled newspaper-y in appearance and consistency. Since the Homosote is relatively soft, I didn't want to install it on the loft floor until just before the hardwood, so I left that off for now. |
|||
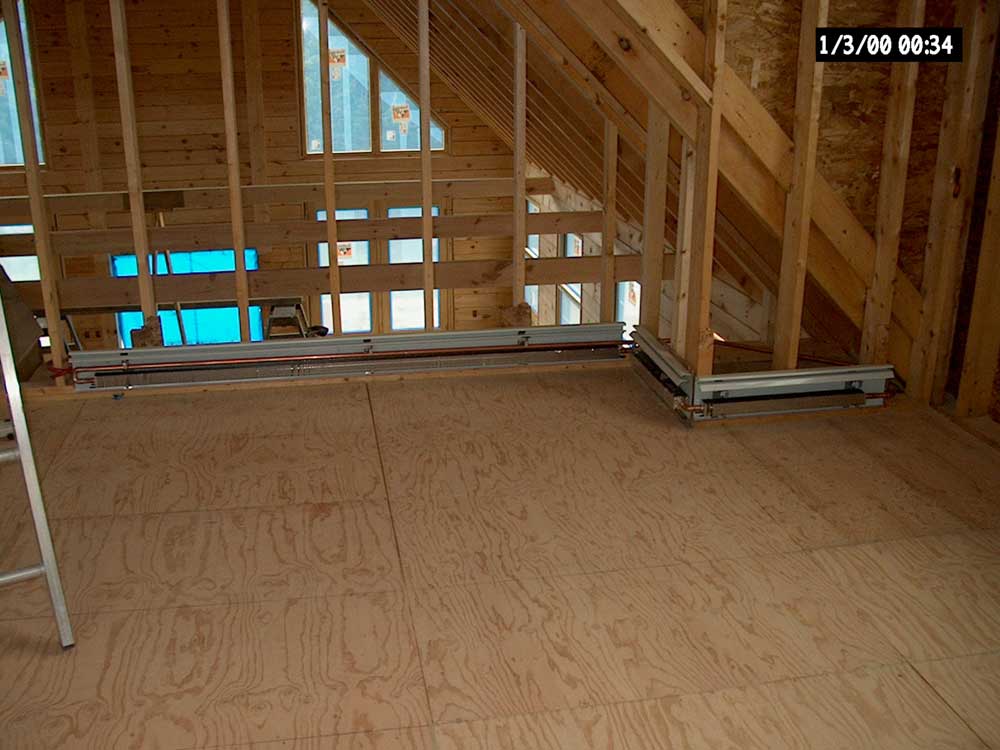
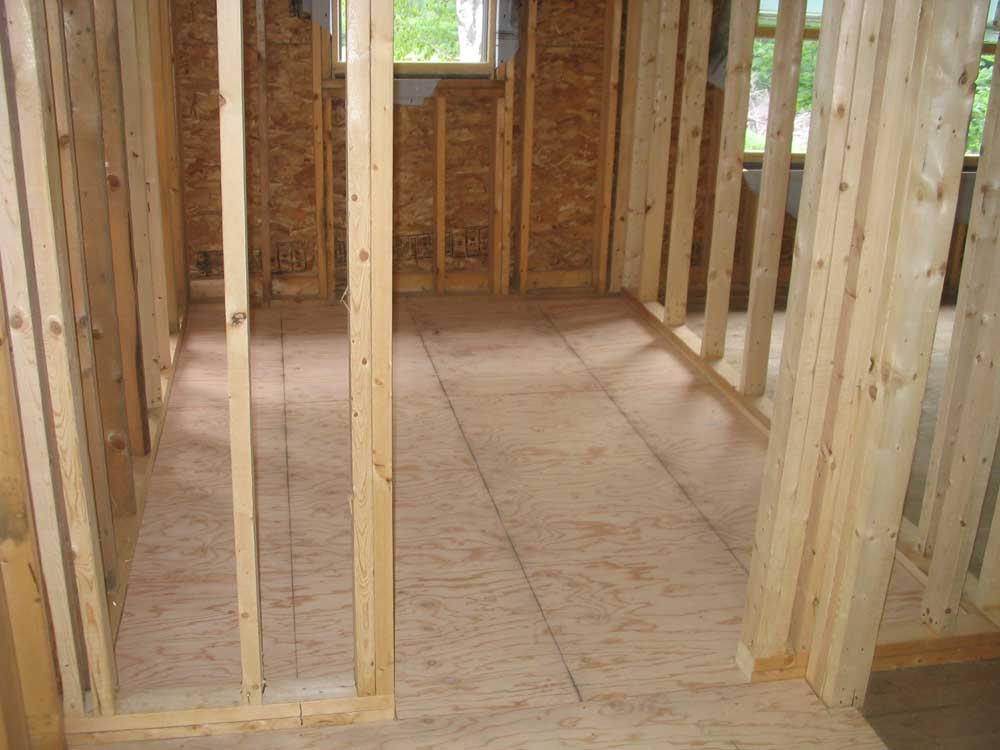
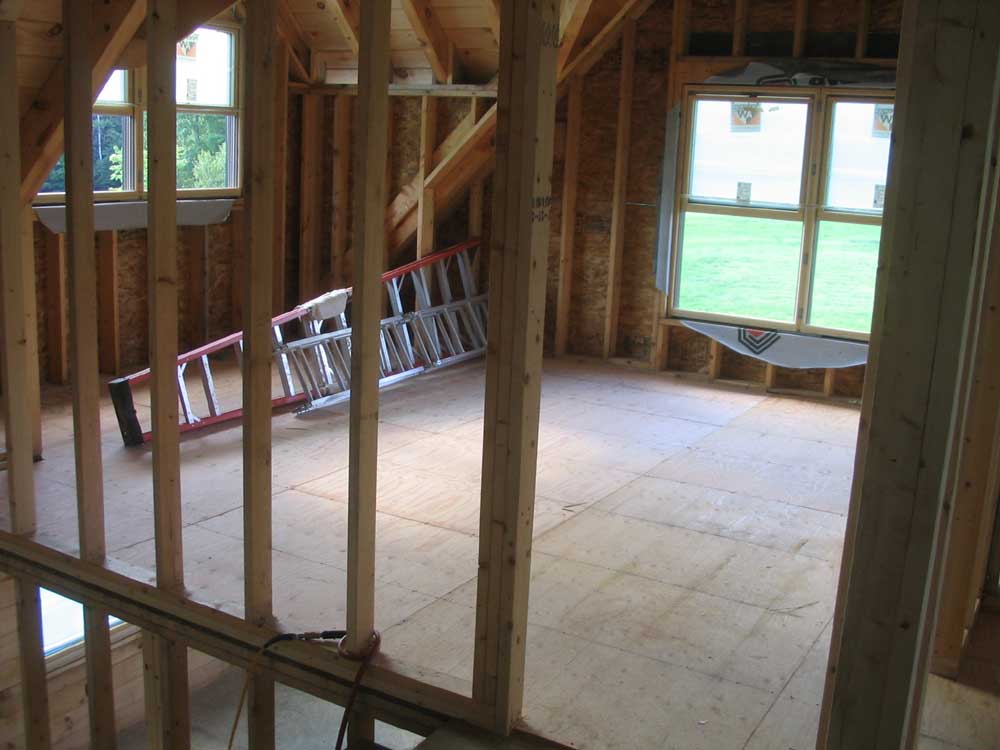 However,
in the bedroom and closet, we plan on wall to wall carpet, so my
next step in these two rooms was to install 1/2" plywood
underlayment. I laid down a bead of construction adhesive over
the tops of the existing boards in way of the ceiling joists beneath
and at the edges of the plywood sheets, and nailed the plywood down
with ring shank nails. Exciting stuff, this. Nearly all
of the sheets required cutting, so this process took longer than it
might have otherwise. However,
in the bedroom and closet, we plan on wall to wall carpet, so my
next step in these two rooms was to install 1/2" plywood
underlayment. I laid down a bead of construction adhesive over
the tops of the existing boards in way of the ceiling joists beneath
and at the edges of the plywood sheets, and nailed the plywood down
with ring shank nails. Exciting stuff, this. Nearly all
of the sheets required cutting, so this process took longer than it
might have otherwise. |
|||
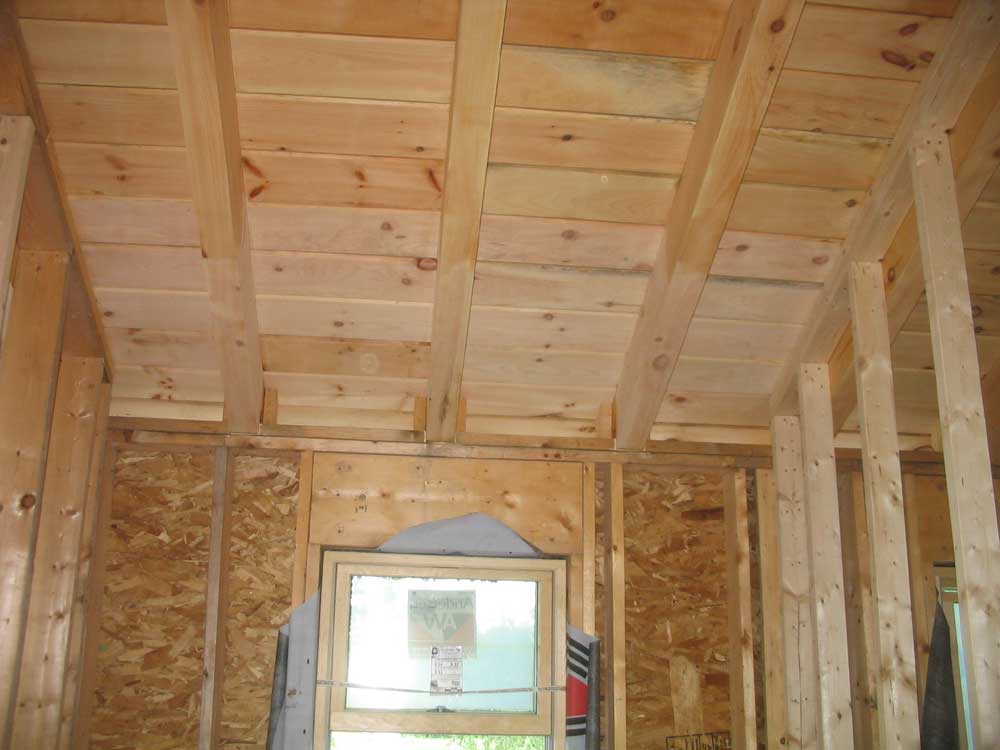
 With
that done, I took a few moments to finally trim off the overhanging
ends of the ceiling boards in the loft area, which we had let run
wild over the edge during installation. I trimmed them off to
an even 1-1/2" overhang and nailed the ends as necessary.
Then, I bored two holes into the floor and down partially through
the carrying beam so that I could install two 12" log screws into
the top of the log post in the kitchen beneath, securing the top
against movement. With
that done, I took a few moments to finally trim off the overhanging
ends of the ceiling boards in the loft area, which we had let run
wild over the edge during installation. I trimmed them off to
an even 1-1/2" overhang and nailed the ends as necessary.
Then, I bored two holes into the floor and down partially through
the carrying beam so that I could install two 12" log screws into
the top of the log post in the kitchen beneath, securing the top
against movement. |
|||
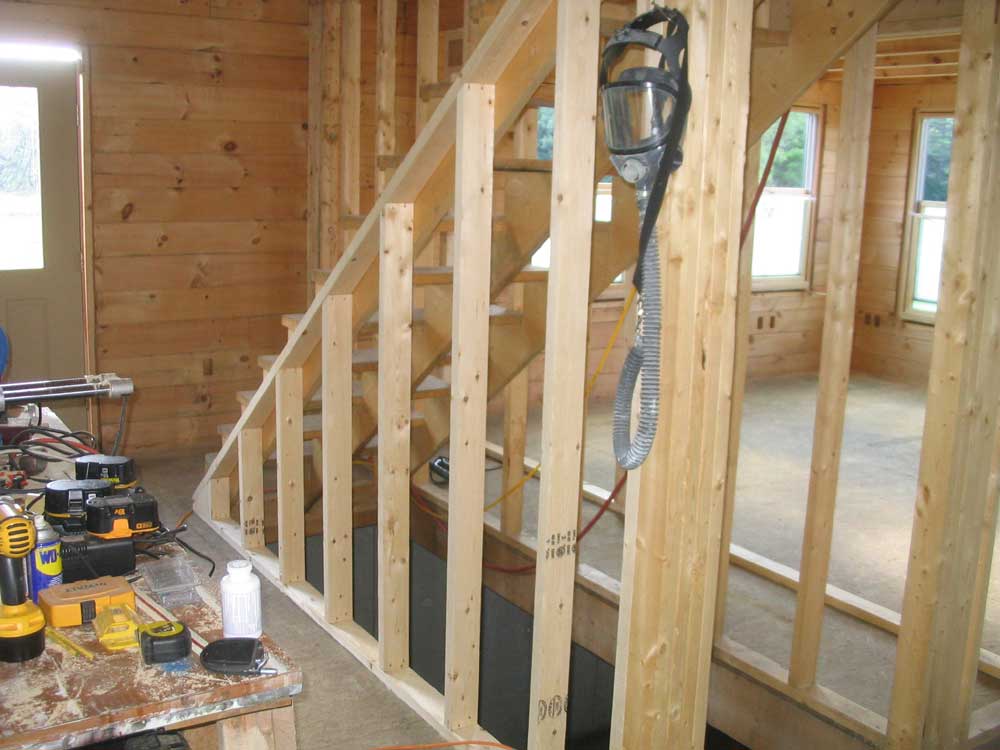
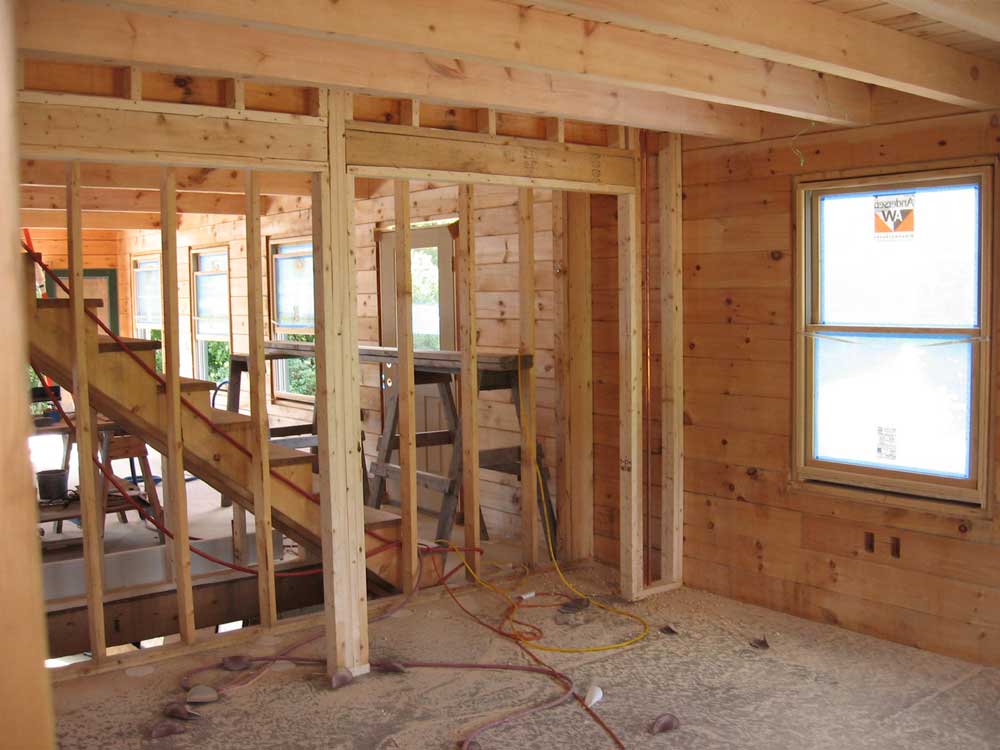
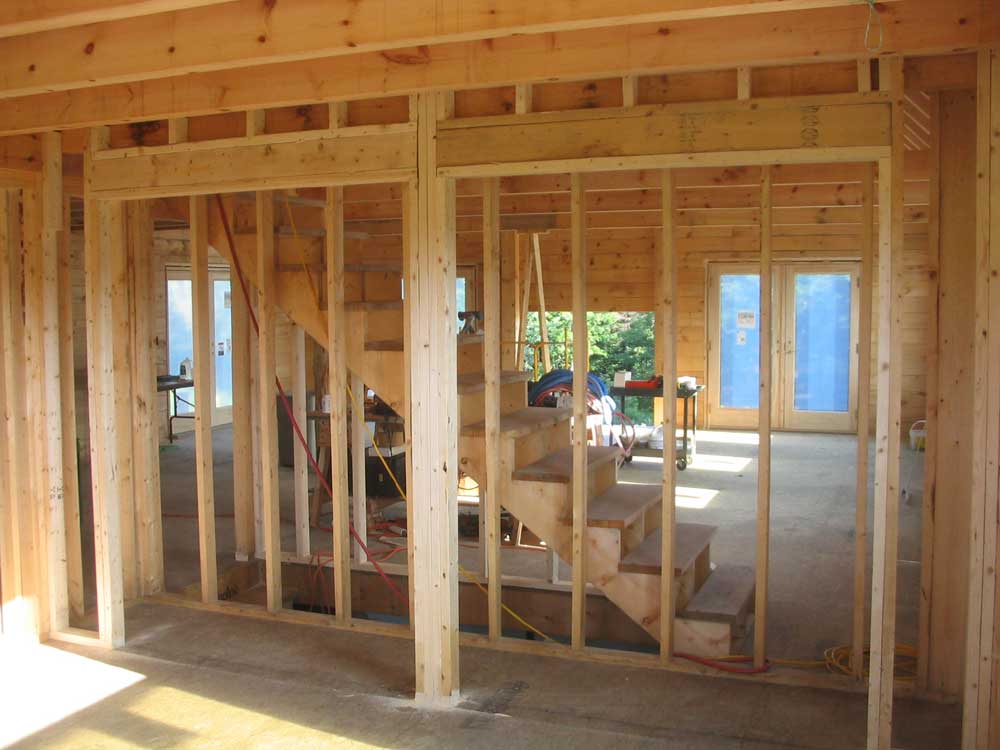
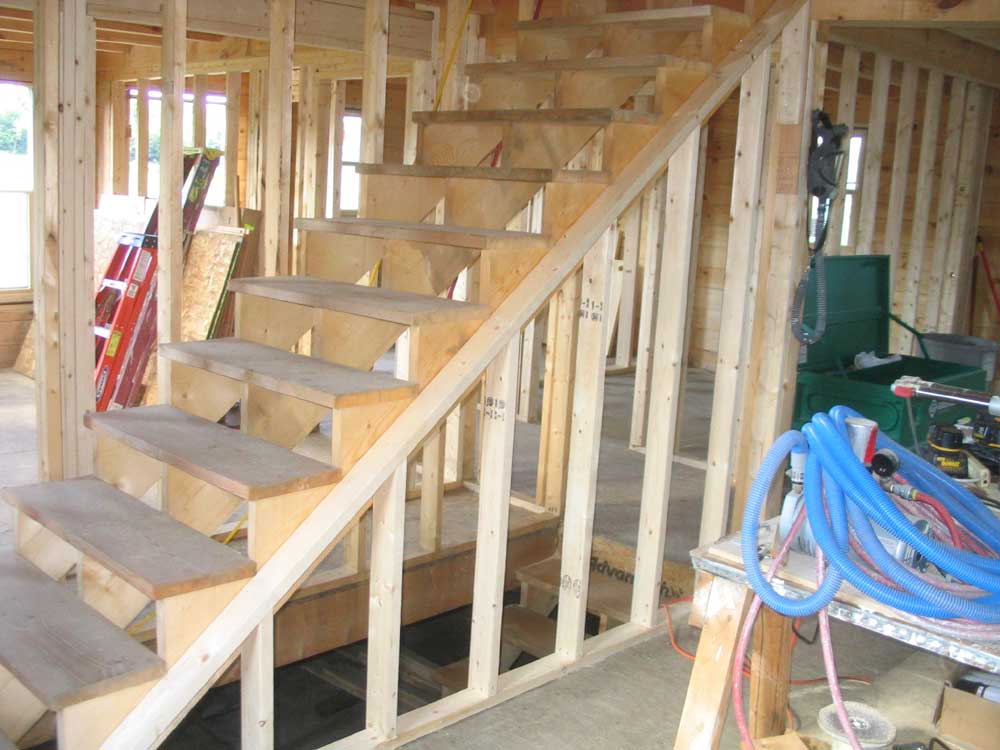 After
cleaning up the sawdust and cutoffs from these jobs, I continued
work downstairs and constructed a couple of the final interior
walls--a wall at the outer edge of the stairway and a closet wall in
Heidi's craft room/office. Layout and construction of the two
walls was straightforward enough, and building the stairway wall
went rather quickly. Later, during final trim, I'll install
the final stair treads and other trim so that the stairs overhang
the top of this wall for a seamless appearance. After
cleaning up the sawdust and cutoffs from these jobs, I continued
work downstairs and constructed a couple of the final interior
walls--a wall at the outer edge of the stairway and a closet wall in
Heidi's craft room/office. Layout and construction of the two
walls was straightforward enough, and building the stairway wall
went rather quickly. Later, during final trim, I'll install
the final stair treads and other trim so that the stairs overhang
the top of this wall for a seamless appearance. |
|||
|
|
|||
 The
wall in Heidi's room took longer, thanks to more layout required and
also thanks to some idiotically wrong cuts that I made on the door
headers, requiring that I recut all the pieces. However, that
was a minor setback and I easily got the wall done by quitting time,
after which I cleaned up the mess from the day's work and tried to
organize my thoughts for tomorrow. I've found that with so
many projects, both large and small, coming up on the "now or soon"
list, finding the best direction each day has been a bit of a
challenge. But things were starting to flow properly again
after the major step of enclosing the windows, so I'm sure I'll be
back in the groove soon. The
wall in Heidi's room took longer, thanks to more layout required and
also thanks to some idiotically wrong cuts that I made on the door
headers, requiring that I recut all the pieces. However, that
was a minor setback and I easily got the wall done by quitting time,
after which I cleaned up the mess from the day's work and tried to
organize my thoughts for tomorrow. I've found that with so
many projects, both large and small, coming up on the "now or soon"
list, finding the best direction each day has been a bit of a
challenge. But things were starting to flow properly again
after the major step of enclosing the windows, so I'm sure I'll be
back in the groove soon. |
|||
THURSDAY, AUGUST 3, 2006 |
|||
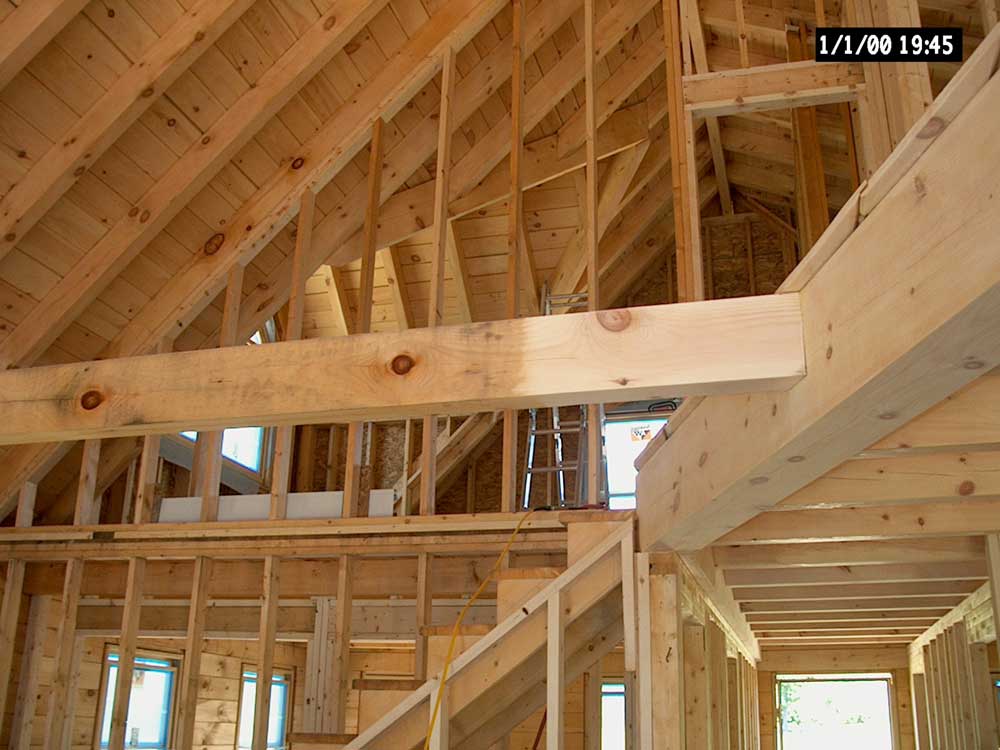
|
The first order of business today was
to get the huge wall stiffeners installed. These 6x8" pine
beams, each about 22' long in their untrimmed state, were required
on the log gable wall to stiffen the logs, and were to be installed
on either side of the fireplace opening. I had been waiting
some time for these to arrive, and they finally came a week or two
ago. They were obviously too large and heavy for me to even
consider installing by myself, though I did manage to get them
inside the house using the tractor and some rollers.
|
|||
 Next,
we tackled the beams. One of the two posts was much heavier
than the other, thanks to its moisture and pitch content. We
decided to start with this one--perhaps to get it out of the way.
In any event, we set up some pipe staging inside to allow us to
reach the top, and then used a plumb bob to mark the top of the wall
where the beam should lie, using a mark on the floor as our
guideline. After measuring, we cut the beam to length, with a
45° angle on the top edge to match the roof pitch. Next,
we tackled the beams. One of the two posts was much heavier
than the other, thanks to its moisture and pitch content. We
decided to start with this one--perhaps to get it out of the way.
In any event, we set up some pipe staging inside to allow us to
reach the top, and then used a plumb bob to mark the top of the wall
where the beam should lie, using a mark on the floor as our
guideline. After measuring, we cut the beam to length, with a
45° angle on the top edge to match the roof pitch.The beam was flat on the floor. Getting it up to vertical and into place posed something of a challenge, thanks to the weight and bulk of the beam, its long length (just under 20' when cut), and the fact that there was a ceiling tie in the way to thwart any attempts to raise the beam easily. |
|||
 One
thing this house construction has proved is that it's possible to
lift almost anything if you plan it out and keep the actual height
of the individual lifts small and manageable. (Suddenly,
construction of the great pyramids seems realistic by the methods
hypothesized by scholars.) In our case, we lifted the top end
of the post onto the staging , and then up bit by bit using
different planks to support it. As feared, we ran out of
height beneath the ceiling tie, but by moving the butt end of the
beam at an angle towards the side wall of the house, we
could gain enough room to continue. Eventually, we reached an
equilibrium where the teetering beam, supported by the very staging
on which we stood, became more stable on its own as it neared
vertical. From there, things went smoothly, and soon post was
vertical. We installed several lag bolts in countersunk holes
to secure the post and pull the wall into shape; there were
significant bows in the wall. Later, I'd install additional
lags and plug the holes, but for now we just installed 4 or 5 lags,
enough to hold it. One
thing this house construction has proved is that it's possible to
lift almost anything if you plan it out and keep the actual height
of the individual lifts small and manageable. (Suddenly,
construction of the great pyramids seems realistic by the methods
hypothesized by scholars.) In our case, we lifted the top end
of the post onto the staging , and then up bit by bit using
different planks to support it. As feared, we ran out of
height beneath the ceiling tie, but by moving the butt end of the
beam at an angle towards the side wall of the house, we
could gain enough room to continue. Eventually, we reached an
equilibrium where the teetering beam, supported by the very staging
on which we stood, became more stable on its own as it neared
vertical. From there, things went smoothly, and soon post was
vertical. We installed several lag bolts in countersunk holes
to secure the post and pull the wall into shape; there were
significant bows in the wall. Later, I'd install additional
lags and plug the holes, but for now we just installed 4 or 5 lags,
enough to hold it.Then, we repeated the process for the other side, which went much more easily thanks to our experience and because the second post was so much lighter. |
|||
 With
that chore out of the way--and looking good, too--we continued by
installing the front door. The opening was quite large,
leaving lots of space around the door jamb. With no exterior
trim on the door, there was little to hold it; I'd have to get the
trim on fairly soon, but for now I tacked it with some finish nails
in the four corners--just enough to hold things in place. For
now, the door would be inoperable. It looked boring without
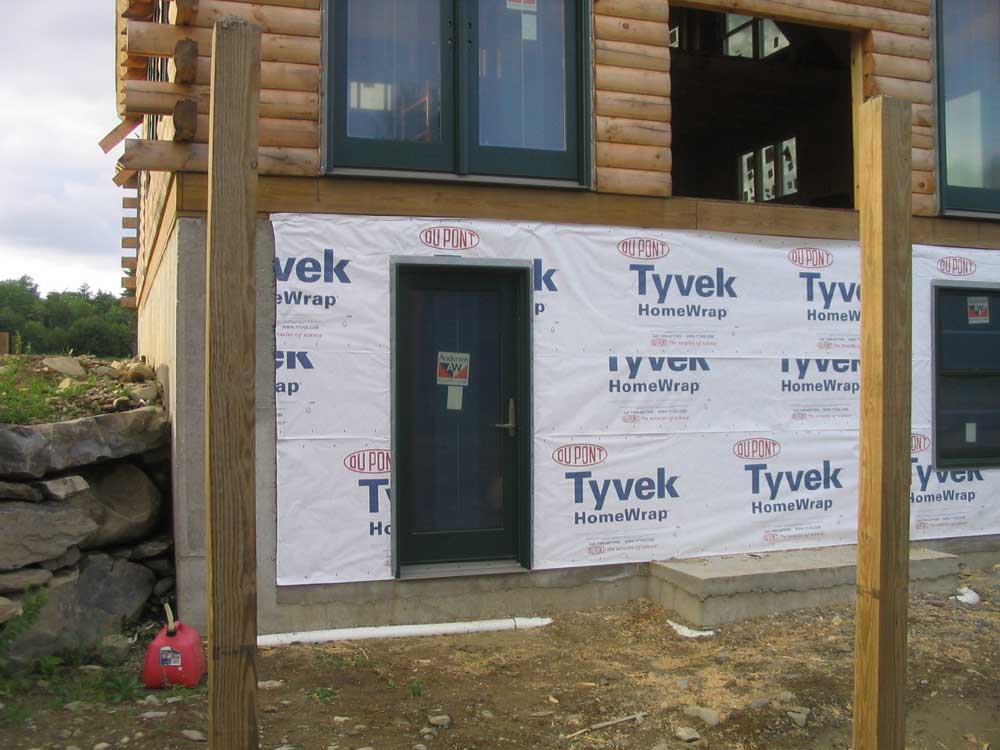
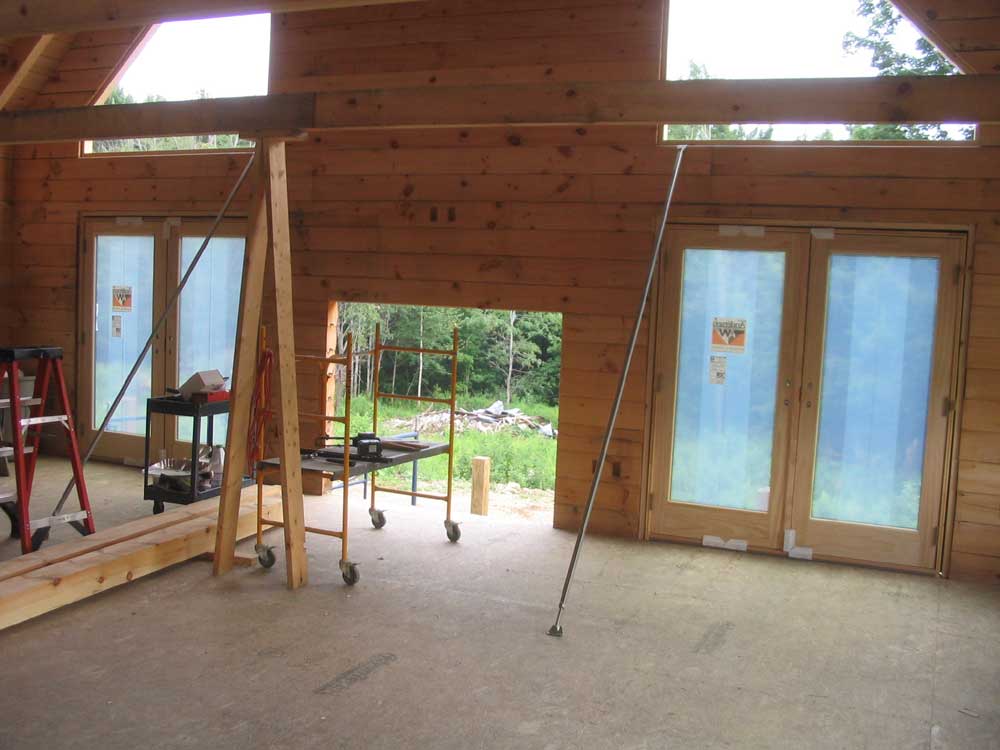
paint, trim, or window grilles, but that should all change in time. With
that chore out of the way--and looking good, too--we continued by
installing the front door. The opening was quite large,
leaving lots of space around the door jamb. With no exterior
trim on the door, there was little to hold it; I'd have to get the
trim on fairly soon, but for now I tacked it with some finish nails
in the four corners--just enough to hold things in place. For
now, the door would be inoperable. It looked boring without
paint, trim, or window grilles, but that should all change in time. |
|||
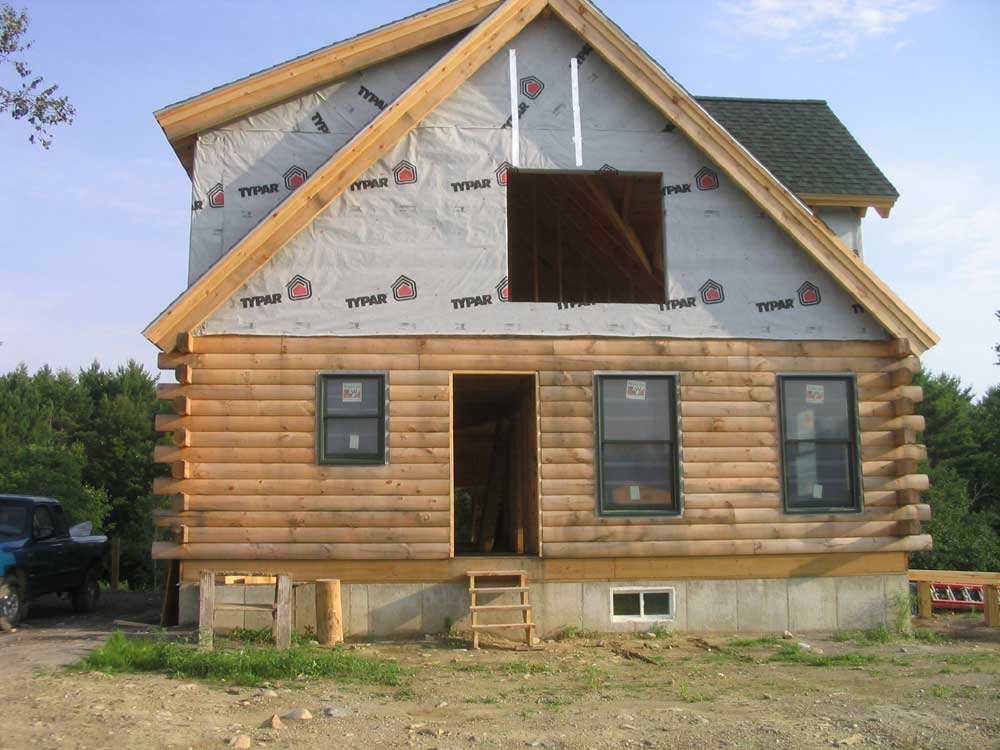
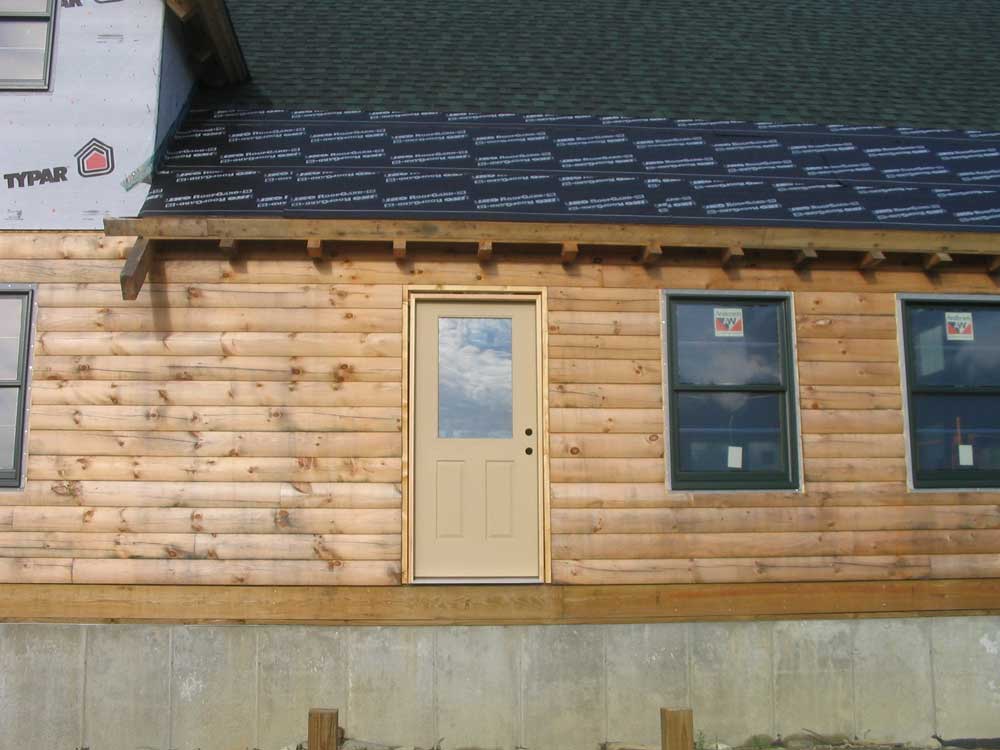
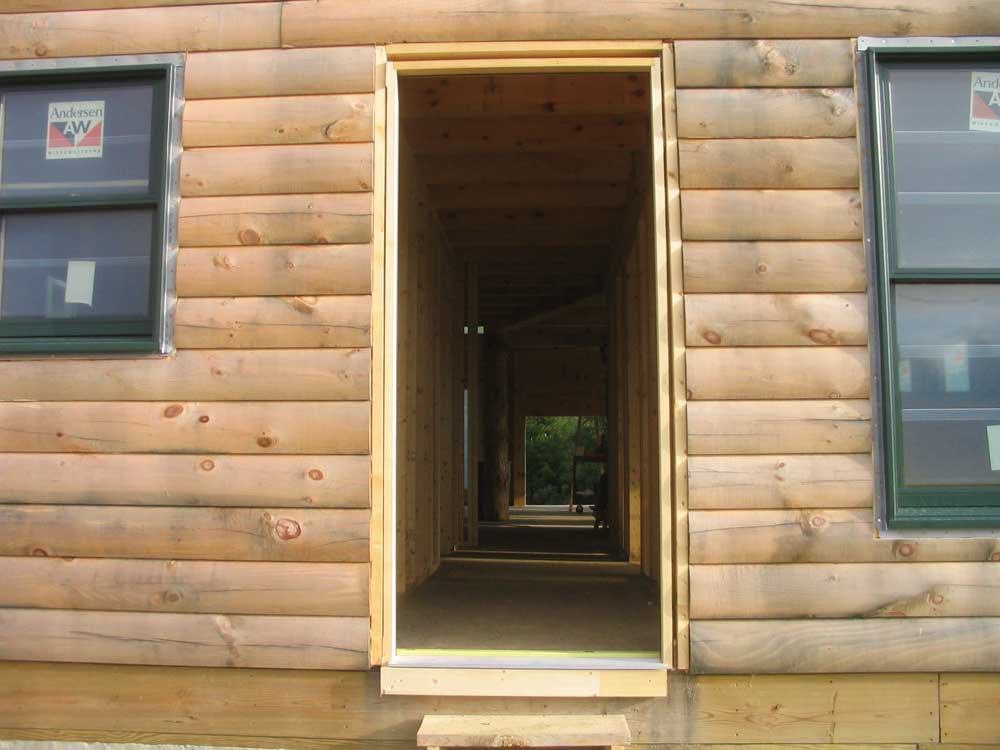 Then,
we installed the door in the northern gable--a Dutch door.
Unfortunately, I don't have a picture of the door in place, since as
soon as it was installed, we unpinned and removed the door from its
frame. Why? Well, it's a solid wood door, and I
needed to get some finish in the inside and outside before exposing
it to the weather. Then,
we installed the door in the northern gable--a Dutch door.
Unfortunately, I don't have a picture of the door in place, since as
soon as it was installed, we unpinned and removed the door from its
frame. Why? Well, it's a solid wood door, and I
needed to get some finish in the inside and outside before exposing
it to the weather.With that, Bob was once again done, and he left right at lunchtime. Once more, his help and expertise were invaluable. |
|||
 During
the afternoon, I had a little trouble getting started in a new
direction, with so many possible ways I could go. I spent some
time cleaning up, and then moved all the excess door parts--screens,
grilles, hardware, and other accessories--down to the basement for
safekeeping until they were needed. Unsure of what to do next,
I eventually managed to get myself into the groove and worked on the
four patio doors--three doubles on the main floor and the single
door down in the daylight basement. These doors needed to be
properly and fully secured with screws, a step that we had not done
during initial installation. During
the afternoon, I had a little trouble getting started in a new
direction, with so many possible ways I could go. I spent some
time cleaning up, and then moved all the excess door parts--screens,
grilles, hardware, and other accessories--down to the basement for
safekeeping until they were needed. Unsure of what to do next,
I eventually managed to get myself into the groove and worked on the
four patio doors--three doubles on the main floor and the single
door down in the daylight basement. These doors needed to be
properly and fully secured with screws, a step that we had not done
during initial installation. |
|||
|
|
|||
|
|
|||
WEDNESDAY, AUGUST 2, 2006 |
|||
|
We got an early start this morning
after listening to the weather people go on and on about how
terribly hot and humid it was to be today. It was, but hardly
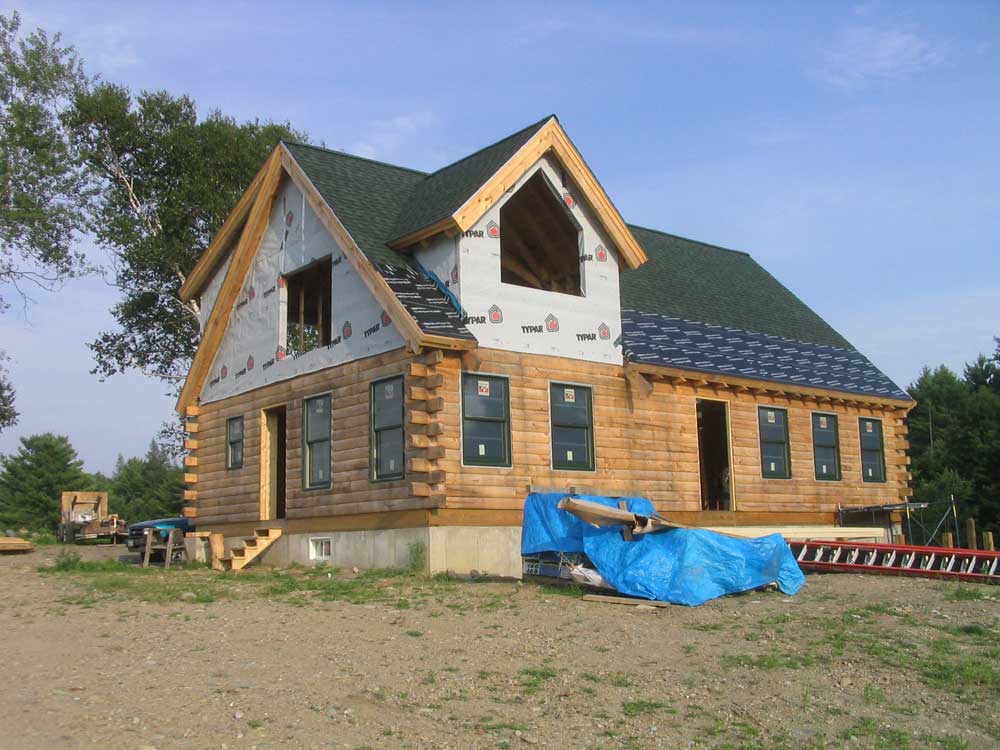
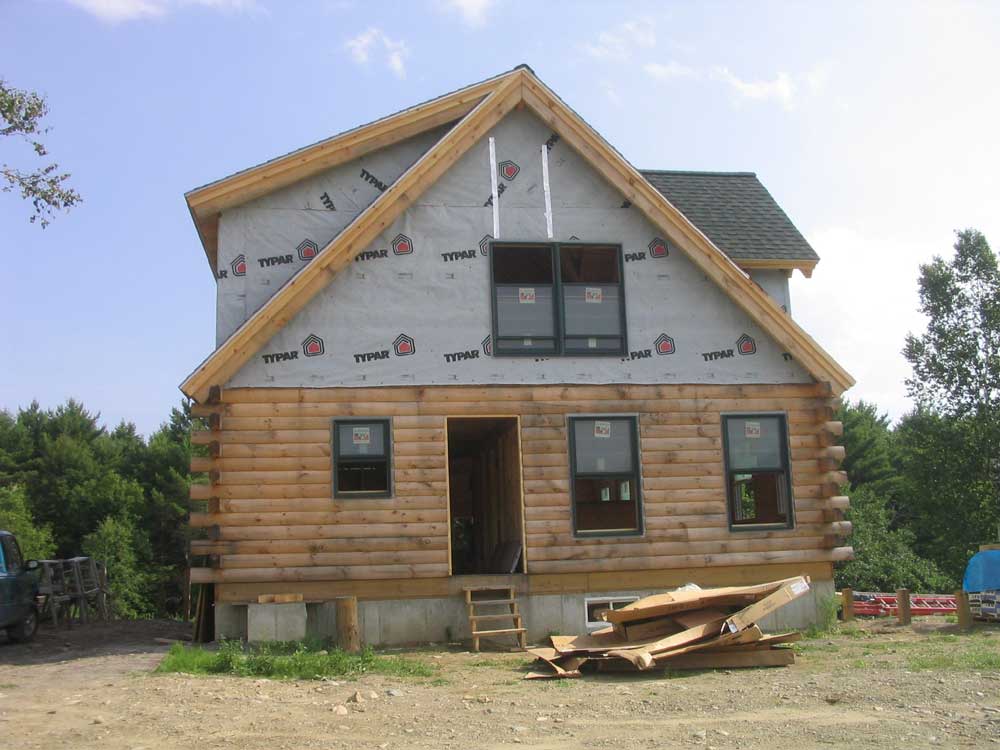
to the extent that they might have had us believe. It seemed the day was starting out badly when we started looking over the custom trapezoid windows before installing them. Built of two sections each, which were joined at the factory, we noticed that the two sections didn't line up at the top of the joint; the smaller section was actually a bit taller than the larger, upper section. This disturbing revelation caused us to measure the rough openings in the log wall. Much to our displeasure, we found that the opening--even though it was built to the specified dimensions given us for this window--was not large enough. The misaligned portion of the window threw everything off, as the rough opening was at such a close tolerance to the overall size of the window. We eventually decided to remove the
2x4 window buck at the bottom edge of the openings and replace it
with a 3/4" board instead. This would lower the window and
increase the clearance at the midpoint of the hypotenuse (for
clarity of description conveniently avoiding the fact, for the
moment, that these windows are trapezoids and don't technically have
a hypotenuse...but I bet you know which side I mean anyway), which
was what we needed. |
|||
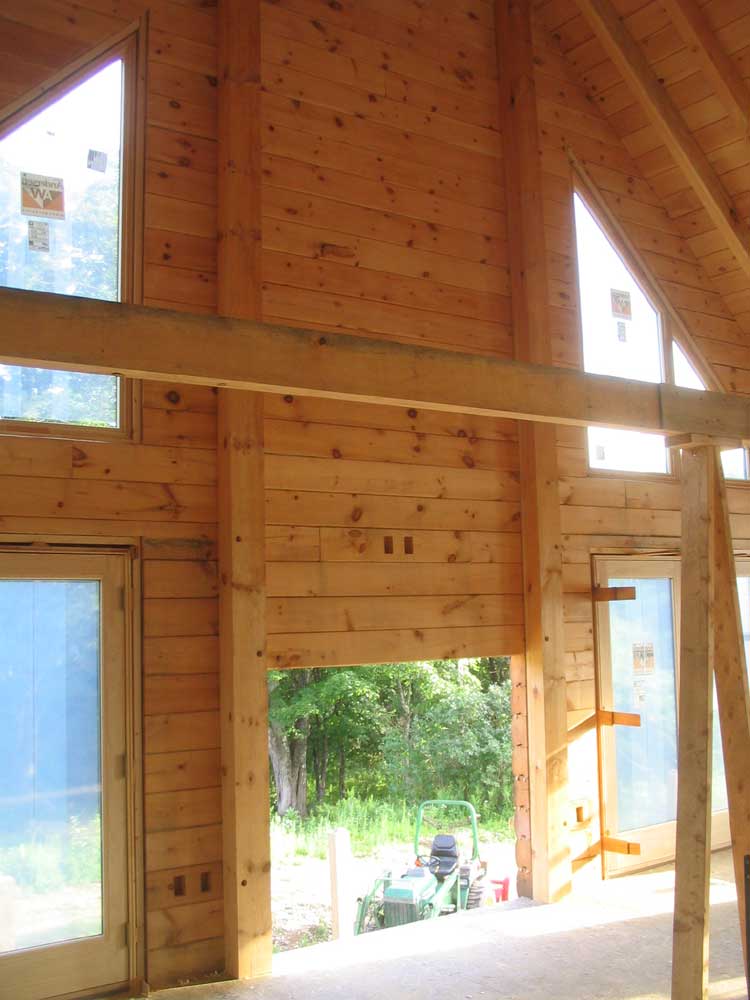
 After
nailing the window in place, we repeated the process on the other
side, which took only about an hour total. It was a relief to
have those awkward, expensive windows secured in place. After
nailing the window in place, we repeated the process on the other
side, which took only about an hour total. It was a relief to
have those awkward, expensive windows secured in place.We continued with the other upstairs windows, beginning with the front dormer. After some confusion regarding the supplied directions for installing the transom (triangular) window on top of the double hung unit, we determined that we could install the transom window after the other was installed, which made life easier--and the window lighter. |
|||
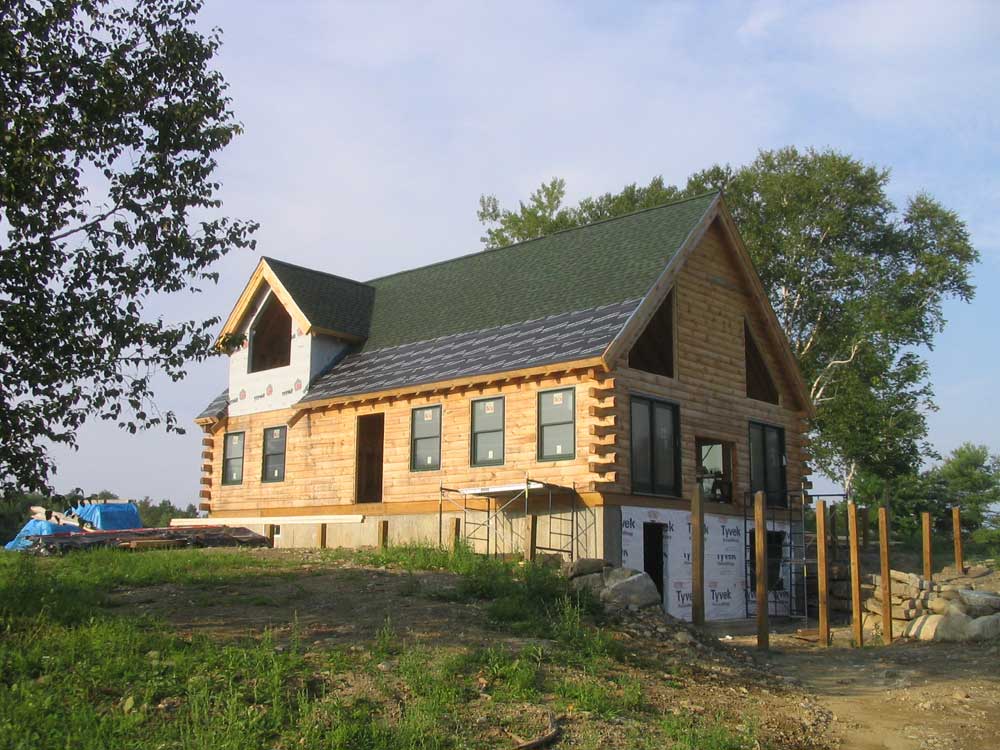
 The
skyhooks I had ordered didn't show up, so instead we set up Bob's
pump jack staging--the real aluminum version, which he ended up
bringing rather than relying on the old style that would have used
the double 2x4s I had built last night. With the pump jacks
set up, we climbed aboard with the window and pumped our way up to
the window opening, where it was easy to install the window.
Then, Bob climbed down a ladder and passed the triangular section
out from the inside, and we installed that as well, eventually
screwing it to the double hung from the inside. This window
unit really dressed up the front of the house, I thought. The
skyhooks I had ordered didn't show up, so instead we set up Bob's
pump jack staging--the real aluminum version, which he ended up
bringing rather than relying on the old style that would have used
the double 2x4s I had built last night. With the pump jacks
set up, we climbed aboard with the window and pumped our way up to
the window opening, where it was easy to install the window.
Then, Bob climbed down a ladder and passed the triangular section
out from the inside, and we installed that as well, eventually
screwing it to the double hung from the inside. This window
unit really dressed up the front of the house, I thought. |
|||
 Next,
we moved around to the north gable window, one of the largest in the
house, and then around to the shed dormer out back, where we
installed two of the three windows, leaving the bow window location
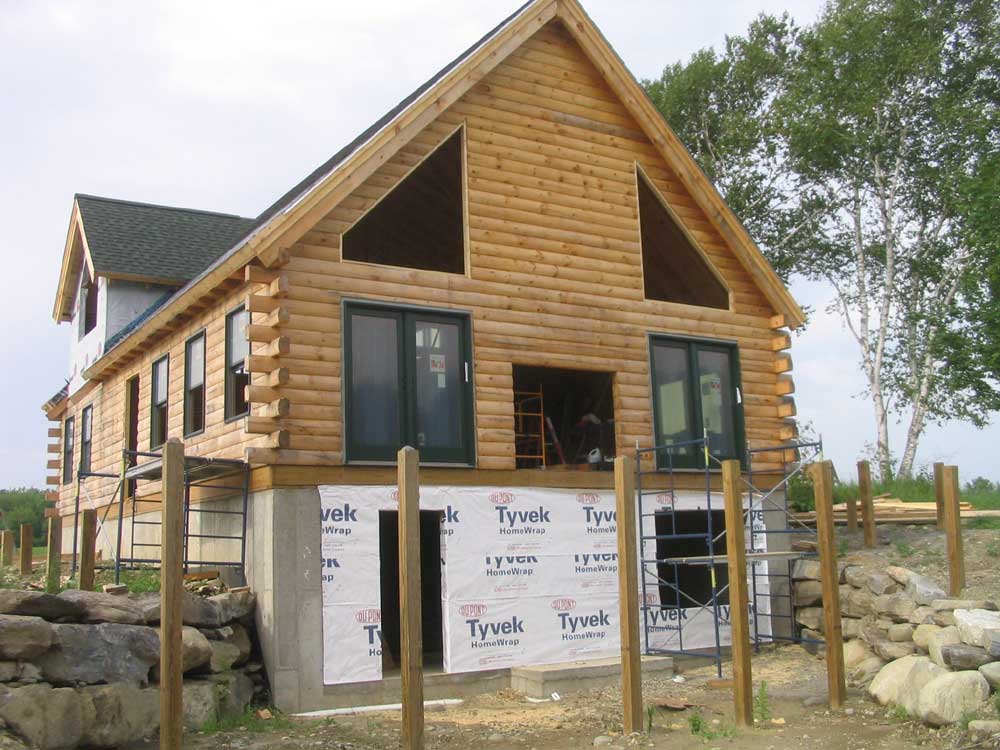
empty since the window was not here thanks to an ordering snafu. Next,
we moved around to the north gable window, one of the largest in the
house, and then around to the shed dormer out back, where we
installed two of the three windows, leaving the bow window location
empty since the window was not here thanks to an ordering snafu. |
|||
|
|
|||
 Finally,
we installed the large double window in the daylight basement.
By now it was 3 and rather hot, and we decided to call it a day--or
at least Bob did. I continued by installing an external jamb
extension kit on the daylight basement door, which was required
before the door could be installed. Finally,
we installed the large double window in the daylight basement.
By now it was 3 and rather hot, and we decided to call it a day--or
at least Bob did. I continued by installing an external jamb
extension kit on the daylight basement door, which was required
before the door could be installed.Tomorrow, we'll attack it one more day and install the three exterior doors, and also install the 6x8 pine wall stiffener beams against the log gable wall. |
|||
TUESDAY, AUGUST 1, 2006 |
|||
 Bob
was back today to help with the installation of the windows.
We both hoped it would be a relatively simple 2-day process. Bob
was back today to help with the installation of the windows.
We both hoped it would be a relatively simple 2-day process.Since I had left staging set up on the southern side of the house, and since the large French doors in their boxes seemed to be very much in the way inside, we chose to begin with these. We passed the door through the opening in the wall and out onto the staging, where we applied the vinyl installation flange, caulked the opening, and then installed the unit, nailing through the flange into the window bucks. Later, I'd install screws through the door frame into the wood, but for now we left things as is and moved on to the next door, which was identical. |
|||
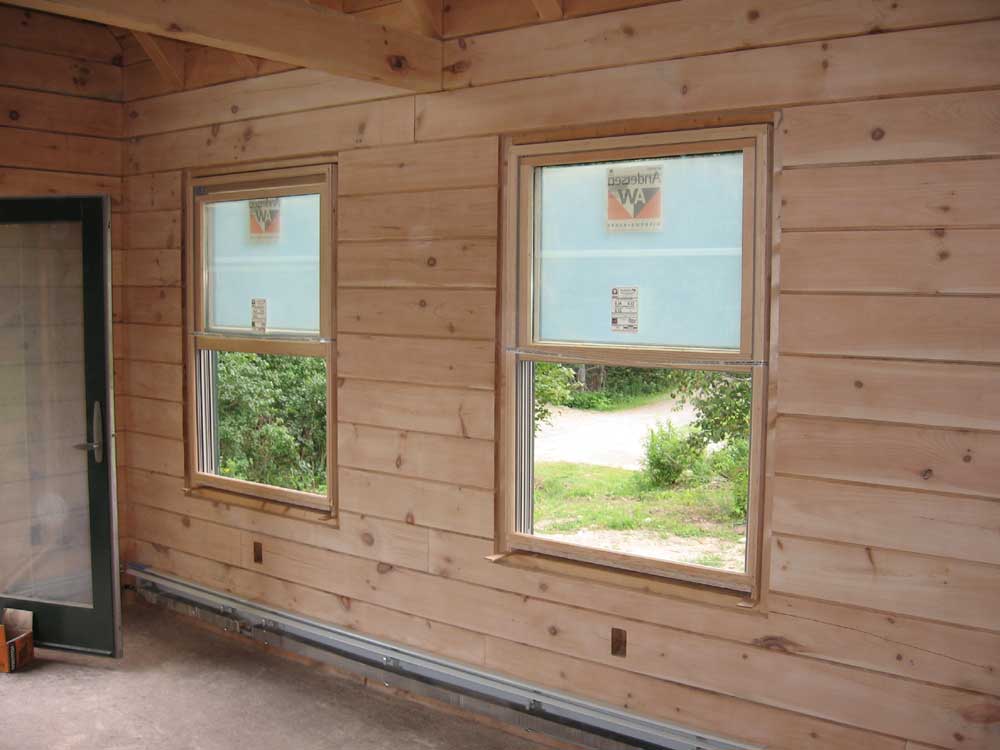
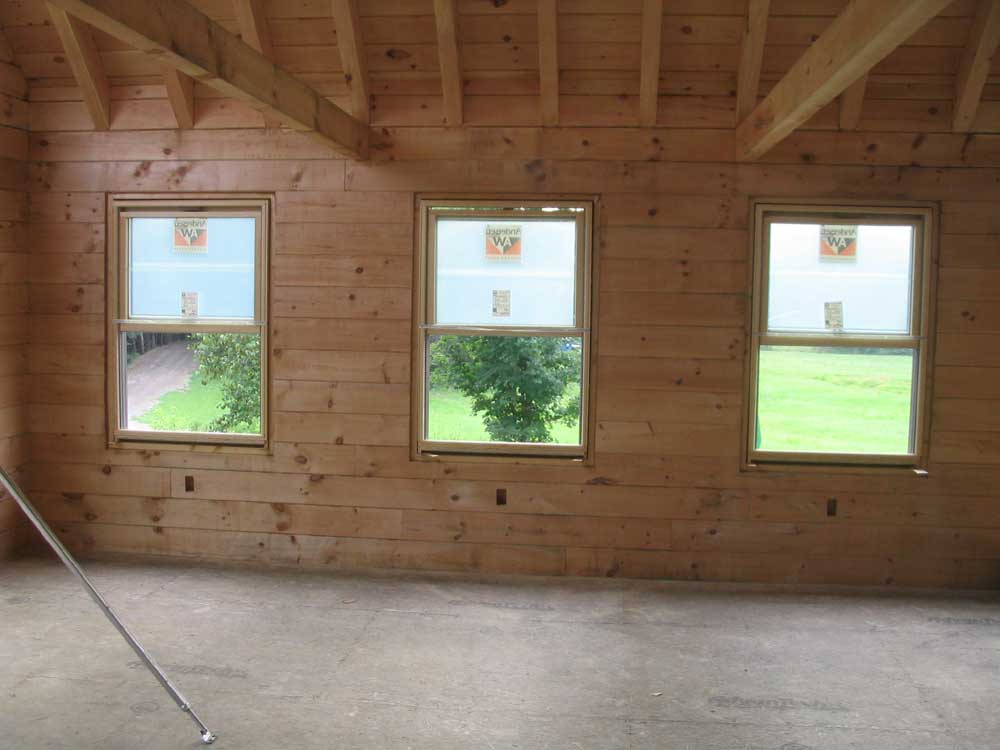
 The
third French door differed slightly in that it was an out swing
door, but installation was essentially the same. However, the
opening was out of square and too narrow at the top, so I had to
modify the window buck with a heavy duty grinder armed with some 16
grit sandpaper to widen the opening and allow the door to fit.
The grinder made pretty short work of this, but it was still plenty
of work. The
third French door differed slightly in that it was an out swing
door, but installation was essentially the same. However, the
opening was out of square and too narrow at the top, so I had to
modify the window buck with a heavy duty grinder armed with some 16
grit sandpaper to widen the opening and allow the door to fit.
The grinder made pretty short work of this, but it was still plenty
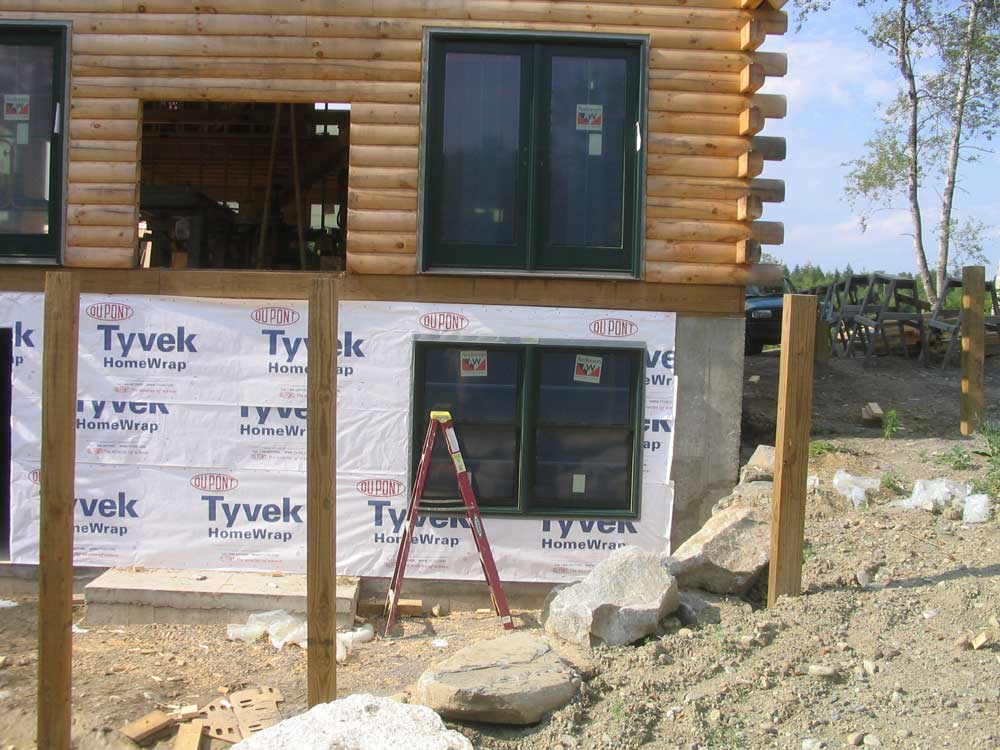
of work.With the large doors out of the way, we moved on to a number of the downstairs windows, and rapidly installed the smallest ones in the back of the house, as well as the kitchen window. All the windows in these pictures have a protective film over the glass, and will later receive decorative grilles to simulate the look of divided light--and of course the windows require trim, etc. |
|||
|
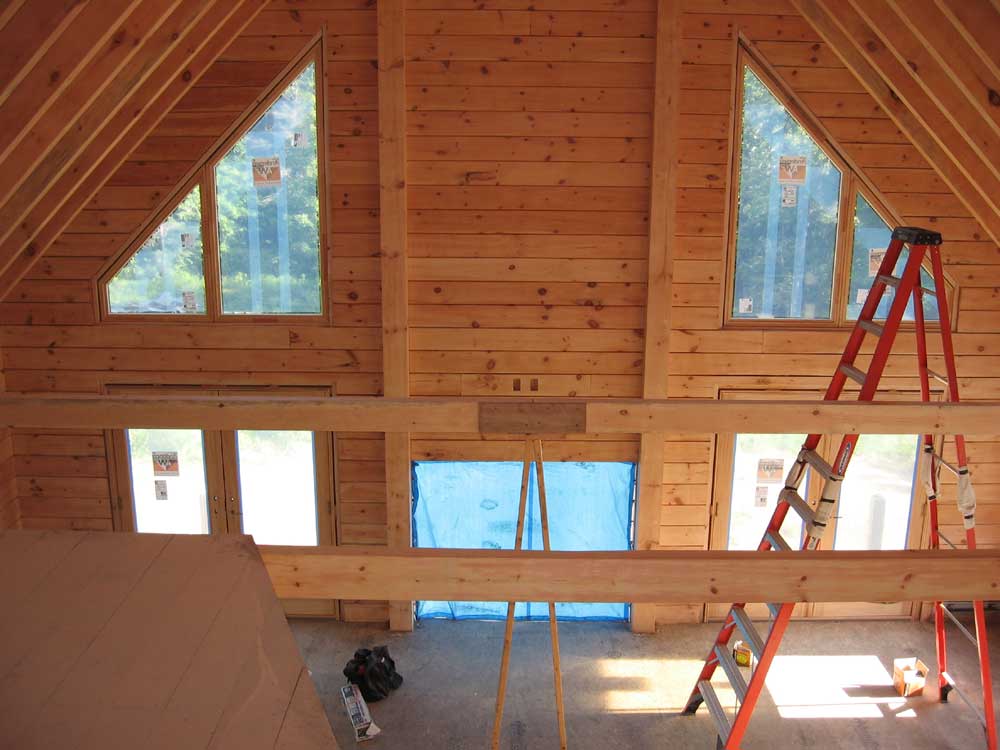
After lunch, during which I had to make a run to the nearest lumber store for some more caulk, we installed all the windows in the front of the house. It felt great to fill opening after opening with the new windows! |
|||
|
|
|||
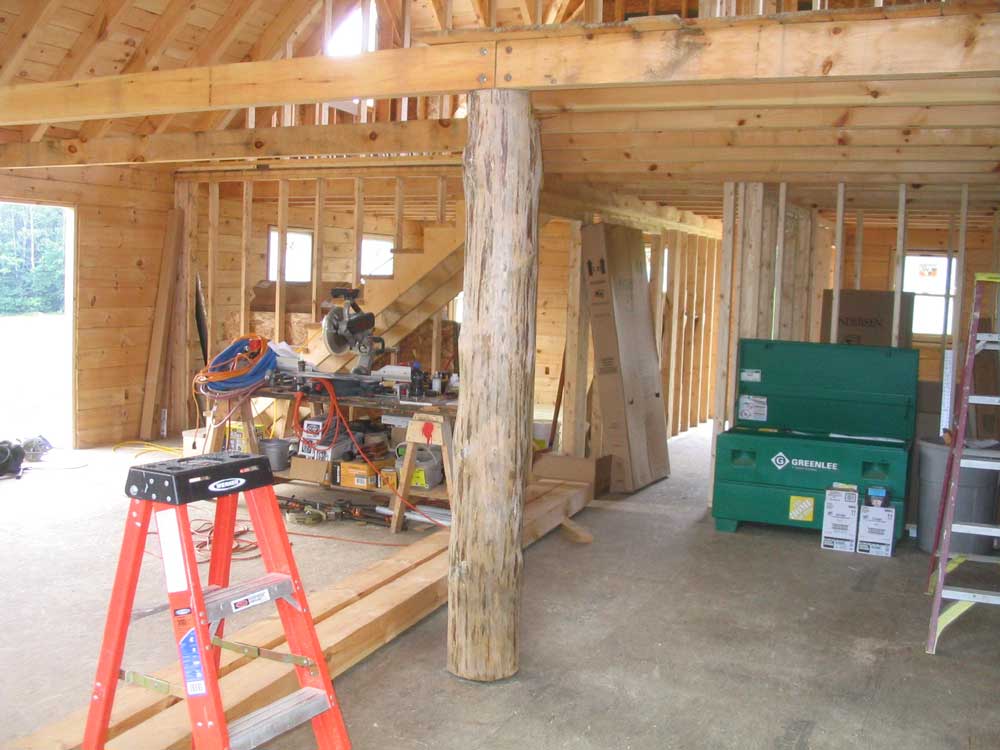
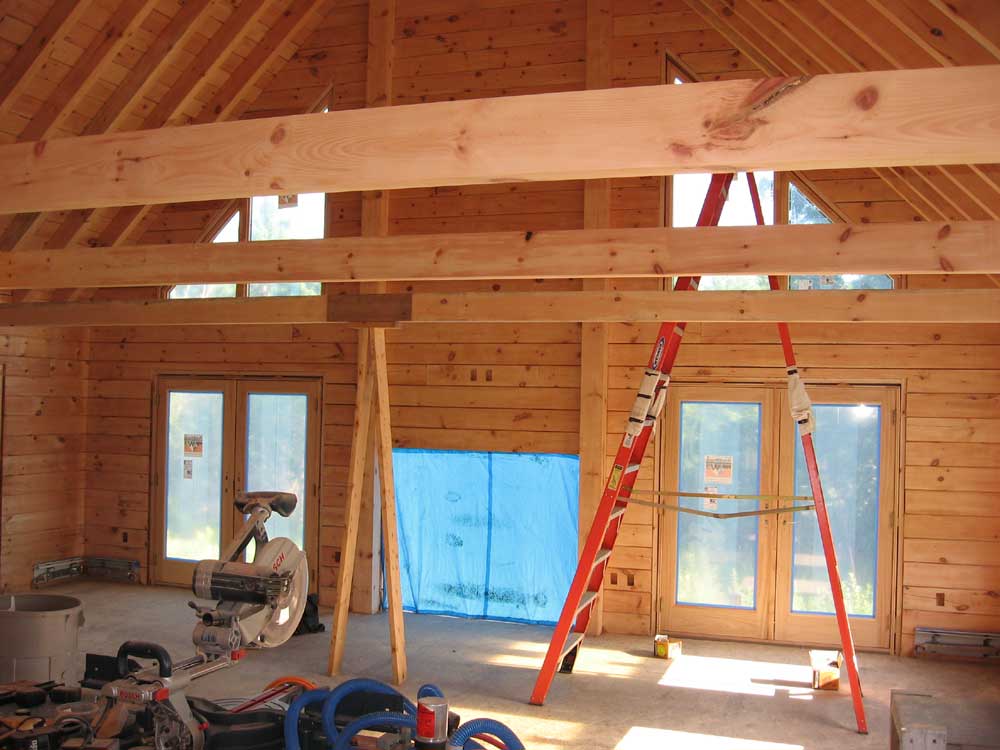
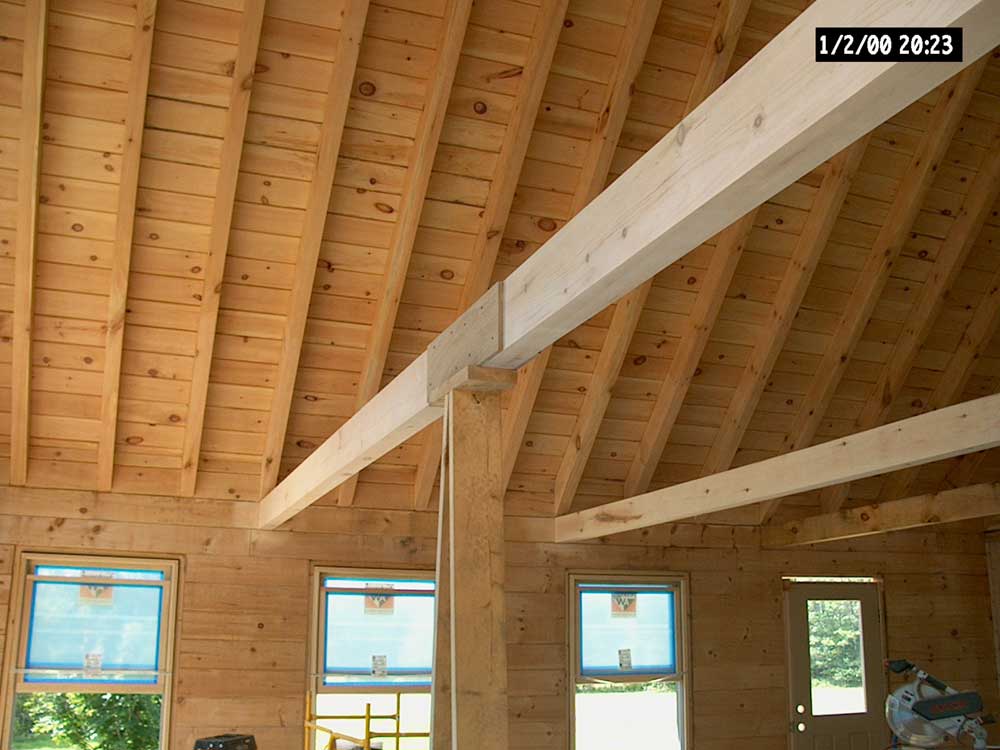
|
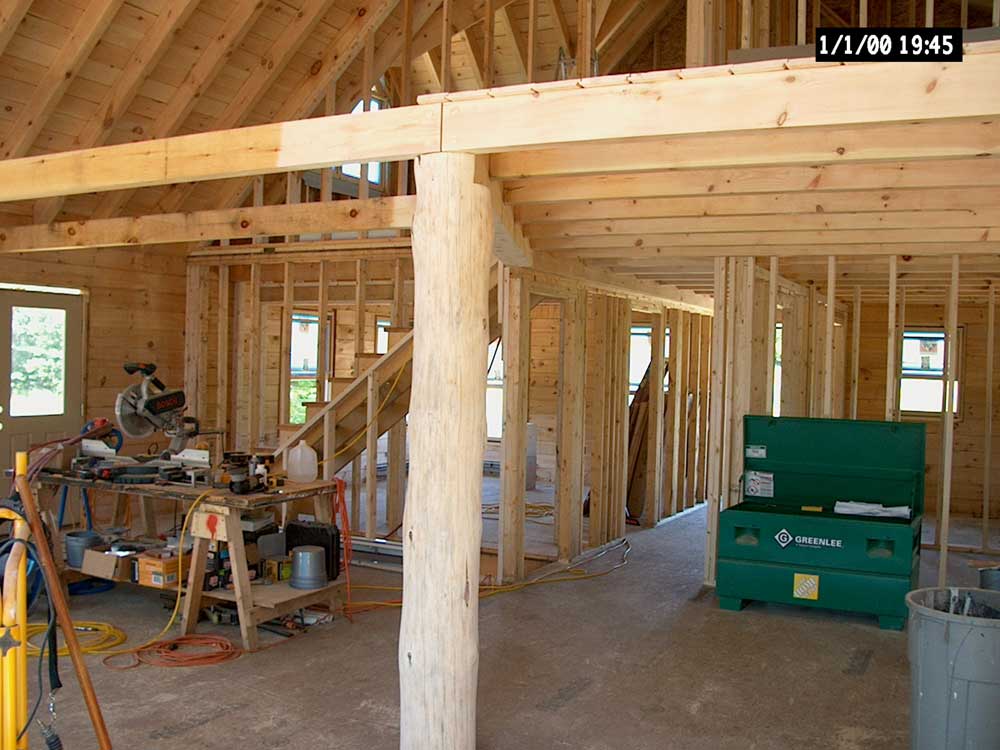
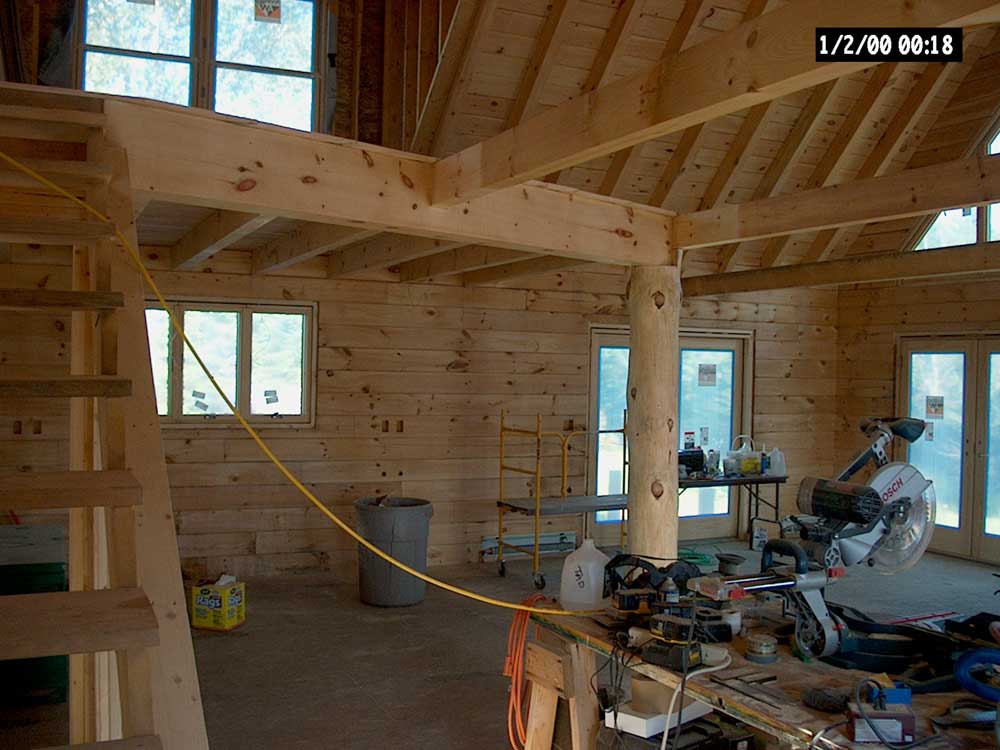
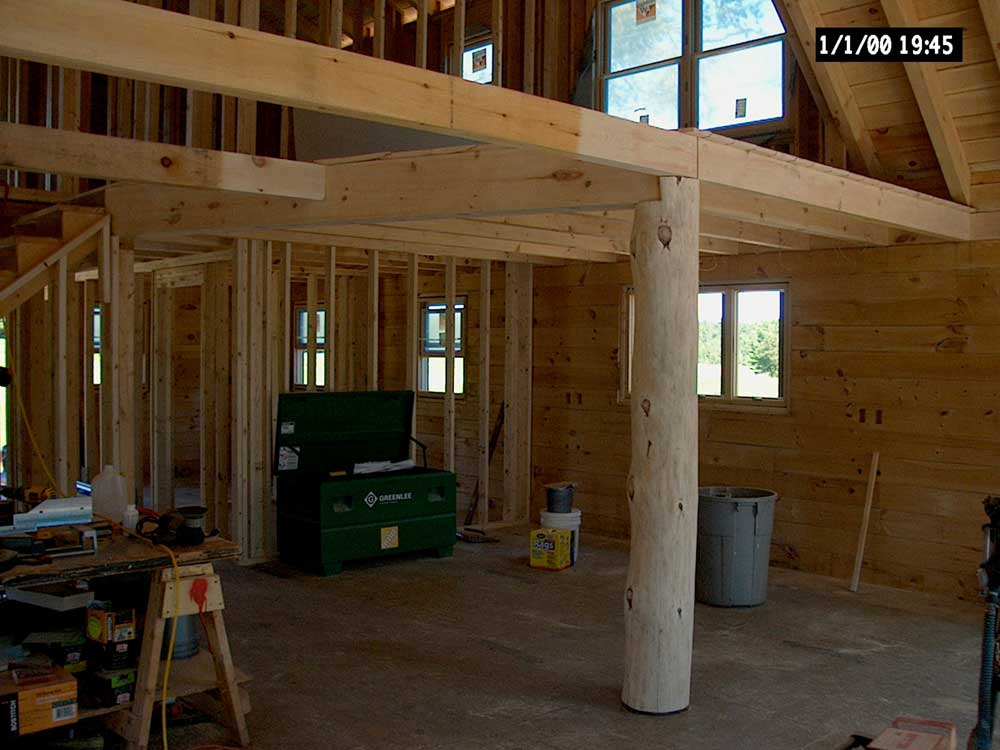
Later, we installed the pine post in the kitchen area, finally replacing the temporary A-frame support that had been there for months. We created a notch at the top of the post to allow it to support the ceiling tie as well as the loft carrying beam. The post was weathered after its stay outdoors for some time, but it will clean up nicely to match the interior pine. |
|||
|
|
|||
 After
some discussions about how to handle the more difficult
installations for the upstairs windows, we called it a day. We
were most apprehensive about the large and heavy trapezoid windows
going in the south gable, but I'm sure we'll get them in. After
some discussions about how to handle the more difficult
installations for the upstairs windows, we called it a day. We
were most apprehensive about the large and heavy trapezoid windows
going in the south gable, but I'm sure we'll get them in.Also, it seems that we received one incorrect window: that for the upstairs bath, which is supposed to be a bow window, but the one we received was flat. I notified the company about it and they said they'd re-order the correct one. This is actually OK, since we planned to leave this window out for the moment until we could come up with a way to lift the heavy cast iron bathtub that Heidi picked out in through the window and into the bathroom upstairs. With the tub tipping the scales at about 450 pounds, we weren't about to try negotiating it through the interior and up the stairs! I stayed a little later to make up a couple "laminated" (with nails) 2x4 posts to use with some of Bob's old pump jacks in the morning to better access the upstairs windows. |
|||
|
Tomorrow: more windows. The weather forecast is for very hot and humid conditions, so we planned an early start. |
|||
|
|||