|
|||
|
|
~ The bLog Home ~ |
||
| Click here to read the remaining July entries, from the 16th on. | |||
SATURDAY, JULY 15, 2006 |
|||
 It
was a little tough getting motivated to go to work this morning, but
the job wasn't going to get done if I didn't do it, so at 7:30 I
found myself, once again, op top of the staging with sander in hand.
The good news was that all I had to sand was the third section of
the great room, on the front side only since the back side was part
of the shed dormer that I would sand a little later from the second
floor. My immediate goal, these past several days, was to
complete what I deemed to be the worse part of the job--the tallest
portions of the great room, sanding and finishing. It
was a little tough getting motivated to go to work this morning, but
the job wasn't going to get done if I didn't do it, so at 7:30 I
found myself, once again, op top of the staging with sander in hand.
The good news was that all I had to sand was the third section of
the great room, on the front side only since the back side was part
of the shed dormer that I would sand a little later from the second
floor. My immediate goal, these past several days, was to
complete what I deemed to be the worse part of the job--the tallest
portions of the great room, sanding and finishing.
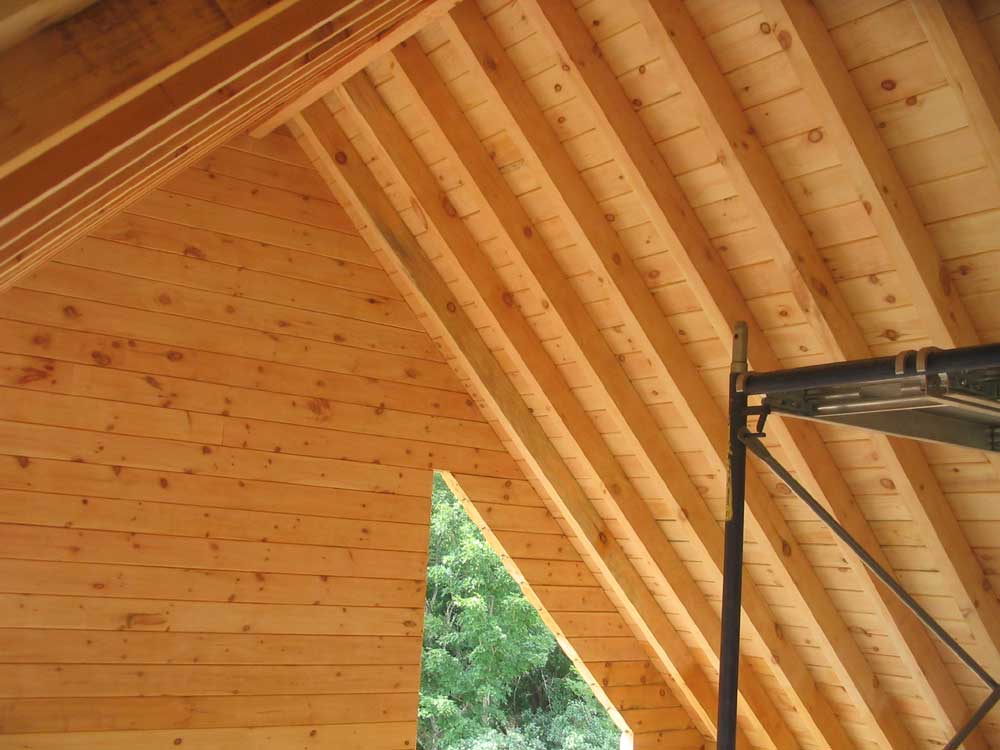
While there was still a huge amount of area remaining to be sanded--the ceilings in the second floor, including the two dormers; the entire ceiling on the first floor beneath the floor joists; and, of course, all the log walls. Such is the necessary dementia of large, overwhelming jobs that, by this point, I was almost looking forward to these "easy" tasks ahead. |
|||
|
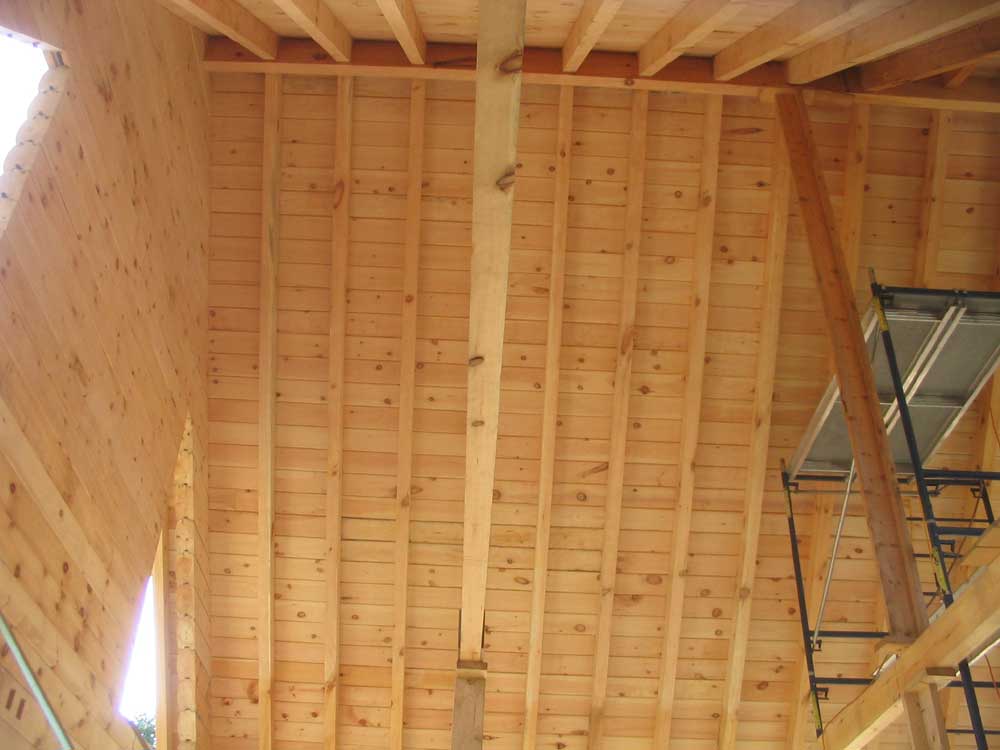
I finished up the sanding of this final area in a couple hours, and thankfully retired my sanding and breathing equipment for the (short-lived) time being. There was one section remaining in the great room--the area directly above the stair case, where unfortunately the pipe staging would not fit. I had another plan to stage this area, but that would wait for just a little while. Meantime, I wanted to finish up with the remainder of the great room so that I'd never have to climb to the ridge again. |
|||
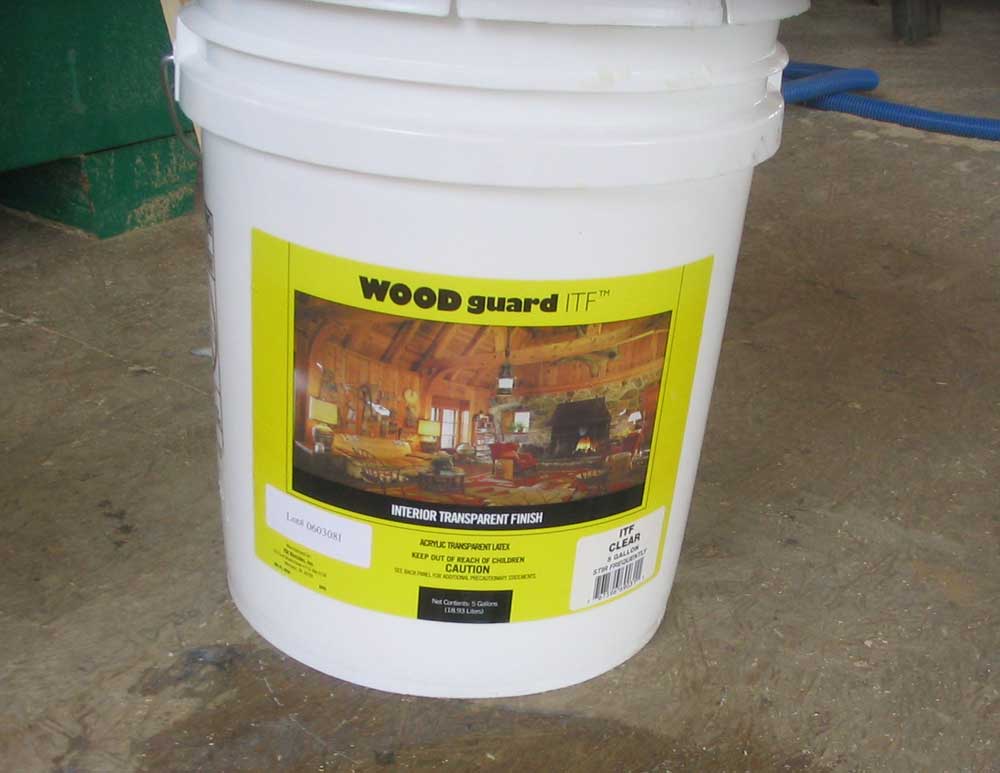 Now,
I turned to the interior finishing. We chose a clear,
waterborne satin interior polyurethane for the job, as this choice
would keep the fresh pine in its most natural state--lighter and
less orangey than an oil-based finish, and without the fear of
discoloration around wall hangings, etc. The pine would darken
slightly with age no matter what, but we wanted to keep it as bright
and clean as possible. Plus, waterborne finishes are easy to
apply since they dry so fast, and can be rapidly overcoated--perfect
for the ceiling job ahead. Now,
I turned to the interior finishing. We chose a clear,
waterborne satin interior polyurethane for the job, as this choice
would keep the fresh pine in its most natural state--lighter and
less orangey than an oil-based finish, and without the fear of
discoloration around wall hangings, etc. The pine would darken
slightly with age no matter what, but we wanted to keep it as bright
and clean as possible. Plus, waterborne finishes are easy to
apply since they dry so fast, and can be rapidly overcoated--perfect
for the ceiling job ahead. |
|||
 As
I had sanded, I had used an air hose and blow gun to clean away the
sanding dust from each section, and at ceiling height this was good
enough to prepare for the finish. On the walls and lower
ceilings, I planned to sand to a finer grit and clean a bit better
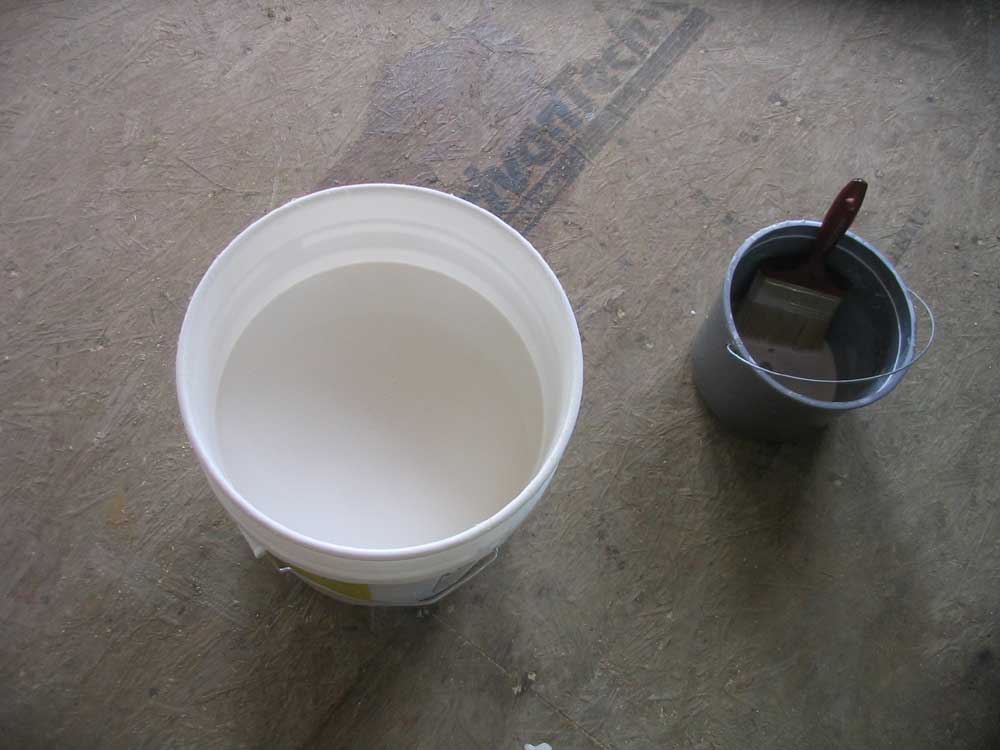
where it would be more noticeable. After some thought, I
decided to brush-apply the finish. The spray equipment I had
would be awkward to use in this situation because the material cup
was so small; I felt I would be always climbing down to refill.
And the extra hoses and such would just be a bother on the staging.
I could have rented a dedicated sprayer designed to pull directly
from a 5-gallon bucket, but this was too much trouble, and I figured
that the time I might "save" with spray equipment would be put to
better use getting going right now, with a time-honored method with
which I was very familiar and ready to go. Brush it was.
I used a 4" brush designed for use with waterborne stains and
polyurethanes. As
I had sanded, I had used an air hose and blow gun to clean away the
sanding dust from each section, and at ceiling height this was good
enough to prepare for the finish. On the walls and lower
ceilings, I planned to sand to a finer grit and clean a bit better
where it would be more noticeable. After some thought, I
decided to brush-apply the finish. The spray equipment I had
would be awkward to use in this situation because the material cup
was so small; I felt I would be always climbing down to refill.
And the extra hoses and such would just be a bother on the staging.
I could have rented a dedicated sprayer designed to pull directly
from a 5-gallon bucket, but this was too much trouble, and I figured
that the time I might "save" with spray equipment would be put to
better use getting going right now, with a time-honored method with
which I was very familiar and ready to go. Brush it was.
I used a 4" brush designed for use with waterborne stains and
polyurethanes.The finish wasn't that satisfying to apply; it is very watery and milky in appearance when it goes on, and the first coat soaked in to the wood with very little noticeable effect. But the second coat was nicer and easier to apply, and began to leave behind a noticeable sheen. |
|||
|
Beginning in the section I had just finished sanding, since the staging was still there, I applied two coats of polyurethane--a first coat at the ridge and downward, wait an hour or so, and then a second coat directly on top of the first. Then I removed the third lift of staging and repeated the process at that level. I wasn't worried about lap marks for a couple reasons: first, this sort of approach was unavoidable working at this height with this equipment; second, the grooves in the v-matched ceiling boards provided natural stopping points; and finally, the laps, if they were noticeable at all up close, would be invisible from the floor beneath. |
|||
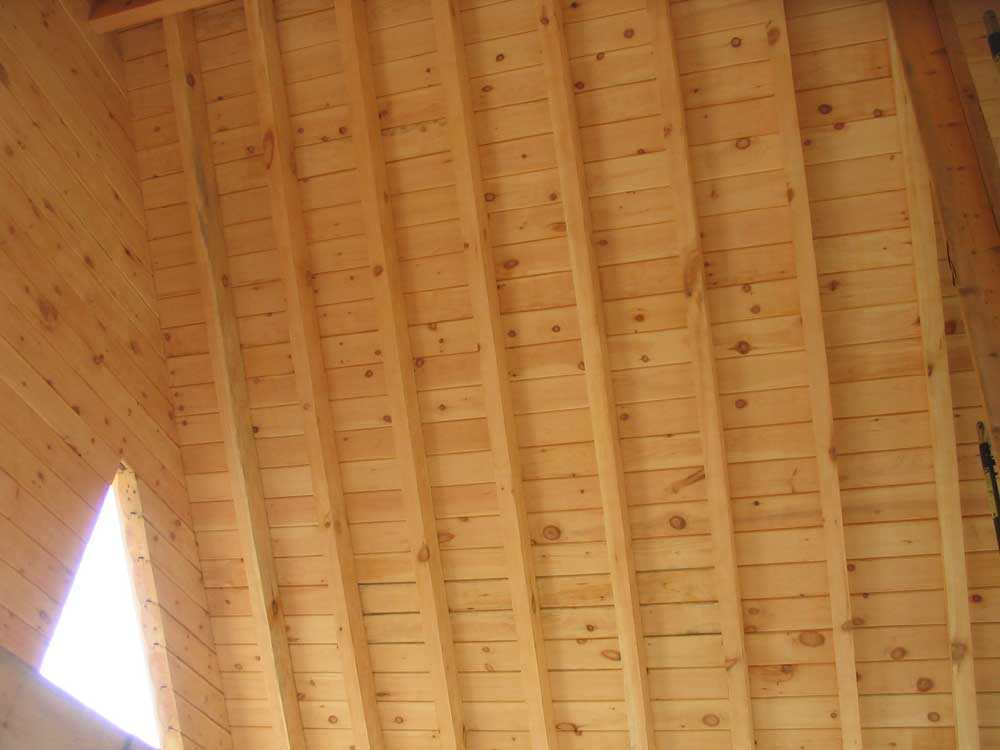
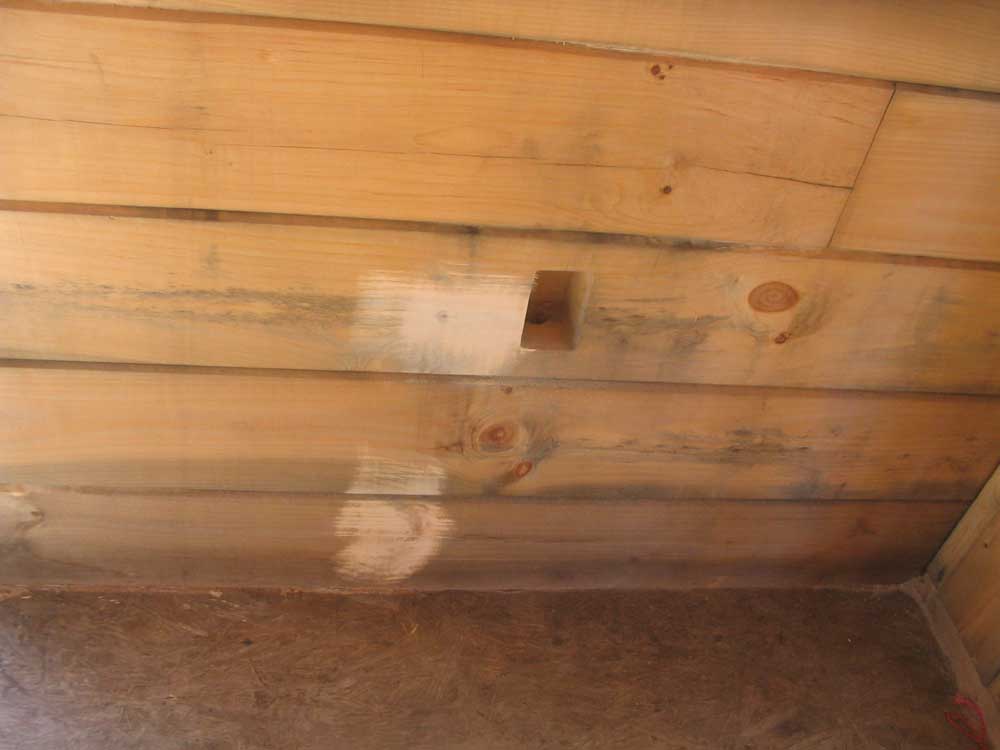
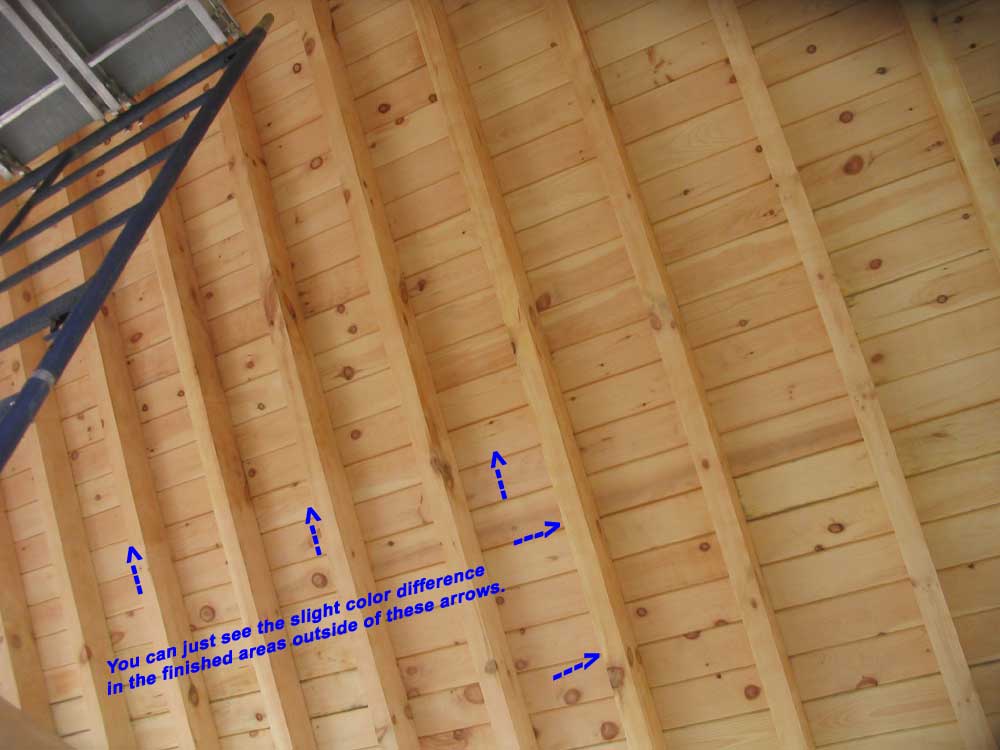 The
finish just slightly darkened the freshly-sanded pine--a very subtle
effect that maybe you can see in this photo. 2 coats of the
poly was sufficient for the ceilings and served only to protect the
wood and provide a very soft lustre. I expected to use 3 coats
on the walls, sanding lightly between coats in order to achieve a
slightly richer end result. The
finish just slightly darkened the freshly-sanded pine--a very subtle
effect that maybe you can see in this photo. 2 coats of the
poly was sufficient for the ceilings and served only to protect the
wood and provide a very soft lustre. I expected to use 3 coats
on the walls, sanding lightly between coats in order to achieve a
slightly richer end result.Once I had finished the first section, I moved the staging over one bay and, starting at the ridge, began to repeat the process. I managed to get 2 coats on one side of the ceiling at the top level before the day was over. It looked like one more work day would see me to completion on this portion of the task, but that would have to wait till Monday: I needed a day of rest, and a day to take care of a few other things on Sunday! This process is difficult to photo document, so please forgive me the lack of photos. In the end, you'll just have to come visit to see the true effect! |
|||
FRIDAY, JULY 14, 2006 |
|||
 Today
was all about sanding. I started where I left off yesterday
and sanded for about 10 hours today, making my way through a large
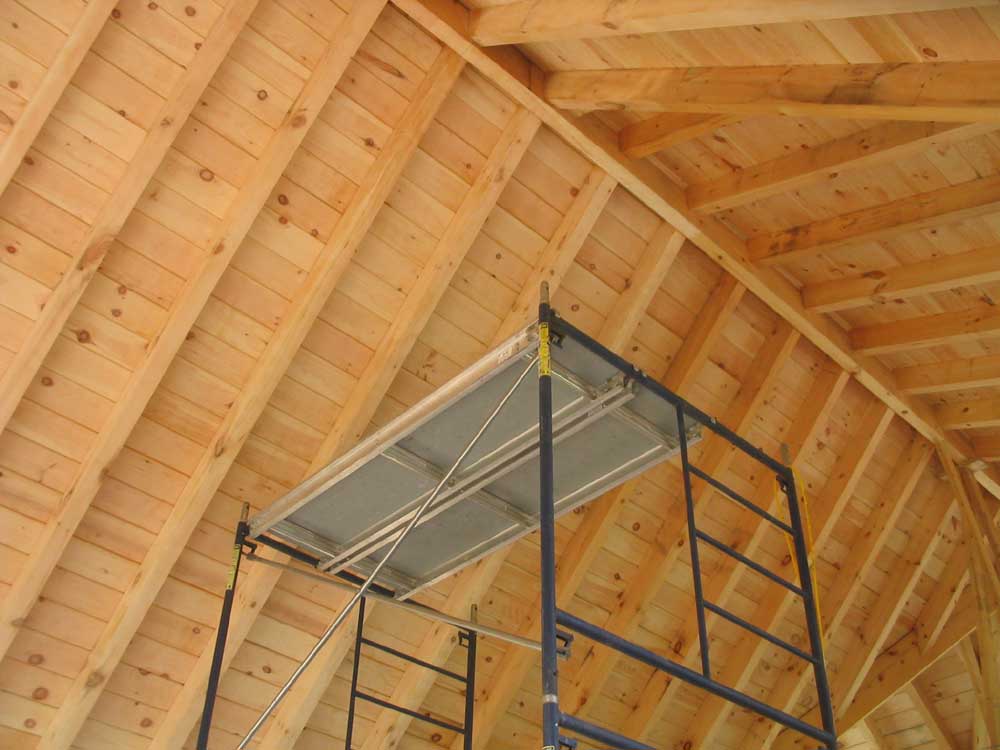
portion of the great room ceiling. The work was slowed
significantly by the awkwardness of the pipe staging. Because
of the steeply-pitched roof, I could only reach relatively small
areas at a time, after which I'd have to get down and readjust the
staging to reach another area. Today
was all about sanding. I started where I left off yesterday
and sanded for about 10 hours today, making my way through a large
portion of the great room ceiling. The work was slowed
significantly by the awkwardness of the pipe staging. Because
of the steeply-pitched roof, I could only reach relatively small
areas at a time, after which I'd have to get down and readjust the
staging to reach another area. |
|||
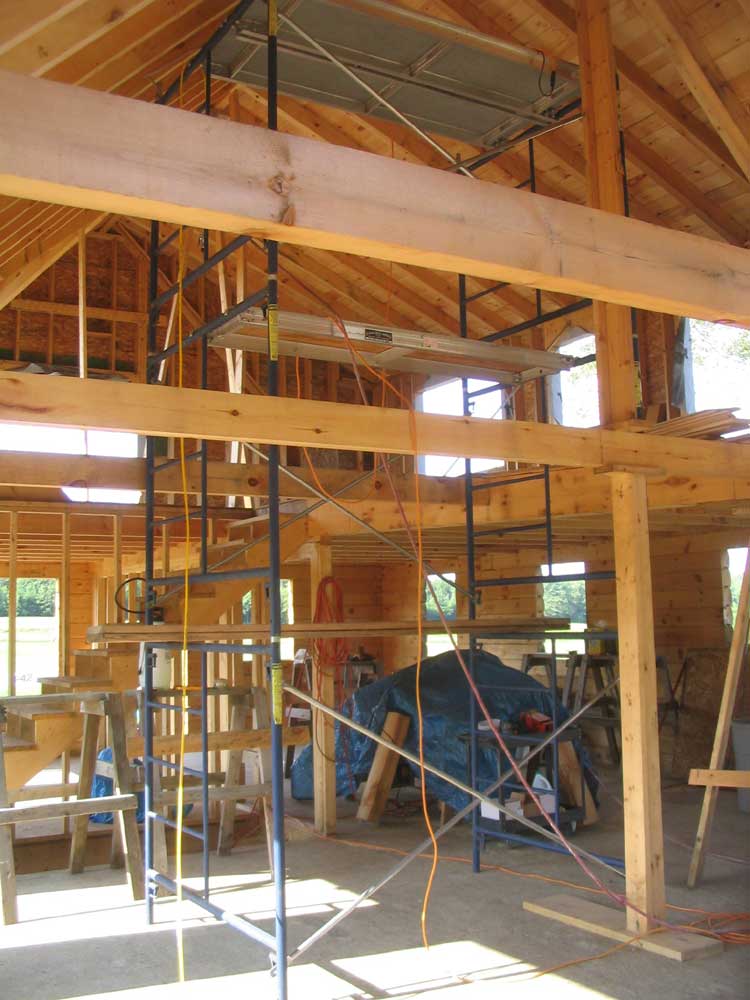
 Up
and down, down and up. I don't know how many times I
repositioned the staging--for height (three 5-foot lifts to reach
the ridge and top portions of the ceiling, then down to two lifts to
reach out closer to the eaves), for side-to-side position inside of
the tight areas defined by the ceiling cross ties, and then from one
"bay" (area between ties) to the next. Because of the ties, I
could not drag the assembled staging around, so to move from one
section to another I had to disassemble down to a single lift and
then build back up again. This was time consuming, but was the
only way. Up
and down, down and up. I don't know how many times I
repositioned the staging--for height (three 5-foot lifts to reach
the ridge and top portions of the ceiling, then down to two lifts to
reach out closer to the eaves), for side-to-side position inside of
the tight areas defined by the ceiling cross ties, and then from one
"bay" (area between ties) to the next. Because of the ties, I
could not drag the assembled staging around, so to move from one
section to another I had to disassemble down to a single lift and
then build back up again. This was time consuming, but was the
only way. |
|||
 I
had earlier considered renting (or even buying, when I saw one in
Uncle Henry's for a reasonable price) a scissor lift for this
job, thinking that it would be extremely handy. But this dream
ended abruptly when I discovered that these weighed, alarmingly,
about 2800lb. or more--far too heavy for the floor system.
Rats. I
had earlier considered renting (or even buying, when I saw one in
Uncle Henry's for a reasonable price) a scissor lift for this
job, thinking that it would be extremely handy. But this dream
ended abruptly when I discovered that these weighed, alarmingly,
about 2800lb. or more--far too heavy for the floor system.
Rats.Pipe staging is pretty good for what it is, but on the third lift--15 feet to the top--every movement was by necessity in slow motion, to ensure that I didn't walk off a plank by accident, and because each movement tended to cause the staging to jitter badly. With a lack of peripheral vision caused by the full face mask I was wearing, it paid to move slowly and take care. |
|||
 By
the end of an exhausting day, I had finished up the entire first
bay, including the log gable wall, down to a height about 6 board
widths from the top of the walls beneath, which area I could easily
reach from a single layer of staging on the floor later, and had
also completed the entire second bay--8 rafter sections on each
side. It was late and I was tired, but I moved the staging and
set it up to the third level in the third bay, next to the
staircase, so that it would be all ready to go in the morning.
I cleaned up the discarded sanding discs and laid everything out for
the morning. By
the end of an exhausting day, I had finished up the entire first
bay, including the log gable wall, down to a height about 6 board
widths from the top of the walls beneath, which area I could easily
reach from a single layer of staging on the floor later, and had
also completed the entire second bay--8 rafter sections on each
side. It was late and I was tired, but I moved the staging and
set it up to the third level in the third bay, next to the
staircase, so that it would be all ready to go in the morning.
I cleaned up the discarded sanding discs and laid everything out for
the morning. |
|||
THURSDAY, JULY 13, 2006 |
|||
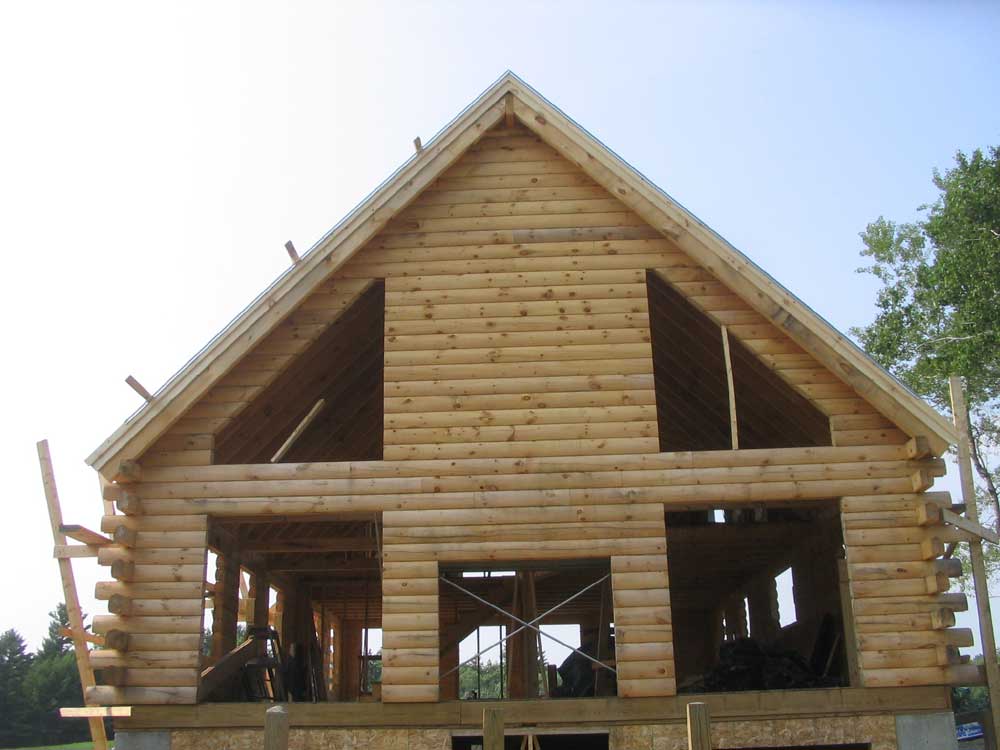
| I thought my next move was going to be washing all the wood on the inside of the house with a recommended solution of water and a mixture of bleach and TSP. During the course of construction, the wood had become somewhat weathered and stained in some areas, thanks to the weeks of endless rain that not only kept the interior exposed for a longer time, but also exacerbated the weathering and staining. There was little I could do until the house was dried in. With no water at the house yet, my first step was a very early morning trip to the store for 500' of hose, as well as a few other needed supplies. By 0730, I was back and starting to get set up. | |||
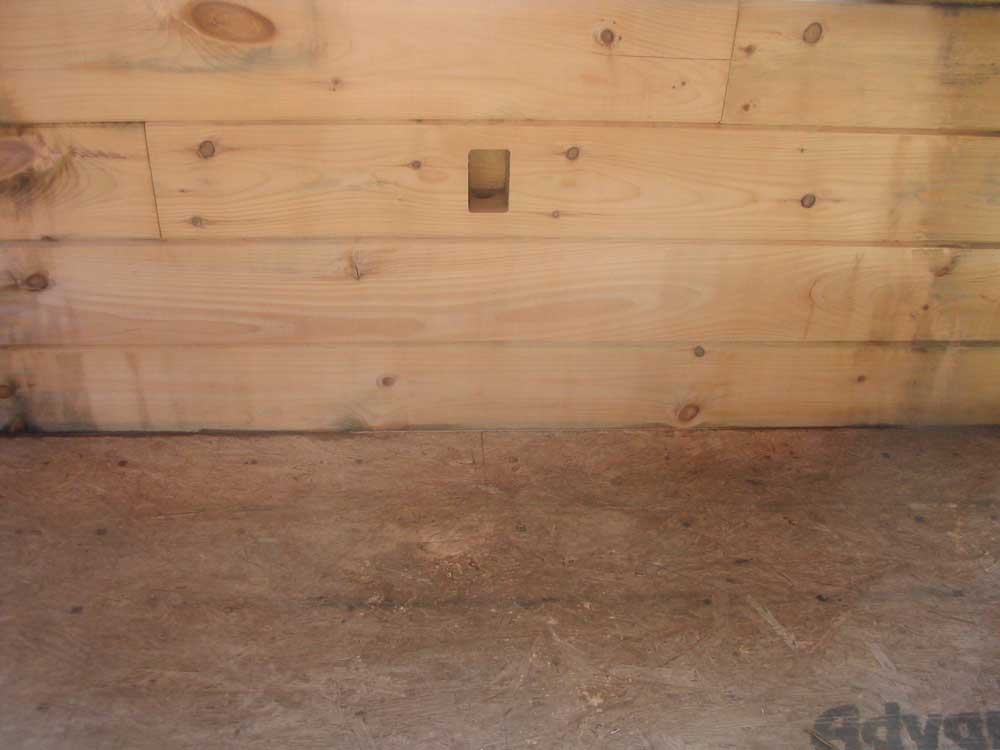 I
wasn't looking forward to the task, but at least I thought it would
be satisfying. I tried a test patch on one of the worst
weathered parts of the wall--beneath one of the windows, applying
the water/bleach/TSP solution with a garden sprayer. The wood
lightened considerably, so it seemed that this would be worth the
effort. I
wasn't looking forward to the task, but at least I thought it would
be satisfying. I tried a test patch on one of the worst
weathered parts of the wall--beneath one of the windows, applying
the water/bleach/TSP solution with a garden sprayer. The wood
lightened considerably, so it seemed that this would be worth the
effort. |
|||
|
I wanted to begin on the ceilings and work downwards--for the obvious gravitational reasons as well as the sheer fact that I wanted to get the worst part over with. The three lifts of pipe staging were still in place at the far end of the great room, so I began there. I dragged hose, sprayer, goggles, and other needed things up to the top of the staging and prepared to go to work. Almost immediately, I hated it. There was no escaping the dripping water and bleach, and it turned the staging into a slippery jungle gym of death-defying proportions. But the final straw was twofold: first, the cleaning solution made almost no visible difference in the ceiling boards and rafters, which were not particularly weathered compared to the log walls; and the garden sprayer stopped working properly and would not dispense a fan of the material. |
|||
 I
rinsed off the mess and gingerly climbed down to regroup. I
could see no difference in the wood I had "cleaned" from the floor,
and I quickly reconsidered the whole process. Why did I need
to wash the wood in this way? I knew I would have to sand
everything inside anyway...why get it all wet and nasty when sanding
would accomplish the same thing and save a very unpleasant step in
the process? The bleach and such would probably work well on
the outside of the logs later, though, since I didn't plan to sand
those. I
rinsed off the mess and gingerly climbed down to regroup. I
could see no difference in the wood I had "cleaned" from the floor,
and I quickly reconsidered the whole process. Why did I need
to wash the wood in this way? I knew I would have to sand
everything inside anyway...why get it all wet and nasty when sanding
would accomplish the same thing and save a very unpleasant step in
the process? The bleach and such would probably work well on
the outside of the logs later, though, since I didn't plan to sand
those. |
|||
|
I wasn't geared up for sanding--that required a whole different group of equipment that I figured I would need for a few days--so it took me some time to retrieve sanders, sandpaper, respirator, compressor, hoses, and other paraphernalia from the shop and bring it to the house. Eventually, I got everything I needed, and tried to get organized. I tried sanding one of the worst-weathered logs in the great room with good results, so I went with this plan.
|
|||
 After
lunch, it seemed the wood was dry enough to sand, so I geared up for
that. It took several trips to bring all the tools and stuff
up to the platform--sander, sandpaper, respirator mask and hose, ear
protection, extension cord. Some of the wood wasn't really dry
enough, as it turned out, but it was OK to work with anyway..
So for the rest of the afternoon, I sanded. It was slow going,
as every step at that height required care and checking my position
on the platform and to ensure that I wasn't hopelessly wrapped up in
hoses and cords. I sanded down as far as I could on the
rafters, ceiling boards, and, in this case, the log gable wall.
I could reach two rafter spaces from my location on each side of
center; when I was finished with those, I climbed down, dragged the
staging as far as I could against the ceiling tie, and sanded
another two. Then, I lowered the planks to the top of the
second lift of staging and repeated the process. After
lunch, it seemed the wood was dry enough to sand, so I geared up for
that. It took several trips to bring all the tools and stuff
up to the platform--sander, sandpaper, respirator mask and hose, ear
protection, extension cord. Some of the wood wasn't really dry
enough, as it turned out, but it was OK to work with anyway..
So for the rest of the afternoon, I sanded. It was slow going,
as every step at that height required care and checking my position
on the platform and to ensure that I wasn't hopelessly wrapped up in
hoses and cords. I sanded down as far as I could on the
rafters, ceiling boards, and, in this case, the log gable wall.
I could reach two rafter spaces from my location on each side of
center; when I was finished with those, I climbed down, dragged the
staging as far as I could against the ceiling tie, and sanded
another two. Then, I lowered the planks to the top of the
second lift of staging and repeated the process. |
|||
 It
was a long afternoon without a huge amount of progress, but I felt
that I had the system figured out and that things would go much
better and more quickly tomorrow. I reached a logical stopping
point at around 5, since I'd have to remove some wall braces in
order to drag the staging closer to the eaves, so I cleaned up and
then spent part of the evening removing the external staging that I
had built through the window openings for the roofing process.
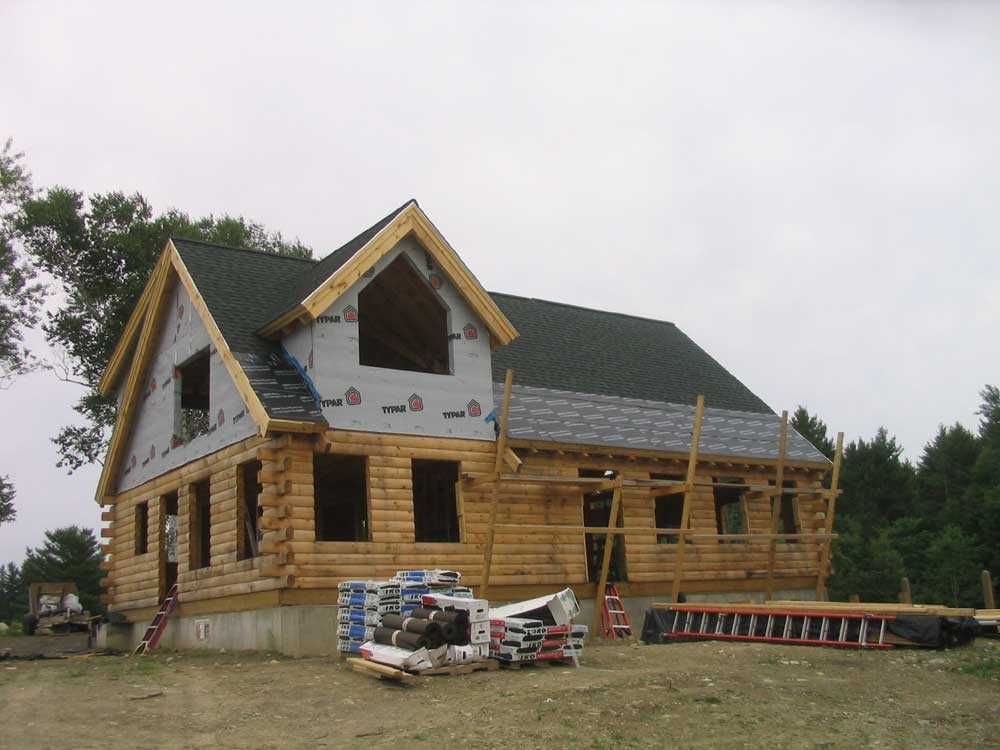
I was thrilled to see it go, but there sure were a lot of nails
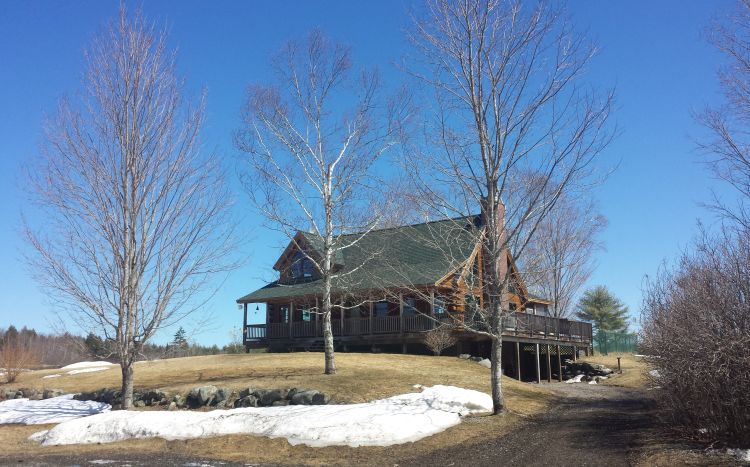
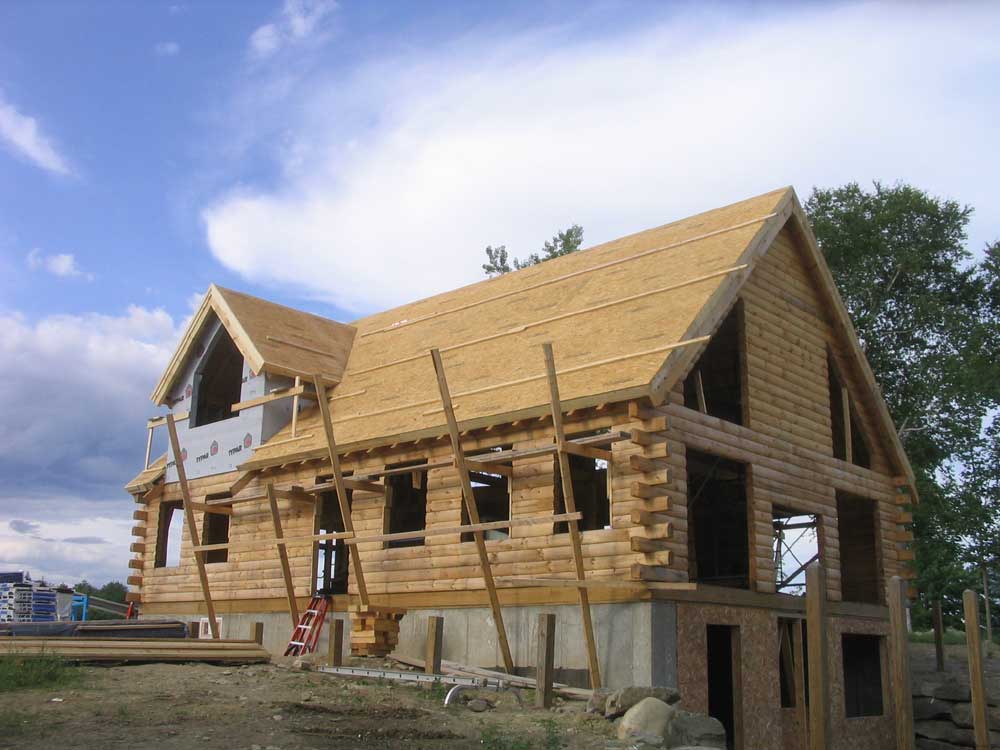
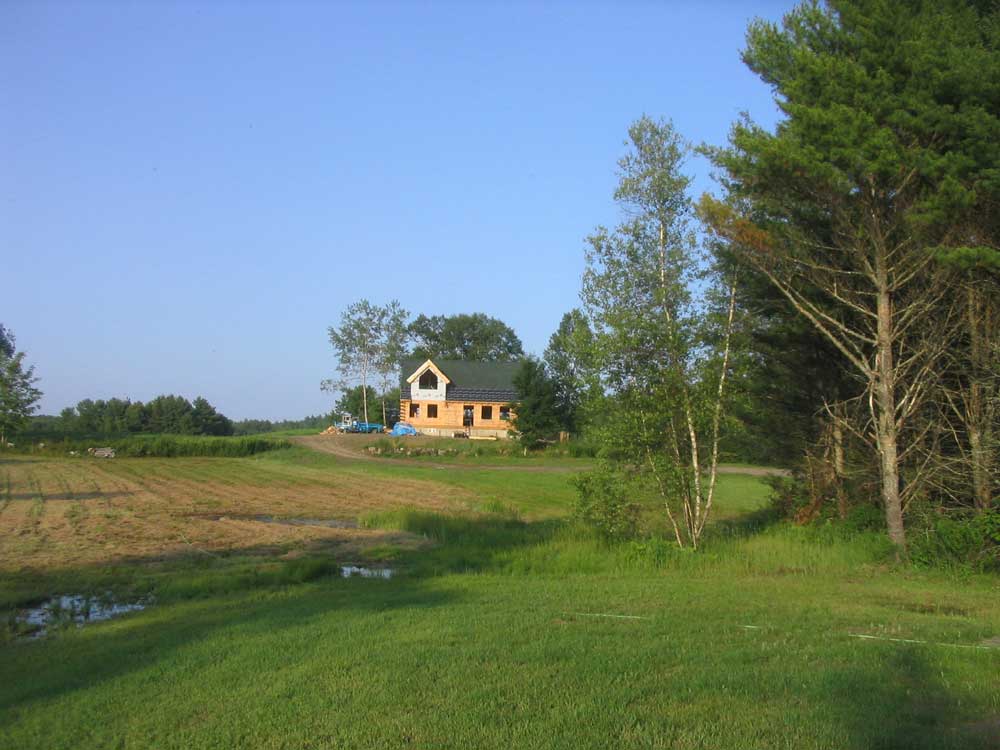
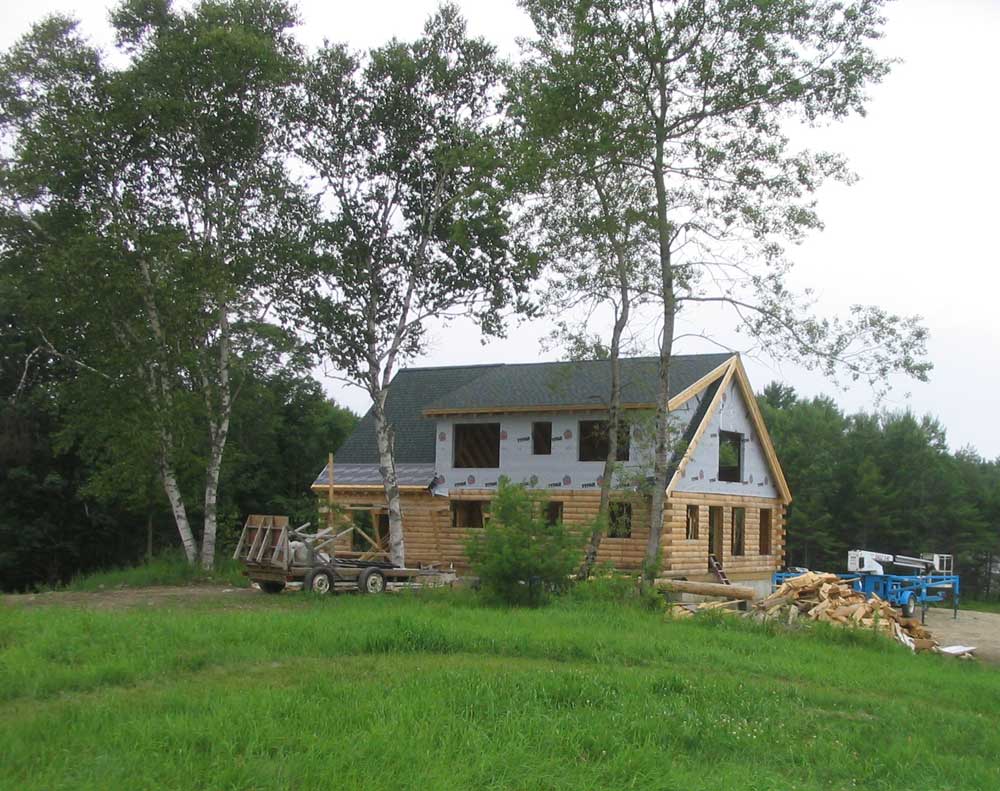
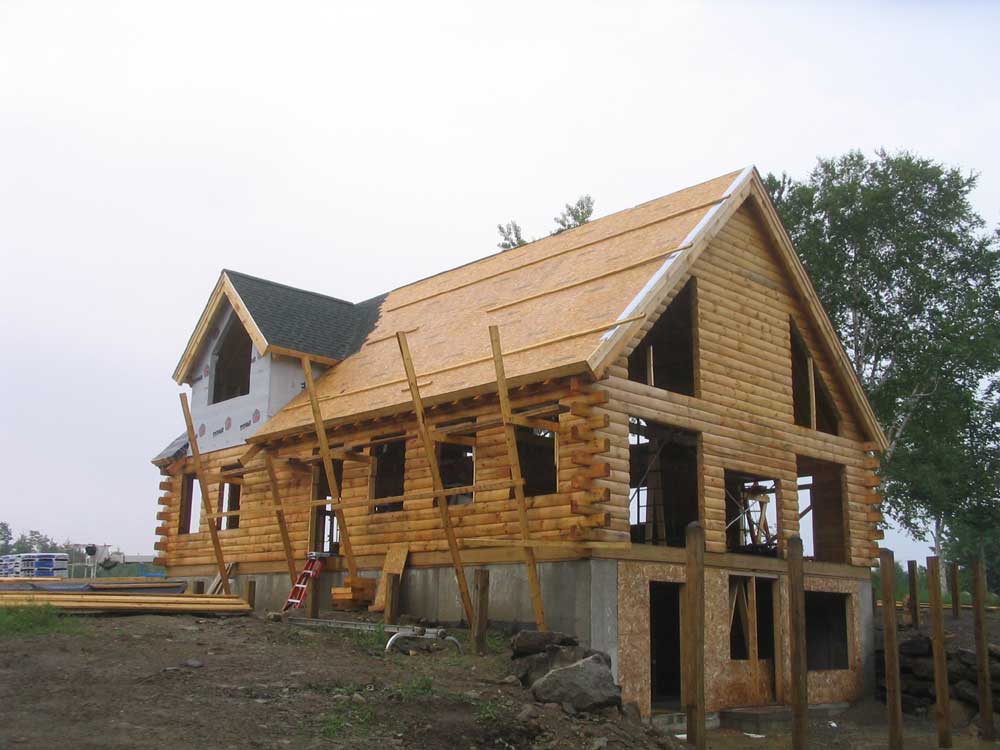
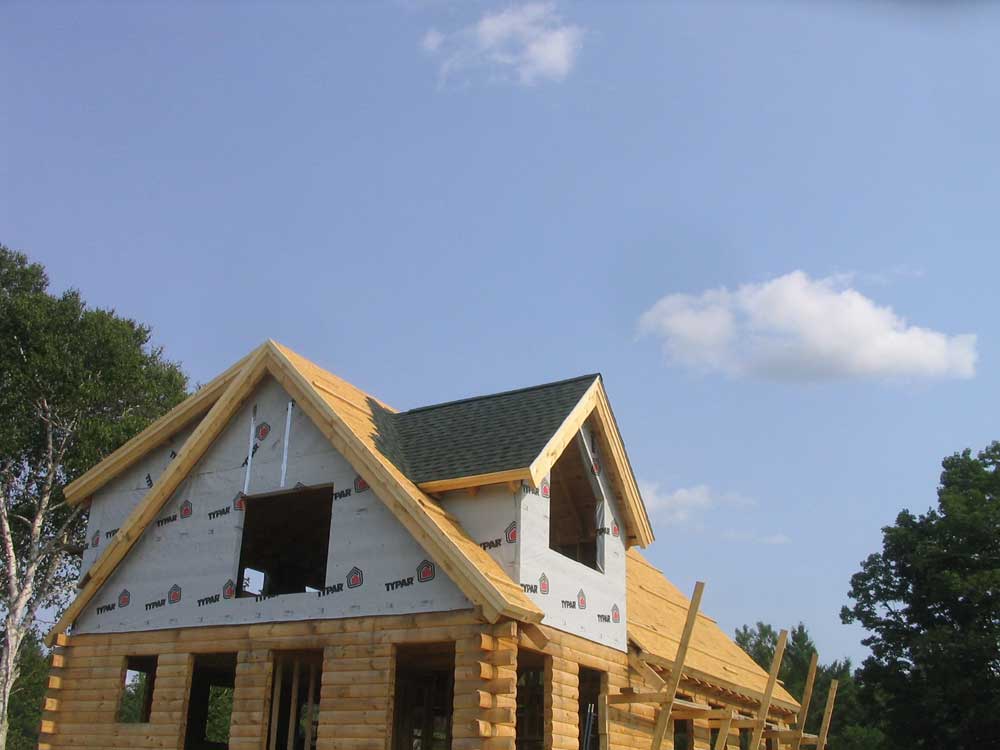
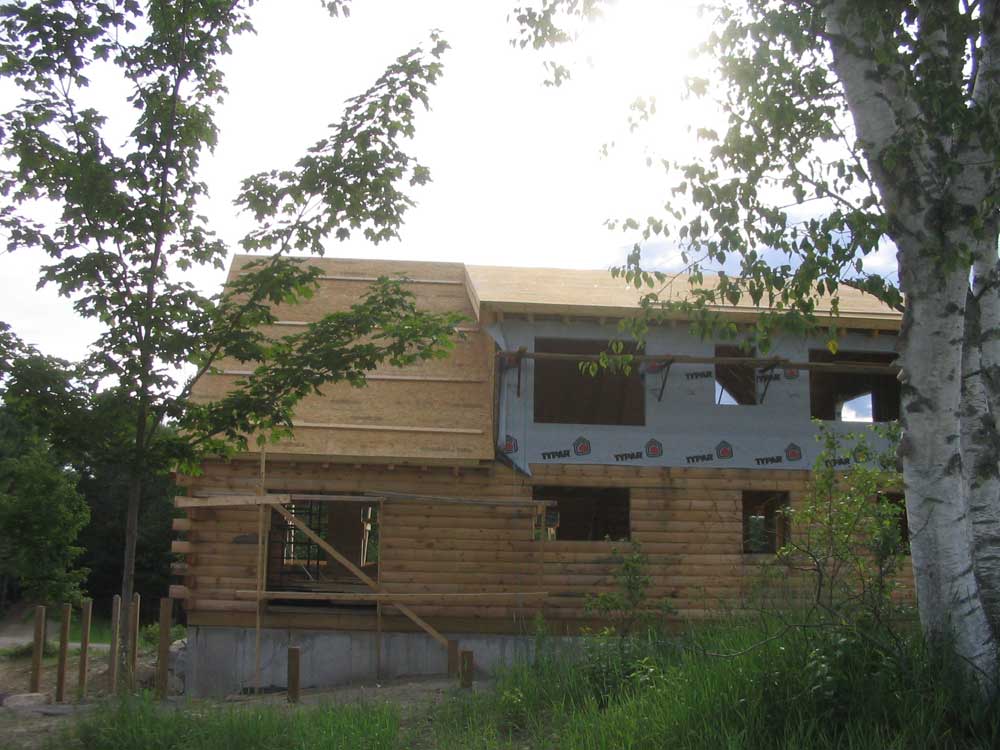
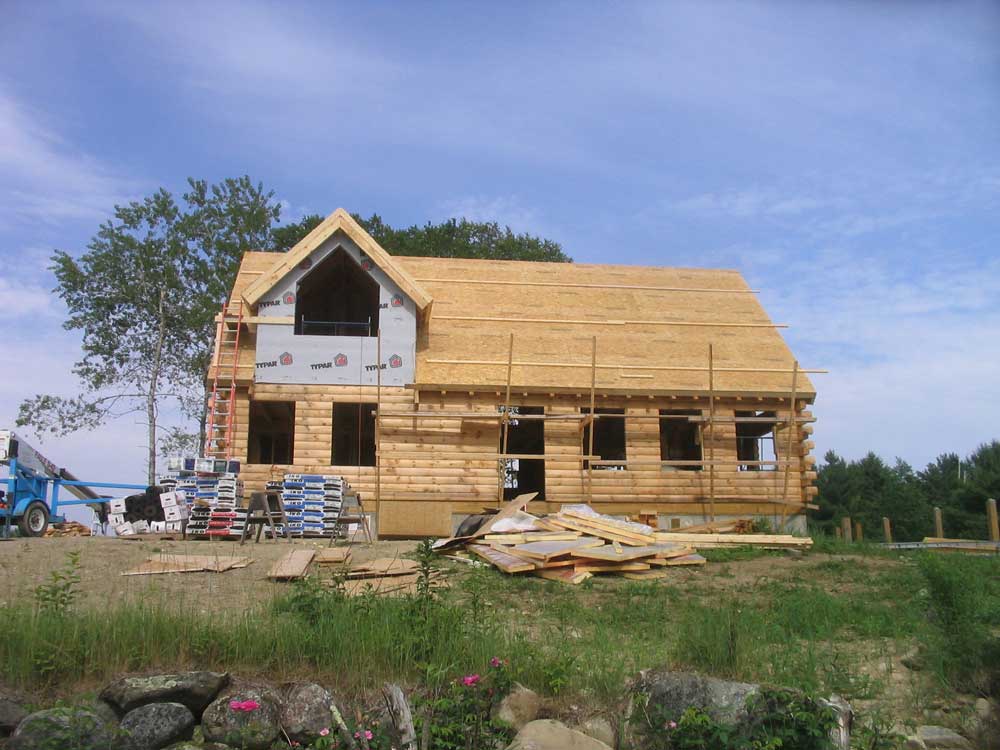
holding everything together! This final photo shows the house
sans staging for the first time in some weeks. It
was a long afternoon without a huge amount of progress, but I felt
that I had the system figured out and that things would go much
better and more quickly tomorrow. I reached a logical stopping
point at around 5, since I'd have to remove some wall braces in
order to drag the staging closer to the eaves, so I cleaned up and
then spent part of the evening removing the external staging that I
had built through the window openings for the roofing process.
I was thrilled to see it go, but there sure were a lot of nails
holding everything together! This final photo shows the house
sans staging for the first time in some weeks. |
|||
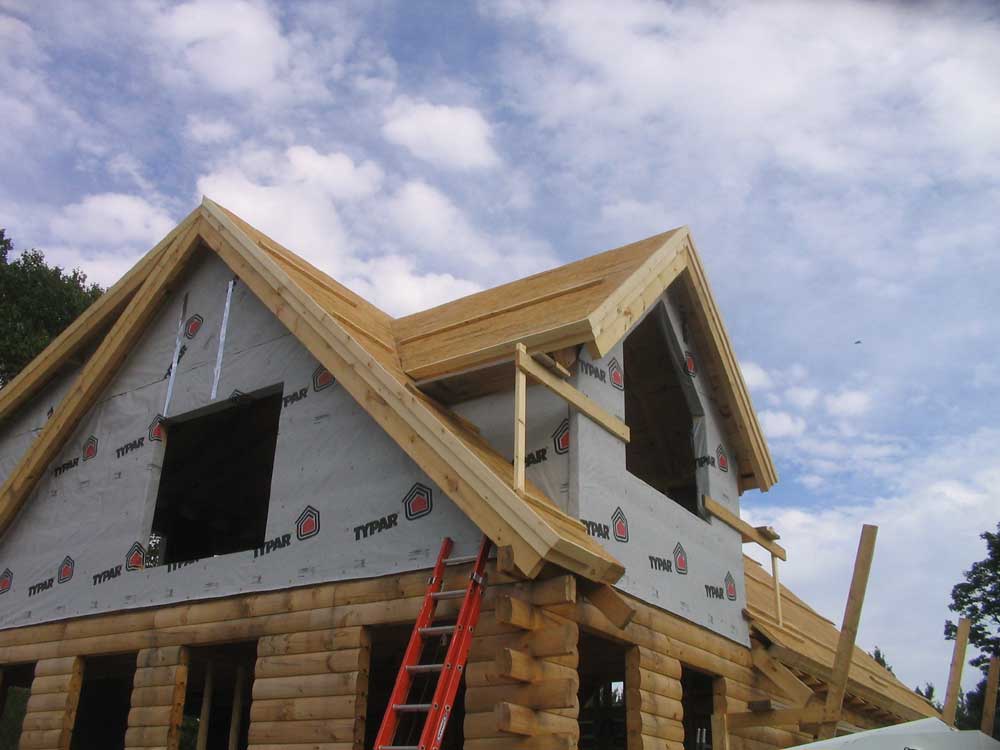
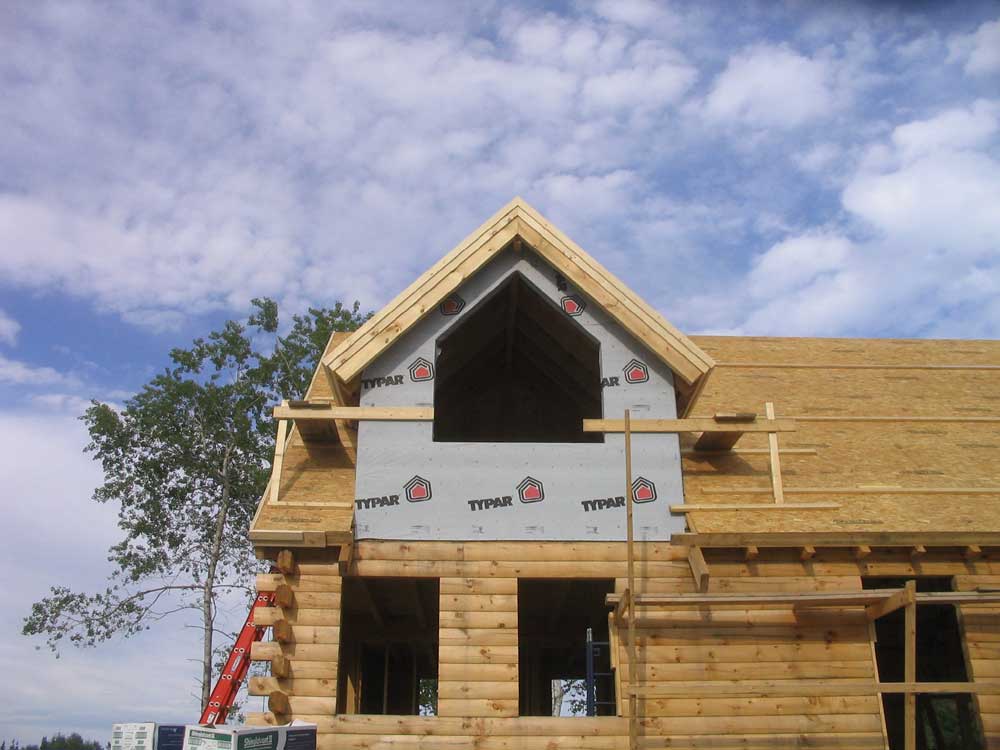
With bright sun this afternoon, I also took some better photos of the finished roof. |
|||
|
|
|||
WEDNESDAY, JULY 12, 2006 |
|||
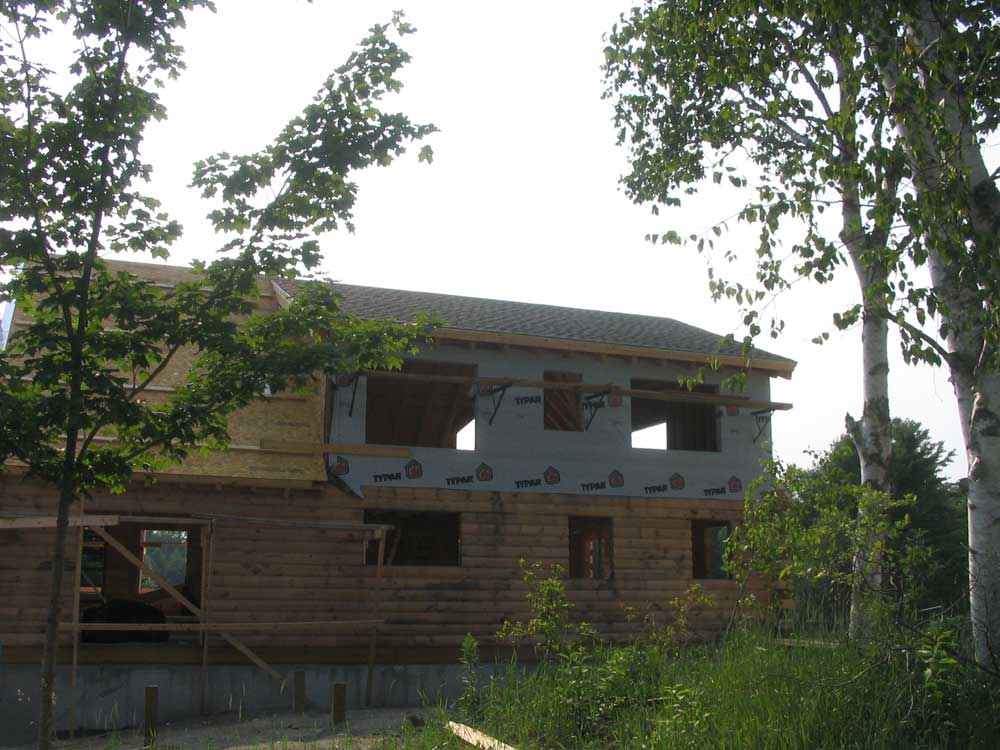
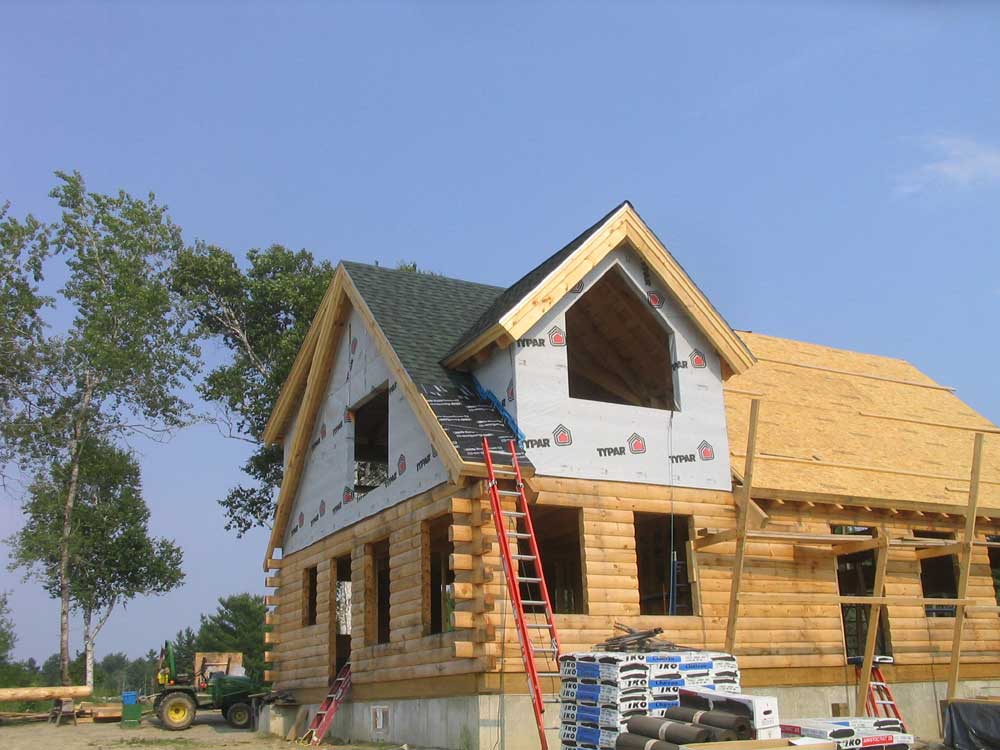
| The roof is done! | |||
 Well,
not really done, as you know from my previous posts, but done for
now--and dry. Well,
not really done, as you know from my previous posts, but done for
now--and dry.
We got going this morning on the back roof and quickly finished up that area: installing some Typar housewrap on the dormer cheekwall, removing staging, and installing the Roof Gard on the lower section. |
|||
 With
that done, we moved around--finally--to the front. I won't
bore you with any detail here: Bob roofed and I lugged.
The usual. I had found over the previous days that I was
becoming more and more comfortable on the roof and staging, and that
was a good thing. On the steeper roofs, I had to carry the
shingles up farther to keep Bob from continually coming down to grab
shingles. With
that done, we moved around--finally--to the front. I won't
bore you with any detail here: Bob roofed and I lugged.
The usual. I had found over the previous days that I was
becoming more and more comfortable on the roof and staging, and that
was a good thing. On the steeper roofs, I had to carry the
shingles up farther to keep Bob from continually coming down to grab
shingles. |
|||
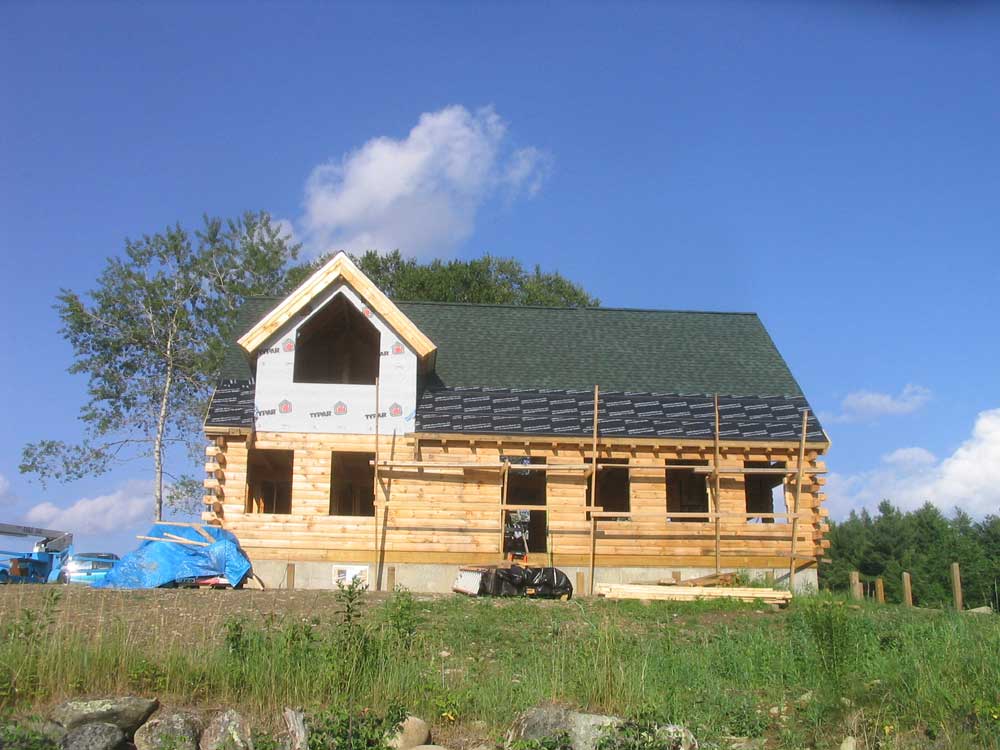
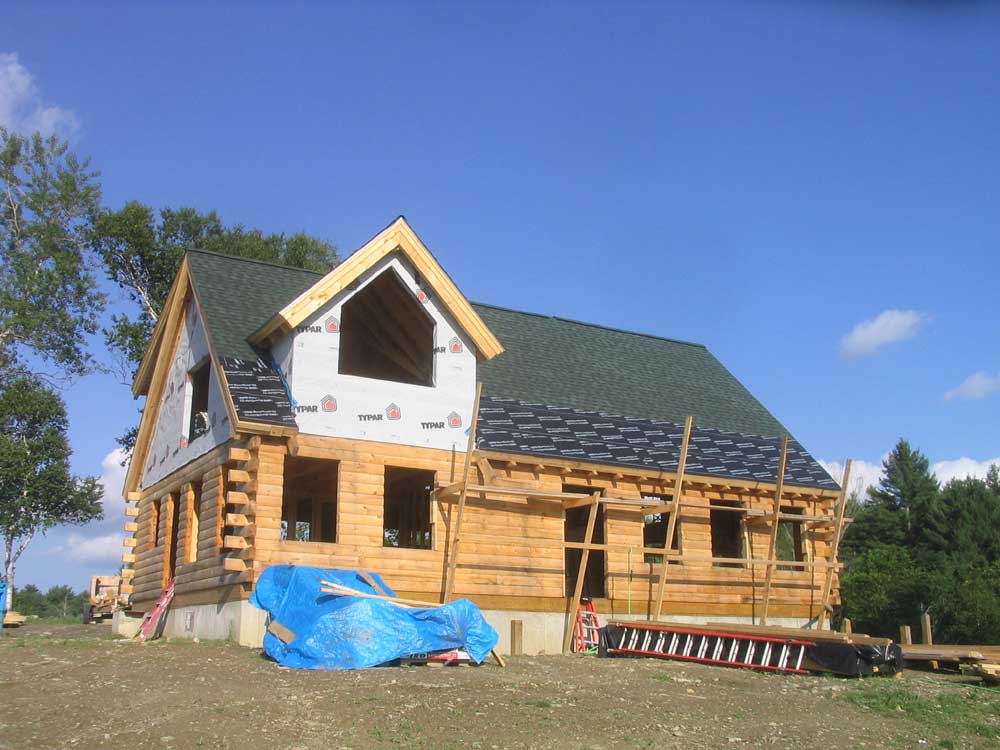
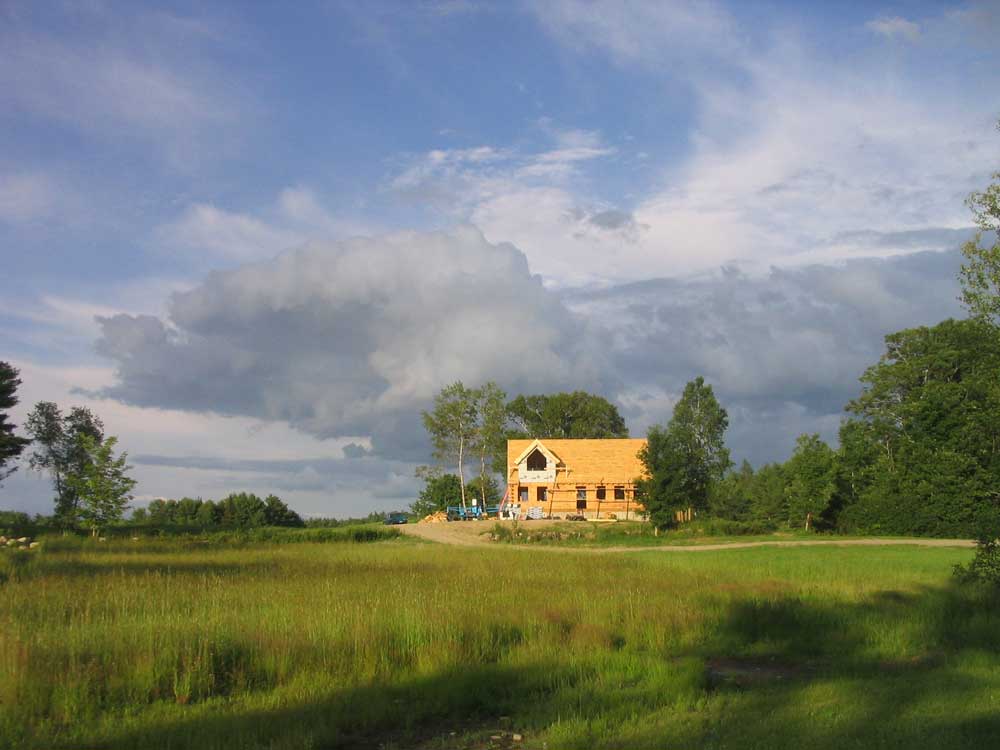
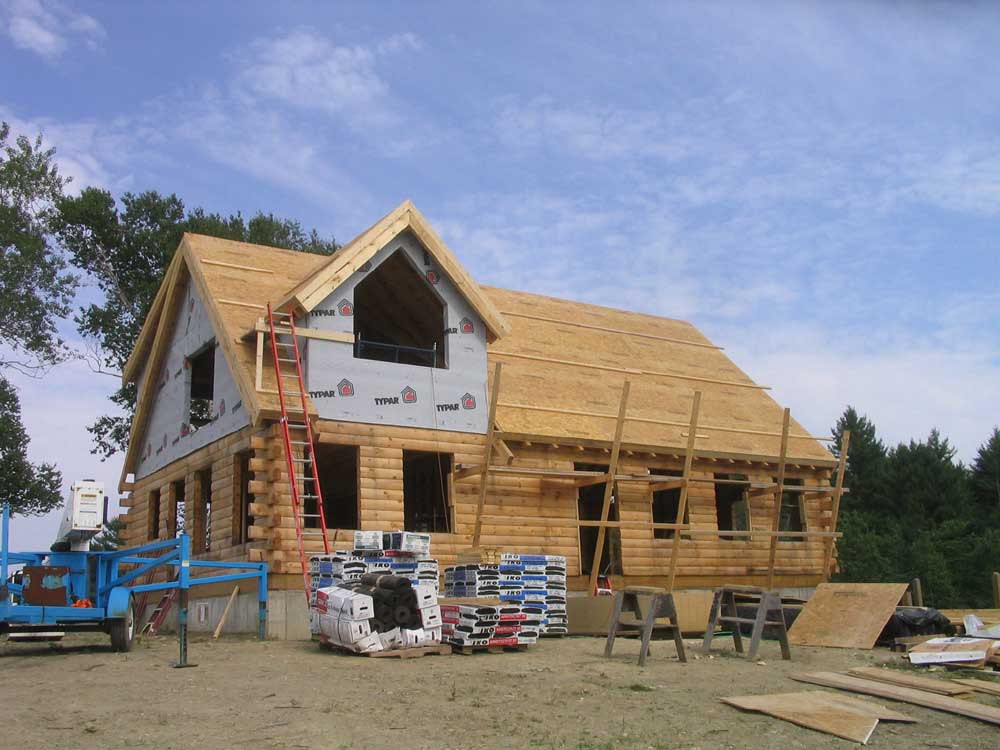
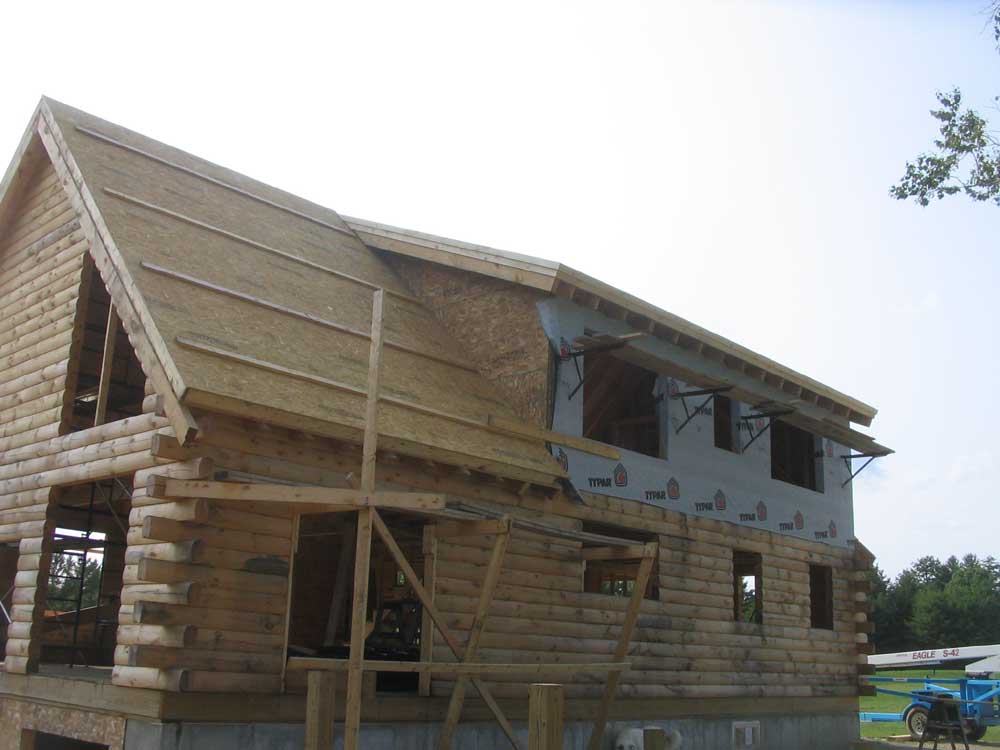
 We
finished up the roof with ridge vent, cap shingles, and the usual
Roof Gard at the lower end where the porch roof would eventually go.
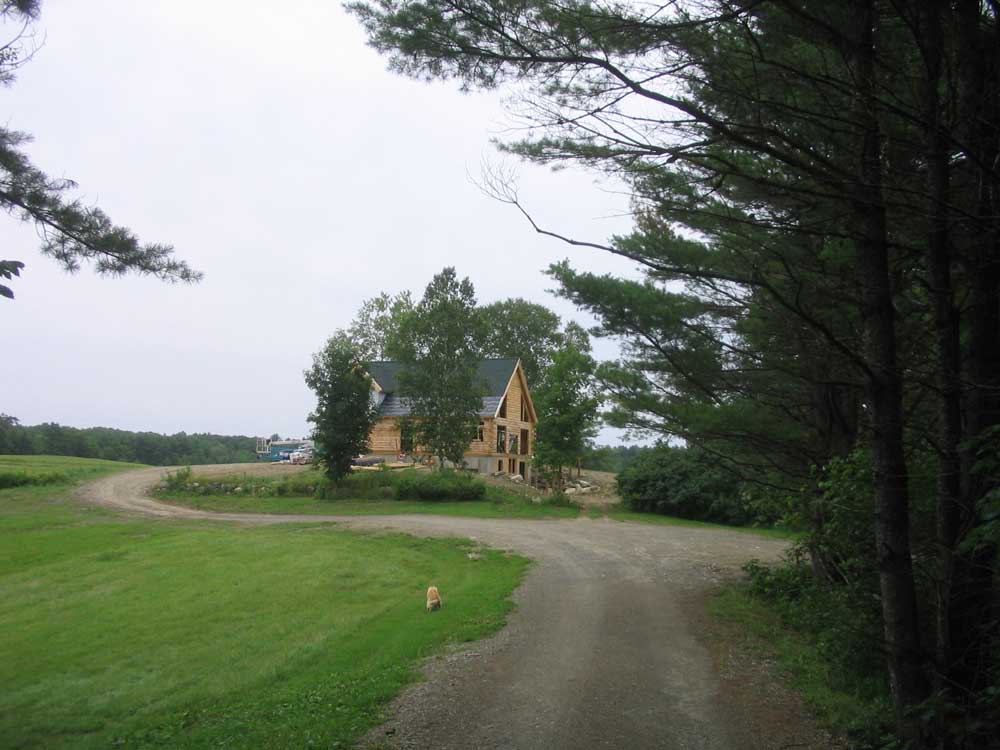
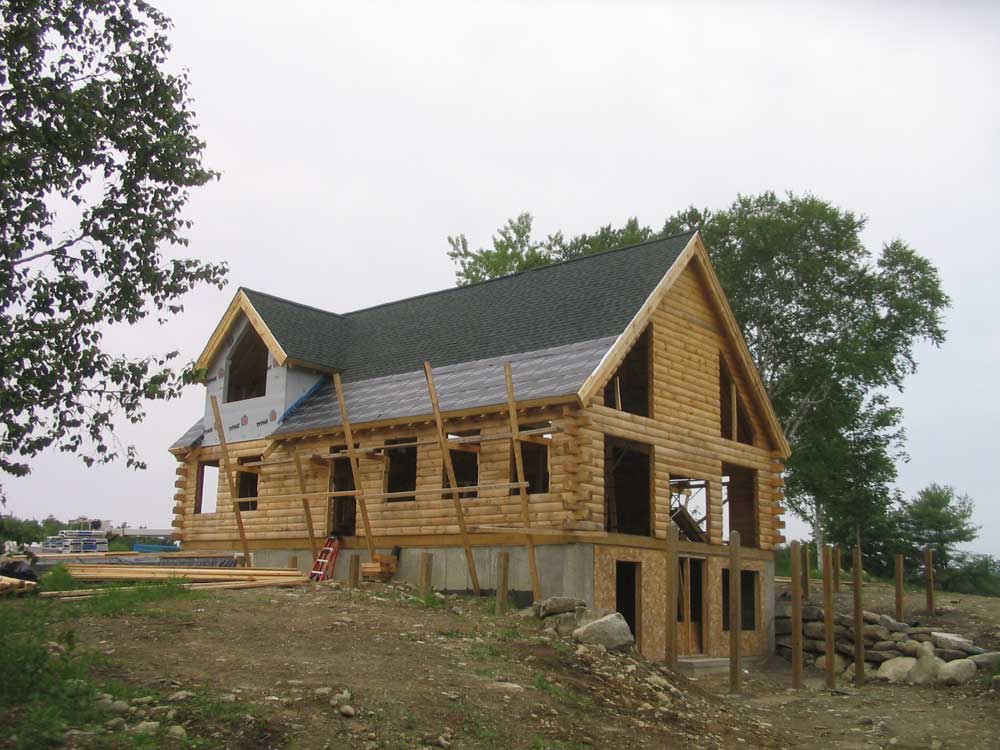
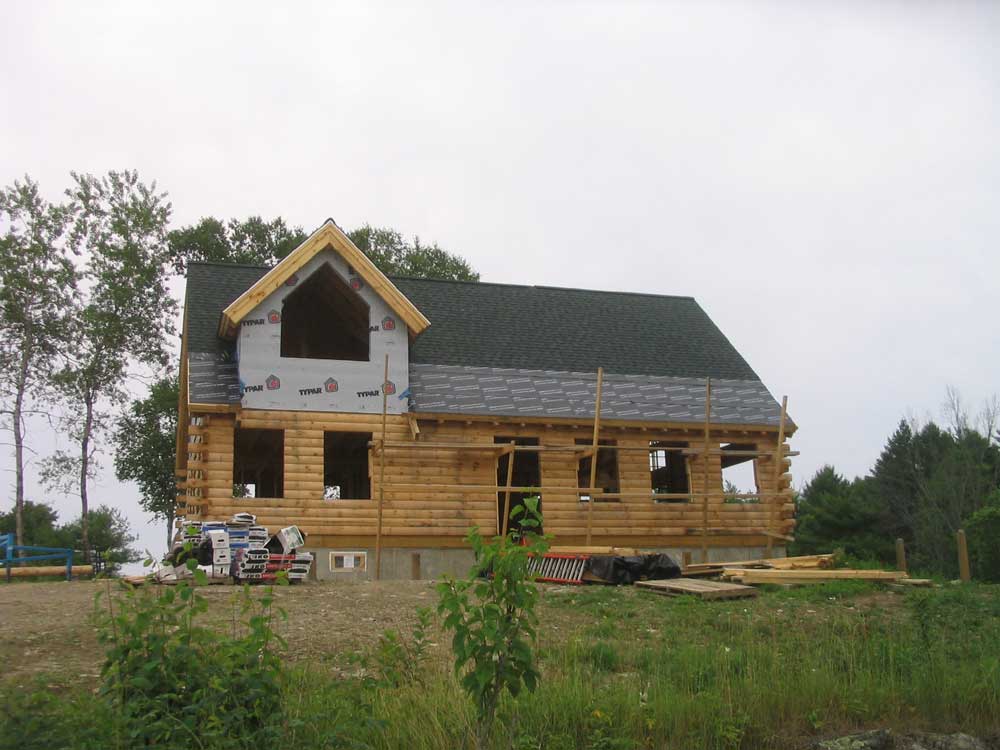
I thought the dark green shingles really brought the house "down" to
the site and it suddenly appeared less of a construction project and
more of a house with the roof done. As usual, covering over
the Advantech is always a great thing, wherever it may be installed. We
finished up the roof with ridge vent, cap shingles, and the usual
Roof Gard at the lower end where the porch roof would eventually go.
I thought the dark green shingles really brought the house "down" to
the site and it suddenly appeared less of a construction project and
more of a house with the roof done. As usual, covering over
the Advantech is always a great thing, wherever it may be installed. |
|||
 The
end of the roofing also signaled a significant change in the
project: Bob was all done, for now anyway. Later, he'll
come back and help me install the windows (or is that the other way
around...), and will also return when it's time to build the
porches. But basically, I would be on my own from here. The
end of the roofing also signaled a significant change in the
project: Bob was all done, for now anyway. Later, he'll
come back and help me install the windows (or is that the other way
around...), and will also return when it's time to build the
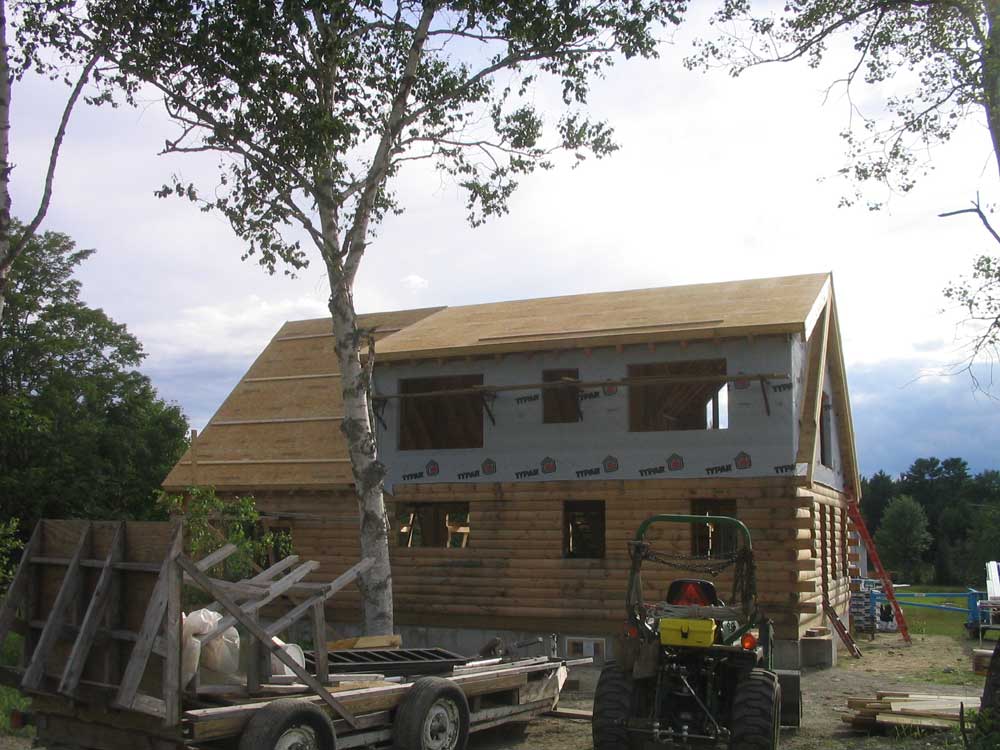
porches. But basically, I would be on my own from here.The next projects would be quite a change--cleaning the interior logs and ceilings, sanding, and finishing as needed. Plenty of work, but beneath a dry roof! In case anyone's keeping track, today was work day 48--some days longer than others, some by myself, some barely worth noting--but in any event this was the 48th day work had occurred since May 1. And now here are a couple gratuitous photos of the finished roof, just because I'm so excited about it. |
|||
|
|
|||
TUESDAY, JULY 11, 2006 |
|||
 We
got to work first thing this morning on the second section of the
back roof. As with the front of the house, we plan a covered
porch--this one screened--off part of the back, so we began
shingling far enough up to allow for later installation of the
screen porch roof and shingles. The process was much the same
as before: haul up shingles and other supplies for Bob.
Because the ladder climb was so much shorter, however, this was far
easier today than yesterday, which was good since I was still tired. We
got to work first thing this morning on the second section of the
back roof. As with the front of the house, we plan a covered
porch--this one screened--off part of the back, so we began
shingling far enough up to allow for later installation of the
screen porch roof and shingles. The process was much the same
as before: haul up shingles and other supplies for Bob.
Because the ladder climb was so much shorter, however, this was far
easier today than yesterday, which was good since I was still tired. |
|||
 The
humidity was even higher today, and it was very warm. As the
sun shone more brightly through the morning, the shingles became
very soft, and by the time we reached the peak of the roof section
it was clear we would have to stop, since the risk of damage to the
shingles was too great. We even left the roof staging in place
and left the step flashing along the dormer wall for later on, if it
got cooler. The
humidity was even higher today, and it was very warm. As the
sun shone more brightly through the morning, the shingles became
very soft, and by the time we reached the peak of the roof section
it was clear we would have to stop, since the risk of damage to the
shingles was too great. We even left the roof staging in place
and left the step flashing along the dormer wall for later on, if it
got cooler. |
|||
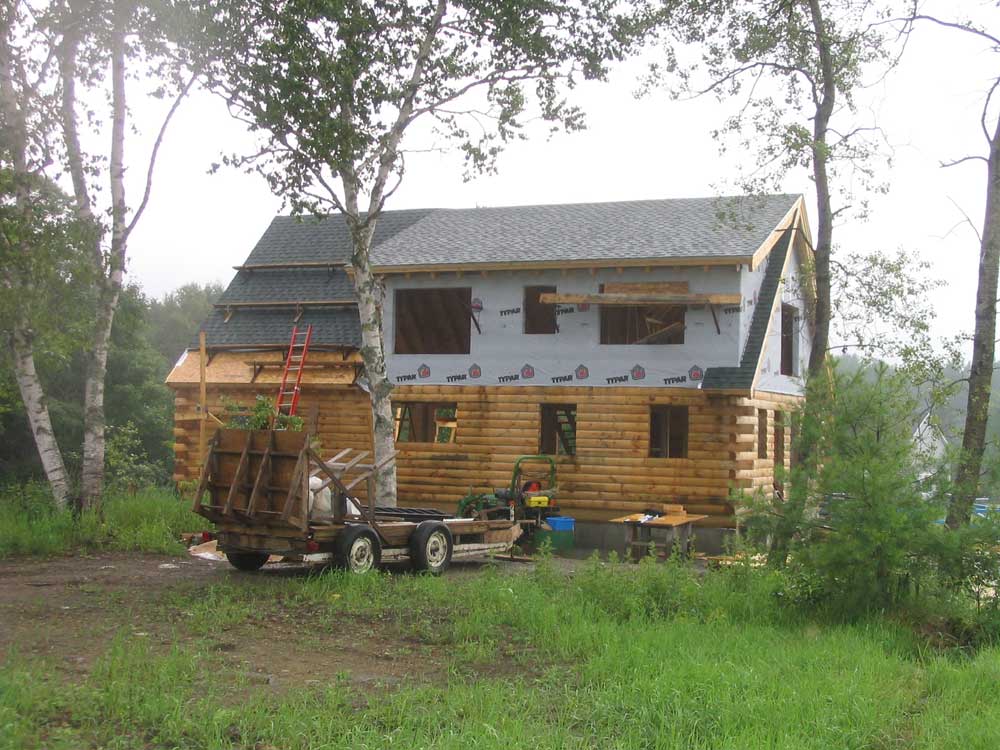
|
So this ended our major roofing effort for the day. I was once again of mixed emotion: glad to be done hauling shingles for the day, but sorry not to get more of it out of the way in a single day.
|
|||
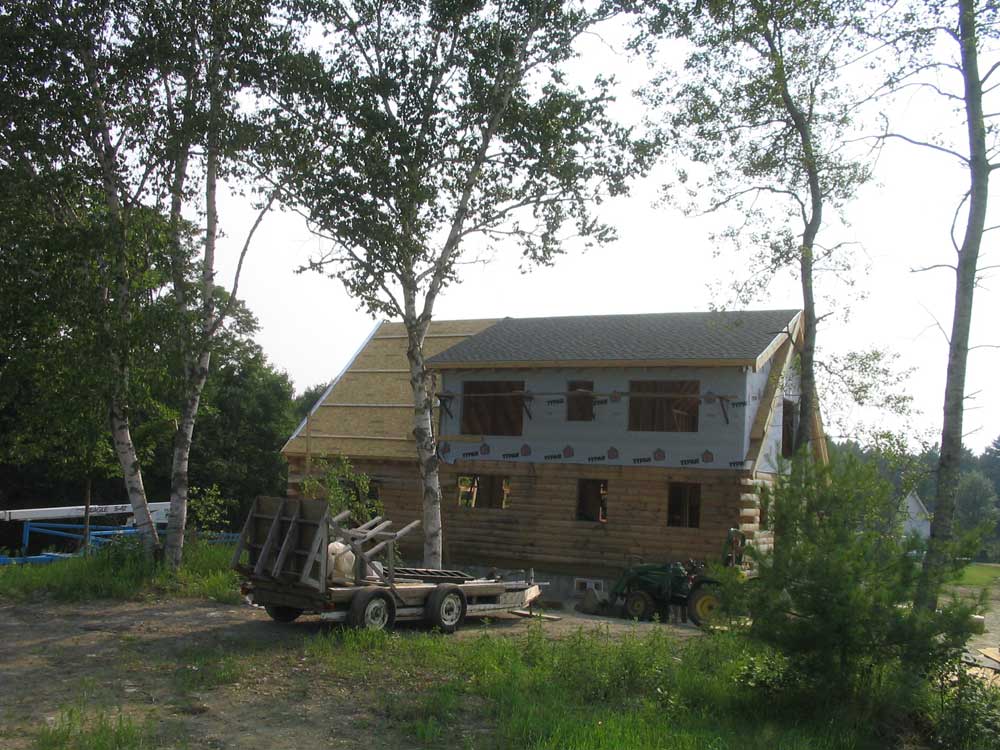
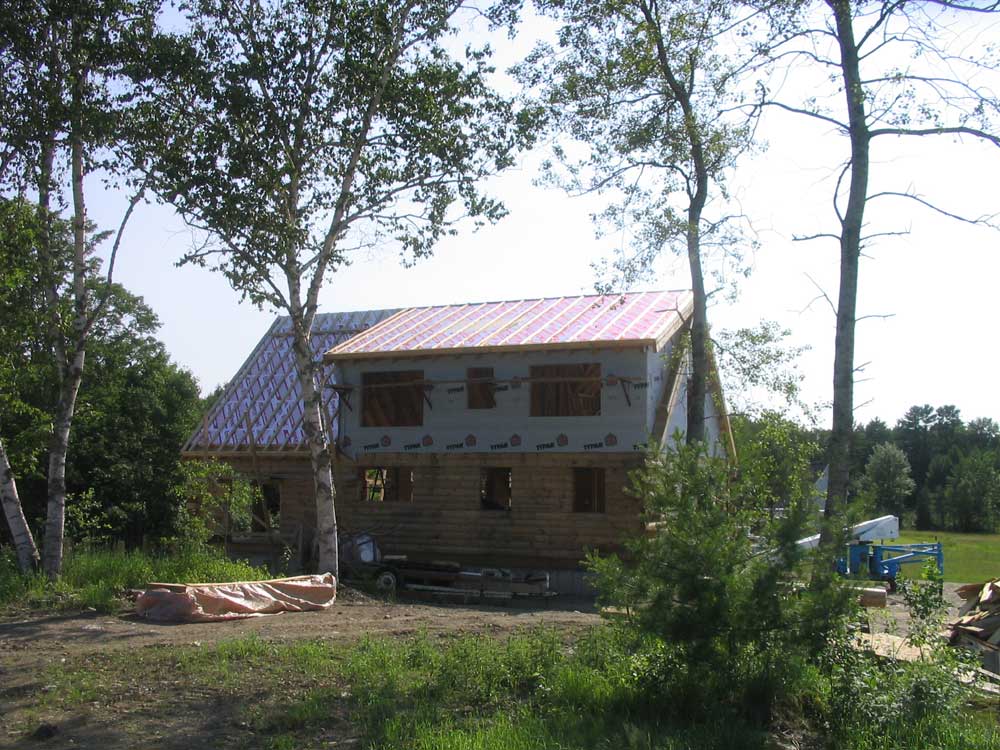
|
This roof incorporates the beginnings of a section of "fake" roof that will eventually run all the way across the back of the house, tying the two steep sections of roof together just above first floor height. This small detail will add significantly to the looks of the house, as well as help protect the logs beneath with the overhang. For now, we just worked on the very beginning of this small roof, so that we could finish up the gable side. Later, we'll add false rafter tails, spacers, and trim to match the rest of the roof and tie everything together. It will look very nice. |
|||
 By
late afternoon, it was clear we would soon have a more significant
storm coming through, so we wrapped it up. Hopefully, we can
get some real work done on the shingles tomorrow and get that over
with. Then, perhaps, the still-barren front of the house might
have some color! By
late afternoon, it was clear we would soon have a more significant
storm coming through, so we wrapped it up. Hopefully, we can
get some real work done on the shingles tomorrow and get that over
with. Then, perhaps, the still-barren front of the house might
have some color!The good news is that even with torrential rain from the afternoon's thunderstorm, the inside of the house stayed very dry, other than the rain that came in through the window and door openings. Yahoo! |
|||
MONDAY, JULY 10, 2006 |
|||
 I
can't say I was looking forward to a long day hauling shingles up a
long ladder, but somehow it helped knowing that we'd get that much
closer to a dry roof during the day. I
can't say I was looking forward to a long day hauling shingles up a
long ladder, but somehow it helped knowing that we'd get that much
closer to a dry roof during the day.
We got started right away on the shed dormer roof in the back of the house, which was in partial shade from the birch trees. It was also the highest part of the roof, with the longest ladder climb since it was the only two-story part of the exterior. It was a hot, sunny day with high humidity, and it didn't take long for the conditions to become rather tiring. |
|||
|
At first, I thought I might try carrying the shingles from their storage area in front of the house to the second floor by using the interior stairs. Then I thought I could get bundles of shingles onto the staging out through the windows before climbing the ladder--unladen--and then lifting the shingles the short distance from the staging to the roof.
|
|||
 I
lost track of how many bundles it took to cover this section of
roof, but it was plenty of them. I tried to always keep at
least two unopened bundles up on the roof ready for Bob, and in
between I caught my breath, gophered other materials that Bob needed
(nails, felt paper, etc.) and cleaned up paper and shingle bundle
wrapping that the wind was blowing all over as Bob discarded them. I
lost track of how many bundles it took to cover this section of
roof, but it was plenty of them. I tried to always keep at
least two unopened bundles up on the roof ready for Bob, and in
between I caught my breath, gophered other materials that Bob needed
(nails, felt paper, etc.) and cleaned up paper and shingle bundle
wrapping that the wind was blowing all over as Bob discarded them. |
|||
 After
we finished up the shed dormer roof, we moved around and got to work
on the front roof next to the gable dormer. Starting 8' up
from the fascia to allow for later installation of the porch
roofing, Bob shingled up beside the dormer and through the valley to
the ridge, finishing in time for a late lunch. This small area
took quite some time because of the large number of cuts required. After
we finished up the shed dormer roof, we moved around and got to work
on the front roof next to the gable dormer. Starting 8' up
from the fascia to allow for later installation of the porch
roofing, Bob shingled up beside the dormer and through the valley to
the ridge, finishing in time for a late lunch. This small area
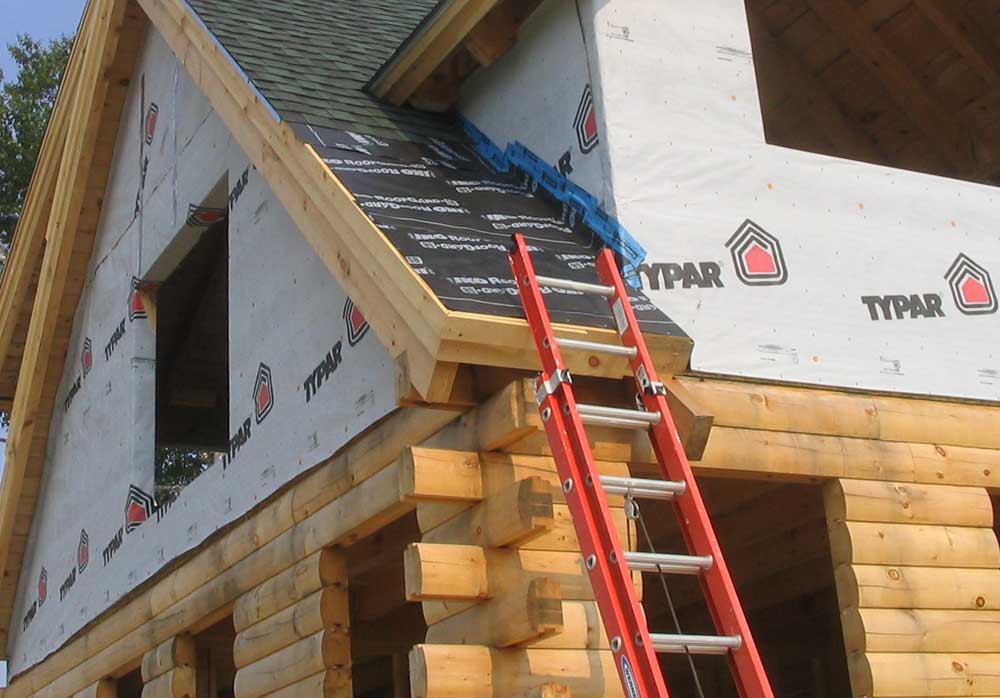
took quite some time because of the large number of cuts required.Alongside the dormer, and in the section down to the fascia, we installed IKO Roof Gard as a weatherproofing measure to protect the roof until the porch could be built later. We sealed the Roof Gard to the cheek wall of the dormer with rubberized Visqueen flashing material as a temporary measure. |
|||
 After
lunch, it was too hot to continue roofing; we might have damaged the
soft asphalt with footprints or other marks, so we moved on to the
trim on the south gable end. The job was simple, but because
it required use of the man lift it took some time to reposition the
lift (twice) and get set up. Installing the pine trim went
smoothly, however, and this brought us to the end of the day. After
lunch, it was too hot to continue roofing; we might have damaged the
soft asphalt with footprints or other marks, so we moved on to the
trim on the south gable end. The job was simple, but because
it required use of the man lift it took some time to reposition the
lift (twice) and get set up. Installing the pine trim went
smoothly, however, and this brought us to the end of the day.Look for more roofing progress tomorrow! |
|||
FRIDAY, JULY 7, 2006 |
|||
| We got started this morning on the front dormer roofing. The dormer had to be roofed first because of the plan for closed valleys (rather than open valleys which incorporate wide areas of exposed flashing). The shingles from the dormer run through the valley and onto the main roof in a closed valley, and therefore must be installed first. | |||
 As
with all things, the dormer roof took longer to shingle than its
small size might indicate. As usual, I was the material man
(read: grunt) while Bob installed the shingles on the roof. We
began with appropriate amounts of Ice & Water Shield in the valleys
and at the base of the roof, followed up with the traditional felt
paper over the remaining sections. As
with all things, the dormer roof took longer to shingle than its
small size might indicate. As usual, I was the material man
(read: grunt) while Bob installed the shingles on the roof. We
began with appropriate amounts of Ice & Water Shield in the valleys
and at the base of the roof, followed up with the traditional felt
paper over the remaining sections. |
|||
 I
was pleased with how the roofing looked. We chose a dark green
architectural shingle to compliment the setting and the other
materials in the house. Somehow, it managed to take several
hours to complete the roofing and ridge vent on the small dormer,
illustrating once again how labor-intensive this feature is.
Fortunately, this particular dormer, while important from an
aesthetic standpoint, is also an important feature for the space in
the bedroom upstairs, so the effort remained worth the time
involved. I
was pleased with how the roofing looked. We chose a dark green
architectural shingle to compliment the setting and the other
materials in the house. Somehow, it managed to take several
hours to complete the roofing and ridge vent on the small dormer,
illustrating once again how labor-intensive this feature is.
Fortunately, this particular dormer, while important from an
aesthetic standpoint, is also an important feature for the space in
the bedroom upstairs, so the effort remained worth the time
involved.We had originally planned to continue with more of the roofing, but after a break for an early lunch, we decided to change our plan a bit. Since there will be a full-length covered front porch on the house--a porch that, not being a priority item right now, will be built a little later on in the process--we needed to allow for roofing the porch and incorporating that roofing into the main roof. Originally, we thought we'd just roof the main roof now, and deal with blending the shingles from the porch roof into the main roof later, when we build the porch. After some thought, though, Bob decided that it would be a better job if we could avoid shingling the bottom portion of the roof--that which would be covered by the porch roof later--and then tie in the porch shingles later, beginning at that point. We discussed the pros and cons of the options, and I was soon convinced that it made better sense to do it this way. This led to the question of how to waterproof the lower portion of the roof, however. I wasn't excited about using the felt paper, which doesn't hold up well if not covered, and the Ice & Water Shield has to be covered shortly after installation and cannot be left exposed, though it is completely waterproof.
|
|||
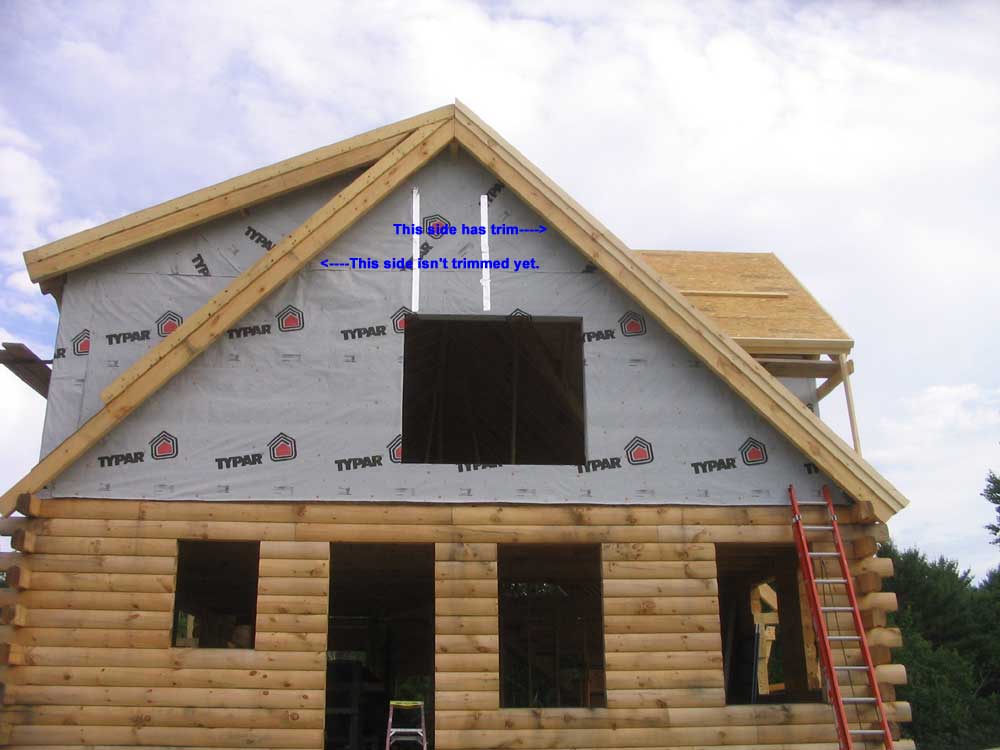
 During
the afternoon, we completed all the roof trim except for the south
gable end, which we'd do just a little later after we had worked the
roofing down towards that end. As before, we installed the two
sections of trim, with Bob installing and me cutting. The trim
went smoothly and took the rest of the afternoon. During
the afternoon, we completed all the roof trim except for the south
gable end, which we'd do just a little later after we had worked the
roofing down towards that end. As before, we installed the two
sections of trim, with Bob installing and me cutting. The trim
went smoothly and took the rest of the afternoon.With luck, we hoped to get a large portion of the roof covered on Monday. |
|||
THURSDAY, JULY 6, 2006 |
|||
|
Yesterday, I wrote: "I
don't know whether we'll finish the roof sheathing in a day or not.
Based on past performance, I'd say no...".
|
|||
 I
had the wrong grip on the sheet the first time--the
technique that had worked for me on the front side was failing badly
now--and nearly lost control several times on the way up--hardly an
auspicious start. I managed to regroup and came up with a
better system, and we completed the shed dormer sheathing without
further incident, though it was exhausting. I
had the wrong grip on the sheet the first time--the
technique that had worked for me on the front side was failing badly
now--and nearly lost control several times on the way up--hardly an
auspicious start. I managed to regroup and came up with a
better system, and we completed the shed dormer sheathing without
further incident, though it was exhausting.
|
|||
 We
finished that up at 10:30, and I had to run down the road several
miles to the nearest lumber store to pick up more gun nails, as we
were nearly out. The respite in my air conditioned truck was
much needed, and when I returned we finished up the back side of the
main roof--a relatively small section that went quickly. By
about 12:30, we were all done with the sheathing, and I was most
pleased to put it behind. We
finished that up at 10:30, and I had to run down the road several
miles to the nearest lumber store to pick up more gun nails, as we
were nearly out. The respite in my air conditioned truck was
much needed, and when I returned we finished up the back side of the
main roof--a relatively small section that went quickly. By
about 12:30, we were all done with the sheathing, and I was most
pleased to put it behind. |
|||
 Next,
we moved on to something much more interesting and fun: the
roof trim. The trim has to be installed before roofing can
begin. I brought my shop-based sliding compound miter saw up
after lunch, and informally retired the big Hitachi 15" chop saw
that had seen us nicely through the logs and floor/roof beams.
It wasn't a trim saw, and it was time to switch tools. Next,
we moved on to something much more interesting and fun: the
roof trim. The trim has to be installed before roofing can
begin. I brought my shop-based sliding compound miter saw up
after lunch, and informally retired the big Hitachi 15" chop saw
that had seen us nicely through the logs and floor/roof beams.
It wasn't a trim saw, and it was time to switch tools. |
|||
 Since
the front dormer needed to be roofed before the main roof (because
of the way the valleys work), we began with the trim on the dormer.
The trim is pretty straightforward: an 8" (really 7-1/4") pine
board, held flush with the roof sheathing at the top and hanging
down just a small amount onto the pine rafters or rafter tails
(depending on whether it's a gable or sidewall, respectively),
followed by a 4" (really 3-1/4") pine board at the top, creating a
second shadow line. Standard stuff. Bob used his manlift
to measure and install the trim while I cut the boards to the
necessary lengths and angles down inside the building. Since
the front dormer needed to be roofed before the main roof (because
of the way the valleys work), we began with the trim on the dormer.
The trim is pretty straightforward: an 8" (really 7-1/4") pine
board, held flush with the roof sheathing at the top and hanging
down just a small amount onto the pine rafters or rafter tails
(depending on whether it's a gable or sidewall, respectively),
followed by a 4" (really 3-1/4") pine board at the top, creating a
second shadow line. Standard stuff. Bob used his manlift
to measure and install the trim while I cut the boards to the
necessary lengths and angles down inside the building. |
|||
 With
the dormer trim complete, we installed the trim on the forward side
of the north gable end--the side at which we intended to begin
shingling. We ran a short section of the trim around the front
corner of the house; since this area would later be completely
hidden by the front porch roof and trim, these boards were temporary
and for alignment purposes only. With
the dormer trim complete, we installed the trim on the forward side
of the north gable end--the side at which we intended to begin
shingling. We ran a short section of the trim around the front
corner of the house; since this area would later be completely
hidden by the front porch roof and trim, these boards were temporary
and for alignment purposes only.This brought us to the end of the day. It was a good day (particularly once 12:30--and the end of the sheathing--rolled around. Perhaps tomorrow, if you're really, really good, you'll see a surprise. |
|||
|
|
|||
WEDNESDAY, JULY 5, 2006 |
|||
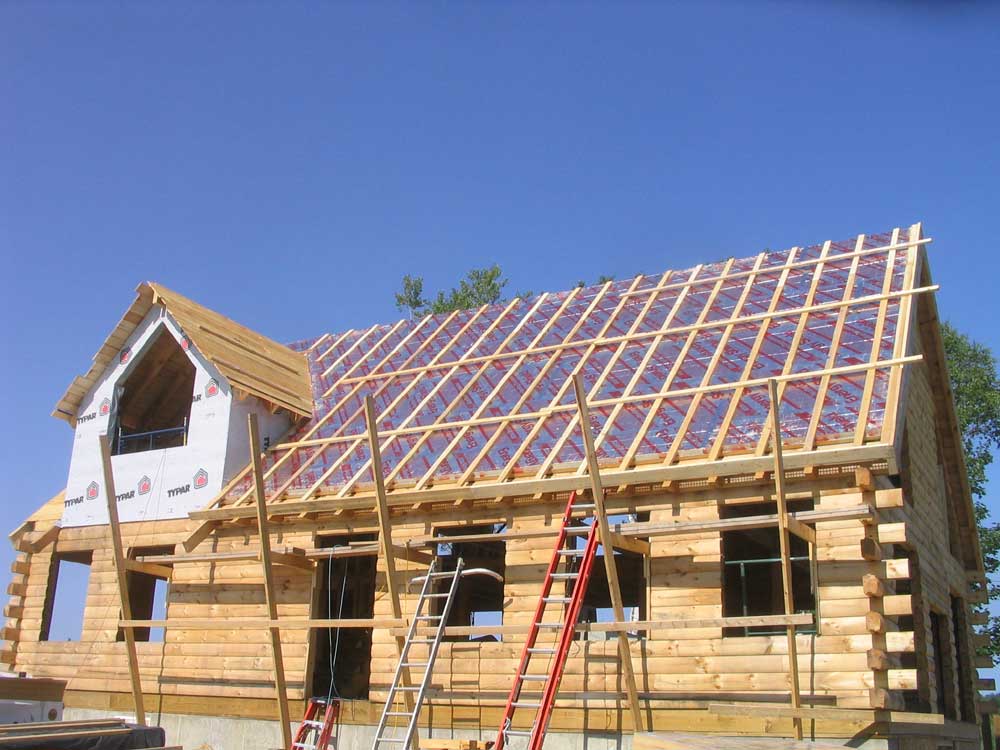
|
Today, we finished up the one dormer
side that we had left uninsulated, and then moved--reluctantly but
necessarily--to the roof sheathing.
|
|||
 I
mentioned earlier how I was not a roof guy. Frankly, I'd
rather grind black bottom paint off a dozen Carver powerboats than
sheathe one more roof. That doesn't mean I want to grind the
paint, but perhaps it puts the sheathing job into perspective. I
mentioned earlier how I was not a roof guy. Frankly, I'd
rather grind black bottom paint off a dozen Carver powerboats than
sheathe one more roof. That doesn't mean I want to grind the
paint, but perhaps it puts the sheathing job into perspective.Tomorrow: more of the same. I don't know whether we'll finish the roof sheathing in a day or not. Based on past performance, I'd say no, but stranger things have happened! |
|||
TUESDAY, JULY 4, 2006 |
|||
|
Happy birthday, USA!
We began with some final trim bits on the gable of the front dormer, including the two 4x8 pine rafters, which we installed with the help of the man lift as on the other gable ends. This process went smoothly, and once the final fly rafters were installed, we moved onto the now-standard 2x6 boards above, as before. |
|||
 Then
we continued with the insulation. The dormer lived up to its
burgeoning reputation as the most time-consuming aspect of the
build, and the tedious process of cutting and fitting the insulation
and related installations took a long time. By noon, we had
completed the remains of the main roof (the small section to the
left of the dormer), and the left side of the dormer. I had
hoped to finish the insulation today, but Bob had other plans for
the afternoon (fair enough), so we called it a day. It was
just as well, as I was getting a little tired of the insulation, the
dust from cutting, and fighting the light sheets against the wind.
Insulation is just never fun. Then
we continued with the insulation. The dormer lived up to its
burgeoning reputation as the most time-consuming aspect of the
build, and the tedious process of cutting and fitting the insulation
and related installations took a long time. By noon, we had
completed the remains of the main roof (the small section to the
left of the dormer), and the left side of the dormer. I had
hoped to finish the insulation today, but Bob had other plans for
the afternoon (fair enough), so we called it a day. It was
just as well, as I was getting a little tired of the insulation, the
dust from cutting, and fighting the light sheets against the wind.
Insulation is just never fun. |
|||
MONDAY, JULY 3, 2006 |
|||
 We
got right back into it this morning by finishing up the incomplete
strapping on the back shed dormer, which we had rushed through on
Friday with imminent thunderstorms nearby. After I passed up
the 2x4s required, I filled some time moving the sawhorses, tools,
and other things around to the front of the house while Bob screwed
down the strapping. Our progress was temporarily slowed when
my electric impact driver, which we had used consistently throughout
the build to install the screws, burned up, spitting out bits of
carbon-like insulation from inside the motor, having been pushed too
hard. (Fortunately, the manufacturer will rebuild these for
little or no charge under the warranty.) We finished up the
day using Bob's identical tool. We
got right back into it this morning by finishing up the incomplete
strapping on the back shed dormer, which we had rushed through on
Friday with imminent thunderstorms nearby. After I passed up
the 2x4s required, I filled some time moving the sawhorses, tools,
and other things around to the front of the house while Bob screwed
down the strapping. Our progress was temporarily slowed when
my electric impact driver, which we had used consistently throughout
the build to install the screws, burned up, spitting out bits of
carbon-like insulation from inside the motor, having been pushed too
hard. (Fortunately, the manufacturer will rebuild these for
little or no charge under the warranty.) We finished up the
day using Bob's identical tool. |
|||
 We
continued the insulation process on the front of the house.
There was little advance work required. The roof boards on one
side needed to be trimmed off, but with that complete we were ready
to go. We installed the requisite 2x6 at the gable edge of the
roof, and then began installing the sheets--I passed them up from
the ground, and Bob spiked them temporarily in place. We
continued the insulation process on the front of the house.
There was little advance work required. The roof boards on one
side needed to be trimmed off, but with that complete we were ready
to go. We installed the requisite 2x6 at the gable edge of the
roof, and then began installing the sheets--I passed them up from
the ground, and Bob spiked them temporarily in place. |
|||
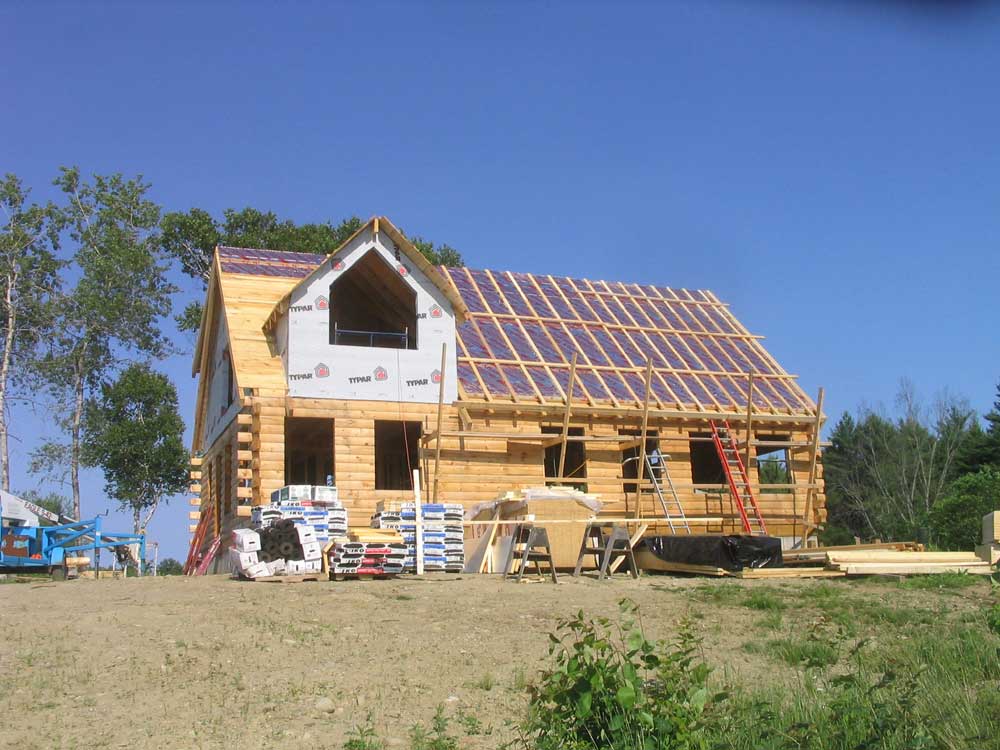 Throughout
the day, we continued in this manner. It was a bright, sunny
day, and the foil-faced insulation reflected significantly, whether
on the ground or on the roof, making it rather warm to work with;
much like being on the water, the effects of the sun were enhanced
greatly by the reflectivity factor, and we consumed much water
throughout the day.
We covered the bulk of the front roof, taped the seams, and
installed the 2x4 strapping, ending around 3:30. All that
remained was the front dormer and a very small section of roof
outboard of that on the north side. It would have been nice to
finish up today, but I certainly wasn't about to ask for more than 8
hours of work on a shiny, steep, hot roof. Throughout
the day, we continued in this manner. It was a bright, sunny
day, and the foil-faced insulation reflected significantly, whether
on the ground or on the roof, making it rather warm to work with;
much like being on the water, the effects of the sun were enhanced
greatly by the reflectivity factor, and we consumed much water
throughout the day.
We covered the bulk of the front roof, taped the seams, and
installed the 2x4 strapping, ending around 3:30. All that
remained was the front dormer and a very small section of roof
outboard of that on the north side. It would have been nice to
finish up today, but I certainly wasn't about to ask for more than 8
hours of work on a shiny, steep, hot roof. |
|||
|
|||