|
|
~MENU~ |
| Home |
| The Concept |
| The Boat |
| Bringing Her Home |
|
Weekly Progress Log |
|
Daysailor Projects |
| The Boat Barn |
| Resources |
| Other Sites |
| Email Tim |
|
|
| Progress Report: 2004 Archives |
|
January February March April May June July August September October November December |
|
|
Reports From June, 2004 6/6/04 6/13/04 6/20/04 6/27/04 Log for the Week Ending June 6, 2004
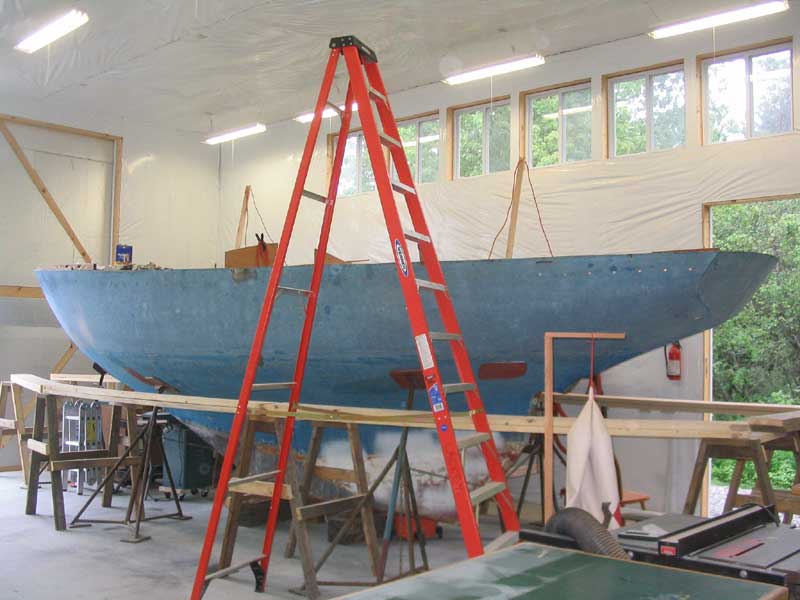
In other shop-related news: I actually finished the Etchells job last week, though I hadn't had a chance to post any further information or photos at that time. Now, however, the boat is done and out of the shop, and I've posted some pictures of the priming and painting. |
|
 With
the Etchells out of the shop, I took the opportunity to move all five of the
jackstands beneath the Daysailor, to better place the pads for some of the hull
work that would be coming up soon. Moving the stands exposed the last
remnants of bottom paint, left over from last summer's stripping. Then I
set the port staging--which I had removed to make room for the Etchells, and to
steal the planks for staging for that purpose--back up, once again surrounding
the entire boat. With
the Etchells out of the shop, I took the opportunity to move all five of the
jackstands beneath the Daysailor, to better place the pads for some of the hull
work that would be coming up soon. Moving the stands exposed the last
remnants of bottom paint, left over from last summer's stripping. Then I
set the port staging--which I had removed to make room for the Etchells, and to
steal the planks for staging for that purpose--back up, once again surrounding
the entire boat.
Time to get back to work. There is also lots of new stuff on Glissando's site, so be sure to check it out. |
|
|
Log for the Week Ending June 13, 2004 Looking back, I see that the last time I did any substantive work on the Daysailor was during the last week of April. That's a long break--longer than I ever anticipated. With my situation finally getting into something of a normal summer groove after myriad springtime projects and other demands on my time, I was pleased to be able to start dedicating time to the project again, starting this week.
Eventually, I decided that it was time to get serious about final preparations leading up to deck sheathing: it was definitely time to get a deck on this boat. It was a year ago this very week that I cut the original deck off, so it seemed fitting that I press onwards towards its very replacement. Click here to revisit last year's deck removal, if you want. (Opens in new window) |
|
 To
prepare for sheathing the deck in the near future, I had a punch list of
projects to attend to, mostly surrounding the deck beams and related
areas. These projects had been on my mind for some time, but I just hadn't
gotten around to them. None were large in scope, but each small step is
part of the overall process, and cannot be ignored. To
prepare for sheathing the deck in the near future, I had a punch list of
projects to attend to, mostly surrounding the deck beams and related
areas. These projects had been on my mind for some time, but I just hadn't
gotten around to them. None were large in scope, but each small step is
part of the overall process, and cannot be ignored.
Click here for more information about the final pre-sheathing punch list. |
|
 I took the opportunity to fill the countersunk sheer
clamp fasteners. With a batch of thickened epoxy, I filled each depression
as well as possible; they will require a second application later. My goal
was only to fill them relatively flush so that when the time comes to fiberglass
the deck (when I run some cloth right over the hull/deck joint on the outside),
the fastener holes will be ready to accept glass, should it extend down that
far. Later, of course, I'll fill and fair them perfectly smooth--that's
all a bit further down the road, though. I took the opportunity to fill the countersunk sheer
clamp fasteners. With a batch of thickened epoxy, I filled each depression
as well as possible; they will require a second application later. My goal
was only to fill them relatively flush so that when the time comes to fiberglass
the deck (when I run some cloth right over the hull/deck joint on the outside),
the fastener holes will be ready to accept glass, should it extend down that
far. Later, of course, I'll fill and fair them perfectly smooth--that's
all a bit further down the road, though.
|
|
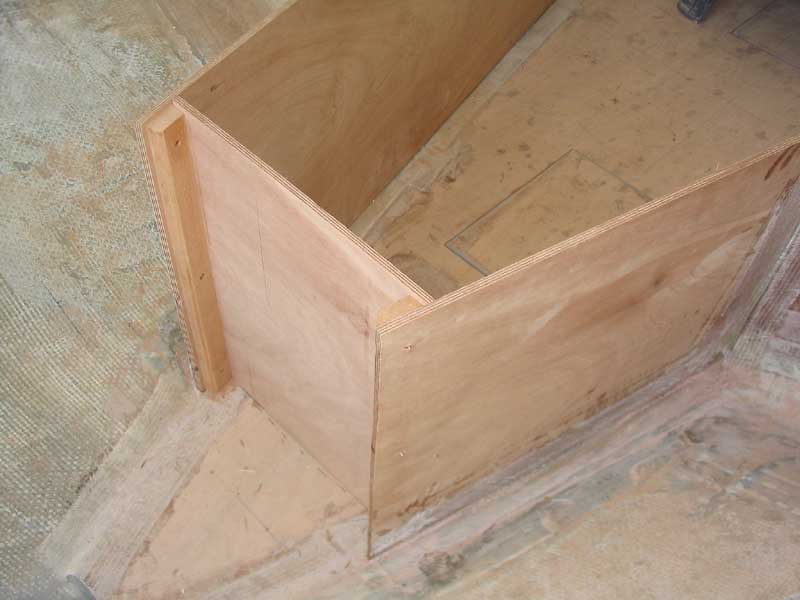 Searching for small things to do with the minimal
amount of raw materials I had in the shop (I've been postponing another large
plywood and lumber order...I like the project better when I avoid those large
outlays), I cut and installed the plywood at the forward end of the cabin
sole, filling in the space between the two sides of the passageway. Then I
worked on some planning for an athwartships support for the V-berth plywood,
about halfway between the chain locker bulkhead and the chainplate bulkhead. Searching for small things to do with the minimal
amount of raw materials I had in the shop (I've been postponing another large
plywood and lumber order...I like the project better when I avoid those large
outlays), I cut and installed the plywood at the forward end of the cabin
sole, filling in the space between the two sides of the passageway. Then I
worked on some planning for an athwartships support for the V-berth plywood,
about halfway between the chain locker bulkhead and the chainplate bulkhead.
Click here for more details on the continuing interior substructure. |
|
|
Log for the Week Ending June 20, 2004 I continued this week with the pre-decking projects, and made good progress towards that end. By the end of the week, there was little of any significance remaining before actually beginning the deck sheathing. However, the installation of the plywood decks will have to wait a bit more, since as of this writing I had not yet purchased the plywood needed for the decks. My decking plan calls for two layers of plywood: first, a down-facing layer of cosmetic beadboard plywood, which will be visible between the deck beams from the interior; and then a top layer of 3/8" Meranti plywood. Finally, I planned to install a couple layers of fiberglass over the entire deck. Since the beadboard plywood requires a number of coats of paint before installation, I'm looking at at least another week before any installation can occur, assuming I get a chance to buy the material early next week. We'll see how it goes, though I am anxious to start priming and painting the sheathing. So what did I get done this week? |
|
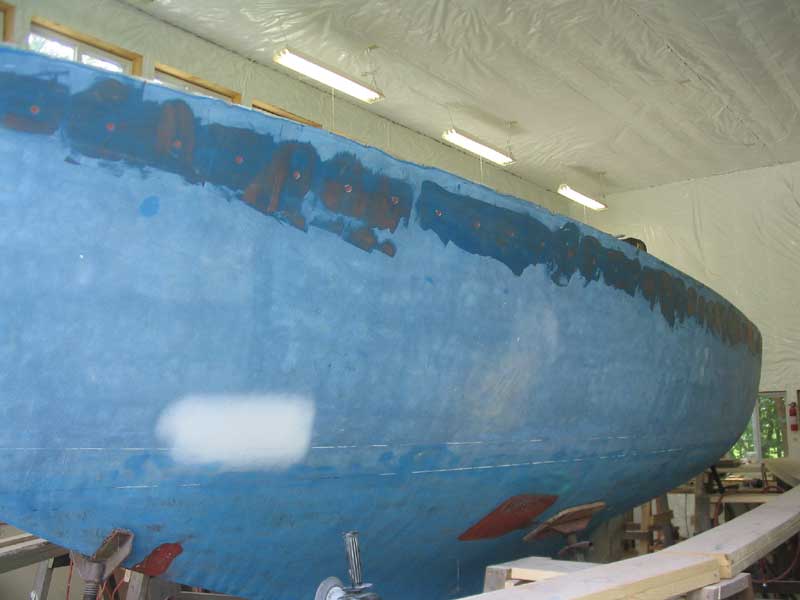
 I ground the first coat of epoxy filler over the sheer clamp boltheads, and
filled in the resulting divots with a second coat of fairing compound, all
towards the goal of a smooth, fair hull in the long run.
I ground the first coat of epoxy filler over the sheer clamp boltheads, and
filled in the resulting divots with a second coat of fairing compound, all
towards the goal of a smooth, fair hull in the long run.
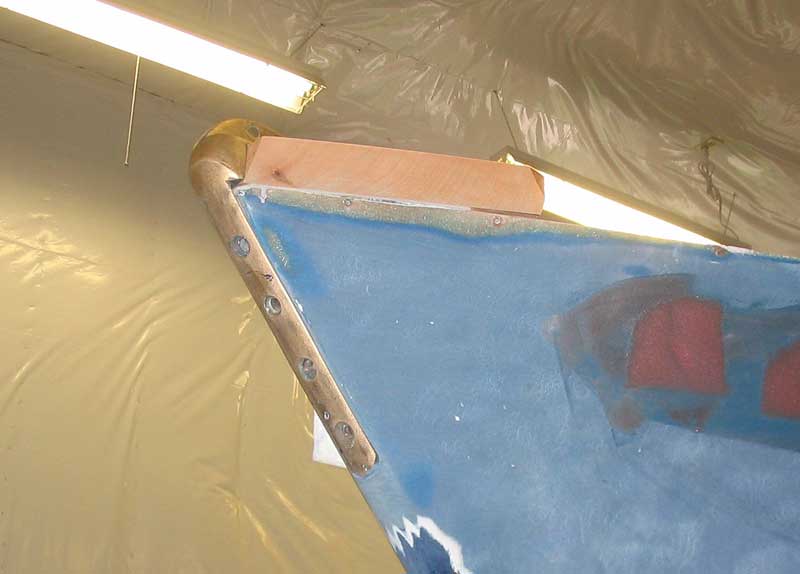
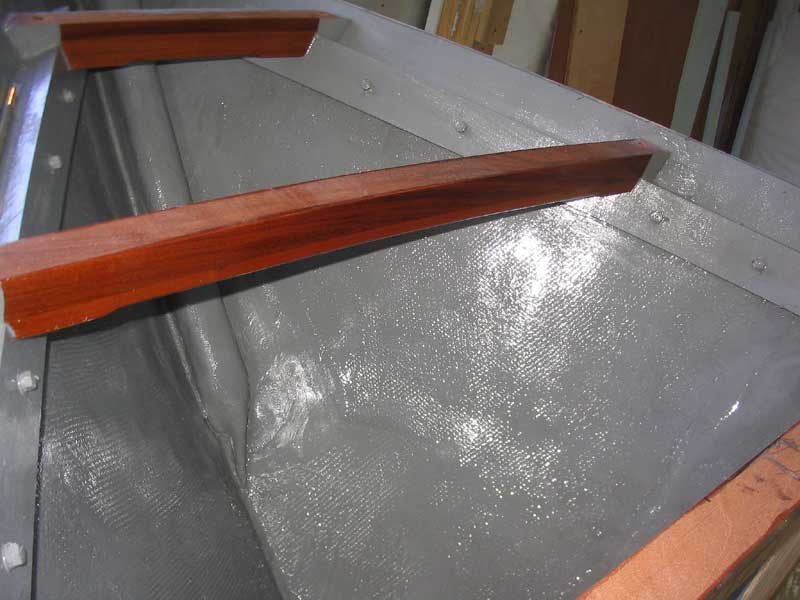
I continued work on the breasthook, and got it roughly cut to shape and permanently installed in place at the stem. |
|
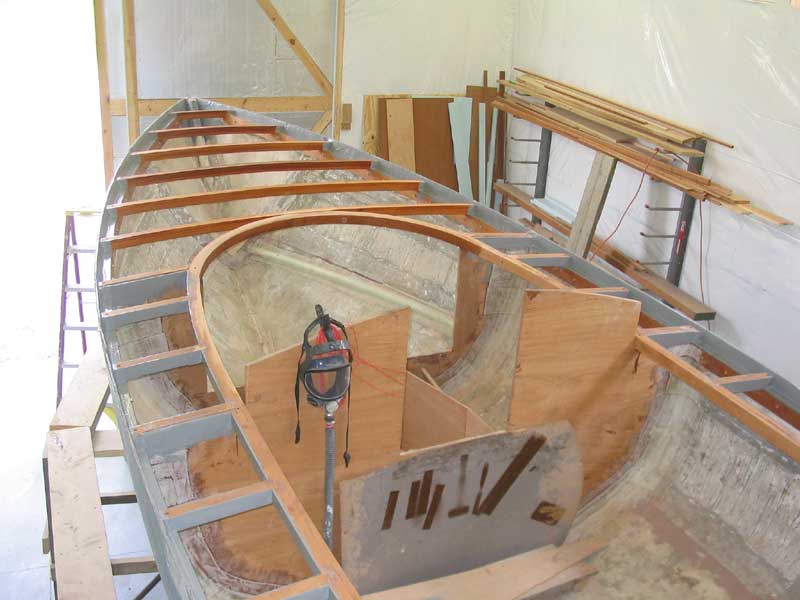
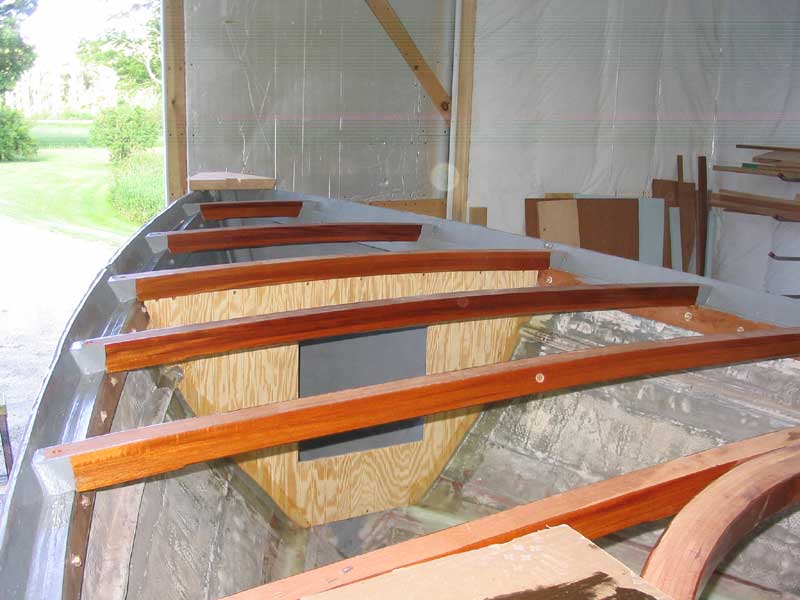 I continued work on the deckbeams in the forward
cabin, which will be exposed in the final construction. As time allowed, I
applied several more coats of gloss varnish to build up the finish on the beams,
sanding between each coat. I finally had enough varnish on the beams to
switch from the gloss finish to the interior rubbed-effect varnish that I
planned for the final coats, and applied a couple coats of this before week's
end. As soon as I achieve the appearance I want, I'll stop, and the
varnishing will be complete for now. Obviously, it's much easier to
varnish the beams before the deck is installed above. The beams are
looking terrific, though. I continued work on the deckbeams in the forward
cabin, which will be exposed in the final construction. As time allowed, I
applied several more coats of gloss varnish to build up the finish on the beams,
sanding between each coat. I finally had enough varnish on the beams to
switch from the gloss finish to the interior rubbed-effect varnish that I
planned for the final coats, and applied a couple coats of this before week's
end. As soon as I achieve the appearance I want, I'll stop, and the
varnishing will be complete for now. Obviously, it's much easier to
varnish the beams before the deck is installed above. The beams are
looking terrific, though.
|
|
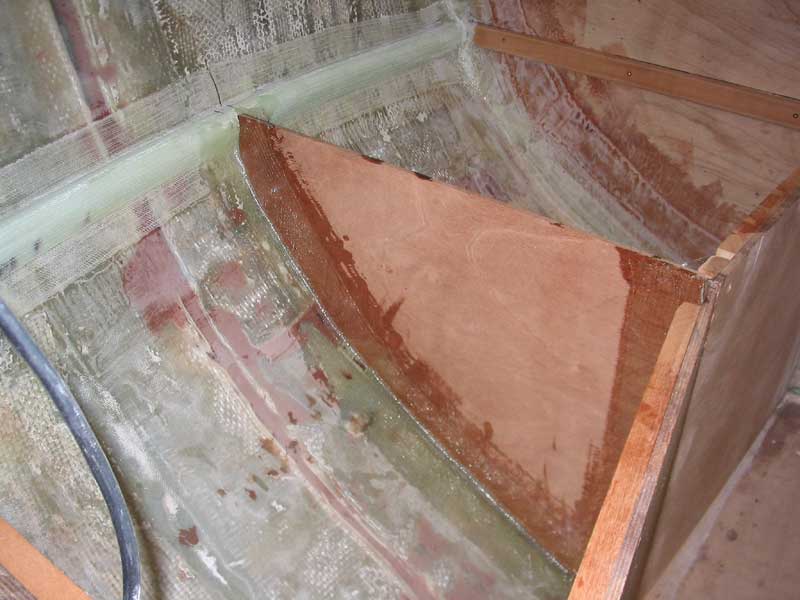
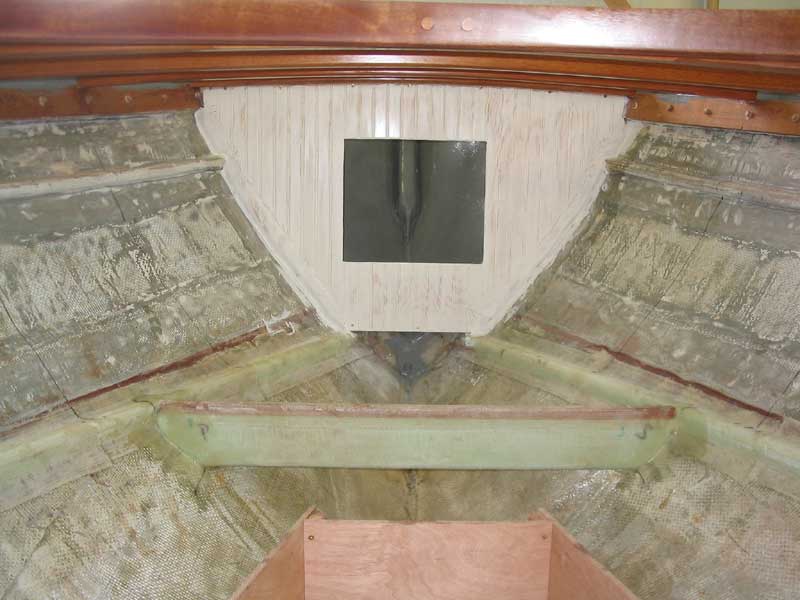 I installed a cosmetic bulkhead at the aft end of
the chain locker, using plywood beadboard, which I intend to use throughout the
cabin (to be eventually accented with varnished mahogany trim in the Herreshoff
tradition). It would have been nice to have been able to simply attach the
new bulkhead to the 4" web remaining from the original chainlocker
bulkhead, but I had discovered long ago that this bulkhead, in the Triton
tradition, was horribly out of alignment and way out of plumb. I installed a cosmetic bulkhead at the aft end of
the chain locker, using plywood beadboard, which I intend to use throughout the
cabin (to be eventually accented with varnished mahogany trim in the Herreshoff
tradition). It would have been nice to have been able to simply attach the
new bulkhead to the 4" web remaining from the original chainlocker
bulkhead, but I had discovered long ago that this bulkhead, in the Triton
tradition, was horribly out of alignment and way out of plumb.
|
|
 With most of the work at the forward end of the boat
complete and awaiting decking, I cleaned up and painted the entire chain locker
with two coats of gray Bilgekote. Each area I paint is a small step, but
the new paint sure makes a pleasing change from the old, raw fiberglass. With most of the work at the forward end of the boat
complete and awaiting decking, I cleaned up and painted the entire chain locker
with two coats of gray Bilgekote. Each area I paint is a small step, but
the new paint sure makes a pleasing change from the old, raw fiberglass.
On the interior, I completed building and installing an athwartships support for the V-berth platform. It seemed as if building this small piece took an inordinate amount of time, though much of the glasswork was wonderfully accelerated once I started using my new, custom-made post-cure autoclave. A new tool? No, not exactly...but placing my glassed parts outside the shop in the hot sun sure does speed up the curing, though! |
|
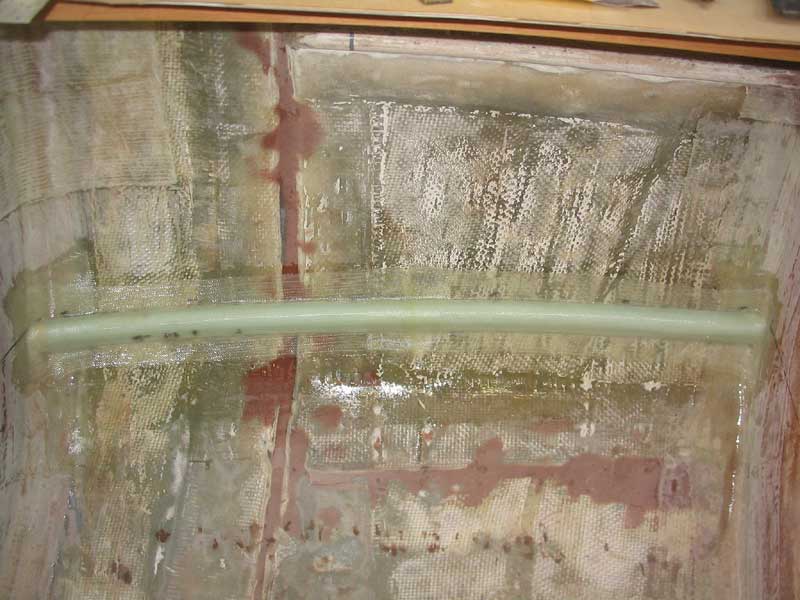 Finally I continued work in the "main"
cabin by installing a simple set of fiberglass-encapsulated foam supports along
the hull at the same level as the plywood skeleton of the settees. Finally I continued work in the "main"
cabin by installing a simple set of fiberglass-encapsulated foam supports along
the hull at the same level as the plywood skeleton of the settees.
|
|
|
Log for the Week Ending June 27, 2004 Where does the time go? How can June nearly be over: it just started, seemingly!
|
|
|
Unfortunately, the remainder of the week passed in the blink of an eye with no further time to work on the boat. See you next week! |
|

 -n
-n t
t ,
-ny
,
-ny -)
-) tus,
past participle of minuere, to lessen. See mei-2
in Indo-European Roots.]
tus,
past participle of minuere, to lessen. See mei-2
in Indo-European Roots.]