|
|
~MENU~ |
| Home |
| The Concept |
| The Boat |
| Bringing Her Home |
|
Weekly Progress Log |
|
Daysailor Projects |
| The Boat Barn |
| Resources |
| Other Sites |
| Email Tim |
|
|
|
From a Bare Hull: The Deck (Page 2) |
|
|
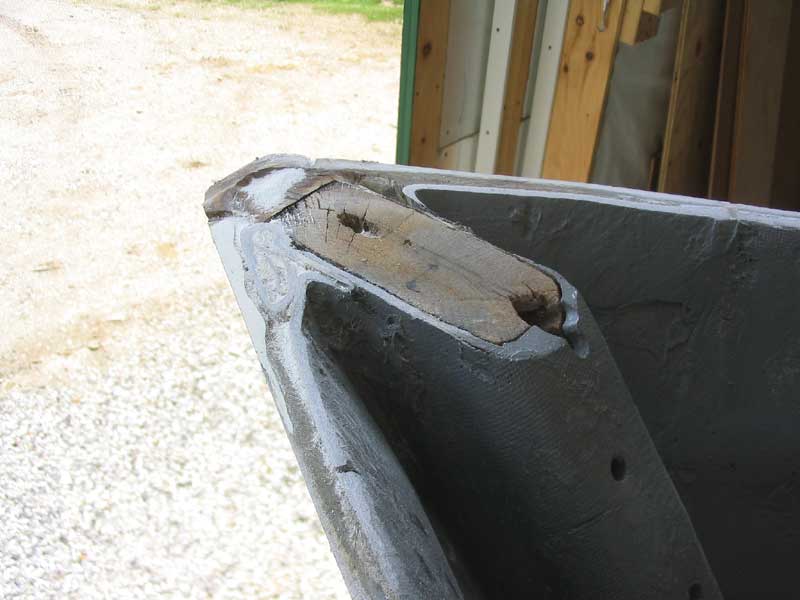
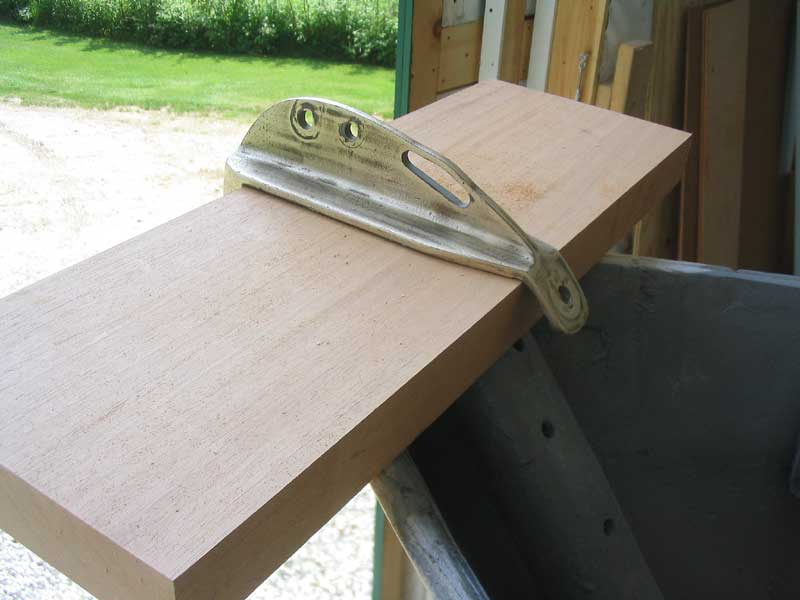
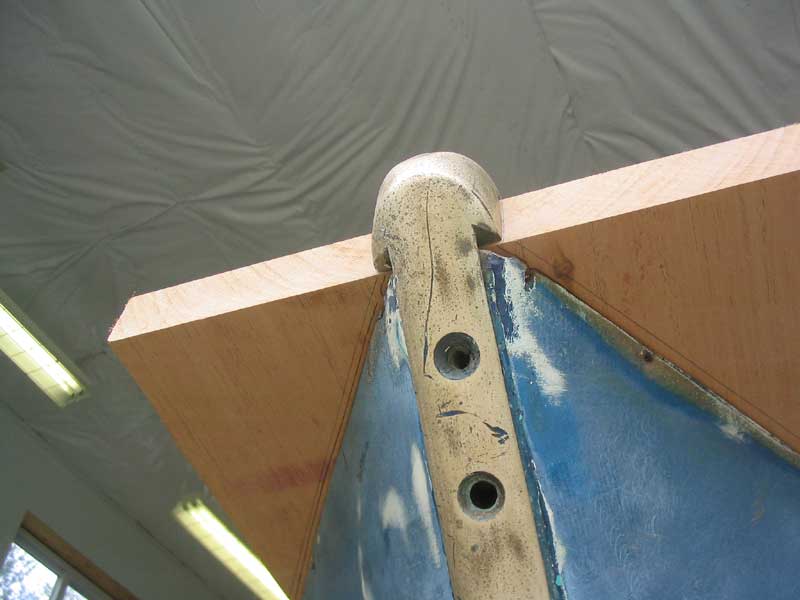
 With
the stem casting in hand, I mocked up the general setup at the bow. I
had a long piece of 8/4 mahogany in stock, but before I could do anything
with it I had to plane it to the proper thickness, which was just over
1-1/2"--the height of the original "step" built into the
casting. After numerous passes through the planer, I finally had the
piece dimensioned properly. I tested the fit of the blank at the stem,
and found that the casting aligned nicely with the boltholes--or was close
enough that I knew that final sanding and fitting would make it so. With
the stem casting in hand, I mocked up the general setup at the bow. I
had a long piece of 8/4 mahogany in stock, but before I could do anything
with it I had to plane it to the proper thickness, which was just over
1-1/2"--the height of the original "step" built into the
casting. After numerous passes through the planer, I finally had the
piece dimensioned properly. I tested the fit of the blank at the stem,
and found that the casting aligned nicely with the boltholes--or was close
enough that I knew that final sanding and fitting would make it so.
|
 Obviously,
this piece was much longer than necessary; however, I planned this, since
the piece was not wide enough to cover the area sufficiently, so I planned
to cut it in half and glue the two sections together side by side in order
to obtain the overall width I needed, which was nearly 13" at the
widest part. My conceptual idea in my mind included extending the
mahogany breasthook some inches aft of the bronze stem casting, which would
also necessitate carving an angled slot to accommodate the after tab of the
stem piece; this concept will become clear later in this description. Obviously,
this piece was much longer than necessary; however, I planned this, since
the piece was not wide enough to cover the area sufficiently, so I planned
to cut it in half and glue the two sections together side by side in order
to obtain the overall width I needed, which was nearly 13" at the
widest part. My conceptual idea in my mind included extending the
mahogany breasthook some inches aft of the bronze stem casting, which would
also necessitate carving an angled slot to accommodate the after tab of the
stem piece; this concept will become clear later in this description.
|
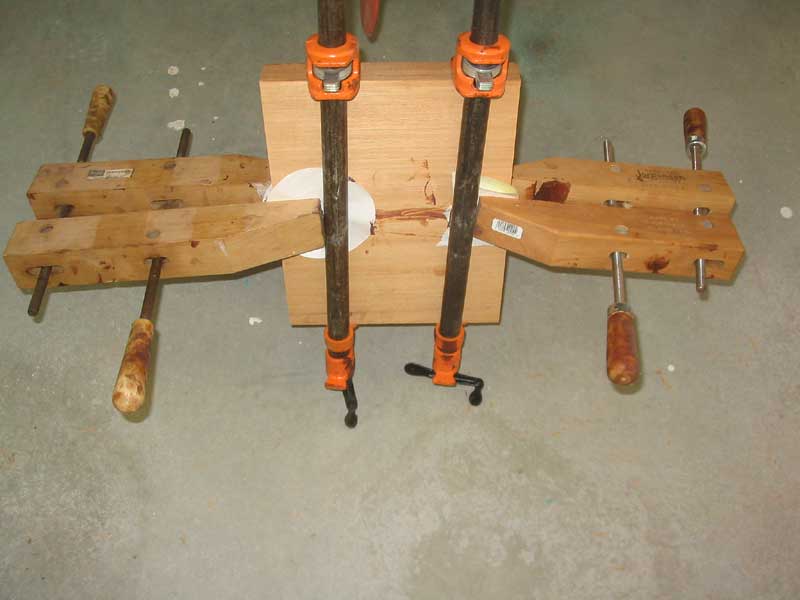 Pleased
with the general fit of the blank, I cut it in half across the short
dimension, and glued the two pieces together with epoxy, clamping it
securely; I set the blank aside to cure before continuing. Pleased
with the general fit of the blank, I cut it in half across the short
dimension, and glued the two pieces together with epoxy, clamping it
securely; I set the blank aside to cure before continuing.
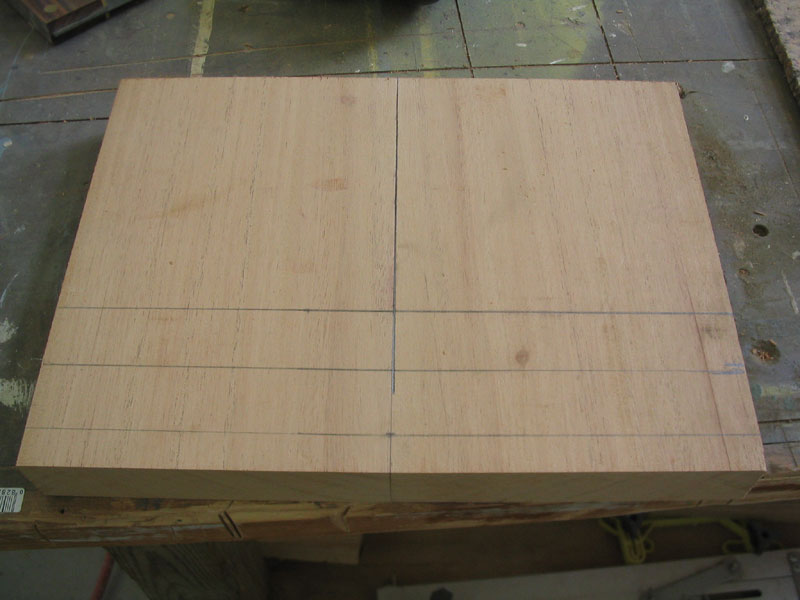
The next day, the blank was cured, so I removed the clamps and sanded away the squeezed-out epoxy. Then, I took a moment to square up the forward and after edges of the blank; the sides would eventually be cut to match the curvature and angle of the hull, so I left them rough. |
|
|
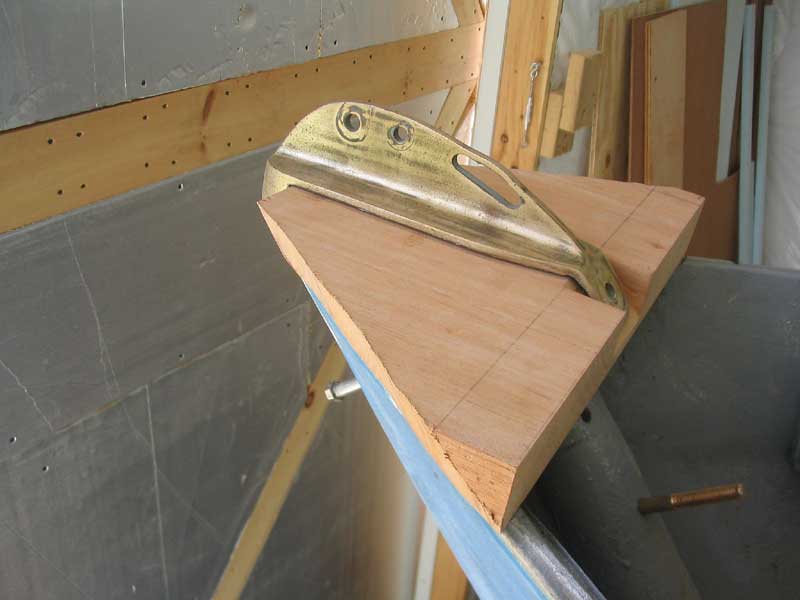
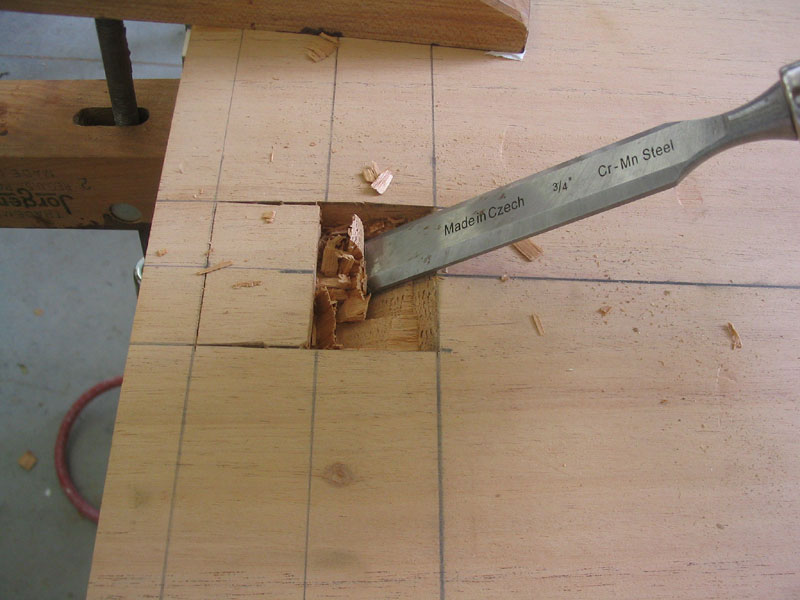 My
next step was to cut out a notch to allow the angled aft tab on the stem
piece to fit into the breasthook. I marked out the location of the
leading edge of the notch, the center, and the after edge--which would allow
a socket wrench to access the nut on the eventual bolt--and used a bevel
gauge to determine the proper angle of the cuts. Using a chisel, I
carefully carved away, removing the material as needed. I completed
the first side up to the centerline mark, then repeated the process on the
after side. My
next step was to cut out a notch to allow the angled aft tab on the stem
piece to fit into the breasthook. I marked out the location of the
leading edge of the notch, the center, and the after edge--which would allow
a socket wrench to access the nut on the eventual bolt--and used a bevel
gauge to determine the proper angle of the cuts. Using a chisel, I
carefully carved away, removing the material as needed. I completed
the first side up to the centerline mark, then repeated the process on the
after side.
|
|
|
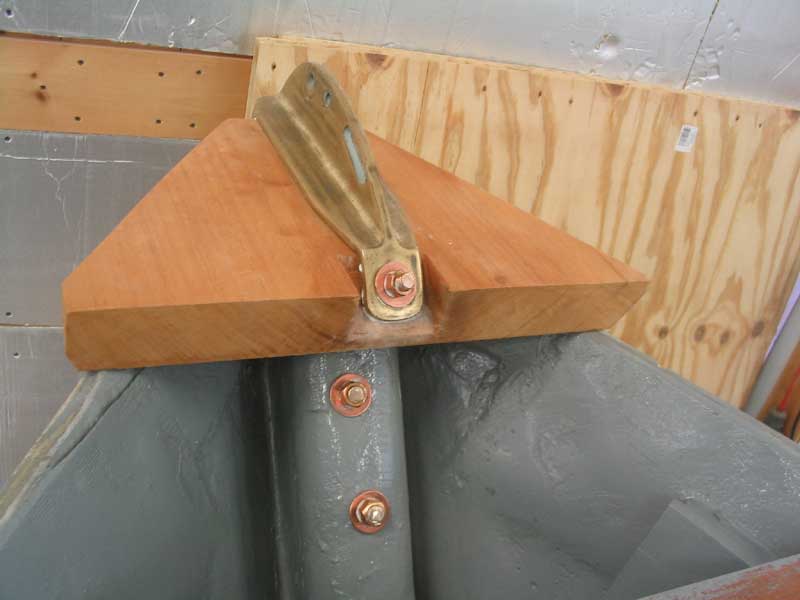
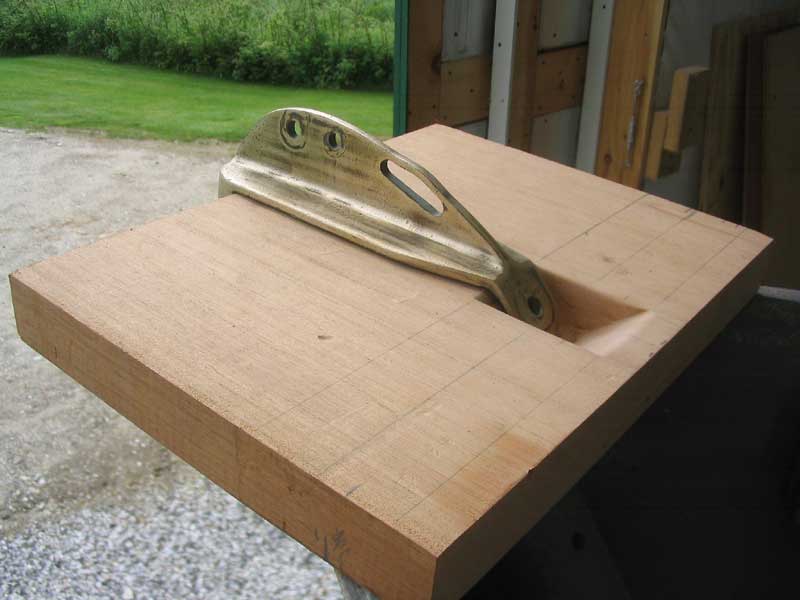 I
mocked up the assembly on the stem and adjusted the breasthook till it was
centered and equidistant from the forwardmost deck beam. I noted that
the old oak stem knee was protruding too far and was "high
centering" the breasthook blank, so I ground the knee down till the new
piece fit more closely. This also brought the boltholes into near
perfect alignment. I also ensured that the blank was level from side
to side. I
mocked up the assembly on the stem and adjusted the breasthook till it was
centered and equidistant from the forwardmost deck beam. I noted that
the old oak stem knee was protruding too far and was "high
centering" the breasthook blank, so I ground the knee down till the new
piece fit more closely. This also brought the boltholes into near
perfect alignment. I also ensured that the blank was level from side
to side.
|
 Once
the blank was properly positioned, I eyed it critically from several angles,
and marked the location where the blank intersected the hull at the after
end. I was still undecided whether I was going to leave the blank as
long as it was, or cut it shorter (closer to the aft end of the bronze
tab). I discovered that the hull was slightly asymmetrical, as the
intersection points were different on each side. This complicated the
matter a bit. I had hoped to have the breasthook extend a bit aft of
the stem casting, mostly for aesthetic reasons, but it might not work.
From beneath, I marked the outline of the hull on the blank for future
cutting, and also noted the angle of the hull with a bevel gauge. Once
the blank was properly positioned, I eyed it critically from several angles,
and marked the location where the blank intersected the hull at the after
end. I was still undecided whether I was going to leave the blank as
long as it was, or cut it shorter (closer to the aft end of the bronze
tab). I discovered that the hull was slightly asymmetrical, as the
intersection points were different on each side. This complicated the
matter a bit. I had hoped to have the breasthook extend a bit aft of
the stem casting, mostly for aesthetic reasons, but it might not work.
From beneath, I marked the outline of the hull on the blank for future
cutting, and also noted the angle of the hull with a bevel gauge.
|
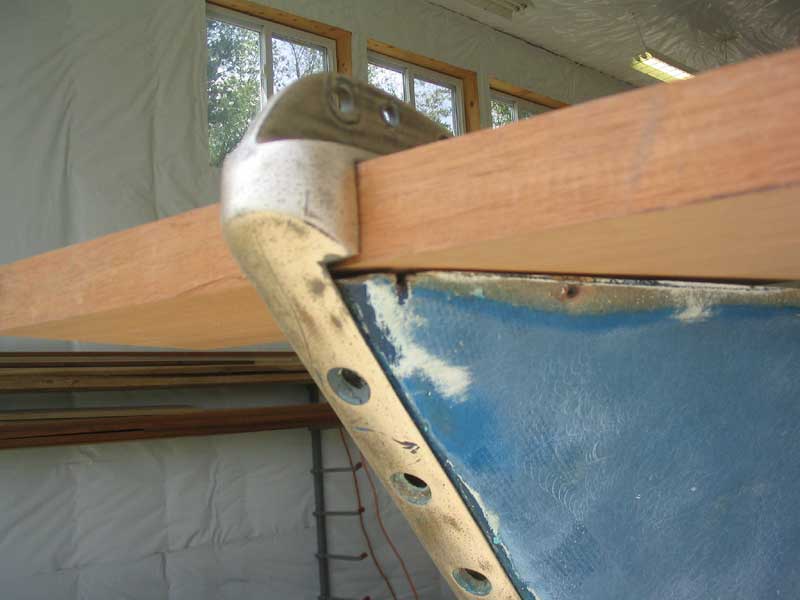
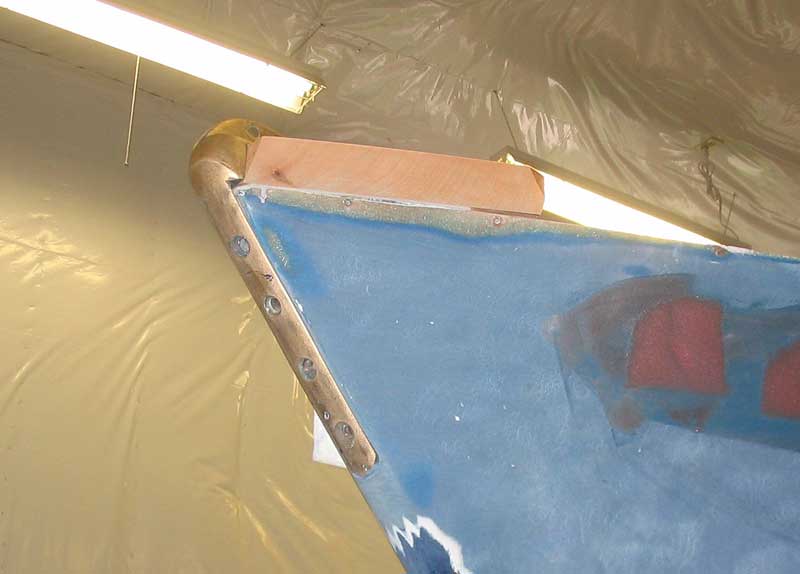
 With a bandsaw, I cut roughly along the line at the
appropriate angle, leaving some extra for final fitting later. Once I
had the edges cut, it was clear that I would need to shorten the piece, so I
trimmed an inch or two off the after side, right in line with the center
part of my carefully-carved notch. Pleased with the overall fit, I
permanently installed the breasthook on the stem in a bed of thickened epoxy
adhesive; later, the throughbolts securing the bronze stem casting would add
additional strength to and means of securing the piece, but at that time the
bolts I needed were on backorder. With a bandsaw, I cut roughly along the line at the
appropriate angle, leaving some extra for final fitting later. Once I
had the edges cut, it was clear that I would need to shorten the piece, so I
trimmed an inch or two off the after side, right in line with the center
part of my carefully-carved notch. Pleased with the overall fit, I
permanently installed the breasthook on the stem in a bed of thickened epoxy
adhesive; later, the throughbolts securing the bronze stem casting would add
additional strength to and means of securing the piece, but at that time the
bolts I needed were on backorder.
|
 When the epoxy cured, I sanded the excess wood
off the breasthook with a belt sander, following the angle of the
hull. I left it like that for the moment, since I was unsure how the
whole thing would eventually integrate with the deck and planned toerail. When the epoxy cured, I sanded the excess wood
off the breasthook with a belt sander, following the angle of the
hull. I left it like that for the moment, since I was unsure how the
whole thing would eventually integrate with the deck and planned toerail.
|
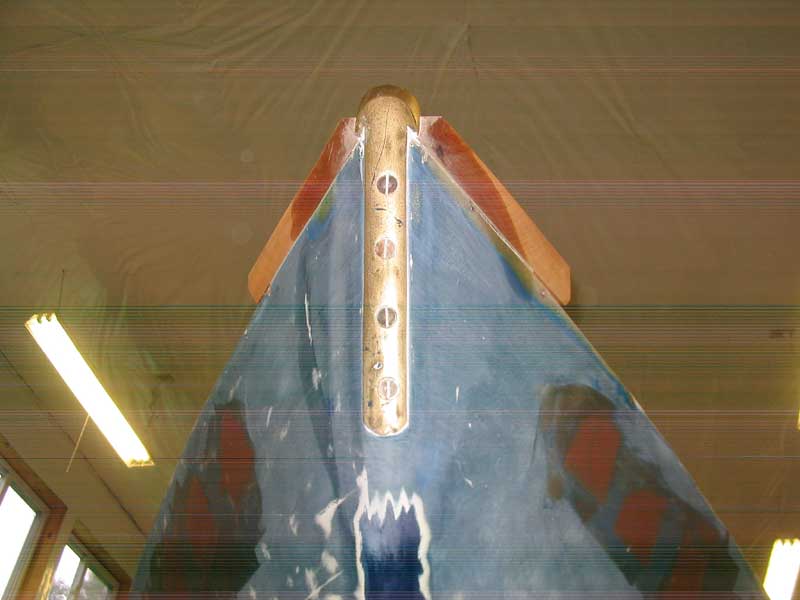
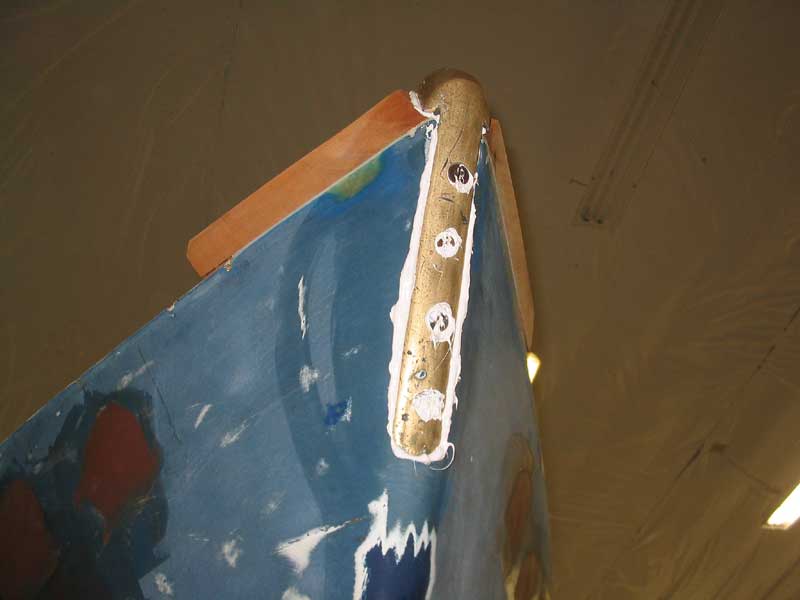 To
complete the stem area, I finally secured the
bronze casting with bronze through bolts and polysulfide sealant. The
installation was the final item on the list of chores that had to be completed
before sheathing the decks, since access to the inside of the stem area
would be difficult to impossible once the decks were covered. To
complete the stem area, I finally secured the
bronze casting with bronze through bolts and polysulfide sealant. The
installation was the final item on the list of chores that had to be completed
before sheathing the decks, since access to the inside of the stem area
would be difficult to impossible once the decks were covered.
|
|
|
|