|
|
~MENU~ |
| Home |
| The Concept |
| The Boat |
| Bringing Her Home |
|
Weekly Progress Log |
|
Daysailor Projects |
| The Boat Barn |
| Resources |
| Other Sites |
| Email Tim |
|
|
| Progress Report: 2004 Archives |
|
January February March April May June July August September October November December |
|
Reports from December, 2004 12/5/04 12/12/04 12/19/04 12/26/04 |
|
Log for the Week Ending December 5, 2004  With
things finally settling down after thanksgiving and our vacation before, it was
great to get back to the shop for some real work. My immediate goal was to
complete the short list of tasks that needed to be done before the next major
step on the process: fiberglassing the deck. With
things finally settling down after thanksgiving and our vacation before, it was
great to get back to the shop for some real work. My immediate goal was to
complete the short list of tasks that needed to be done before the next major
step on the process: fiberglassing the deck.Click here to read more about the final steps leading up to glassing the deck. |
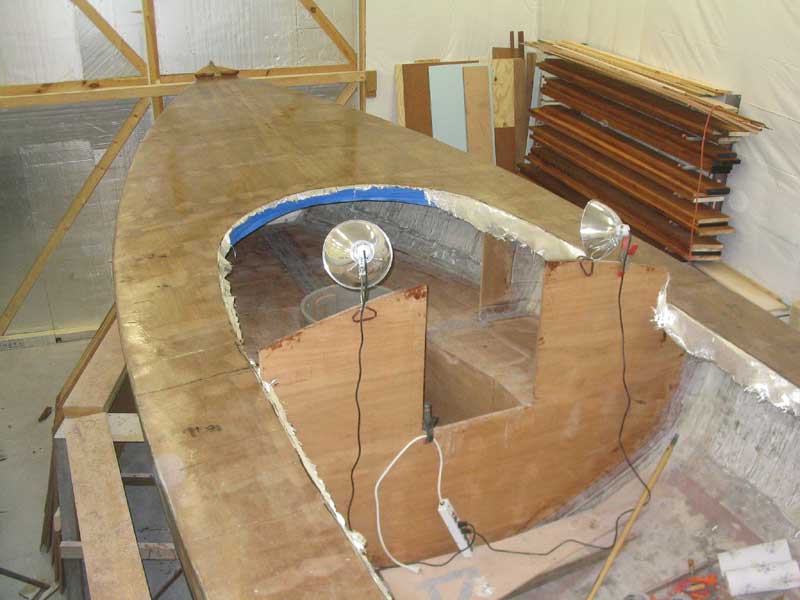
 I
also worked on the interior, roughing in the plywood platforms that formed the
tops of the settees and v-berths, and installing access hatches in the new
platforms. As of this writing, the new platforms were awaiting permanent
installation, which you can read about next week. I
also worked on the interior, roughing in the plywood platforms that formed the
tops of the settees and v-berths, and installing access hatches in the new
platforms. As of this writing, the new platforms were awaiting permanent
installation, which you can read about next week. |
|
Log for the Week Ending December 12, 2004
|
 Although
fiberglassing and the necessary preparations consumed most of the time I had
available for shop work, I also completed additional work on the new settees and
V-berth, as I closed in on their ultimate completion. Although
fiberglassing and the necessary preparations consumed most of the time I had
available for shop work, I also completed additional work on the new settees and
V-berth, as I closed in on their ultimate completion. |
 I
must be getting serious about finishing this boat, because on Friday (during
about the busiest portion of the fiberglassing process, of course) I received a
large shipment of marine plywood and mahogany needed to build the cockpit, cabin
trunk, remaining interior structures, and trim work. A full wood rack is
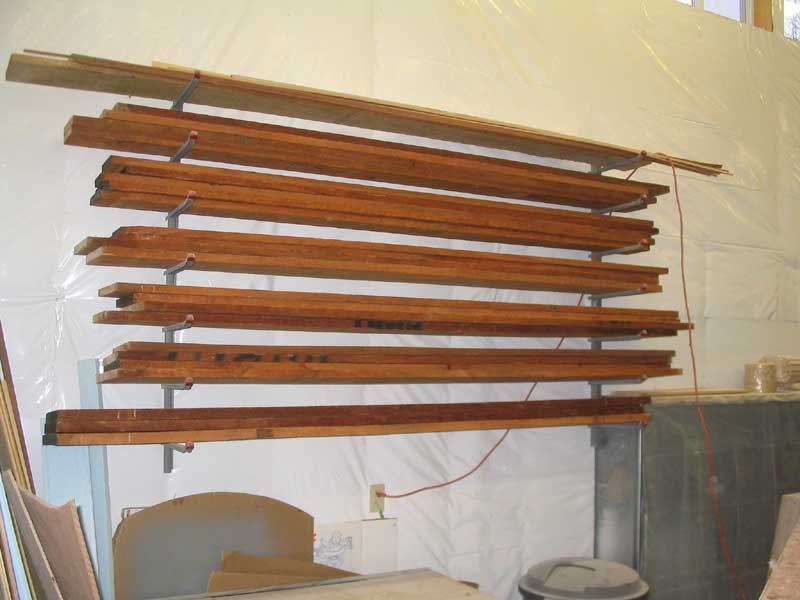
always a good sign! I
must be getting serious about finishing this boat, because on Friday (during
about the busiest portion of the fiberglassing process, of course) I received a
large shipment of marine plywood and mahogany needed to build the cockpit, cabin
trunk, remaining interior structures, and trim work. A full wood rack is
always a good sign! |
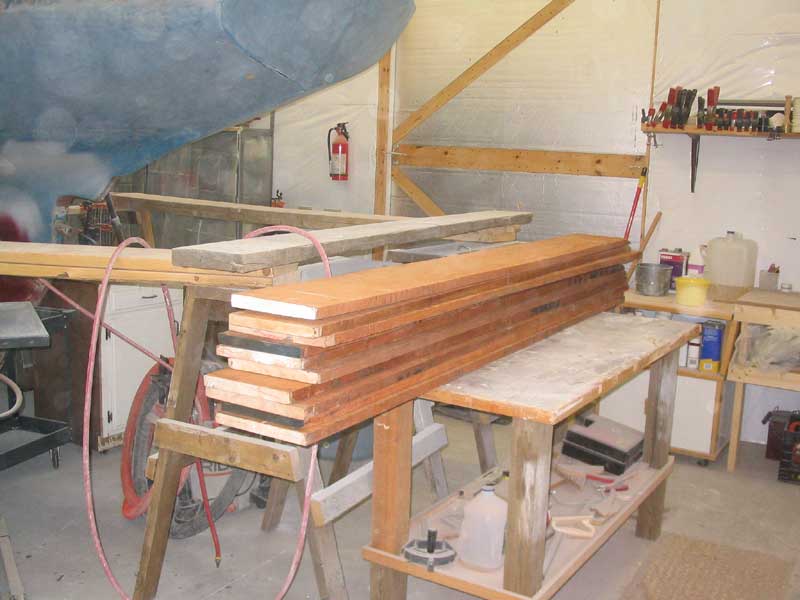
 Included
with the shipment were some very long, wide boards that I ordered to make the
cockpit coamings and portions of the cabin trunk. These boards are about
12" wide and over 17 feet long; planing promises to be a challenge. Included
with the shipment were some very long, wide boards that I ordered to make the
cockpit coamings and portions of the cabin trunk. These boards are about
12" wide and over 17 feet long; planing promises to be a challenge.Looks like there just might be some more action in the weeks ahead. See you next Sunday!
|
|
Log for the Week Ending December 19, 2004 Monday, I dove right into work with an unsavory task: planing out some of the rough mahogany boards I had received Friday. However, I simply couldn't justify putting off the job: I needed the wood to continue with work on the boat.
|
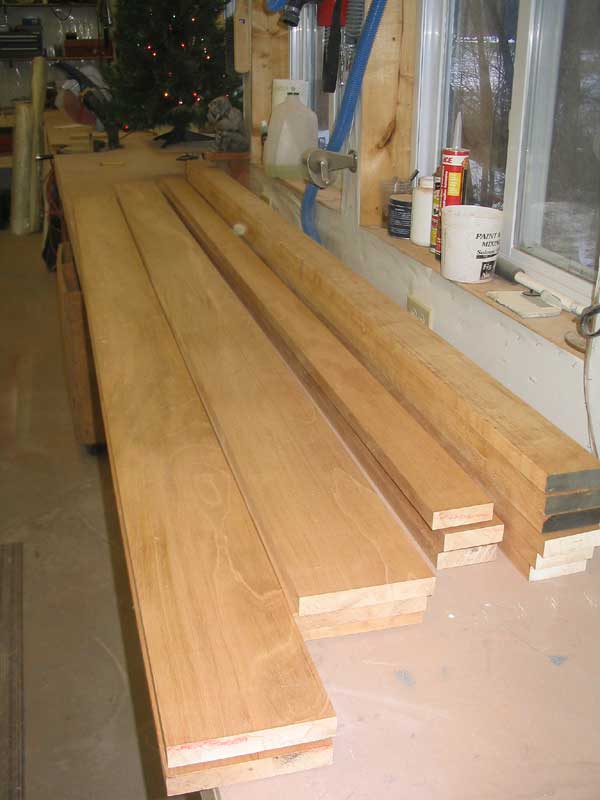
 Whining
aside, I managed, over a period of about 2.5 hours of constant shuffling, to
plane all 10 boards down to a consistent 7/8" thickness, and smooth on both
sides. Since two or three of the original boards were nearly 1-1/4" in the
rough, and the others about 1-1/8", this process left sheer mountains of planer
chips and clouds of dust behind. After filling three empty trash cans to
the brim with the chips, I cleaned the whole shop and blew the dust off the
walls, light fixtures, boats, and other areas it had invaded. Then, I set
up to cut one straight edge on each board, using a long straightedge made from a
piece of plywood and my circular saw. Whining
aside, I managed, over a period of about 2.5 hours of constant shuffling, to
plane all 10 boards down to a consistent 7/8" thickness, and smooth on both
sides. Since two or three of the original boards were nearly 1-1/4" in the
rough, and the others about 1-1/8", this process left sheer mountains of planer
chips and clouds of dust behind. After filling three empty trash cans to
the brim with the chips, I cleaned the whole shop and blew the dust off the
walls, light fixtures, boats, and other areas it had invaded. Then, I set
up to cut one straight edge on each board, using a long straightedge made from a
piece of plywood and my circular saw. |
|
|
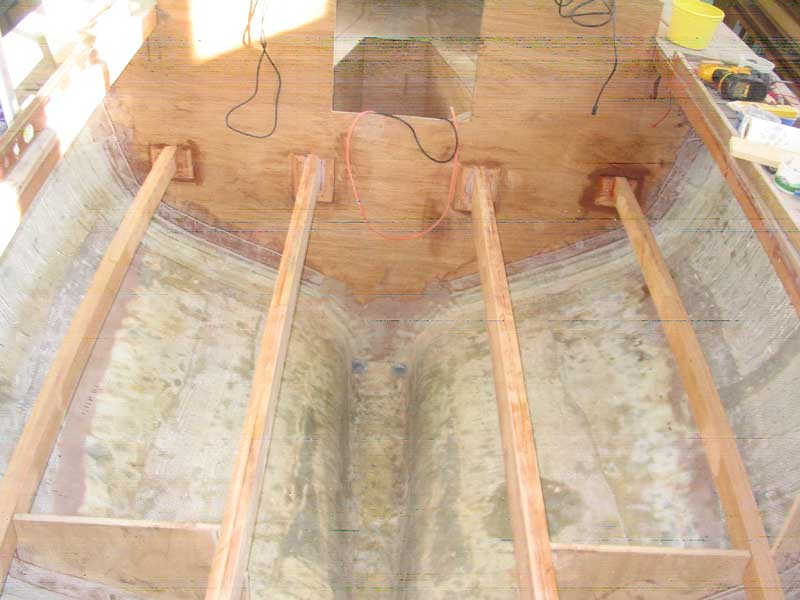
 With
the prepwork out of the way, I could finally begin milling some of the pieces
into the sizes needed for the cockpit structure. I needed two longitudinal
laminated supports a foot or two off the centerline, plus two additional
laminated supports--curved to match the shape of the deck and carlins above--for
the outer edges of the cockpit sole. Since I didn't wish to
install supports and bracing to the hull beneath the cockpit, I planned on some
rather deep laminated beams for the center supports--5.5", with 2, 7/8"
laminations--and 2-3" deep boards to make up the laminated and curved outer
supports. I milled the various pieces needed and set the remaining planed
boards aside for later use. Then, just before the end of the day, I
laminated the two beam blanks needed for the center cockpit beams. With
the prepwork out of the way, I could finally begin milling some of the pieces
into the sizes needed for the cockpit structure. I needed two longitudinal
laminated supports a foot or two off the centerline, plus two additional
laminated supports--curved to match the shape of the deck and carlins above--for
the outer edges of the cockpit sole. Since I didn't wish to
install supports and bracing to the hull beneath the cockpit, I planned on some
rather deep laminated beams for the center supports--5.5", with 2, 7/8"
laminations--and 2-3" deep boards to make up the laminated and curved outer
supports. I milled the various pieces needed and set the remaining planed
boards aside for later use. Then, just before the end of the day, I
laminated the two beam blanks needed for the center cockpit beams.Click here for more detail on the cockpit structure construction. |
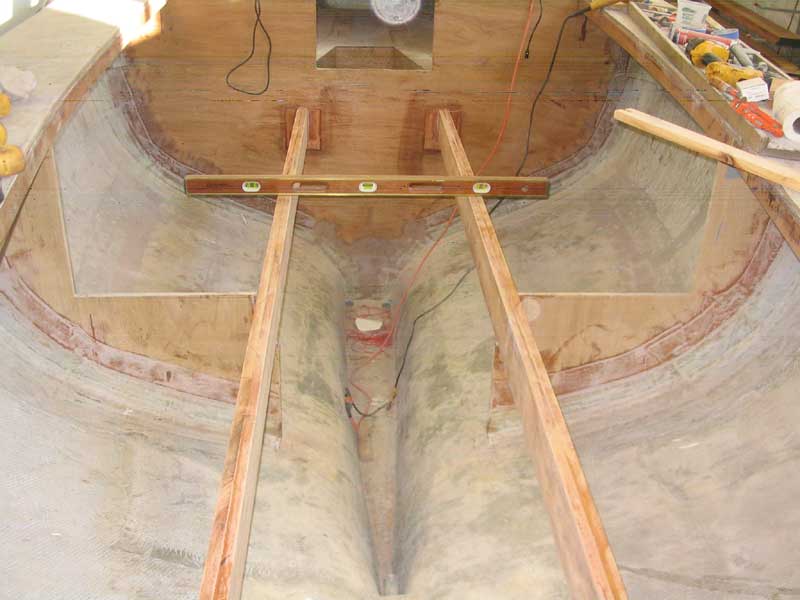 Tuesday, I continued with the cockpit. Over
the course of the morning, I cut, fit, and installed the two new longitudinal
beams. Then, I moved on to the edge beams and, by the end of the day, had
glued up the two beams necessary. Tuesday, I continued with the cockpit. Over
the course of the morning, I cut, fit, and installed the two new longitudinal
beams. Then, I moved on to the edge beams and, by the end of the day, had
glued up the two beams necessary. |
 Wednesday
I removed the two curved edge beams from the clamps and repeated the preparation
and installation process that I did the day before with the centerline beams,
though the cuts on the after ends of the edge beams were somewhat more
difficult. By the end of the day, I had epoxied the beams in place and
left them to cure overnight. Thursday was a more abbreviated day in the
shop, as I had some other obligations, but I managed to spend a few hours
tabbing all the beams in place with biaxial tape and epoxy--a step I really
wanted to make so that I could grind the new tabbing Friday and be ready for
installation of the cockpit sole. Wednesday
I removed the two curved edge beams from the clamps and repeated the preparation
and installation process that I did the day before with the centerline beams,
though the cuts on the after ends of the edge beams were somewhat more
difficult. By the end of the day, I had epoxied the beams in place and
left them to cure overnight. Thursday was a more abbreviated day in the
shop, as I had some other obligations, but I managed to spend a few hours
tabbing all the beams in place with biaxial tape and epoxy--a step I really
wanted to make so that I could grind the new tabbing Friday and be ready for
installation of the cockpit sole. |
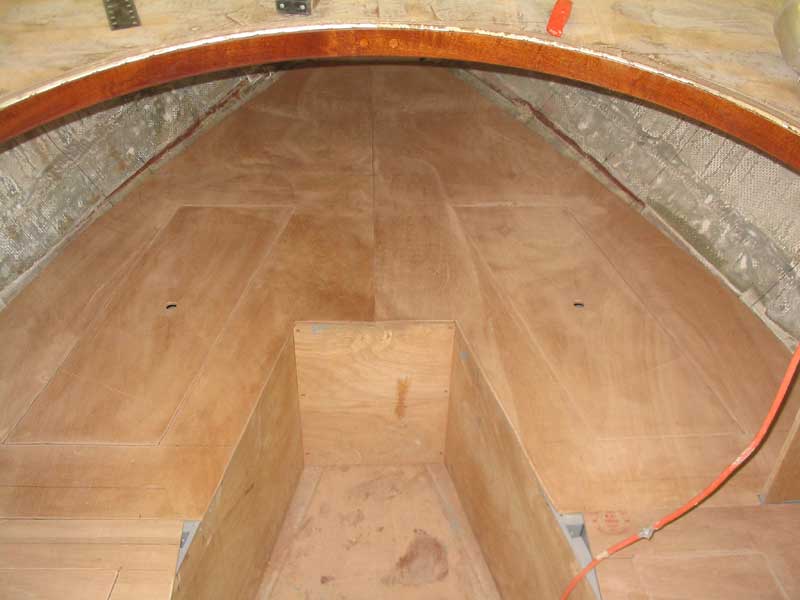
 Friday,
after an hour's worth of grinding on the new tabbing, I prepared to cut and fit
the various pieces of plywood needed for the cabin sole. This took a
surprisingly long time, not the least of which was because the plywood was so
heavy it seemed to have been made of lead. Friday,
after an hour's worth of grinding on the new tabbing, I prepared to cut and fit
the various pieces of plywood needed for the cabin sole. This took a
surprisingly long time, not the least of which was because the plywood was so
heavy it seemed to have been made of lead. |
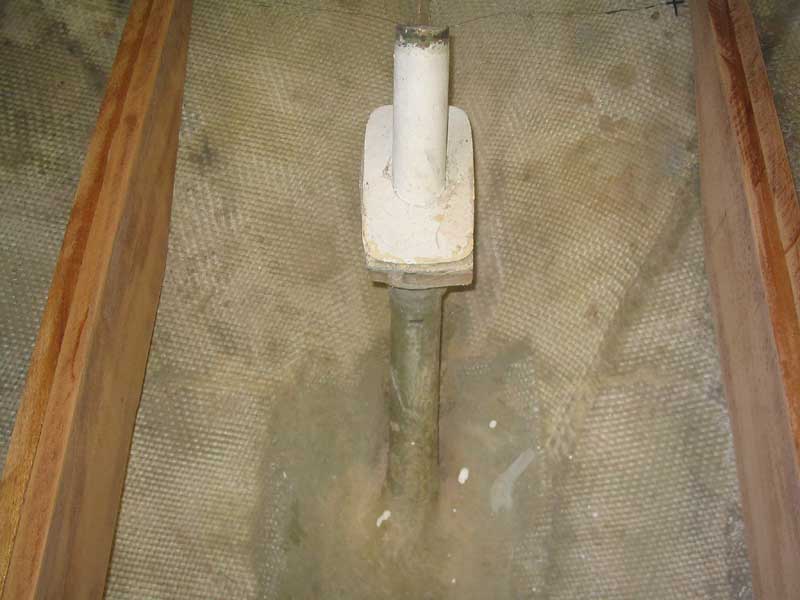 I
also completed a couple smaller tasks during the week. Once I had the
first of the cockpit support beams installed, I had no further need for the
small bit of the original cockpit platform that had been fiberglassed to the
rudder tube. This small bit of the original boat had remained in place; I
left it simply to provide me with a useful reference as to the original cockpit
sole height. I
also completed a couple smaller tasks during the week. Once I had the
first of the cockpit support beams installed, I had no further need for the
small bit of the original cockpit platform that had been fiberglassed to the
rudder tube. This small bit of the original boat had remained in place; I
left it simply to provide me with a useful reference as to the original cockpit
sole height. |
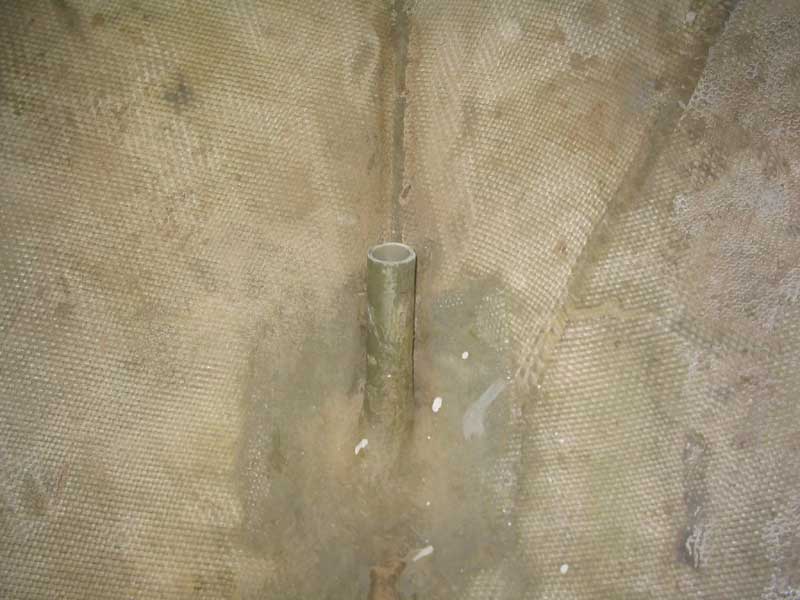 But
with the beams installed permanently, I could finally cut off the excess tube.
Later, I'd glass on a new length of tube to extend it to the new level required. But
with the beams installed permanently, I could finally cut off the excess tube.
Later, I'd glass on a new length of tube to extend it to the new level required. |
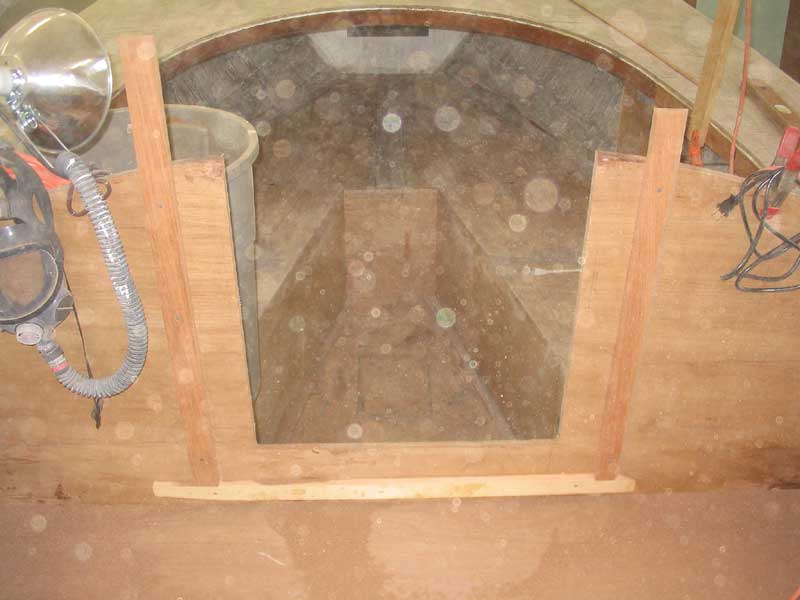
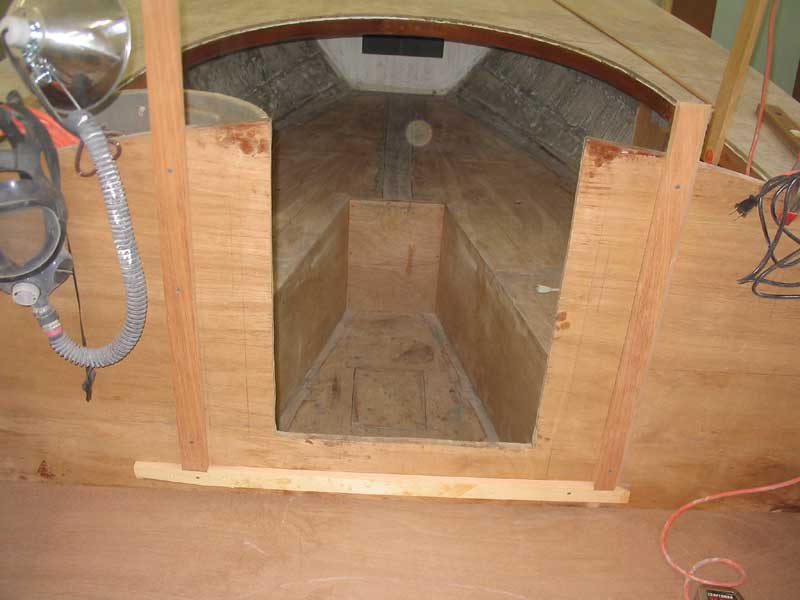 I
also decided to go ahead and enlarge the companionway opening in the amidships
bulkhead. Much earlier, I had cut a temporary opening that was a bit
smaller than the one I eventually planned. Since I had my big router out
for part of the cockpit sole job, I decided to install some cleats alongside the
rough opening and use the router to cut a new, clean opening. I
also decided to go ahead and enlarge the companionway opening in the amidships
bulkhead. Much earlier, I had cut a temporary opening that was a bit
smaller than the one I eventually planned. Since I had my big router out
for part of the cockpit sole job, I decided to install some cleats alongside the
rough opening and use the router to cut a new, clean opening. |
 Thus endeth the week. |
|
Log for the Week Ending December 26, 2004 Merry Christmas! Now that the three pieces comprising the cockpit sole were in place and cut to fit, my next step was to prepare them--and the surrounding boat--for their final installation. I moved a little slowly at this stage, as I didn't want to forge ahead and regret some lack of access or another in the coming days and weeks, so I carefully thought through each stage of the process that I was anticipating. However, I needed to get the pieces installed, as several deck-related projects hung in the balance until I could get the cockpit sides installed. |
 Before
I could think about installing the cockpit side pieces, I had to permanently
install the cockpit sole. Before I could do that, I needed to be sure that
I would have adequate access to the bilge area beneath the cockpit for all
future tasks. This area would also be where the engine is installed, and
the access needed to be adequate enough for its installation and maintenance.
Therefore, my first step was to concentrate on how and where to locate the
access hatches. Obviously, I didn't care to make a mistake at this point
and either box myself in (or, more specifically, out), or make some future job
more difficult or, worse, make an incorrect cut on the plywood sole that I might
need to repair later. Before
I could think about installing the cockpit side pieces, I had to permanently
install the cockpit sole. Before I could do that, I needed to be sure that
I would have adequate access to the bilge area beneath the cockpit for all
future tasks. This area would also be where the engine is installed, and
the access needed to be adequate enough for its installation and maintenance.
Therefore, my first step was to concentrate on how and where to locate the
access hatches. Obviously, I didn't care to make a mistake at this point
and either box myself in (or, more specifically, out), or make some future job
more difficult or, worse, make an incorrect cut on the plywood sole that I might
need to repair later. |
|
After the hatches were cut, I decided to go ahead and install a platform to secure the eventual fuel tank and batteries. I researched the tank options in a catalog, and found one of appropriate size and shape. With these measurements, as well as the basic measurements of two battery boxes, I could cut and install a plywood platform for the tank and batteries. |
|
I had anticipated getting significant work done during the week, but on Monday and Tuesday I found myself waylaid with a miserable cold/flu virus type thing. I rarely get sick to the point that I cannot function, but this was one of those times. After a full day of misery and rest on Monday, I had high hopes for Tuesday...but, unfortunately, I simply couldn't face working in the shop on Tuesday, either; despite feeling better early in the morning, my condition deteriorated and I felt miserable once more. What a waste of a couple good days. |
|
Wednesday, although I was still far from the picture of perfect health, I could finally get back to work. I began by working on the rudder tube, which needed to be extended from its present height. Some fiberglass tubing I had ordered arrived late Tuesday, so I set right to it. |
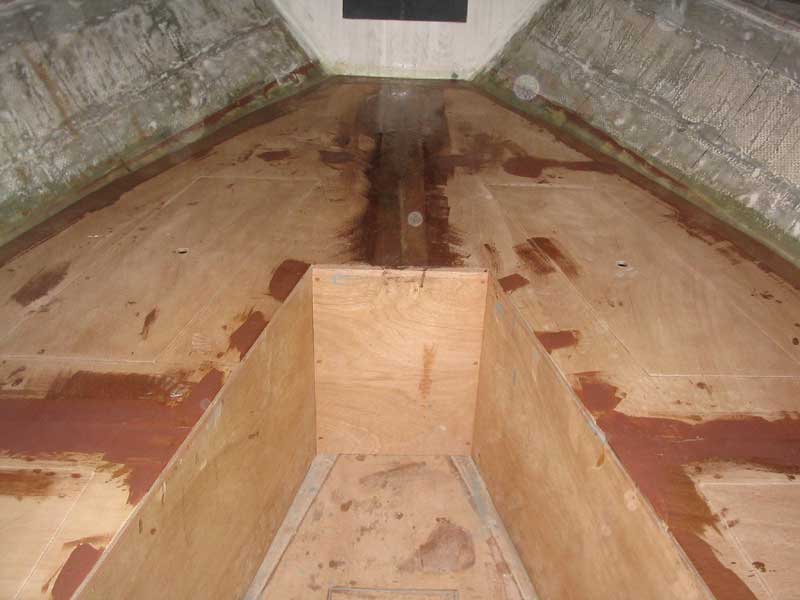
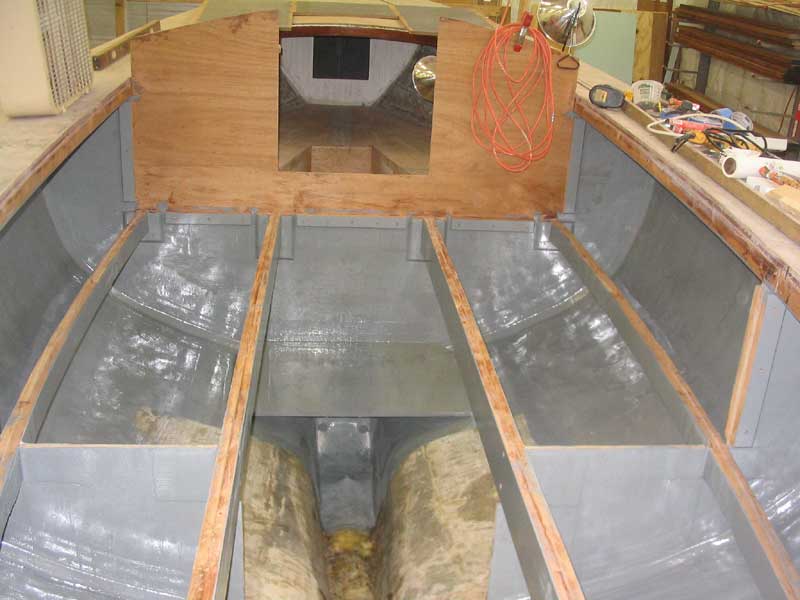 With the rudder tube glassed in place, I continued by beginning to paint out the
inside of the hull and the remaining structural members, including the
bulkheads, bottoms of the deck beams, and the cockpit support beams. The
process was more challenging than I had anticipated, partly because at the
time I was armed with only a puny 3/16" nap paint roller--far too fine for
adequate rolling onto the fiberglass hull--so before I was even
halfway done--having completed only the sections aft of the aftermost
bulkheads--the paint fumes were so strong that I had to call it quits for a
while. I returned the next day with a fluffier roller cover (3/4" nap) and finished off the painting
(wearing a respirator this time) that needed
to be done before I could install the cockpit sole, which was the main issue at
hand. Obviously I had only thought I was feeling better on
Wednesday, but my poor performance at work that day would seem to indicate
otherwise. With the rudder tube glassed in place, I continued by beginning to paint out the
inside of the hull and the remaining structural members, including the
bulkheads, bottoms of the deck beams, and the cockpit support beams. The
process was more challenging than I had anticipated, partly because at the
time I was armed with only a puny 3/16" nap paint roller--far too fine for
adequate rolling onto the fiberglass hull--so before I was even
halfway done--having completed only the sections aft of the aftermost
bulkheads--the paint fumes were so strong that I had to call it quits for a
while. I returned the next day with a fluffier roller cover (3/4" nap) and finished off the painting
(wearing a respirator this time) that needed
to be done before I could install the cockpit sole, which was the main issue at
hand. Obviously I had only thought I was feeling better on
Wednesday, but my poor performance at work that day would seem to indicate
otherwise. |
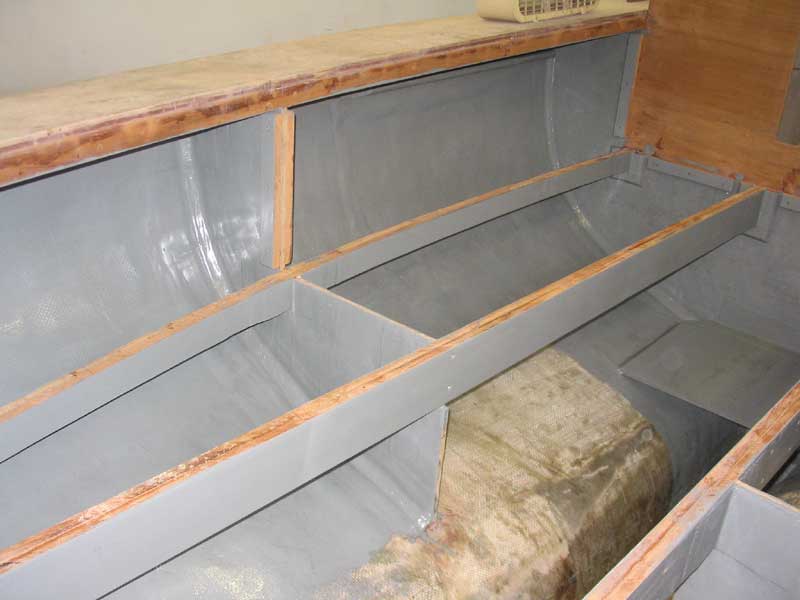 For
now, I left some areas unpainted, most notably the center portion of the bilge
in way of the eventual engine foundations, where additional fiberglass work
would be required. However, all of these areas would be able to be easily
reached even after the cockpit sole was permanently attached. For
now, I left some areas unpainted, most notably the center portion of the bilge
in way of the eventual engine foundations, where additional fiberglass work
would be required. However, all of these areas would be able to be easily
reached even after the cockpit sole was permanently attached.As it turned out, the nasty virus dogged me for the remainder of the week, but fortunately to a lesser extent than Monday and Tuesday. Thursday marked the 2nd anniversary of the boat's trip home to Maine. She's come a long way since then. And just last year at this time she was only an empty hull, with nothing inside whatsoever. Now the major structural work is nearly complete, though ultimate completion of the boat is still much work ahead. 2005, here we come!
|