Phase 3: Finish
Work
|
Shop Home
Page
Shop
Planning
Phase 1: Site Prep and Foundation
Phase 2: Framing
Phase 3: Finish Work
Phase 4: Shop Setup |
|
Bath and Utility
 I planned a small bathroom
(1/2 bath only; I rejected my own initial idea for a
shower as well), with flush and slop sink, and a larger
utility/storage room next door. The design (if you
can call my sketch that) called for these two spaces to
be squeezed into the area between the office and the
back of boat bay 2 (the eastern bay, or the one on the
right as you face the front of the building). On
paper, there seemed to be sufficient room available, and
based on this plan we installed plumbing stacks for the
flush and sink drains beneath the concrete slab. I planned a small bathroom
(1/2 bath only; I rejected my own initial idea for a
shower as well), with flush and slop sink, and a larger
utility/storage room next door. The design (if you
can call my sketch that) called for these two spaces to
be squeezed into the area between the office and the
back of boat bay 2 (the eastern bay, or the one on the
right as you face the front of the building). On
paper, there seemed to be sufficient room available, and
based on this plan we installed plumbing stacks for the
flush and sink drains beneath the concrete slab. |
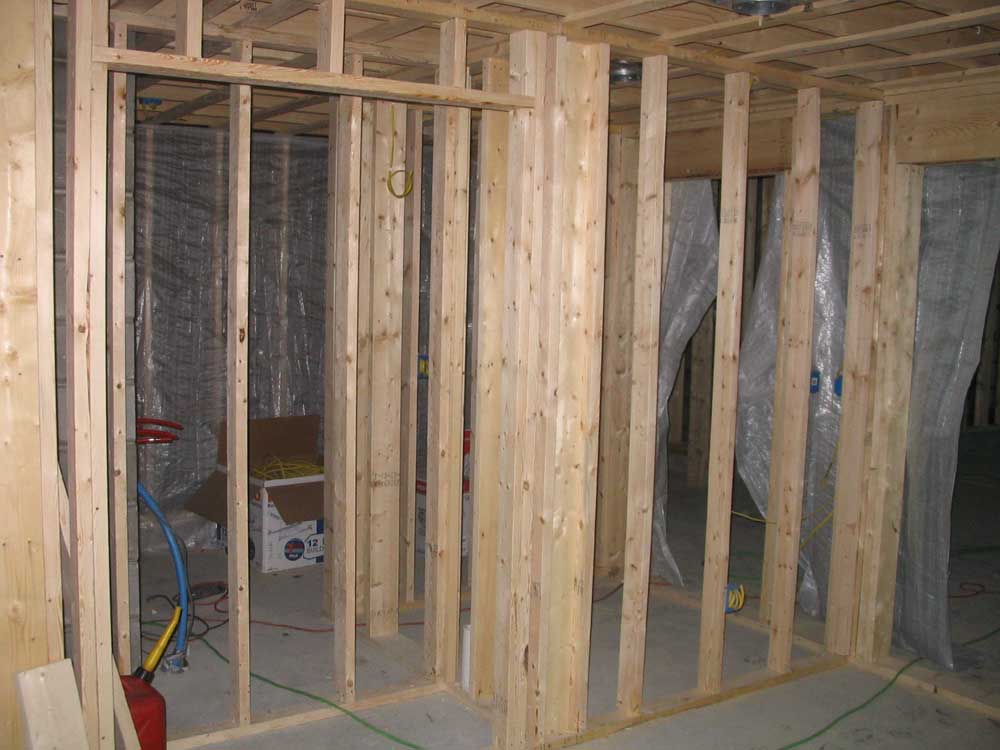
 Later in the process, when Bob framed up the walls
defining these areas, he noticed a problem: there
wasn't enough room in the bathroom. A compounding
of errors resulting from the initial drawing's lack of
proper detail and the lack of accommodation for
thicknesses of walls led to the need to move the
shop-side office wall a couple feet outward, thereby
increasing the space available in the bathroom to make
it usable. This also increased the size of the
office--not a bad thing--but decreased the size of the
woodshop, which was already feeling tight.
However, it was a necessary change, and highlighted the
need for excess care in planning and conception.
There would still be sufficient room in the woodshop,
but the wall location change dictated a change in the
planned table saw orientation. Later in the process, when Bob framed up the walls
defining these areas, he noticed a problem: there
wasn't enough room in the bathroom. A compounding
of errors resulting from the initial drawing's lack of
proper detail and the lack of accommodation for
thicknesses of walls led to the need to move the
shop-side office wall a couple feet outward, thereby
increasing the space available in the bathroom to make
it usable. This also increased the size of the
office--not a bad thing--but decreased the size of the
woodshop, which was already feeling tight.
However, it was a necessary change, and highlighted the
need for excess care in planning and conception.
There would still be sufficient room in the woodshop,
but the wall location change dictated a change in the
planned table saw orientation.
During the early stages of
the foundation project, I had specified the location for
a conduit through which to run the table saw wiring.
Once the concrete was poured, this became a permanent
fixture, of course. For one reason or another, I
had become used to a table saw facing "right", as it
were; that is, with the outfeed of the table towards the
righthand side of any shop. All my various shop
iterations had featured the saw in this orientation, and
I had simply planned on it the same way in the new shop.
The change in the wall
location, however, seemed to favor a saw running the
opposite direction, which would allow more space for the
outfeed table, given the complications of the office
wall and staircase on the other side. This was
fine, and the wiring location in the center of the floor
allowed for this change without issue. (Later,
after some additional changes to the stairs, I realized
that I could align the saw in the manner to which I was
used.) |
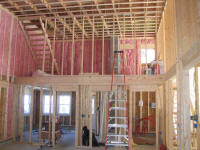
Also complicating the entire layout, and which I had not
completely anticipated, was the construction of the
stairs leading to a second floor area directly above the
office, bath, and utility rooms. The need to keep
the stairs as small and out-of-the-way as possible was
causing Bob heartburn, I think, but we came to an
acceptable plan after some figuring. This plan was
to change yet again--and finally--some time later. |
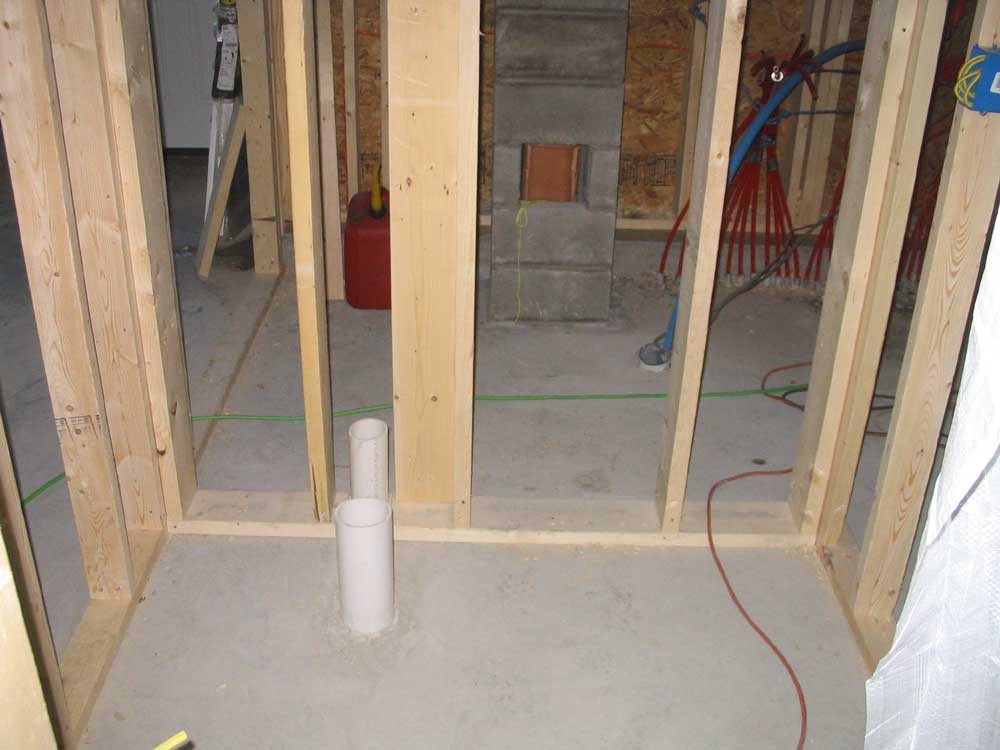
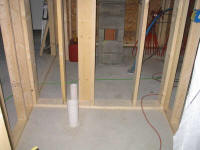
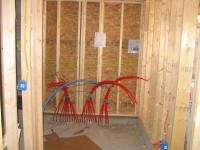
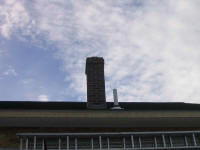 Before
insulation, I had to install a plumbing stack through
the walls. After some consideration, I determined
a viable route for the vent stack, leading straight up
from the vent/drain stubout in the bathroom wall, over
the closet ceiling, and straight up through the exterior
wall to the roof, just next to the chimney. After
drilling a large hole through the double top plate, I
dry-installed the top section of the vent pipe so that I
could locate the hole on the roof above; then, I drilled
through the roof from inside. From a ladder
outside, I installed the metal and rubber vent seal, and
pushed the pipe up from inside to hold it temporarily
while I laid out the remaining sections of the vent
stack. Before
insulation, I had to install a plumbing stack through
the walls. After some consideration, I determined
a viable route for the vent stack, leading straight up
from the vent/drain stubout in the bathroom wall, over
the closet ceiling, and straight up through the exterior
wall to the roof, just next to the chimney. After
drilling a large hole through the double top plate, I
dry-installed the top section of the vent pipe so that I
could locate the hole on the roof above; then, I drilled
through the roof from inside. From a ladder
outside, I installed the metal and rubber vent seal, and
pushed the pipe up from inside to hold it temporarily
while I laid out the remaining sections of the vent
stack. |
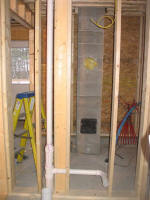 I
cut and fit the remaining pipe sections dry, then
disassembled everything and glued up the pipes using a
cold-temperature PVC glue, since it was barely in the
teens. I also installed the drain stubout for the
bathroom utility sink. I
cut and fit the remaining pipe sections dry, then
disassembled everything and glued up the pipes using a
cold-temperature PVC glue, since it was barely in the
teens. I also installed the drain stubout for the
bathroom utility sink.
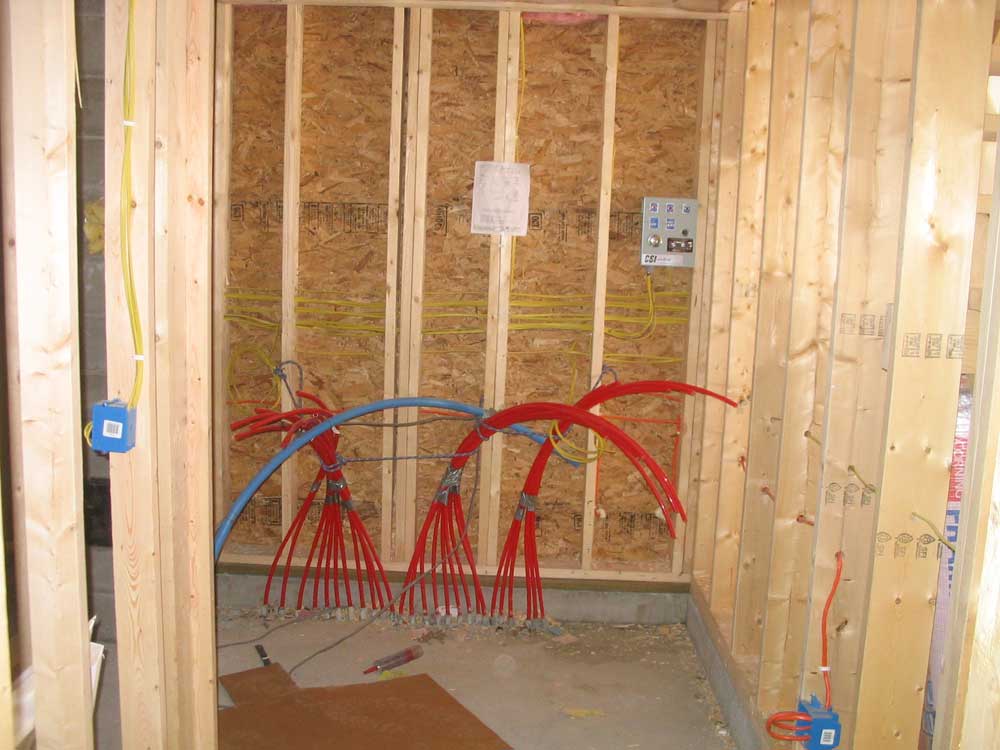
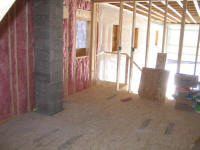
The utility and storage room provided a good place in
which to locate the oil-fed boiler, heating system
manifold, and temporary well tank and controls.
(Later, we'll move the well tank to the house basement,
but that's in the future.) In whatever space
remains following these critical installations, I
planned to install plenty of dedicated storage. I
also planned to install a yet-to-be-purchased air
compressor in this space, to isolate it as much as
possible from the remainder of the shop. |
|
|
|
|
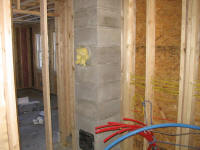
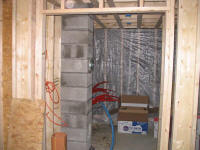 Of course, the boiler required a chimney--either that or
a power vent (which directly vents the combustion gasses
out through the sidewall), which I decided to avoid
after some discussions with Bob and others with more
experience in this area than I. The chimney, 16"
square, needed to be built in the utility space--a chore
that Bob took care of invisibly one Sunday, building the
basic masonry chimney all the way to roof height inside
the building. A couple weeks later, on a warm
Friday, he finished up the chimney above the roofline,
this time with bricks. Of course, the boiler required a chimney--either that or
a power vent (which directly vents the combustion gasses
out through the sidewall), which I decided to avoid
after some discussions with Bob and others with more
experience in this area than I. The chimney, 16"
square, needed to be built in the utility space--a chore
that Bob took care of invisibly one Sunday, building the
basic masonry chimney all the way to roof height inside
the building. A couple weeks later, on a warm
Friday, he finished up the chimney above the roofline,
this time with bricks. |
|


|
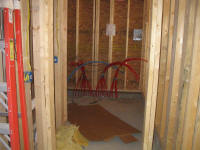
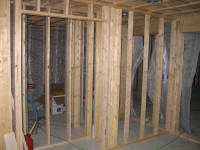 The framing of these
spaces also allowed room for a fairly large storage
closet accessed from the office side, intended for
office supplies and the like. The framing of these
spaces also allowed room for a fairly large storage
closet accessed from the office side, intended for
office supplies and the like.
Next: more detail as
progress dictates. |
|
|
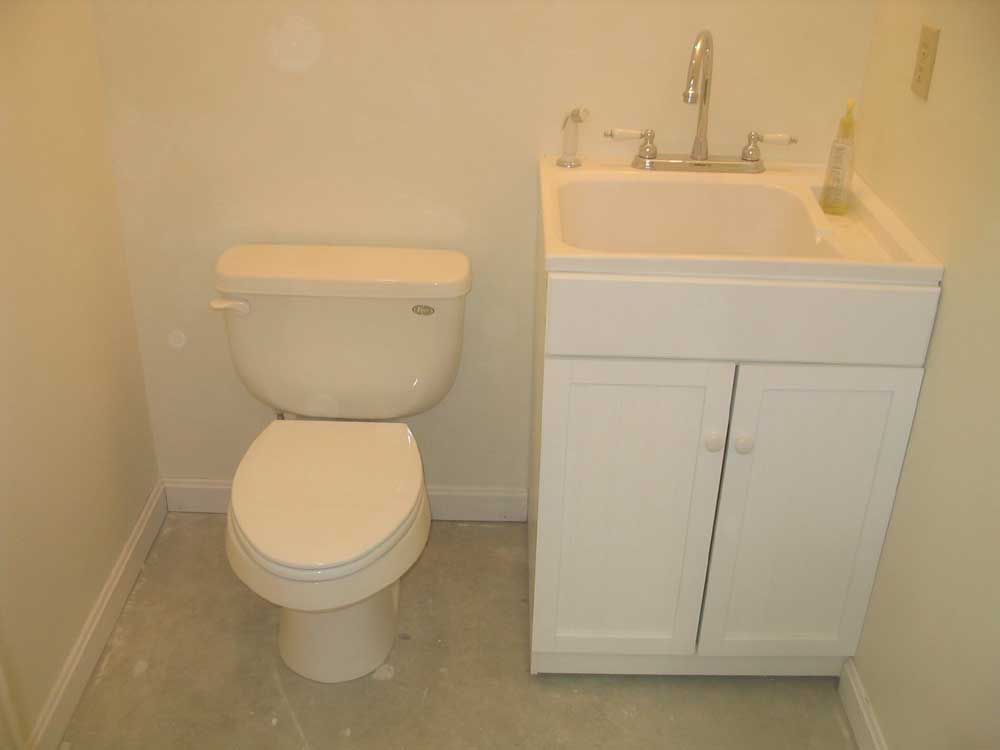
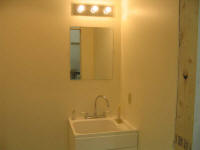 Much
later, I installed drywall in the bathroom (and office),
and finished off these spaces. In the bathroom, I
installed a utility slop sink at one side of the back
wall, complete with overhead light and mirror so that I
could wash paint or Smurf-like sanding dust off my face
if need be. Much
later, I installed drywall in the bathroom (and office),
and finished off these spaces. In the bathroom, I
installed a utility slop sink at one side of the back
wall, complete with overhead light and mirror so that I
could wash paint or Smurf-like sanding dust off my face
if need be. |
Thanks to an installation error by the plumber who
installed the in-slab drain and vent pipes for the
bathroom, I discovered that a typical 12" rough-in
toilet would not work. Instead, I'd need a special
10" rough, which was not immediately available.
Thanks to Bob, I was able to obtain one of these through
the plumber after a couple weeks' delay. But when
I went to install it, I discovered that there were no
closet bolts included (the bolts that secure the toilet
to the flange in the floor). I was surprised, as I
don't recall ever buying these separately for other
toilet installations. Nevertheless, they weren't
there, further delaying the installation until I could
buy some. (Fortunately, there's a plumbing and
heating contractor only a couple miles away, who
maintains a small store filled with some of the plumbing
basics. This small store had already saved me
several other times during the installation of the
heating and plumbing systems, and came to the rescue for
the flange bolts as well, saving me a long trip to
another store.) |
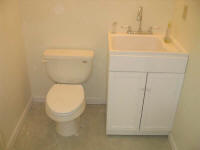 Once
I had the needed parts, I had the toilet installed in no
time. There's a lot to be said for full indoor
plumbing! Once
I had the needed parts, I had the toilet installed in no
time. There's a lot to be said for full indoor
plumbing!The
inside of the bathroom door still required casing and
trim, but otherwise this bathroom was done. |
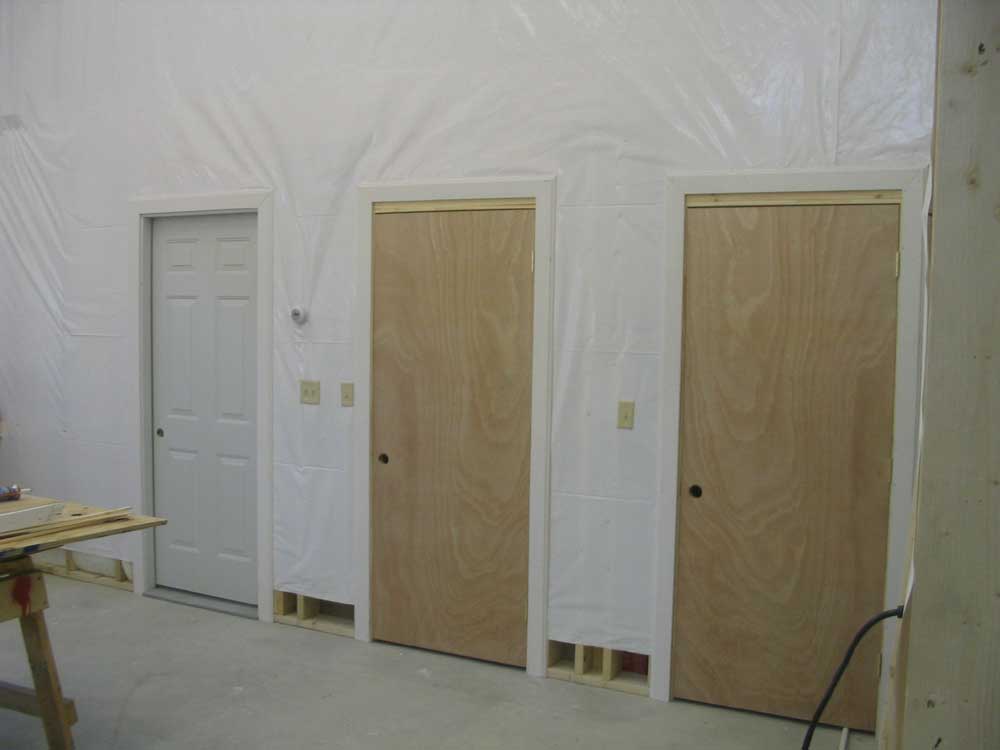
 I
installed a pair of inexpensive lauan hollow core doors,
one each in the bathroom and neighboring utility room.
To save precious space inside these rooms, I installed
the doors so that they would swing out. The rough
openings were several inches taller than the doors I
bought--whether the openings were overly generous or the
doors I bought were too short I don't know, but in any
case I needed to install a filler piece of trim above
the doors after installation. I
installed a pair of inexpensive lauan hollow core doors,
one each in the bathroom and neighboring utility room.
To save precious space inside these rooms, I installed
the doors so that they would swing out. The rough
openings were several inches taller than the doors I
bought--whether the openings were overly generous or the
doors I bought were too short I don't know, but in any
case I needed to install a filler piece of trim above
the doors after installation. |
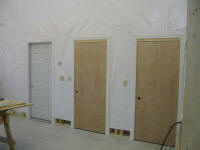 To
keep the door trim for the three doors at the same
height (even though it's just a shop it's still nice to
worry about details), I installed the top trim for the
two lauan doors a bit higher than I might have
otherwise. Since I had erred earlier in purchasing
the incorrect base molding trim for the office, I had on
hand several lengths of the incorrect base trim--and not
enough door casing. So I decided to use the base
molding for door trim around the three shop doors.
It actually looked very nice, and it saved me the
irritation of returning erroneous trim and buying new
trim. To
keep the door trim for the three doors at the same
height (even though it's just a shop it's still nice to
worry about details), I installed the top trim for the
two lauan doors a bit higher than I might have
otherwise. Since I had erred earlier in purchasing
the incorrect base molding trim for the office, I had on
hand several lengths of the incorrect base trim--and not
enough door casing. So I decided to use the base
molding for door trim around the three shop doors.
It actually looked very nice, and it saved me the
irritation of returning erroneous trim and buying new
trim. |
|
|
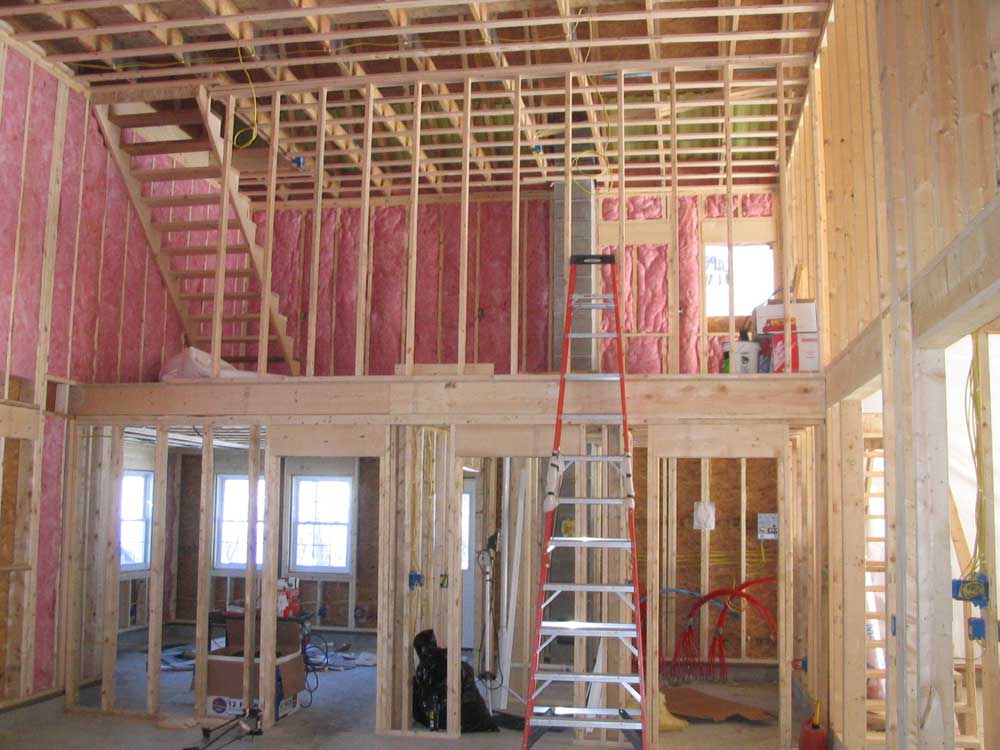
Finishing/Storage Room
 The office, bath, and
utility room framing offered a perfect opportunity to
create a second floor area directly above, since none of
these spaces needed--nor wanted--a full 16' ceiling
height. Originally planned as a 10' wide by 20'
long space, it ended up about 12' wide once the
office/bath/utility room wall was extended outward as
described above. I planned to use this space as a
dedicated paint storage room and dust-free
painting/varnishing area for small parts, an important
addition to any shop. Given the size of the space
as it ultimately came to be, it looked like I'd also
have plenty of room for additional storage areas here as
well. The office, bath, and
utility room framing offered a perfect opportunity to
create a second floor area directly above, since none of
these spaces needed--nor wanted--a full 16' ceiling
height. Originally planned as a 10' wide by 20'
long space, it ended up about 12' wide once the
office/bath/utility room wall was extended outward as
described above. I planned to use this space as a
dedicated paint storage room and dust-free
painting/varnishing area for small parts, an important
addition to any shop. Given the size of the space
as it ultimately came to be, it looked like I'd also
have plenty of room for additional storage areas here as
well. |
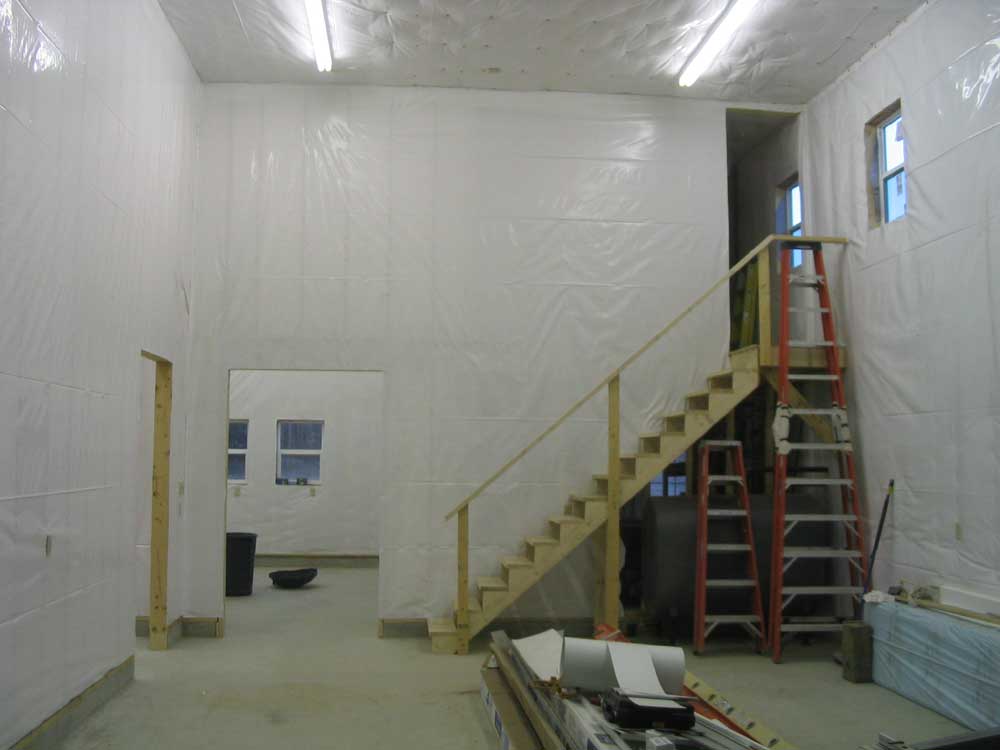
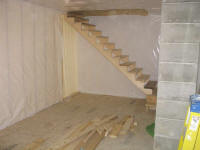
 The
space was defined by the back of the boat bay wall on
one side, exterior walls on two of the sides, and a
final framed wall facing the woodshop. Stairs, one
from the woodshop below and a second leading to the
attic above, were to be installed along the back wall of
the space. The
space was defined by the back of the boat bay wall on
one side, exterior walls on two of the sides, and a
final framed wall facing the woodshop. Stairs, one
from the woodshop below and a second leading to the
attic above, were to be installed along the back wall of
the space.
After much
consideration, head-scratching, and calculation, Bob and
I decided that the original location planned for the
stairs was not going to work. Located at the back
corner of the woodshop, adjacent to the door to the
office, the space was too tight, and building stairs
there would have resulted in one or more of several
unappetizing situations: |
1. The stairs might interfere with the office
door
2. The stair treads might be too narrow or
shallow to allow easy use
3. To avoid #1 and #2, the stairs would have
to extend way too far into the limited shop space
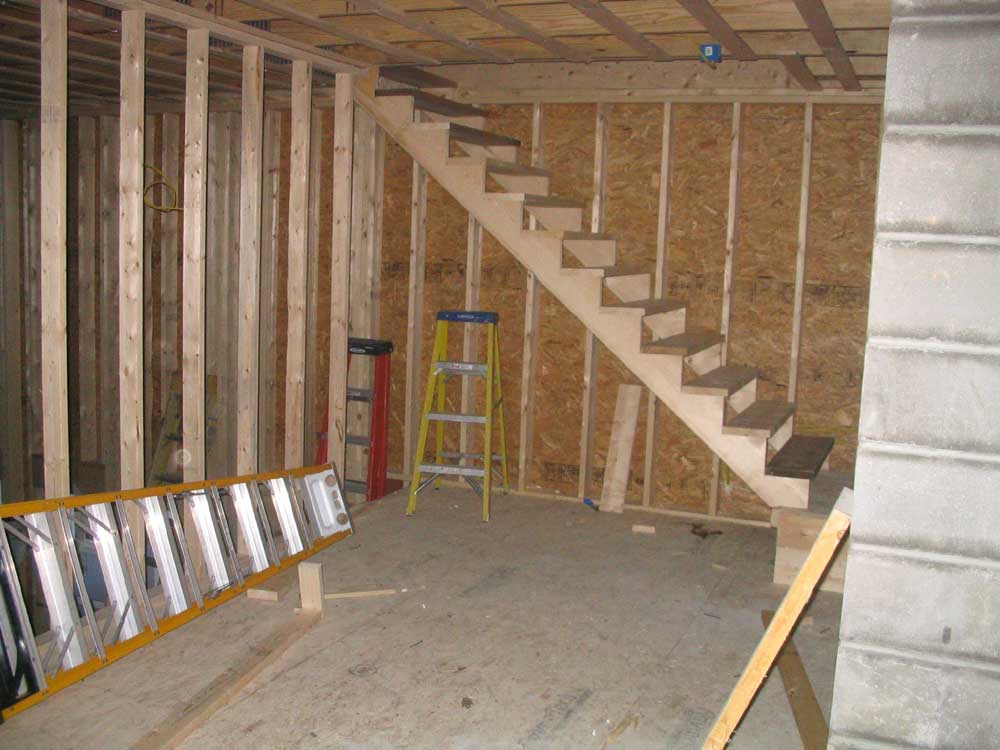
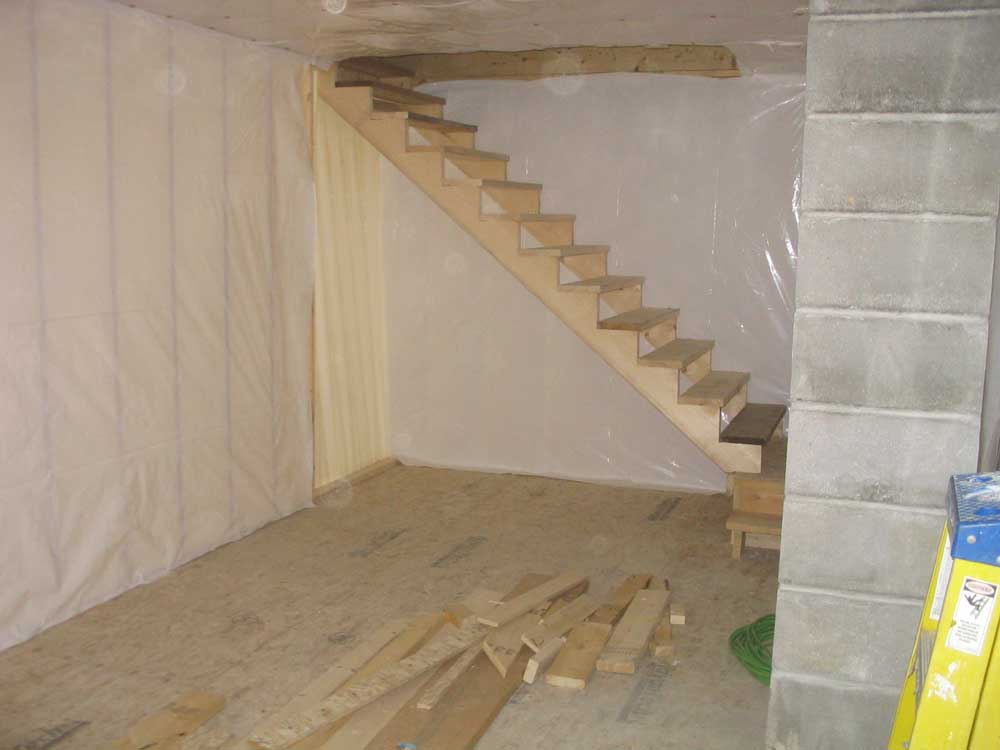
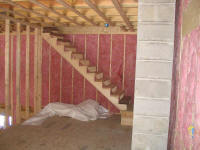
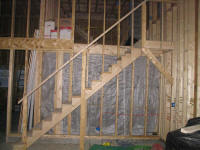 One
morning, after a brief discussion, we decided, seemingly
instantly, to move the stairs to the back wall of boat
bay 2, the eastern bay. Doing this would open up
the space in the woodshop completely, would allow for a
comfortable, safe stairway free from turns and twists,
and would only use up under 36" of space in the bay.
I decided that I could better afford the lost space here
than in the woodshop, and gave the go ahead to build the
stairs. The space beneath the stairs would be
perfect for the fuel oil tank, as well as additional
storage. One
morning, after a brief discussion, we decided, seemingly
instantly, to move the stairs to the back wall of boat
bay 2, the eastern bay. Doing this would open up
the space in the woodshop completely, would allow for a
comfortable, safe stairway free from turns and twists,
and would only use up under 36" of space in the bay.
I decided that I could better afford the lost space here
than in the woodshop, and gave the go ahead to build the
stairs. The space beneath the stairs would be
perfect for the fuel oil tank, as well as additional
storage.
Later, after deciding
to move the stairway, I had to move the switch box and
some of the ceiling wiring in order to make it more
convenient to access from the new stairs--in other
words, completely across the room. |
|
|
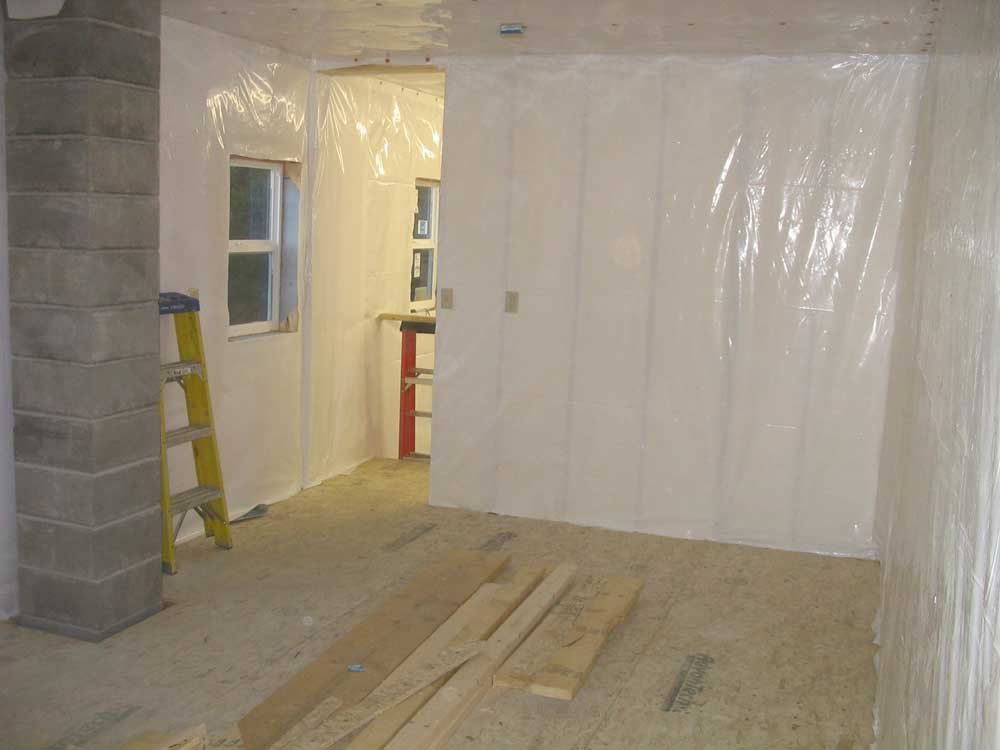
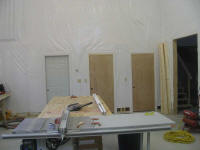
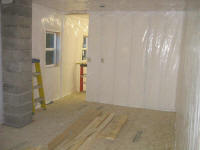
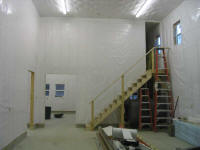
Once the insulation was
complete, I installed white plastic on all the walls in
the finishing room. The insulation guys did the
ceiling and the exterior wall. The plastic defined
the space and set it apart from the remainder of the
shop. |
|
|
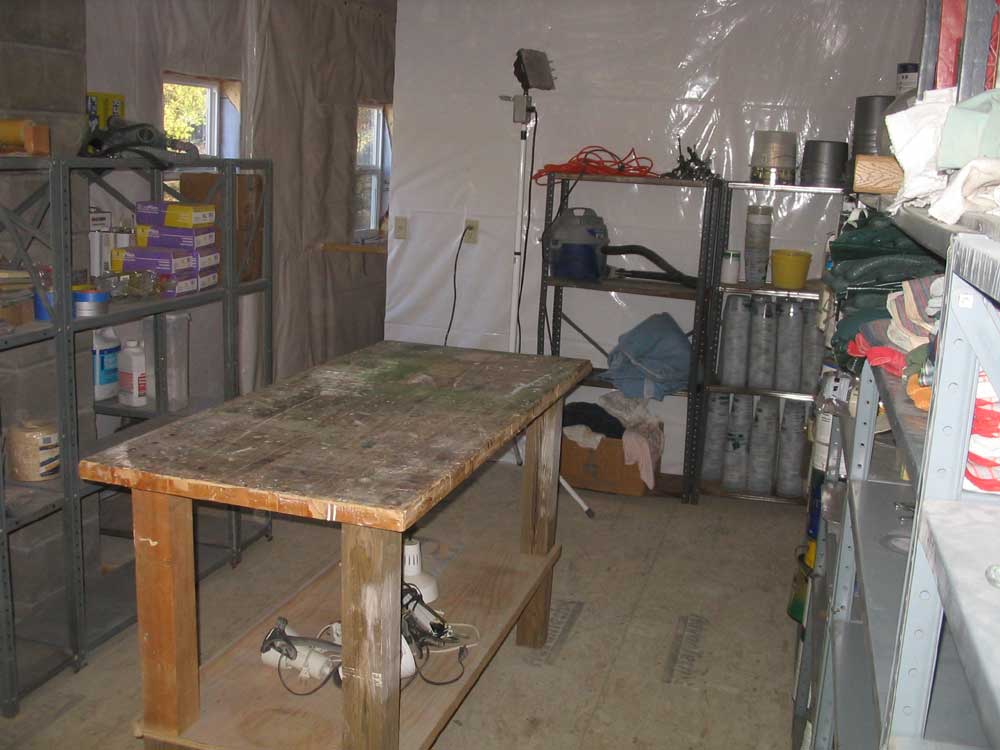
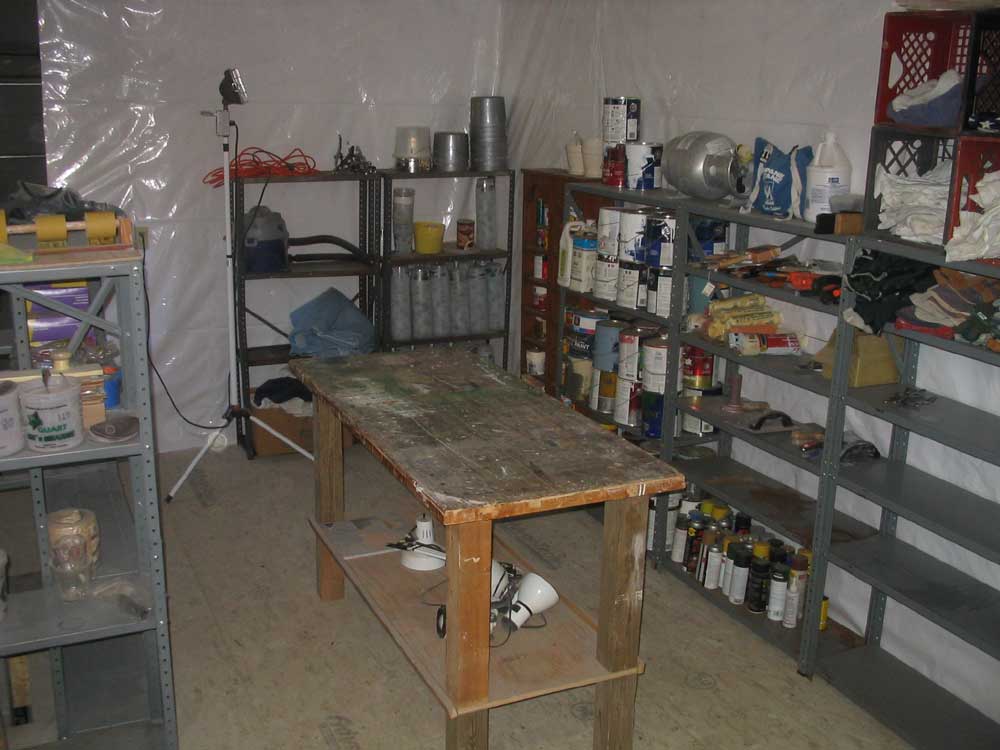
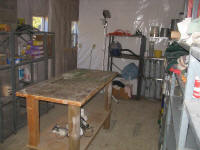
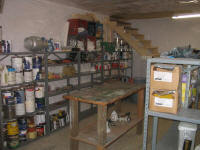
Eventually, I moved
shelving, benches, and supplies from the old shop and
set things up in the new space. Since my
downstairs utility closet ended up so filled with
heating and plumbing equipment, I couldn't store as many
supplies there as hoped, so I set up additional shelving
in the finishing room for not only paint and supplies,
but other bulk storage as well, including sanding
supplies, fiberglass, and other items to come. |
|

|
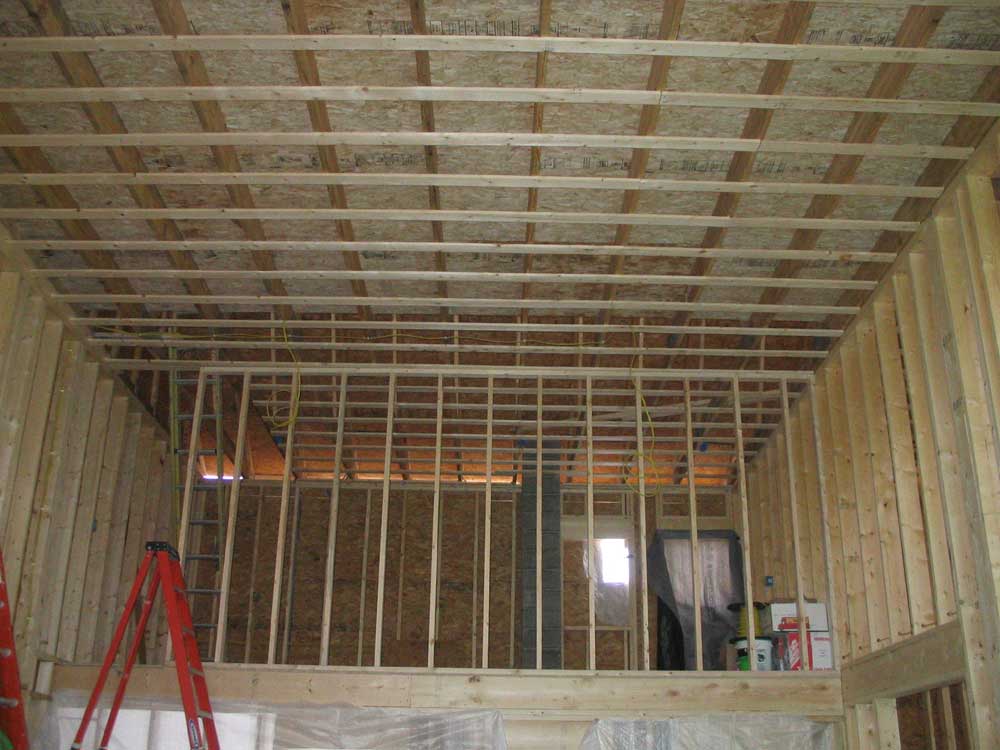
Attic
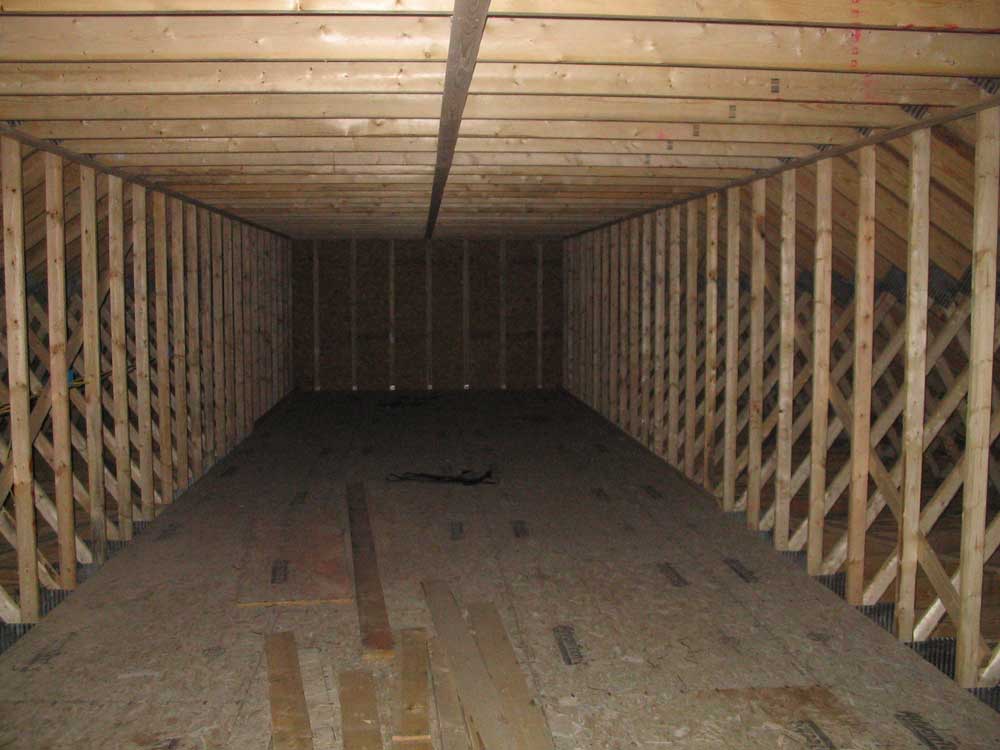
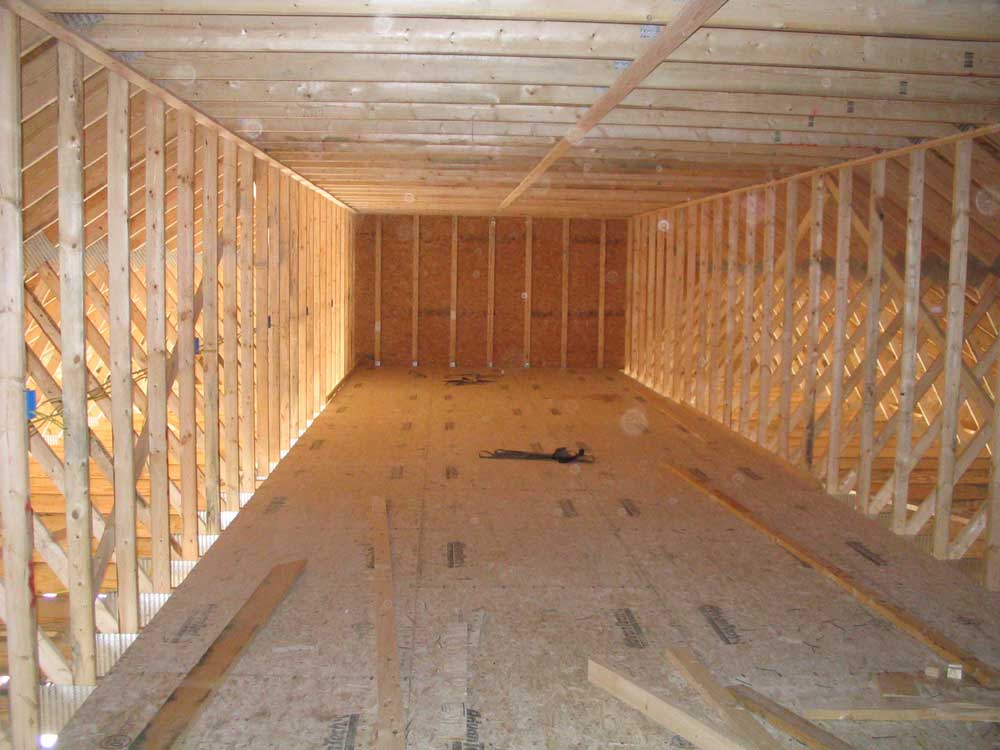
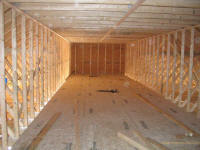
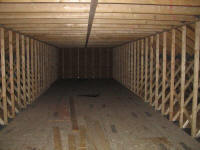 A large opening framed within the roof trusses allowed
for a huge storage space on the third floor. It
was some time after the roof was framed up that I was
able to get up there to see the space, as there was no
easy means of doing so until the floor platform for the
finishing room was completed. Afterwards, the crew
secured a subfloor in the attic (Advantech), and, while
access for the time being was limited to a ladder stuck
through the trusses, the space above was complete--and
impressive in its scope. About 16' wide, 8' high,
and 60' long, the space represented a bonanza of
potential cold storage. This photo was taken from
the back wall looking forward. A large opening framed within the roof trusses allowed
for a huge storage space on the third floor. It
was some time after the roof was framed up that I was
able to get up there to see the space, as there was no
easy means of doing so until the floor platform for the
finishing room was completed. Afterwards, the crew
secured a subfloor in the attic (Advantech), and, while
access for the time being was limited to a ladder stuck
through the trusses, the space above was complete--and
impressive in its scope. About 16' wide, 8' high,
and 60' long, the space represented a bonanza of
potential cold storage. This photo was taken from
the back wall looking forward. |
 During the wiring
rough-in, I installed a number of outlet boxes in the
space, which I wired through a switch near the
anticipated stair location. I didn't plan on any
permanent lighting fixtures, but figured with the
outlets, I could easily install a number of portable
lights where needed, and have them switched on easily
upon arrival upstairs. During the wiring
rough-in, I installed a number of outlet boxes in the
space, which I wired through a switch near the
anticipated stair location. I didn't plan on any
permanent lighting fixtures, but figured with the
outlets, I could easily install a number of portable
lights where needed, and have them switched on easily
upon arrival upstairs. |
Click here to continue... |
This page was originally
posted on December 22, 2005.
|
Updates |
12/26/05 |
| |
12/30/05 |
|
1/1/06 |
|
1/8/06 |
|
2/23/06 |
|
|