Phase 4: Shop Setup
The opportunity to set up a
new shop, fine-tuning setups and correcting mistakes from
past shops, is always fun. In this case, I had been
pleased overall with the way my "old" shop, located at the
back end of my old shop building, had worked and, with a
similar layout to work with here, I planned to keep things
more or less in the same configuration. |
Shop Home
Page
Shop
Planning
Phase 1: Site Prep and Foundation
Phase 2: Framing
Phase 3: Finish Work
Phase 4: Shop Setup |
However, I planned a few changes. First of all, I
had a rectangular space that was about 28' long and 20'
wide, all dedicated to the workshop; in the old setup, I
had a similarly-sized overall space, but there was no
definition between the woodworking tools and the boat
storage area, so the shop ended up being in and amongst
the boats. Still, the long bench across the back
wall and the general tool configuration had worked well,
and I planned to emulate the overall setup. |
With dust always an issue, this time I planned to be
nearly fanatical about closed-in storage spaces.
Fortunately, I had several completely separate spaces in
the new shop in which to store certain materials and
supplies--a storage and utility room directly off the
shop (also containing the oil burner); the dedicated
paint and finishing room upstairs, and isolated from the
shop; and, of course, the huge raw storage of the attic,
a nearly unfillable--if non-temperature
controlled--space that was available. In addition,
I planned for all storage areas in the main shop to be
covered with solid doors to keep dust to a minimum.
Storage areas, however, would come a bit later on.
First I needed to set up some critical tools and
benches. |
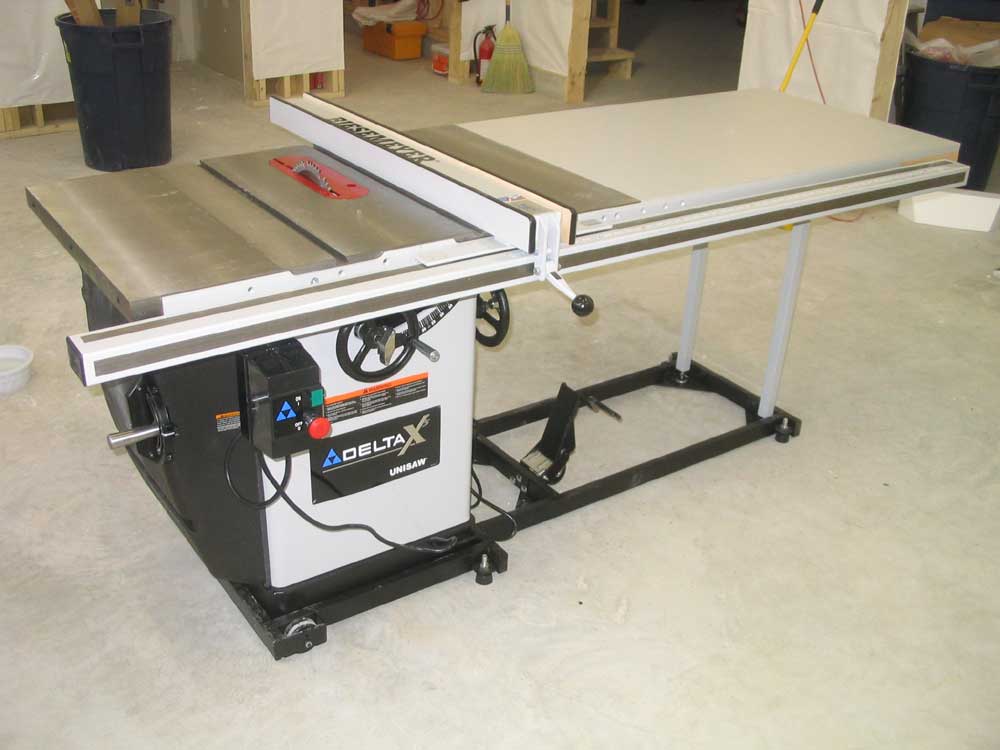
Tablesaw
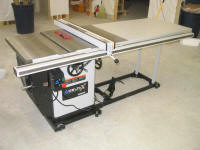 After
10 years of faithful service (and the saw was used when
I obtained it) , I decided to retire my old
Craftsman contractor's saw and replace it with a Delta
X5 3HP 220-volt cabinet saw, complete with 52"
Biesemeyer fence. The saw came with a free mobile
base that I figured I might as well use, though I
planned for the saw to be stationary. After
10 years of faithful service (and the saw was used when
I obtained it) , I decided to retire my old
Craftsman contractor's saw and replace it with a Delta
X5 3HP 220-volt cabinet saw, complete with 52"
Biesemeyer fence. The saw came with a free mobile
base that I figured I might as well use, though I
planned for the saw to be stationary.
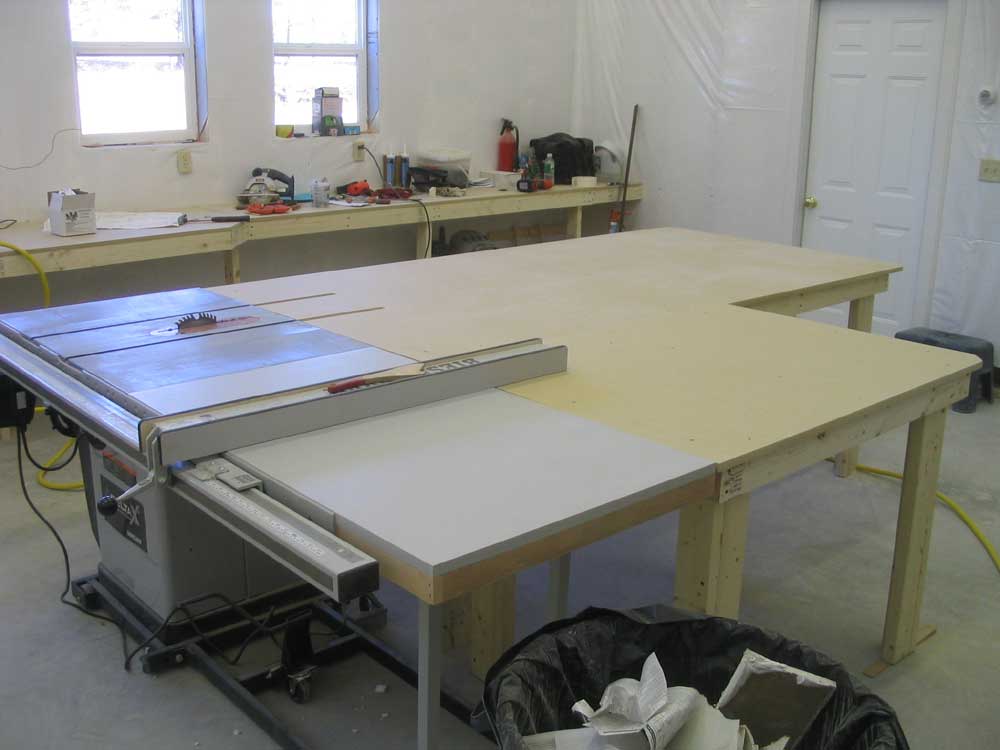
Located in the center of the shop, the tablesaw would be
the main shop feature. I planned to surround it
with large outfeed tables which would also serve as work
surfaces for the shop, in addition to the main bench
along the back wall. |
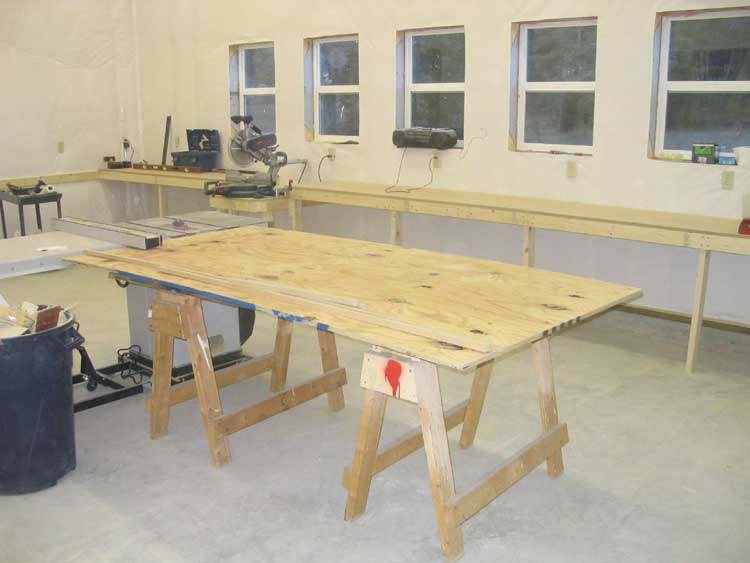
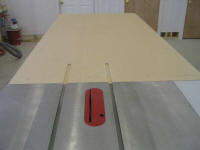
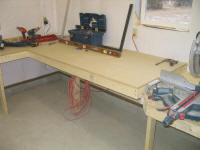
 To
help me along during the initial portion of shop
construction, I threw together a temporary outfeed table
using a pair of sawhorses, an old door, and a sheet of
plywood. While inelegant, this outfeed table
proved invaluable for milling the MDF for the long shop
benches and the trim for the office. To
help me along during the initial portion of shop
construction, I threw together a temporary outfeed table
using a pair of sawhorses, an old door, and a sheet of
plywood. While inelegant, this outfeed table
proved invaluable for milling the MDF for the long shop
benches and the trim for the office.
But I had bigger and
better things in the works. Some time ago, I saw a
project on the New Yankee Workshop where Norm
built a nice work table featuring a unique and simple
caster arrangement that allowed the table to be easily
lowered off the casters, making it stable and affixed in
position, but could also be easily moved about using the
simple caster setup. I thought this seemed like a
great solution, since I didn't want most of my shop
fixtures to be, well, fixed. |
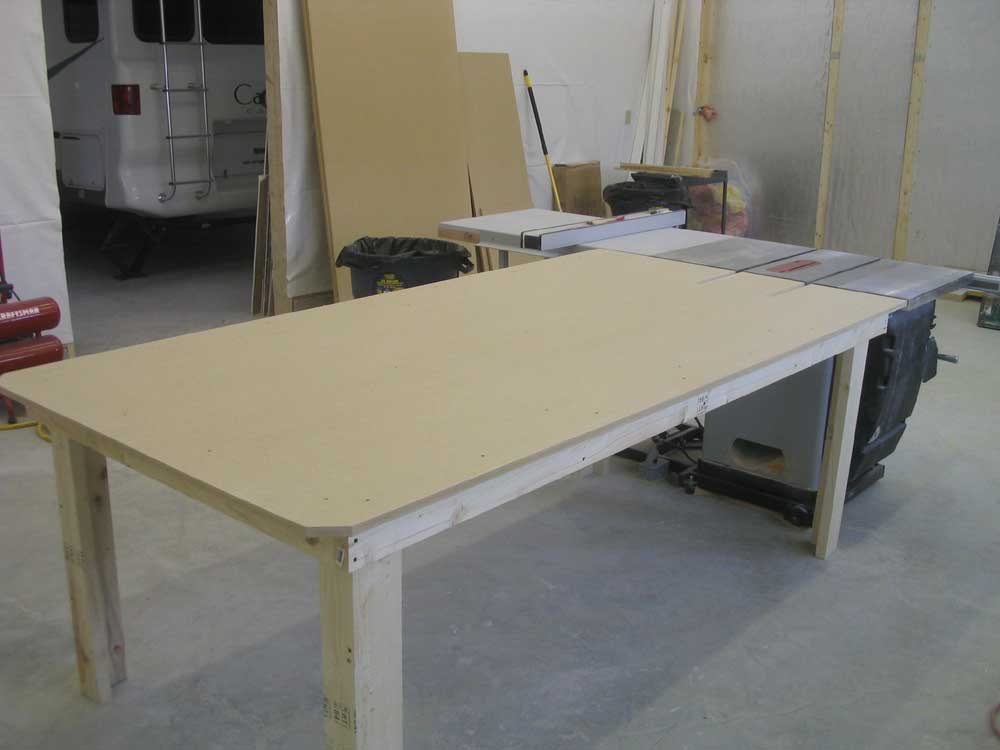
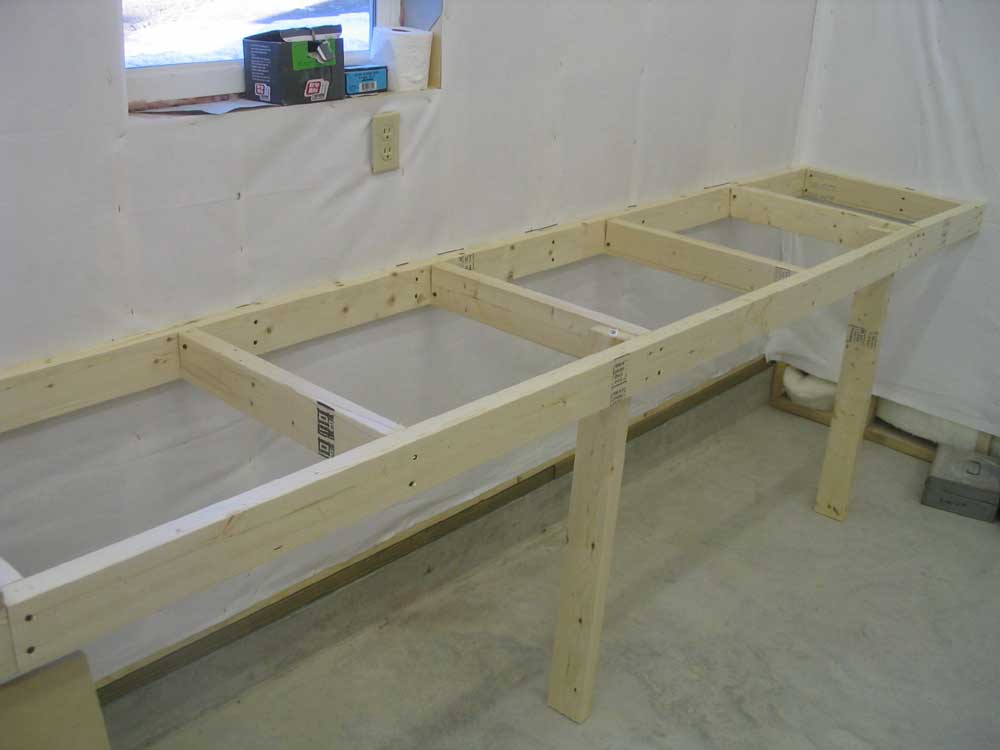
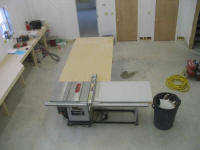
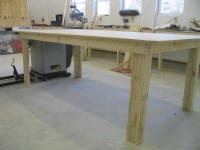 I
built the basic table frame and legs from 2x4 lumber,
attaching everything with 2-1/2" drywall screws.
Since I was awaiting a shipment that included my
casters, I forged ahead with the basic table, planning
to add the caster assemblies later on. The height
of the table was designed to be just barely lower than
the table saw table. Over the frame, I installed a
full sheet of 3/4 MDF, allowing plenty of overhang on
all edges for clamps, etc. At the saw end of the
table, I used a simple jig and a router to mill two
slots for the table saw miter gauge, which needs to pass
beyond the table when in use. I
built the basic table frame and legs from 2x4 lumber,
attaching everything with 2-1/2" drywall screws.
Since I was awaiting a shipment that included my
casters, I forged ahead with the basic table, planning
to add the caster assemblies later on. The height
of the table was designed to be just barely lower than
the table saw table. Over the frame, I installed a
full sheet of 3/4 MDF, allowing plenty of overhang on
all edges for clamps, etc. At the saw end of the
table, I used a simple jig and a router to mill two
slots for the table saw miter gauge, which needs to pass
beyond the table when in use. |
|

|
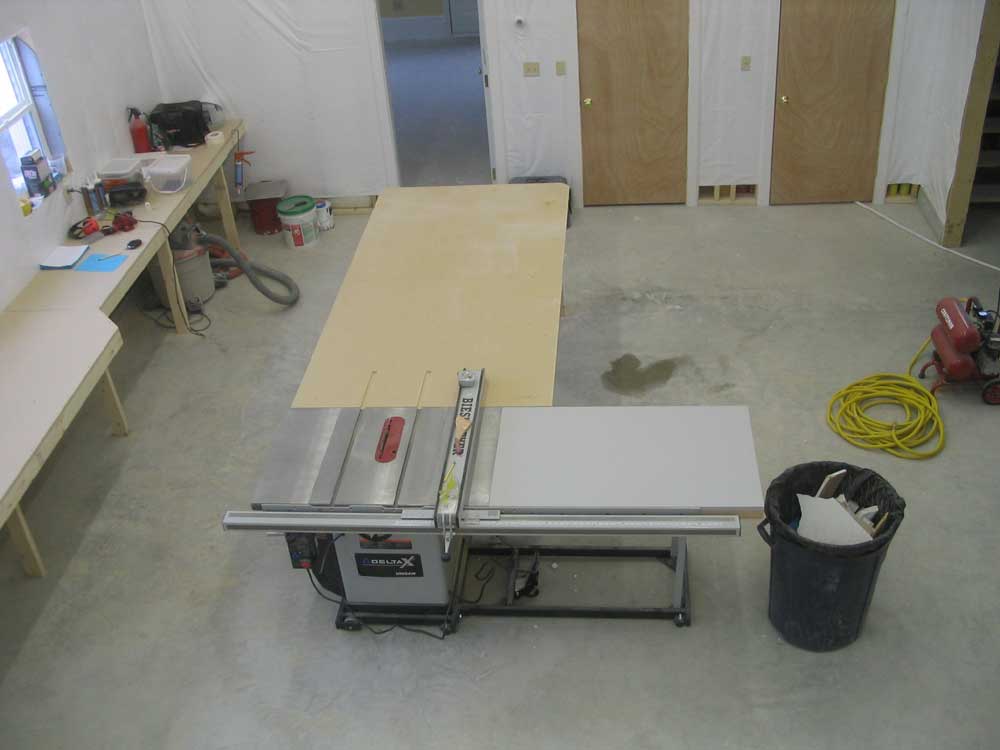
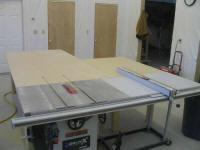 Several
days later, armed with more materials, I built the
second section of the outfeed table. This section
was quite a bit smaller and shorter, designed to fill in
the space in front of the extension table on the saw.
Since this wide width would only be used when sawing
sheet goods like plywood, I decided the second part of
the outfeed table only needed to be 4' long--enough to
support the plywood width. This would keep some
extra floor space free, and save on the materials as
well. Several
days later, armed with more materials, I built the
second section of the outfeed table. This section
was quite a bit smaller and shorter, designed to fill in
the space in front of the extension table on the saw.
Since this wide width would only be used when sawing
sheet goods like plywood, I decided the second part of
the outfeed table only needed to be 4' long--enough to
support the plywood width. This would keep some
extra floor space free, and save on the materials as
well. |
 I
built the second section in the same way as the first,
only with a more diminutive size. Thanks to some
twisty 2x4s, one corner of the new table ended up
being a bit high, causing rocking; I solved this, at
least for now, by sliding a shim beneath the offending
leg. I
built the second section in the same way as the first,
only with a more diminutive size. Thanks to some
twisty 2x4s, one corner of the new table ended up
being a bit high, causing rocking; I solved this, at
least for now, by sliding a shim beneath the offending
leg. |
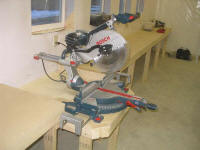 Chop Saw Chop Saw
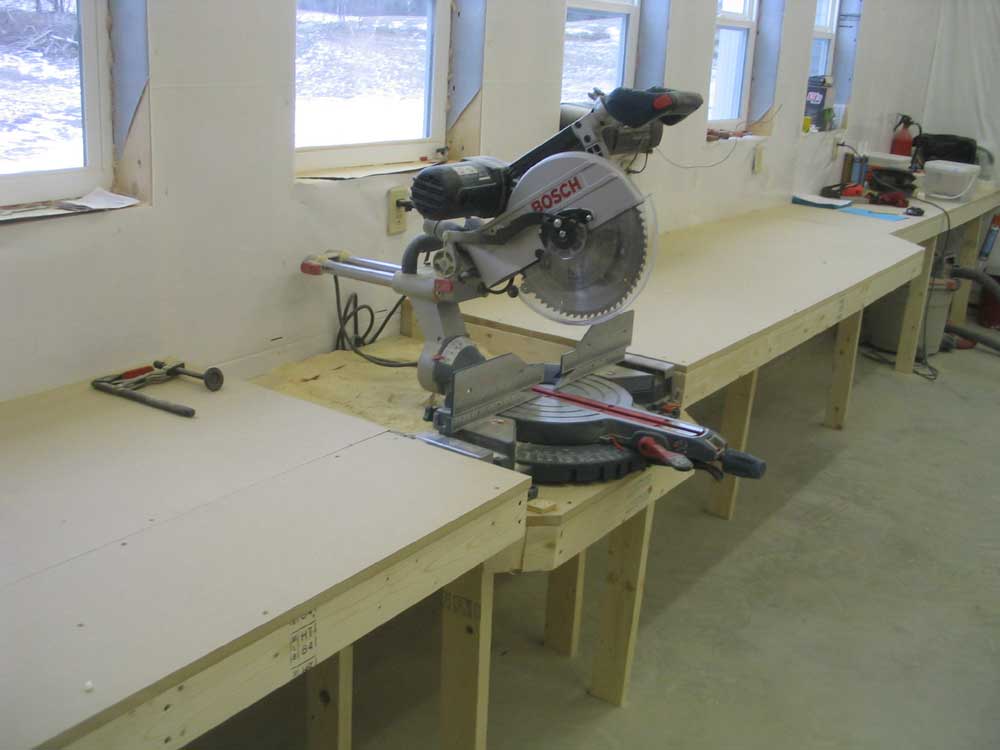
The
time had also come to replace my venerable Ryobi 10"
straight miter saw, which was functional but lacked any
ability to cut compound angles or wide stock. I
purchased a Bosch 12" sliding compound miter saw after a
fair bit of research into the various choices; the Bosch
saw, a late entry into the list of consideration, seemed
to have an excellent combination of features,
performance, pricing, and quality. The fact that I
could get free shipping and $110 off the regular price
didn't hurt, either. My initial opinion of the
saw, after a fair bit of use during shop construction
and trimming out the office, is extremely positive. |
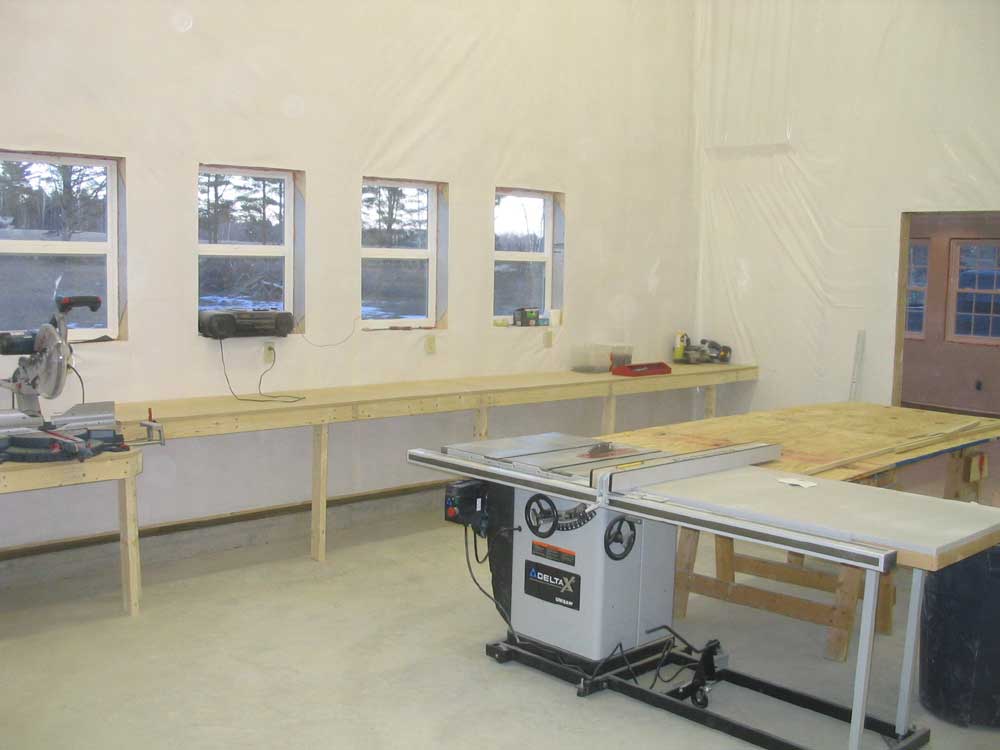
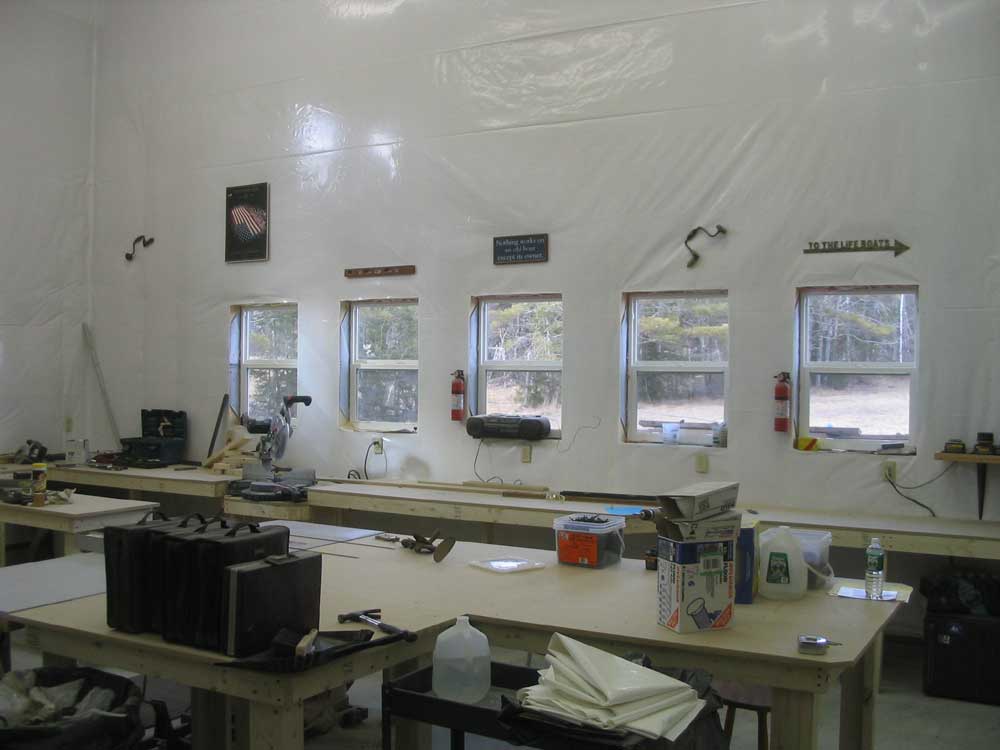
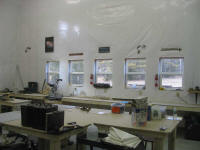
Main Shop Benches
 I
built a long bench against the back wall of the shop,
running the full 28' length of the shop. I built a
framework out of 2x4 lumber, with a cleat secured to the
wall studs and vertical legs every so often as required,
and covered the top with 3/4" MDF board, which makes an
outstanding work surface--smooth and durable. I
also ran one section of bench along one of the adjacent
sidewalls (incomplete in these photos). Keeping
the benches at 24" in depth allowed me to get two
sections of countertop out of a sheet of the MDF,
minimizing my materials use. Since I do most of my
work on freestanding benches that offer 360° access, the
smaller surface afforded by the 24" main bench never
poses a problem. I
built a long bench against the back wall of the shop,
running the full 28' length of the shop. I built a
framework out of 2x4 lumber, with a cleat secured to the
wall studs and vertical legs every so often as required,
and covered the top with 3/4" MDF board, which makes an
outstanding work surface--smooth and durable. I
also ran one section of bench along one of the adjacent
sidewalls (incomplete in these photos). Keeping
the benches at 24" in depth allowed me to get two
sections of countertop out of a sheet of the MDF,
minimizing my materials use. Since I do most of my
work on freestanding benches that offer 360° access, the
smaller surface afforded by the 24" main bench never
poses a problem. |
 To
accommodate the miter saw, I built a lowered section of
bench wide enough to accommodate the saw base, and
designed to keep the saw table flush with the adjacent
benches. Unfortunately, I realized too late (after
all benches had been built) that I had erred in my
concept, and that the saw--which required substantial
back clearance to allow for the rails on which the saw
slides--would end up too far forward to enable the main
benches to be used as table extensions. Oops.
Fortunately, a solution was simple, though I wish I'd
planned better at the onset. To
accommodate the miter saw, I built a lowered section of
bench wide enough to accommodate the saw base, and
designed to keep the saw table flush with the adjacent
benches. Unfortunately, I realized too late (after
all benches had been built) that I had erred in my
concept, and that the saw--which required substantial
back clearance to allow for the rails on which the saw
slides--would end up too far forward to enable the main
benches to be used as table extensions. Oops.
Fortunately, a solution was simple, though I wish I'd
planned better at the onset. |
|
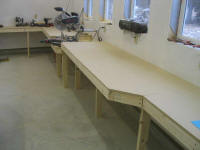 To
resolve this issue, I widened the benches on both sides
of the saw. On the righthand side, I removed the 2'
piece of countertop and replaced it with one cut to 32"
width, which matched the side of the chop saw platform.
The countertop, with a fairly short overhang, didn't
require a lot of additional support, but I installed 2x4
edging to match the remaining countertops, with some
bracing as required. To
resolve this issue, I widened the benches on both sides
of the saw. On the righthand side, I removed the 2'
piece of countertop and replaced it with one cut to 32"
width, which matched the side of the chop saw platform.
The countertop, with a fairly short overhang, didn't
require a lot of additional support, but I installed 2x4
edging to match the remaining countertops, with some
bracing as required.
|
 On
the left side, I added a 12" piece to the leading edge
of the counter, since replacing the whole section was
less feasible here thanks to a 90° countertop that
merged at the corner. I built a supporting
framework and applied the 12" countertop piece over the
top, bringing this section out just a bit further than
the righthand side. Perhaps I should have extended
the right countertop to 36" as well, but I didn't want
the section to extend inconveniently into the aisle. On
the left side, I added a 12" piece to the leading edge
of the counter, since replacing the whole section was
less feasible here thanks to a 90° countertop that
merged at the corner. I built a supporting
framework and applied the 12" countertop piece over the
top, bringing this section out just a bit further than
the righthand side. Perhaps I should have extended
the right countertop to 36" as well, but I didn't want
the section to extend inconveniently into the aisle. |
 In
any event, these simple extensions provided me with the
support needed for longer pieces of wood, in both
directions off the saw. I used shims to raise the
saw slightly, so that the saw table was barely above the
countertops on each side, ensuring that the workpiece
would sit flat on the saw table for most accurate
cutting. In
any event, these simple extensions provided me with the
support needed for longer pieces of wood, in both
directions off the saw. I used shims to raise the
saw slightly, so that the saw table was barely above the
countertops on each side, ensuring that the workpiece
would sit flat on the saw table for most accurate
cutting. |
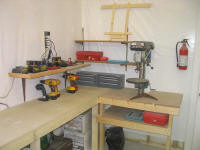 Drill
Press Drill
Press
I recycled a drill press stand that I built for my
shop in North Yarmouth, and adapted it to the new
location. The stand lowers my bench-mounted drill
press to a more convenient height, and has a removable
top surface to allow the table to be lowered for very
thick workpieces. |
Moving the Old
Shop
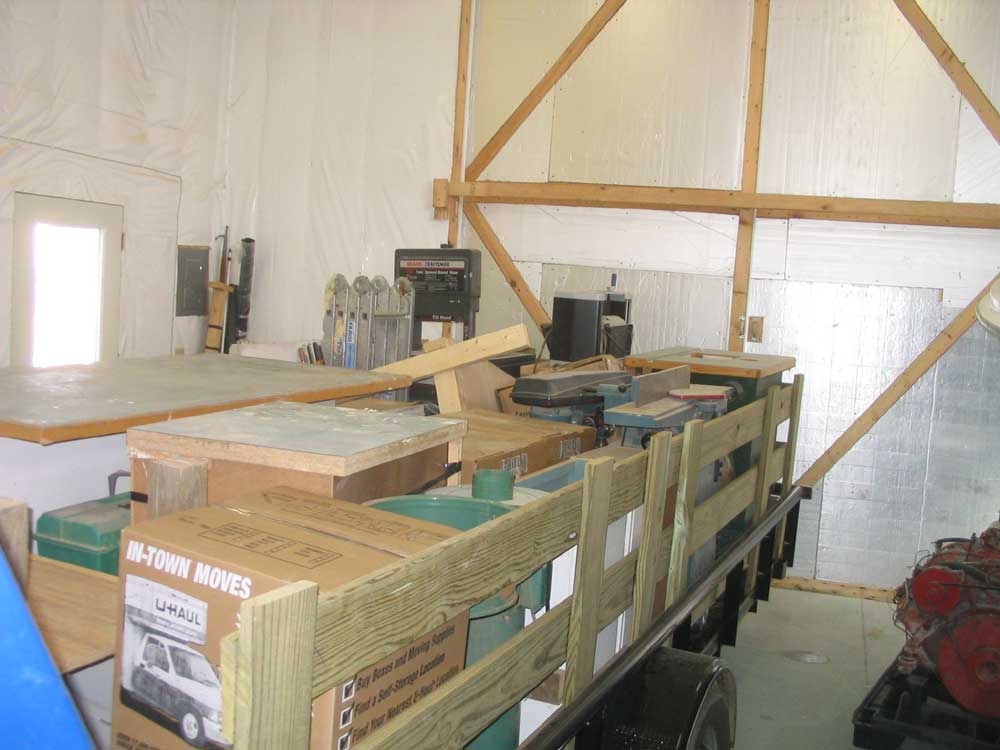
With my final projects completed at the old shop, I
spent several days moving the contents of the old shop
to the new one, bringing a fully-loaded 14' utility
trailer load each day. I'd load the trailer in the
evening, then transport it up first thing in the
morning. Over three days, I completed the move,
and slowly began to incorporate the materials,
fasteners, tools, benches, jigs, paint, sandpaper, and
other supplies into the new building. Total
organization of the new space would take time, of
course, but I made great strides forward during
mid-March, and the new shop began to feel like home. |
|


|
This page was originally
posted on February 12, 2006
|
Updates |
2/28/06 |
| |
3/5/06 |
|
3/18/06 |
| |
|
|