Phase 2:
Framing
(continued)Over
the next week, framing continued at a pleasing pace.
By the time of my next visit, only two working days after
the last time, Bob (with help from Rod) had finished
sheathing the back shop wall, and had built the two interior
walls that divide the separate bays. These walls
remained unsheathed, with the final interior surface up to
me to decide and install. |
Shop Home
Page
Shop
Planning
Phase 1: Site Prep and Foundation
Phase 2: Framing
Phase 3: Finish Work
Phase 4: Shop Setup |
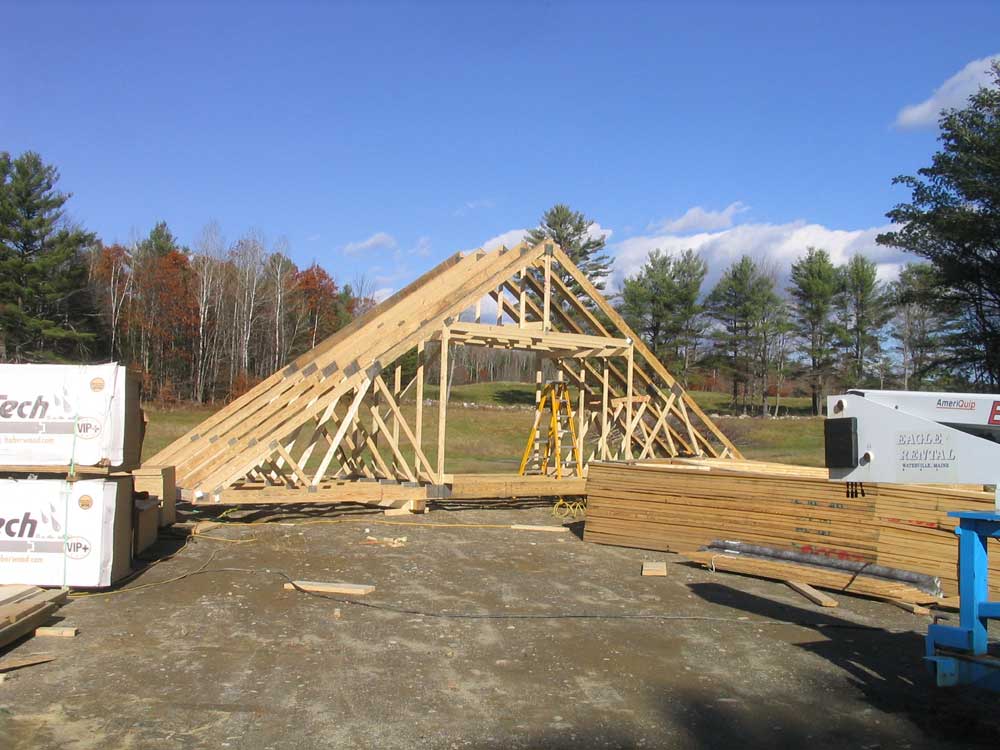
 I
was interested--and a little amused--to discover four of
the roof trusses standing upright next to the
construction site, all tacked together at the
appropriate spacing. I told Bob I had expected the
roof to be a bit higher than ground level! The
method to this madness was to allow for a sturdy, stable
set of trusses from which to work against immediately;
once the crane lifted this prefabricated section into
place at the back of the building, there would be less
fooling around with floppy, oversized trusses, making
for a quicker and safer construction of the remaining
trusses. It seemed like a good idea to me, and
also served to provide the first real idea of the size
of the building. I
was interested--and a little amused--to discover four of
the roof trusses standing upright next to the
construction site, all tacked together at the
appropriate spacing. I told Bob I had expected the
roof to be a bit higher than ground level! The
method to this madness was to allow for a sturdy, stable
set of trusses from which to work against immediately;
once the crane lifted this prefabricated section into
place at the back of the building, there would be less
fooling around with floppy, oversized trusses, making
for a quicker and safer construction of the remaining
trusses. It seemed like a good idea to me, and
also served to provide the first real idea of the size
of the building. |
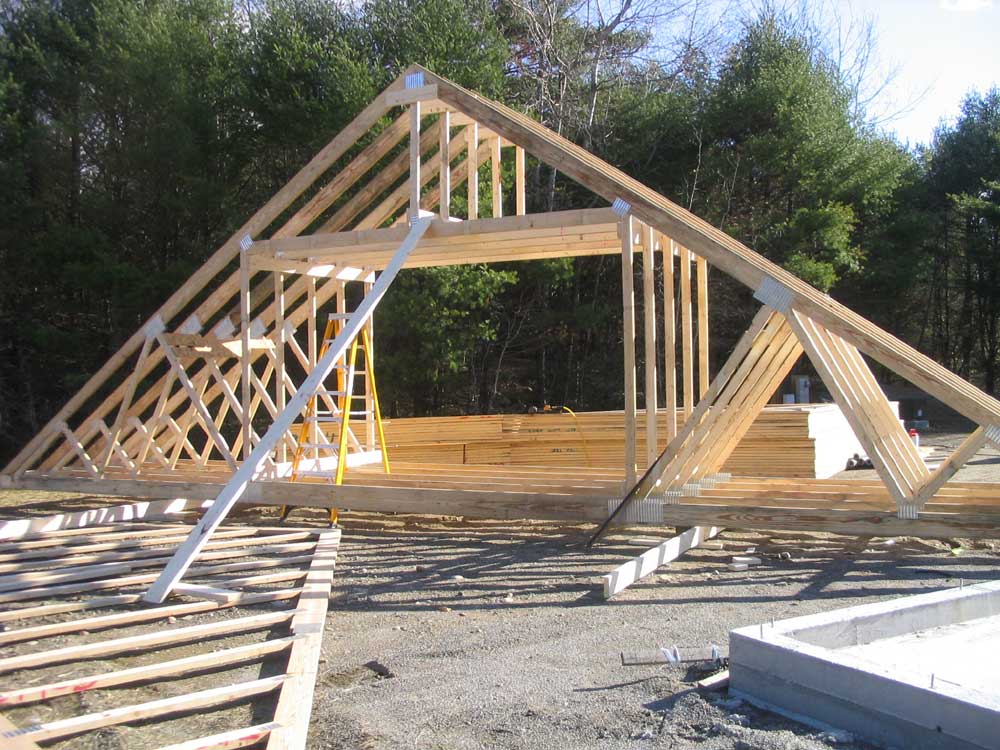
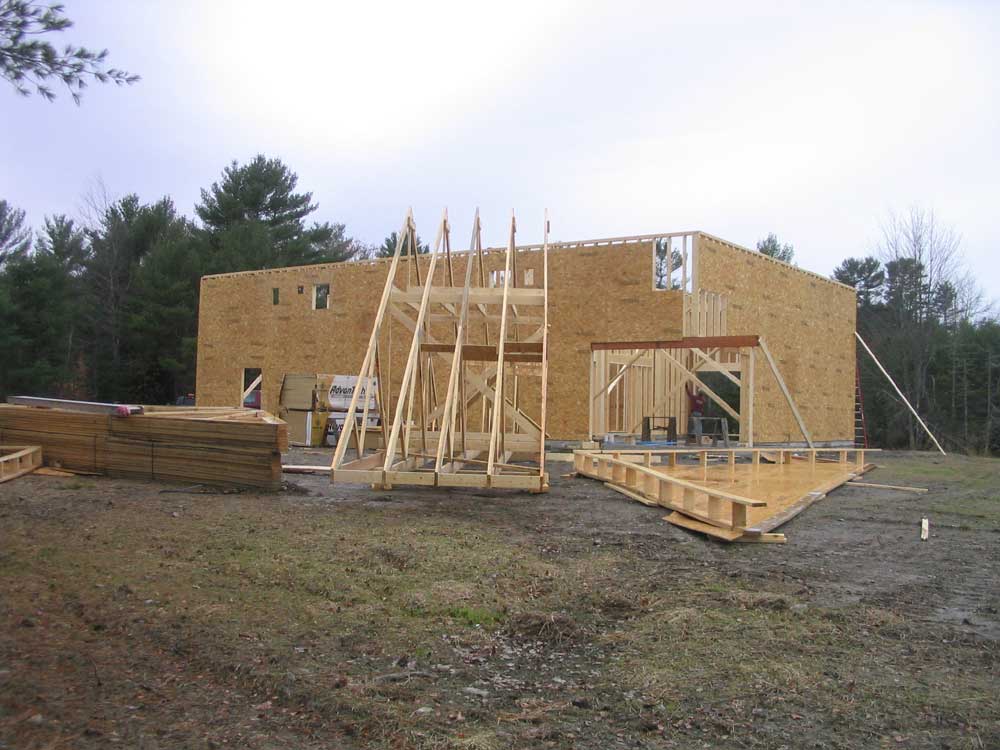
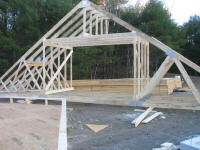
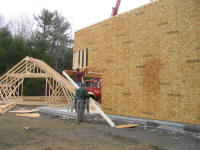
The trusses contained a
framed opening for an attic storage space, and it was
immediately obvious that this would be a huge space with
massive amounts of storage--an outstanding addition to
the building, though I wouldn't relish carrying heavy
items up or down. I'd figure that out later on.
Needless to say, seeing the partial roof structure
together with the fully-framed walls increased my
anxiety about raising the structure, which I hoped would
happen soon. Patience, patience...
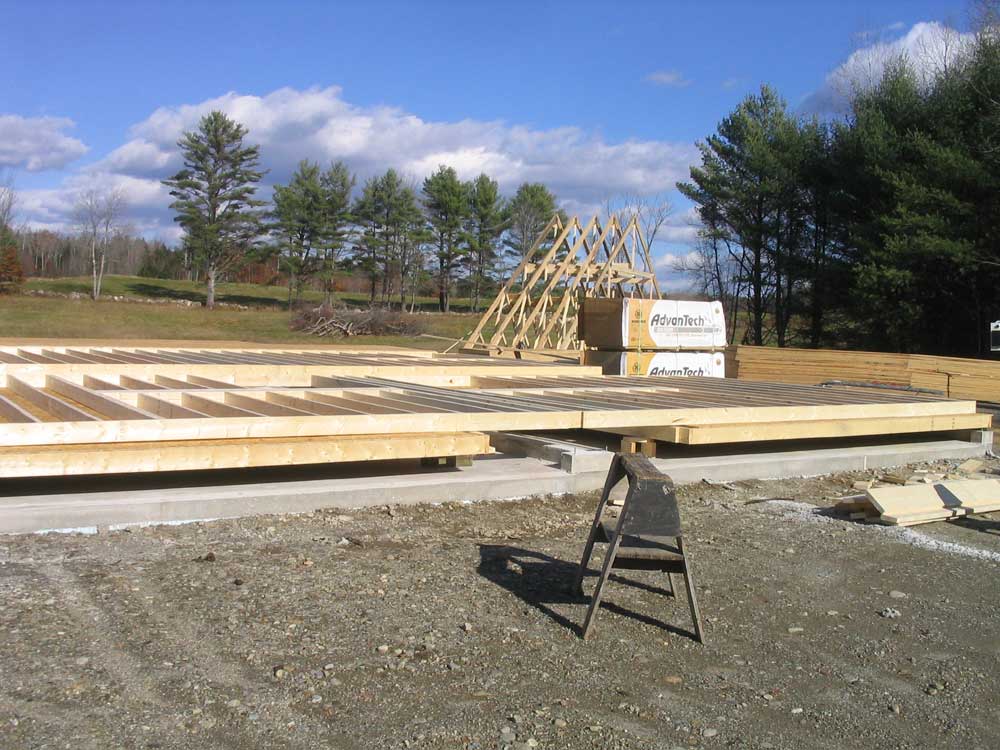
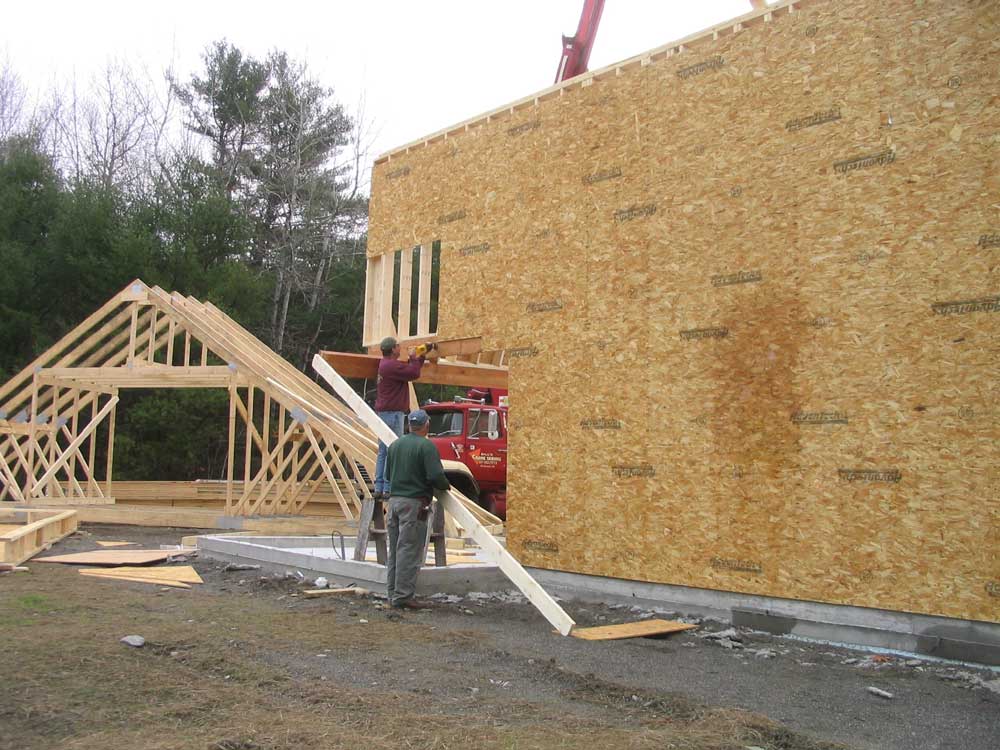
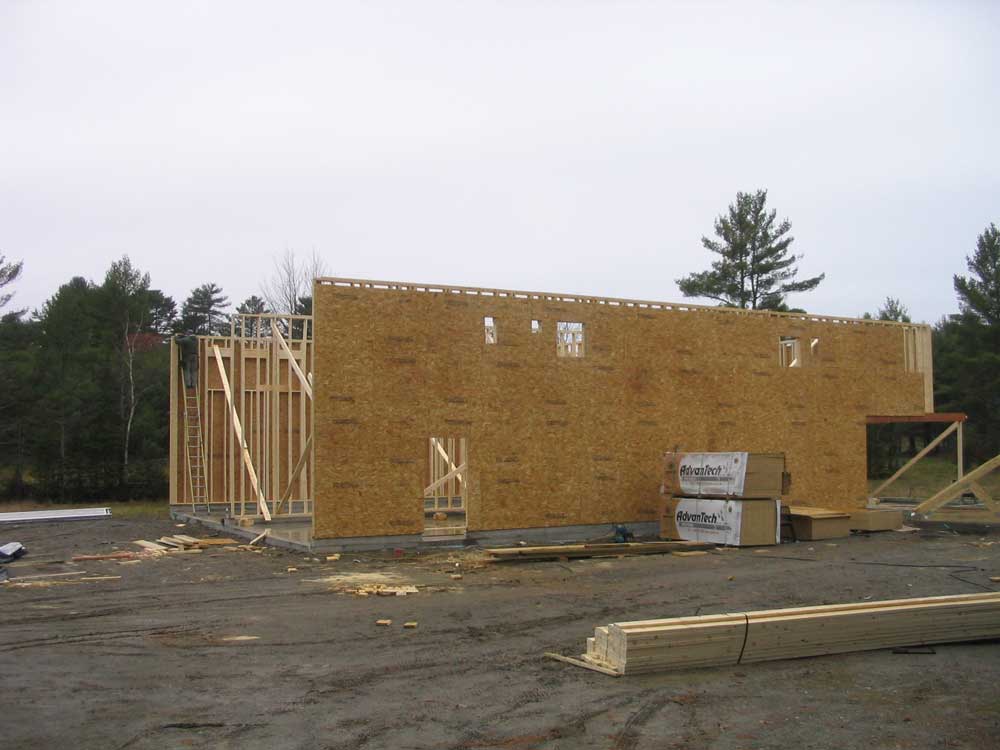
 Before
the end of the day, Bob and Rod had laid the two gable
trusses on the ground, and applied the sheathing
(Advantech) and blocking for the trim, which would
greatly accelerate the closing in of the building, and
make the job much easier (as opposed to attempting to do
this work from ladders or staging). I planned for
an all-vinyl exterior, so the vinyl trim pieces would be
applied directly to the substantial blocking they
installed. This would be done before the trusses
were raised into position, leaving only siding to be
completed afterwards. Before
the end of the day, Bob and Rod had laid the two gable
trusses on the ground, and applied the sheathing
(Advantech) and blocking for the trim, which would
greatly accelerate the closing in of the building, and
make the job much easier (as opposed to attempting to do
this work from ladders or staging). I planned for
an all-vinyl exterior, so the vinyl trim pieces would be
applied directly to the substantial blocking they
installed. This would be done before the trusses
were raised into position, leaving only siding to be
completed afterwards.
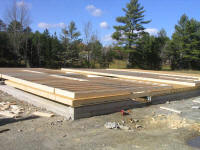
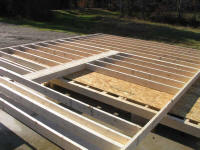
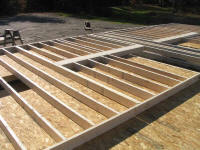
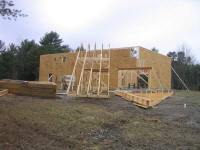
Below are several photographs showing the state of
things as of Tuesday, November 8, 2005. |

The prefabricated section of four roof trusses,
showing the overall size of the structure and
the attic space within. |

Another view of the same. |
And yet another... |
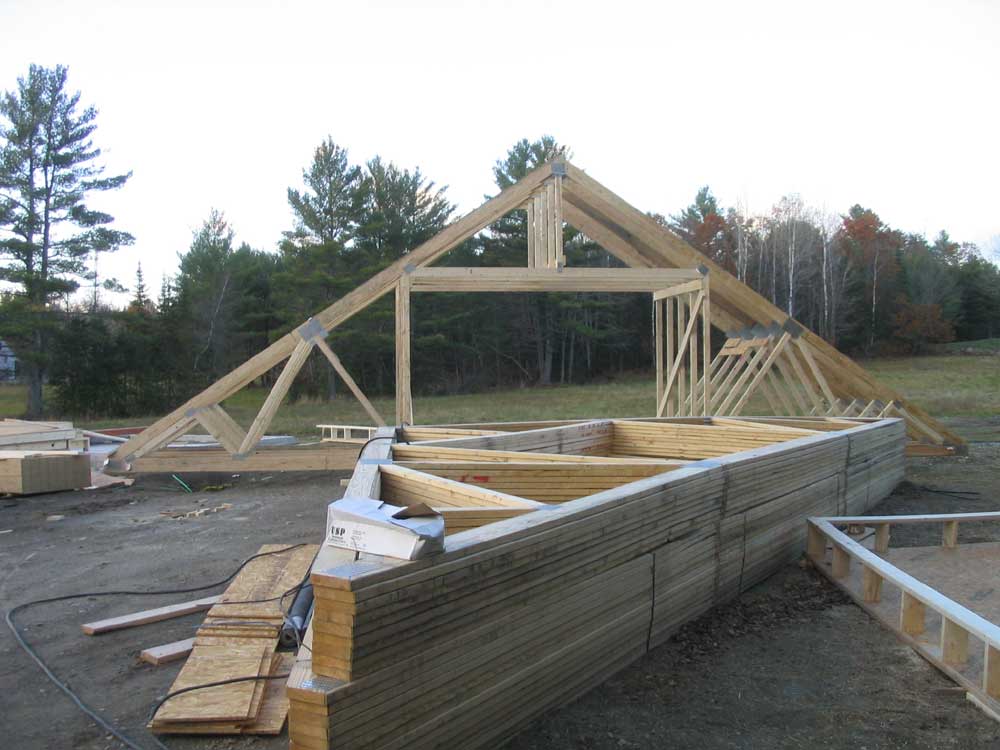
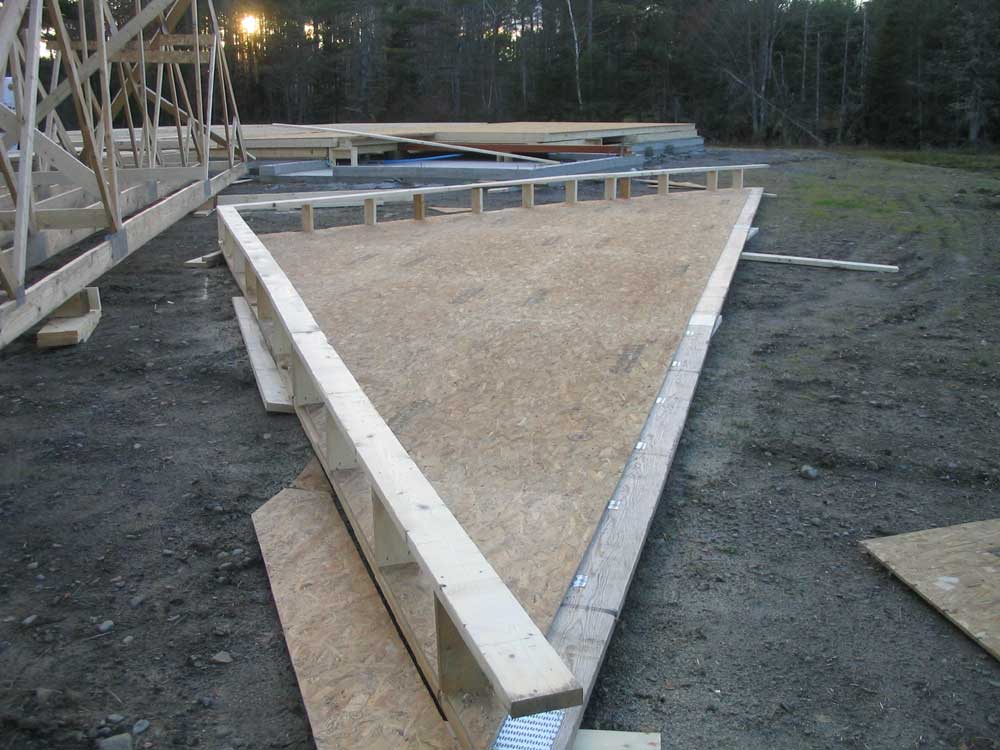
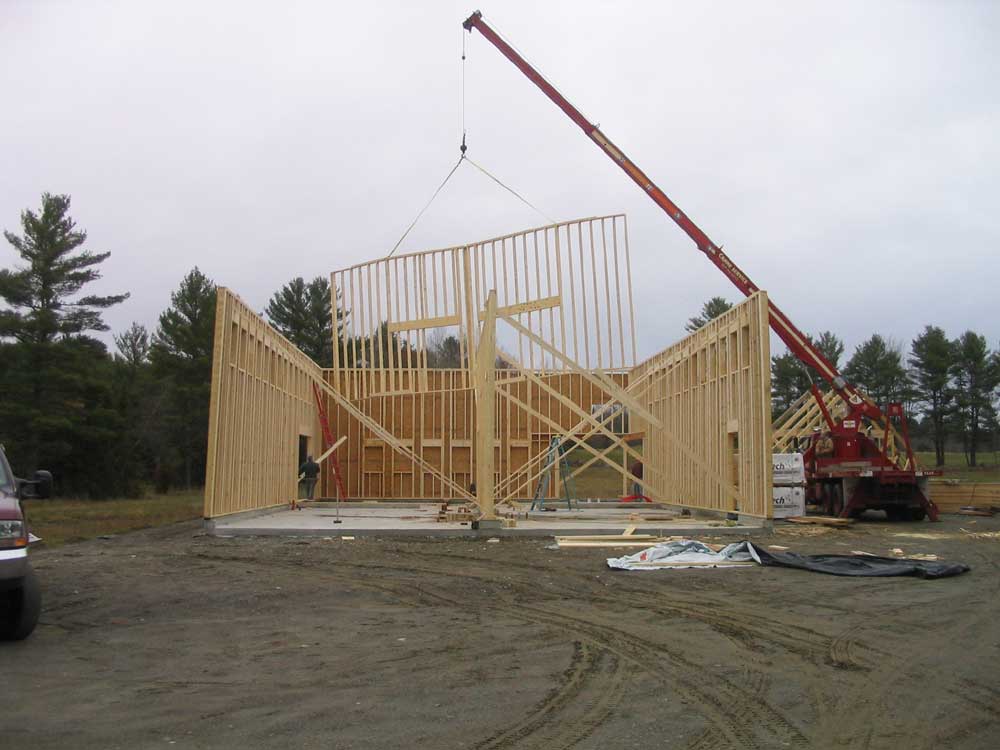
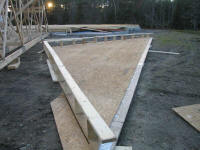
This shows the two unsheathed center (interior)
walls, framed up on top of the outer walls. |
One of the rough openings for the doors running
between the bays and the workshop area in the
back. Solid blocking will allow easy
installation of door hardware. |
This is the other opening in the same wall,
which will lead to the second of the two boat
bays. |

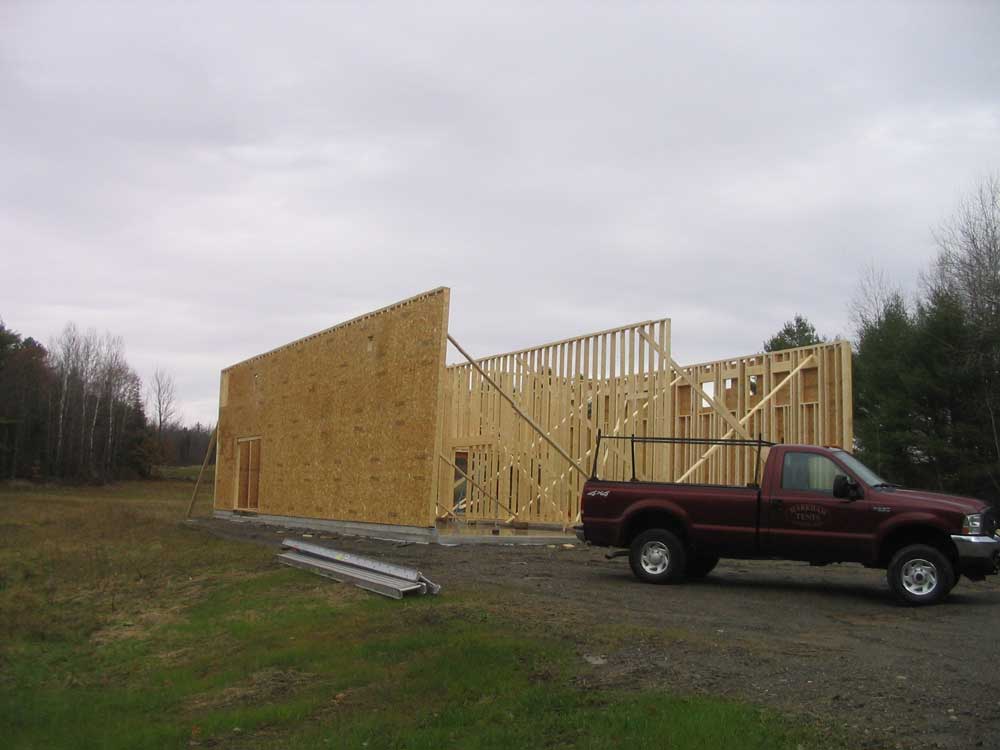
The back wall of the shop, all sheathed. |

Another view of the interior walls. |
One of the gable trusses, sheathed and with
blocking for trim applied. |

The other gable truss. |
|
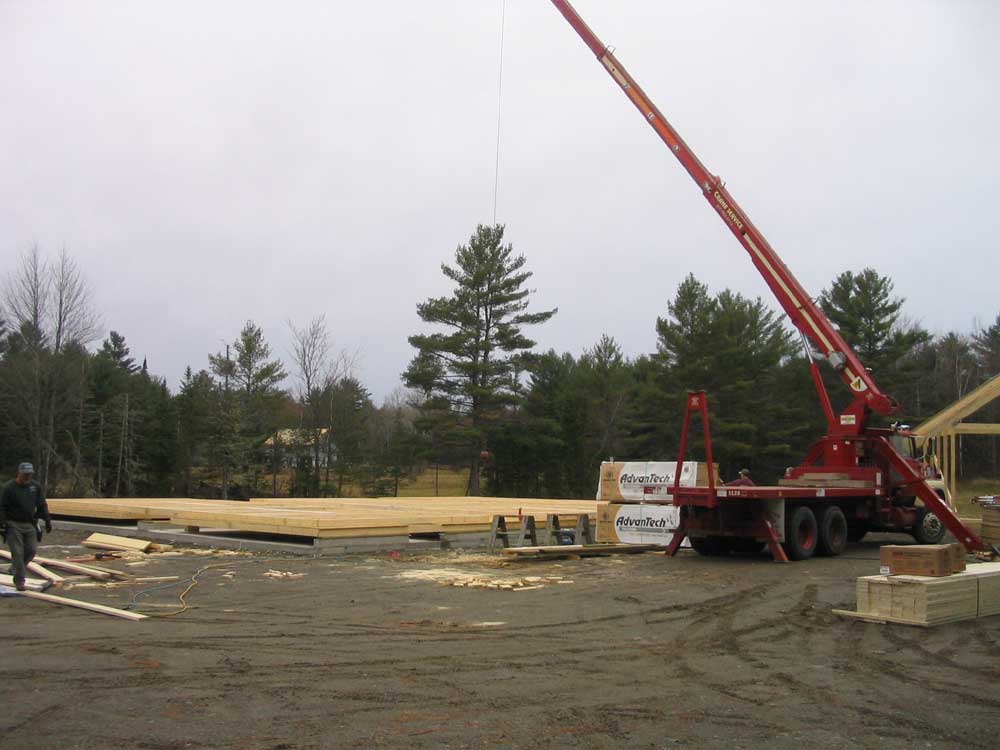
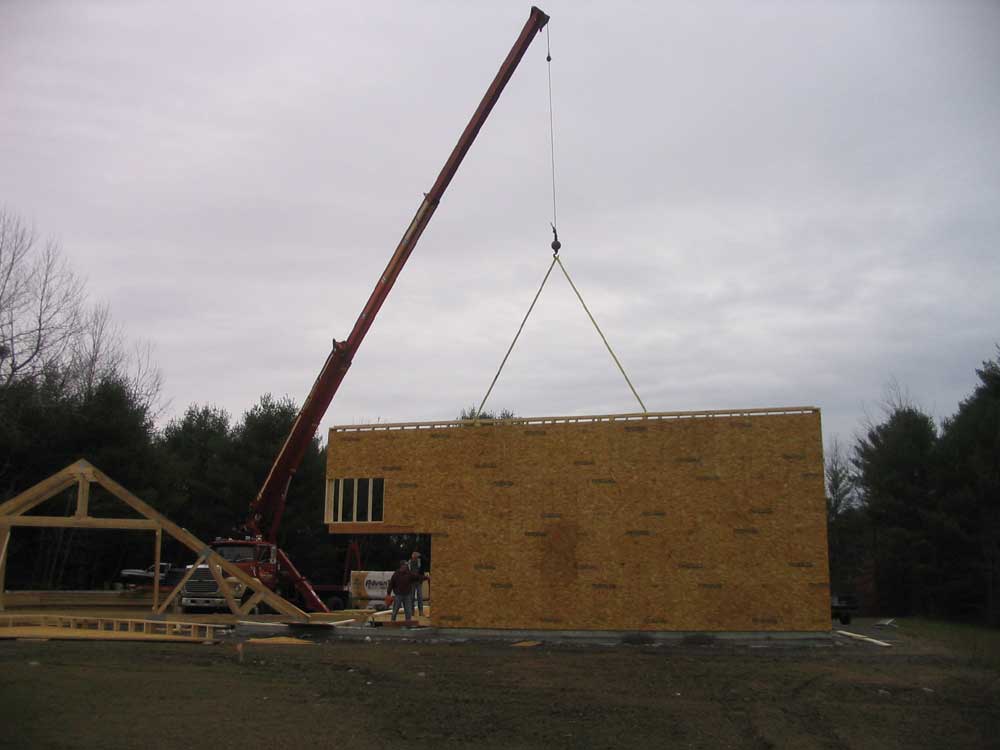
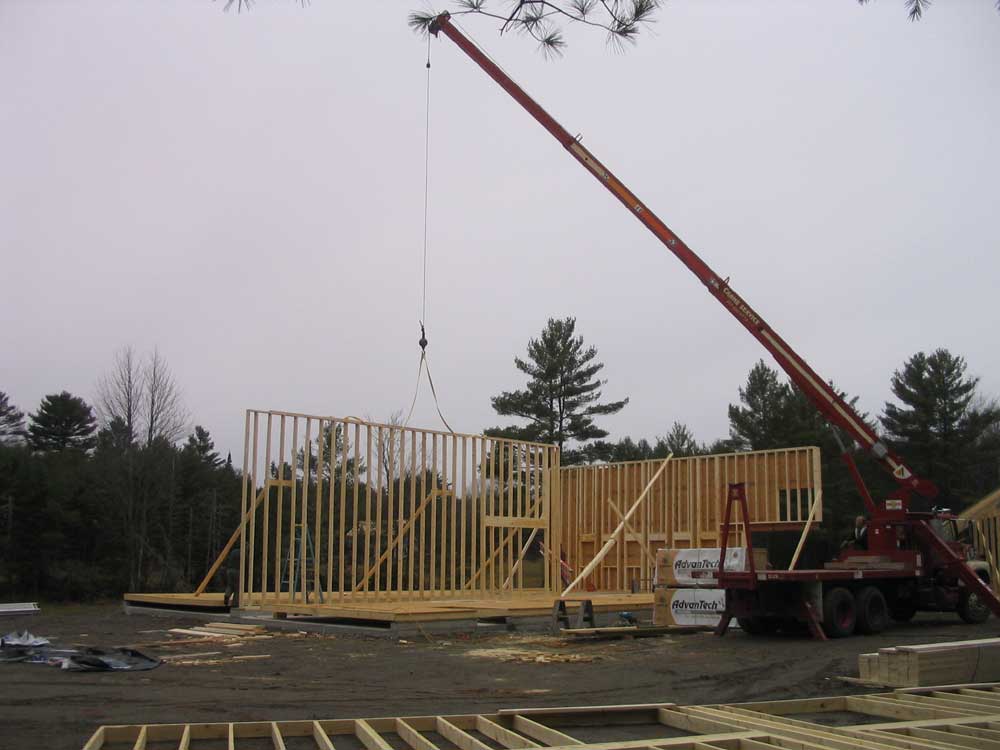
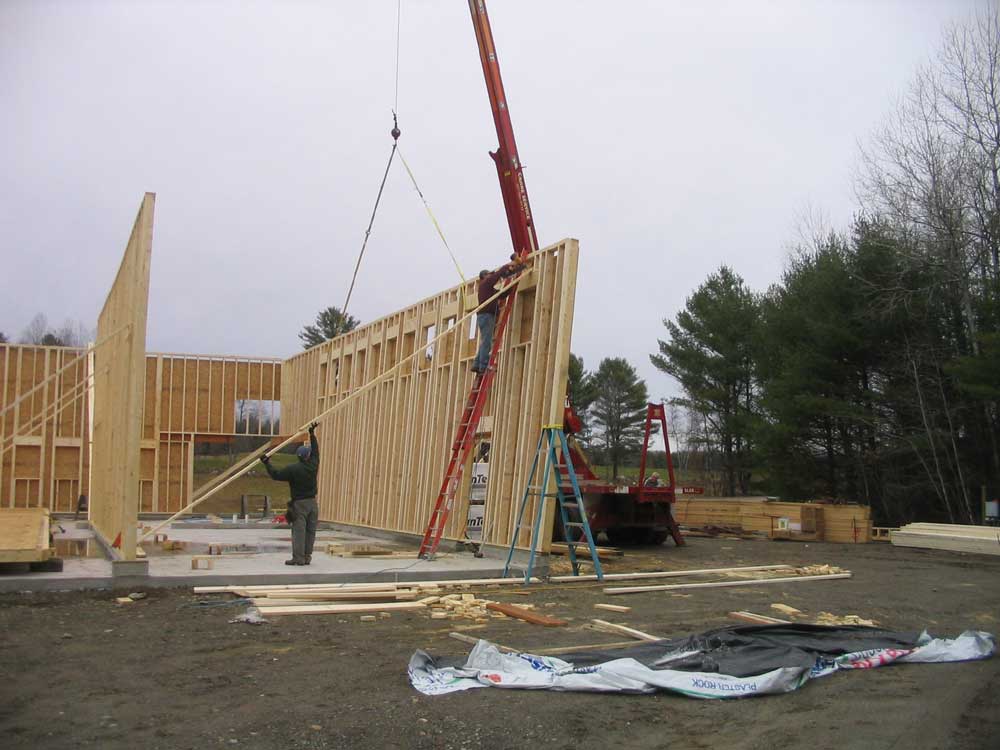
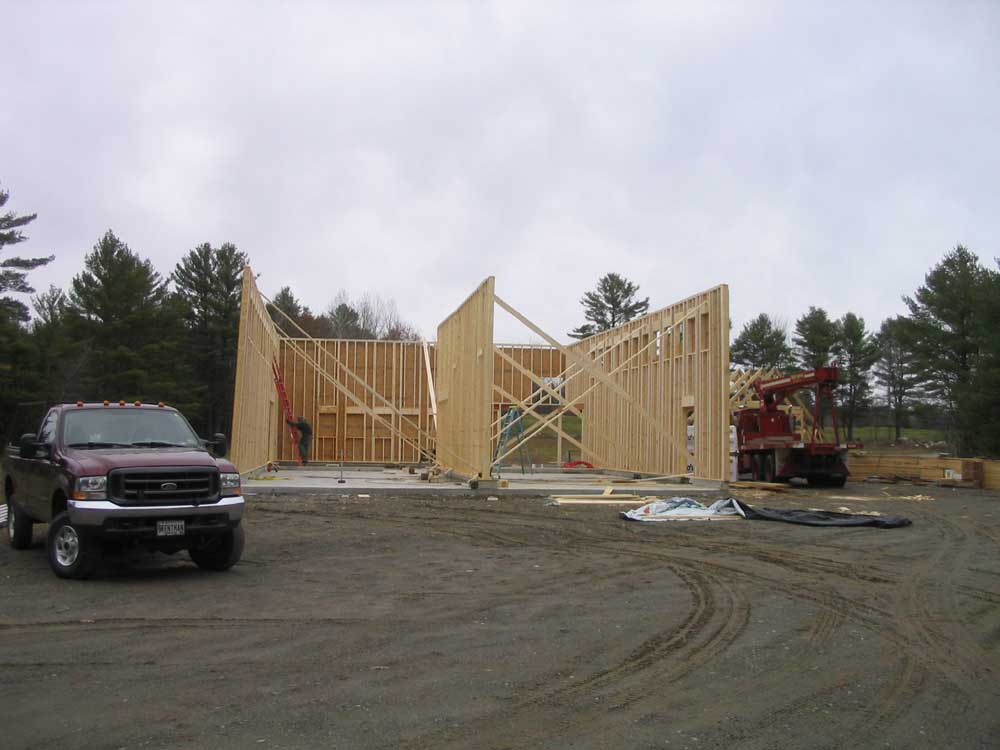
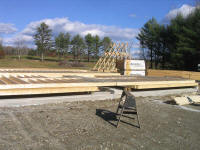
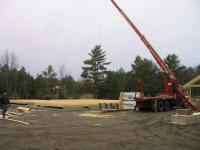
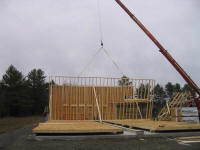
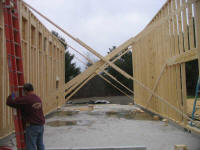
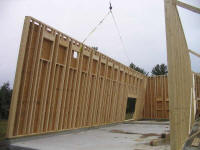
Tuesday morning, November 15, was slated to be crane day
#1: the walls. With the size and weight of
the walls, everyone was anxious, I'm sure, to get them
upright.I
arrived on site early, a little before 7, and ended up
waiting for 30 or 40 minutes for Bob, Rod, and Bill the
crane operator to arrive. Once everyone was on
site, things began to move quickly, and by 1100 all the
walls--3 exterior walls and two interior walls--were
raised and braced in place. Because of the size of
the garage doors for the front, and the need to frame a
specific opening based on the doors' size, there was no
front wall whatsoever at this point. It would be
framed in place later.
Below is a series of
photos showing the raising of the walls, in order:
the rear wall, the center wall between the bays, the
right-hand wall, the left-hand wall, and the inside back
wall.
|
|
The day began with the back wall of the shop,
which was lying flat on top of the two framed
side walls. As the smallest wall to be
raised this day, it went up quickly and easily,
and Bob and Rod soon had it tacked and braced in
position. |
Preparing to lift |

Up she goes! |
Bob and Rod work to tack the wall in place. |
Ready to release the crane |
|
Next, Bill the crane operator picked up one of
the two interior walls (with no sheathing
applied) and laid it on the ground away from the
barn site, as it was lying on top of the other
walls and was in the way. Then, the guys
set up to lift the long center wall, which
divides the two boat bays down the long axis of
the shop. This wall was lightweight, as no
sheathing was applied. |
The crane lifts the longitudinal center wall off
the two side walls, which are lying flat
beneath. |

Twisting the center wall into position. |
The center wall is set in place. |
A view from the other direction. |
|
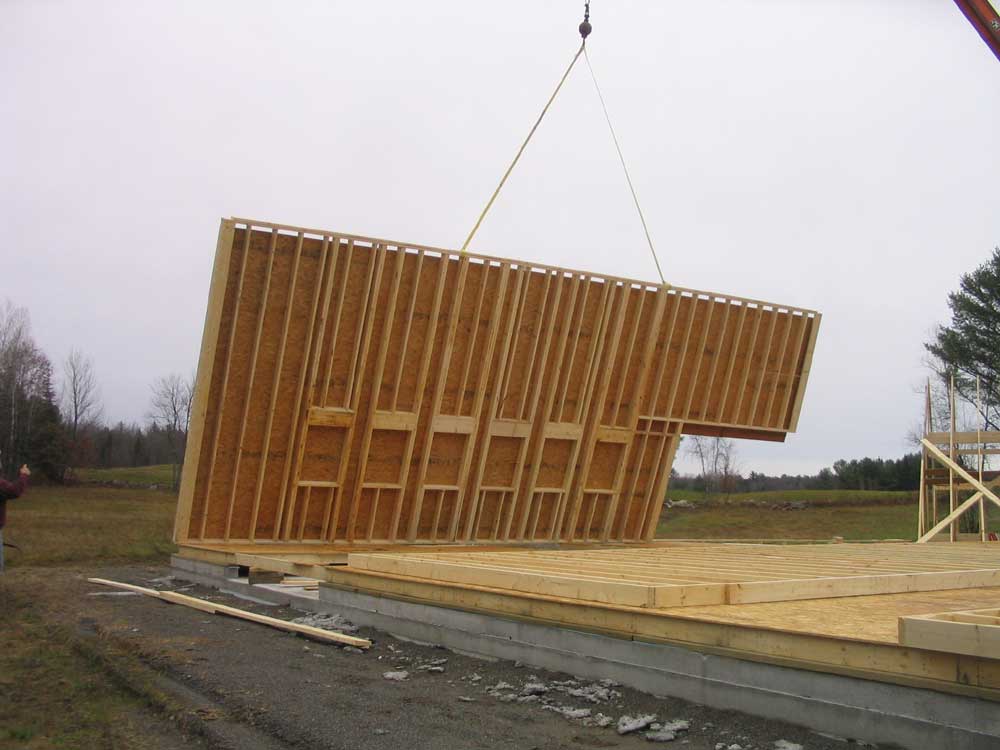
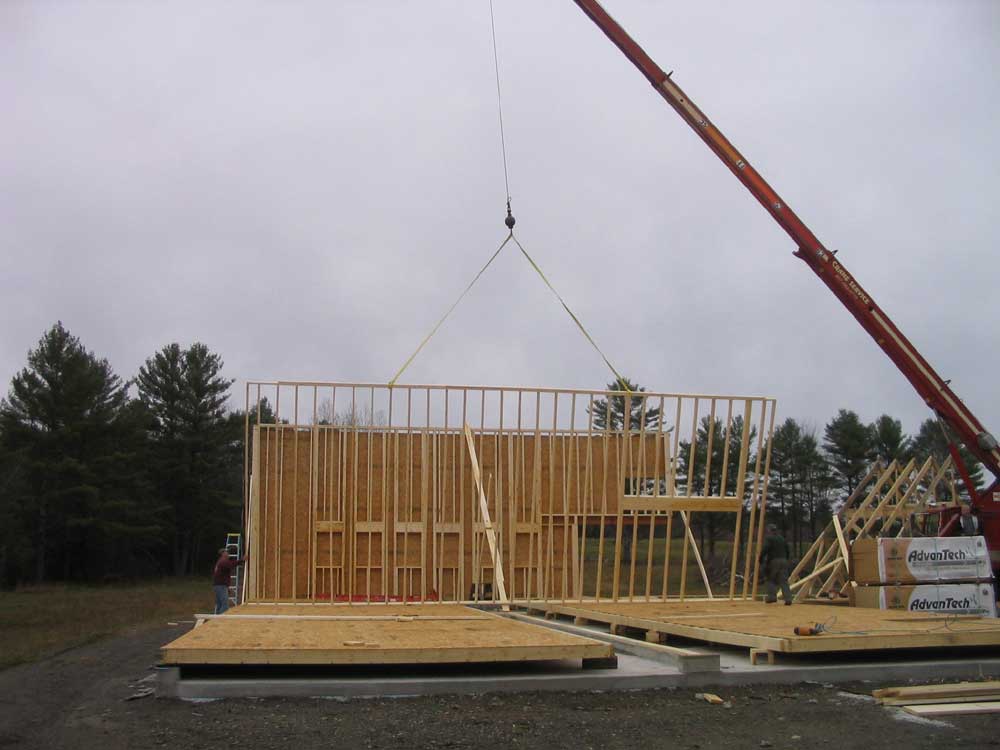
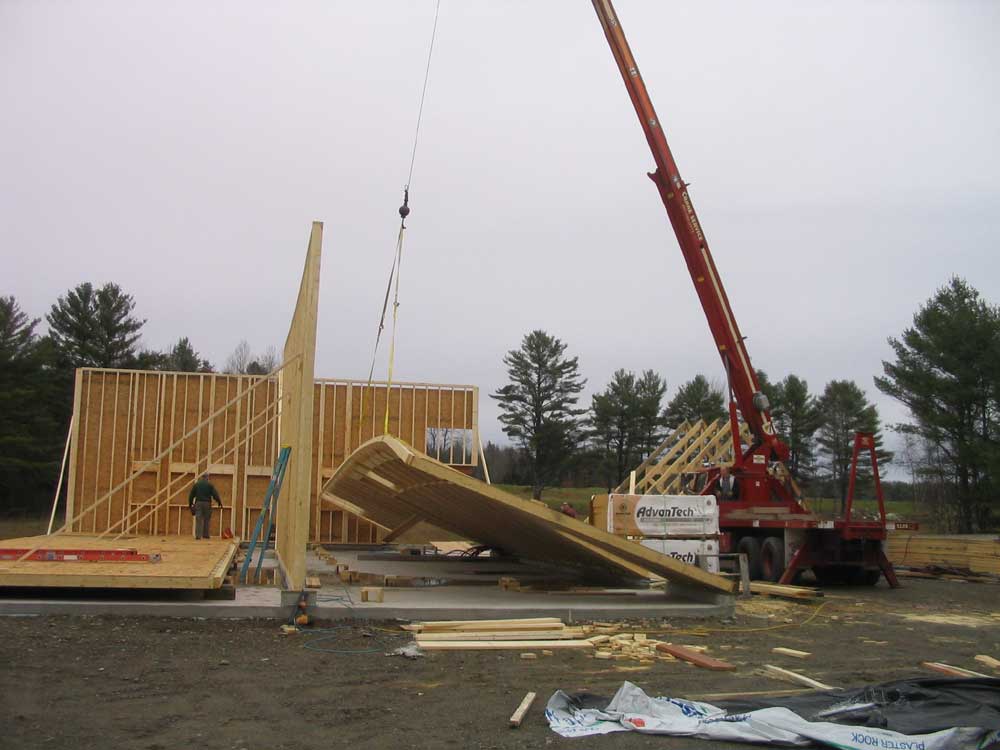
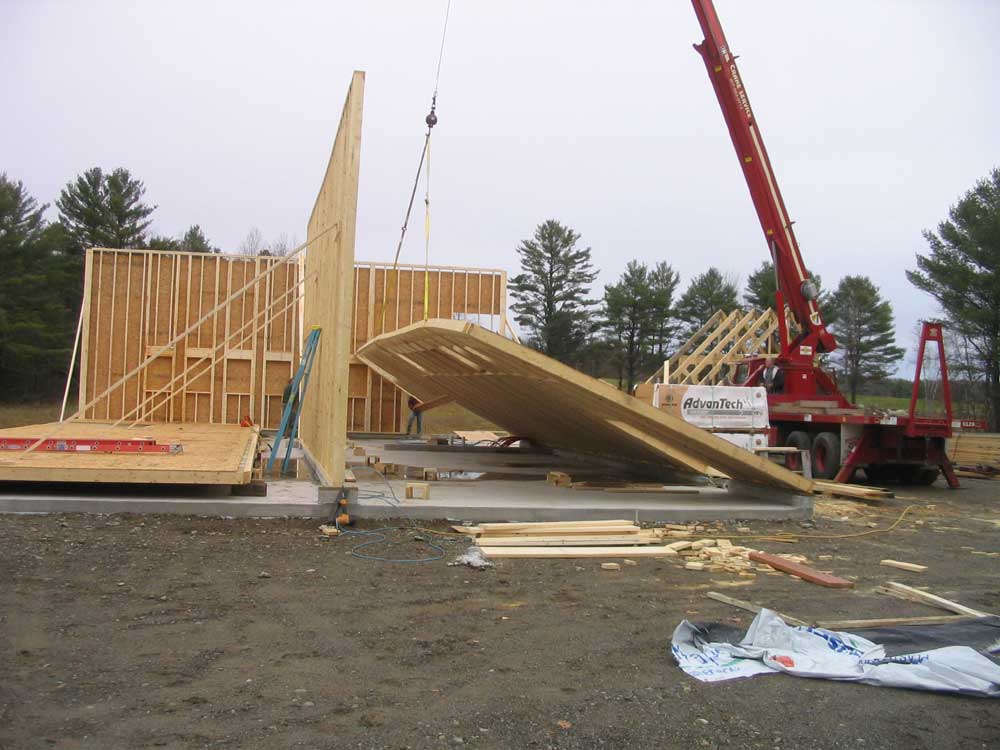
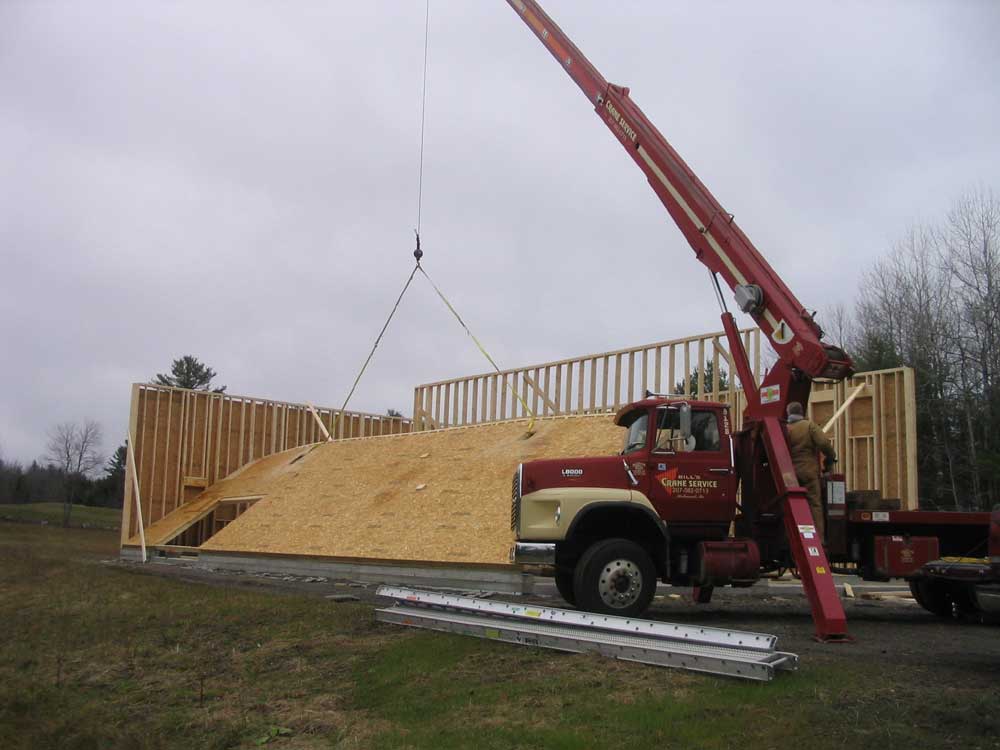
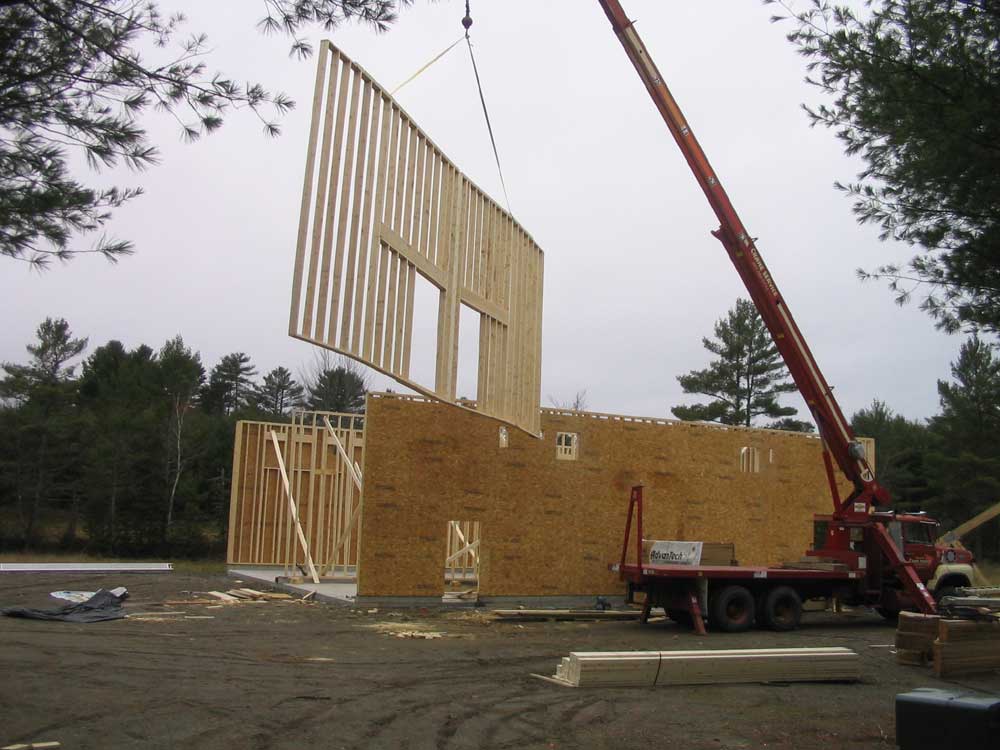
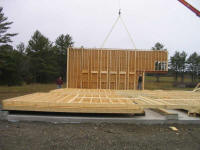
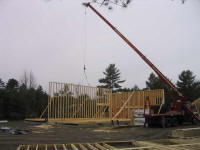
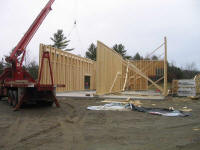
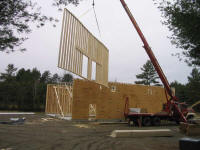
Next, it was time for the big, heavy right-hand
wall, which was complicated not only by the huge
amount of lumber within, but also a heavy LVL
(Laminated Veneer Lumber) beam at the office
corner. |
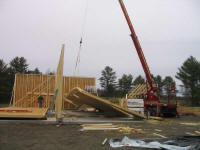
The first attempt to lift the wall was aborted
when it became clear that the straps were not
spread widely enough. The wall was bending
badly. |

With the straps repositioned, another lifting
attempt results in success. |

Slowly but surely, the wall became vertical. |
An LVL beam in the back wall interfered with the
beam in the side wall, so Bob cut it off,
intending to replace it later. |
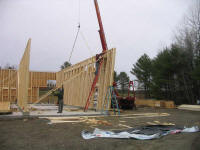
Perched atop a wobbly ladder, Bob tacks one of
the braces in place, the wall held only by the
crane. |
With additional bracing, the wall became
steadier, and everyone could breathe again. |
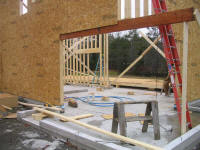
This shows the LVL beam at the office corner,
which allows the office to have a clear span
with no posts to support the building corner. |
X-shaped braces hold the wall in position. |
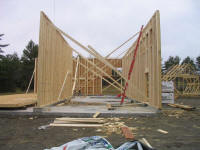
Looking back into the bay. |
|
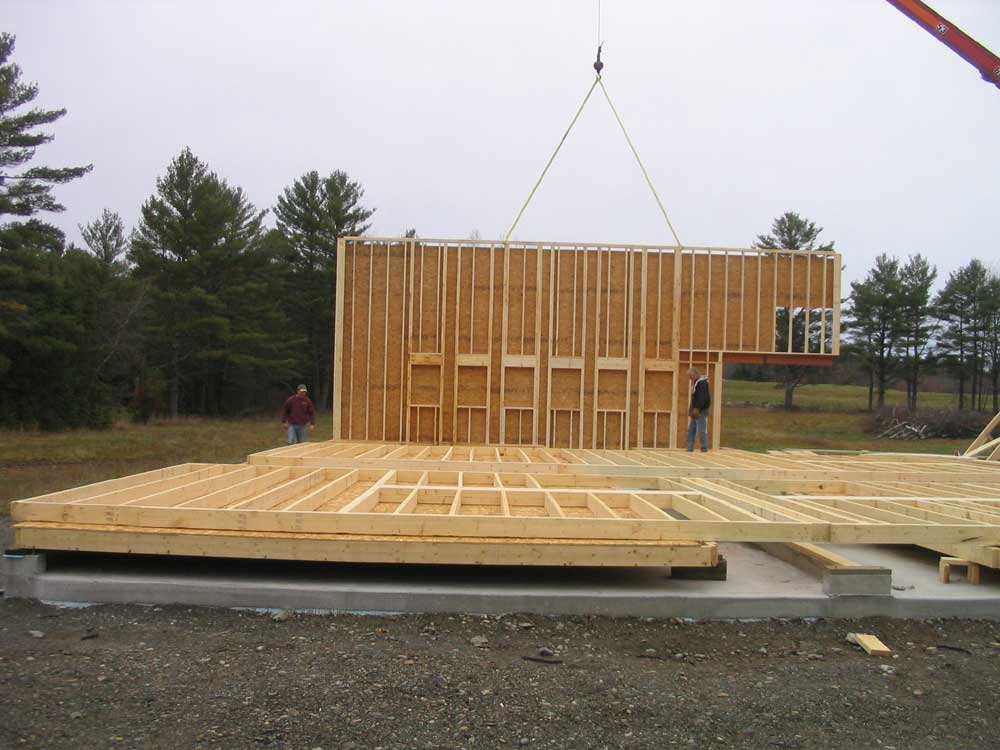
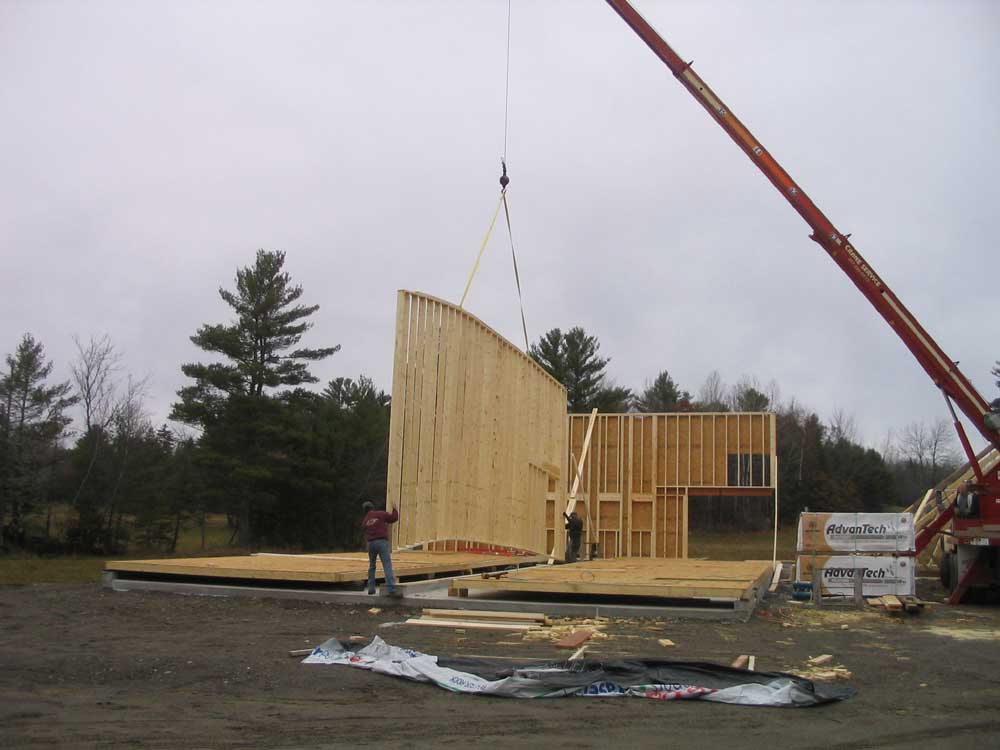
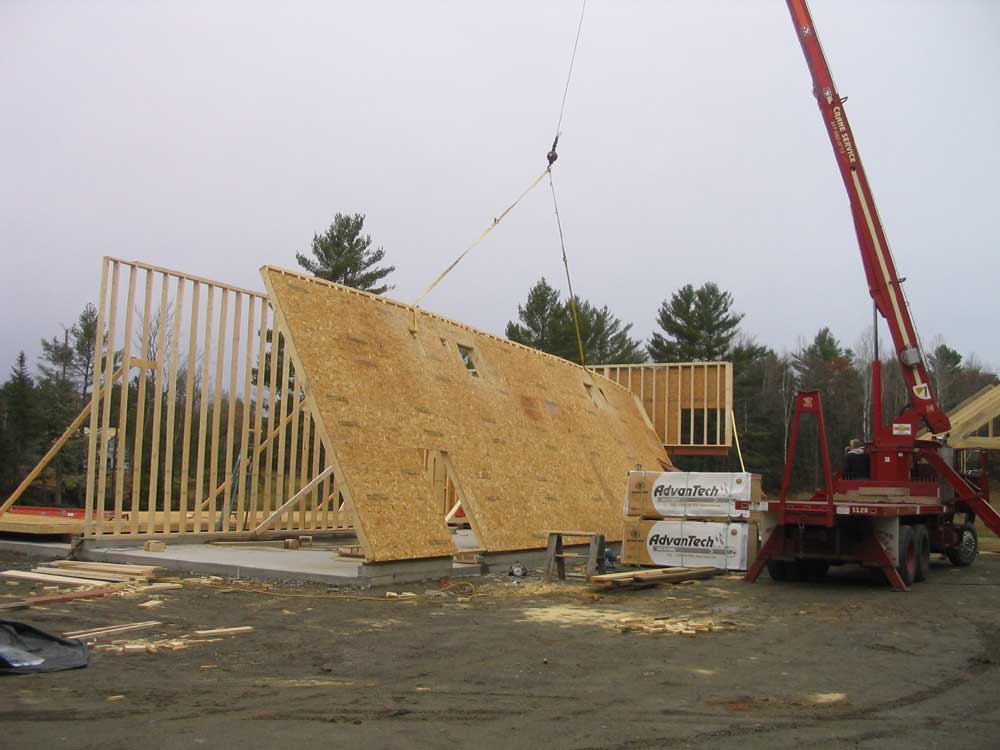
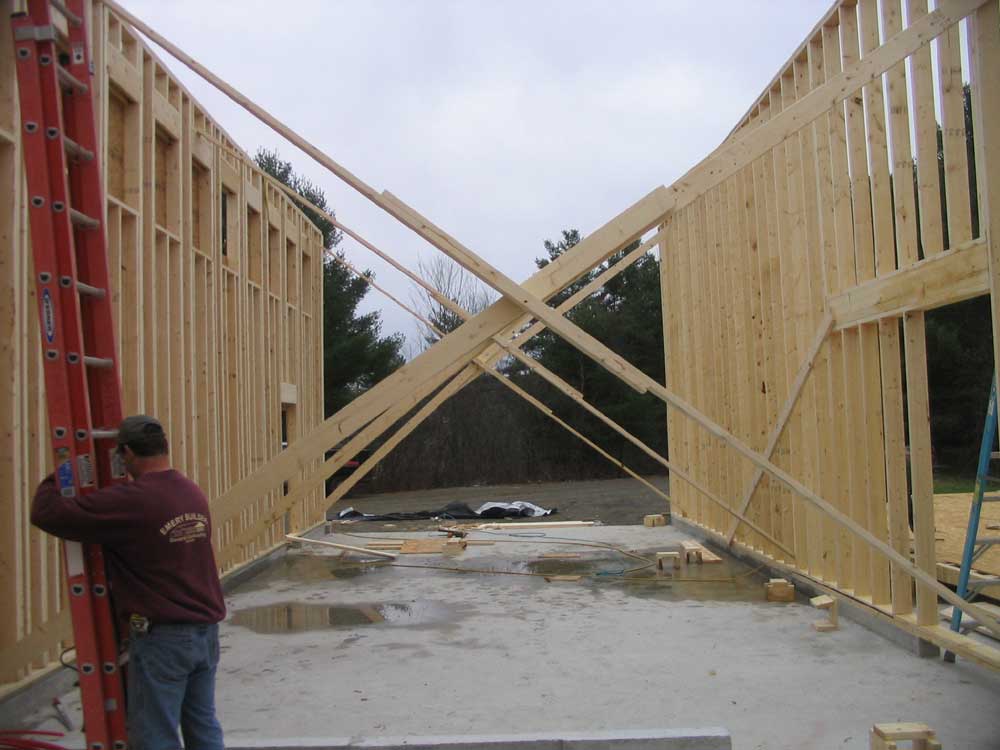
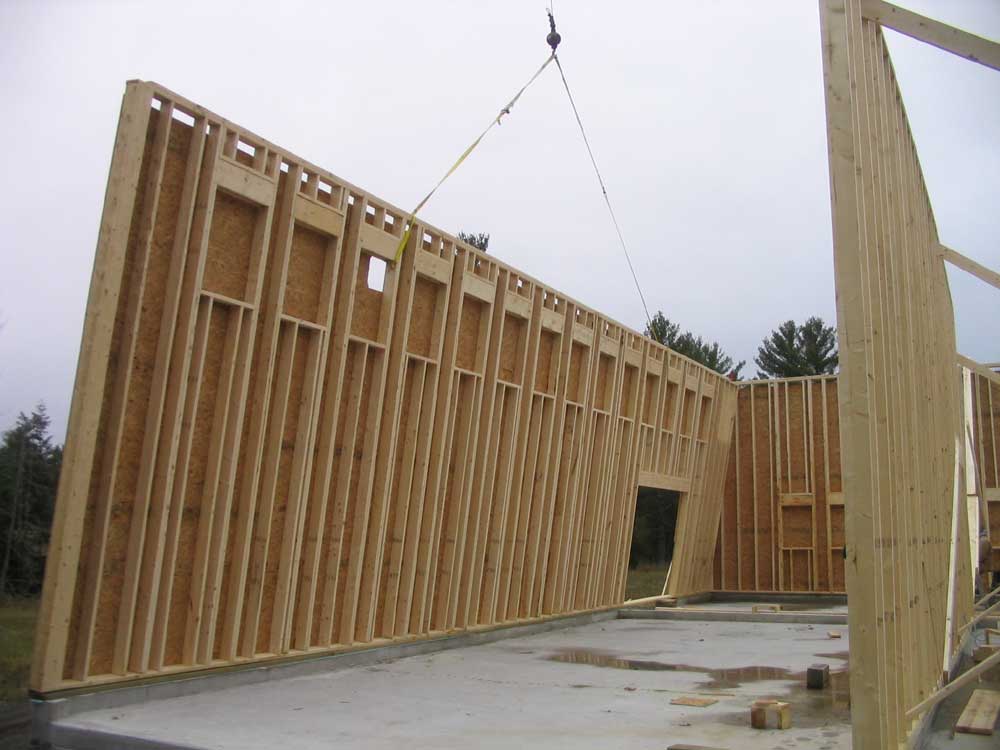
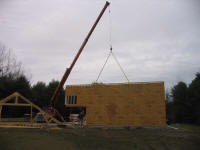
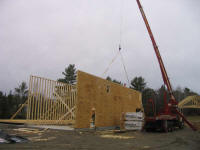
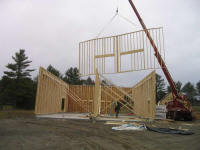
Next, it was time
for the other long wall: the left wall.
Thanks to the lessons learned on the right wall,
this one went much mroe smoothly. There is
a huge amount of lumber in these walls because
of the numerous framed window openings. I
don't intend to install windows in all the
openings, but it was easier to frame the
openings now than decide to add one later on.
|
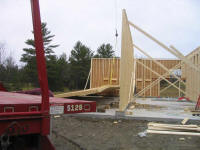
The lift begins. |
Getting closer... |
Nearly upright. You can see the numerous
window openings, and the amount of lumber
required. |
The wall is vertical and ready for bracing. |

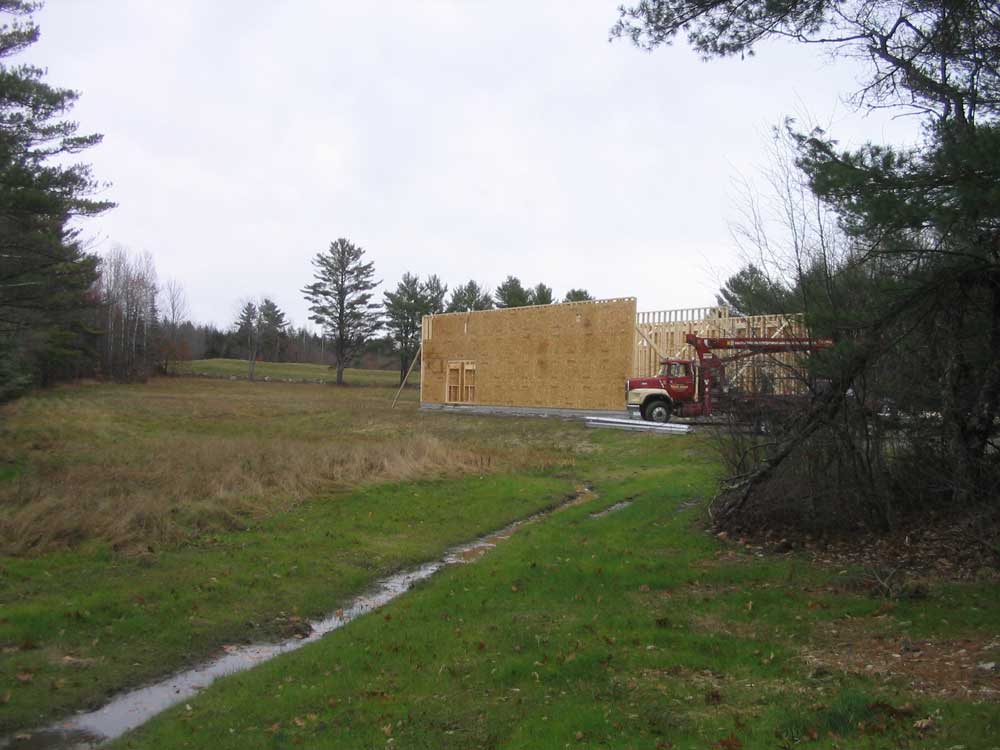
A view from the driveway coming in. |
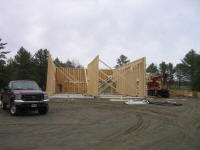
A view from the front, showing both bays. |
A view from back in the field, looking out.
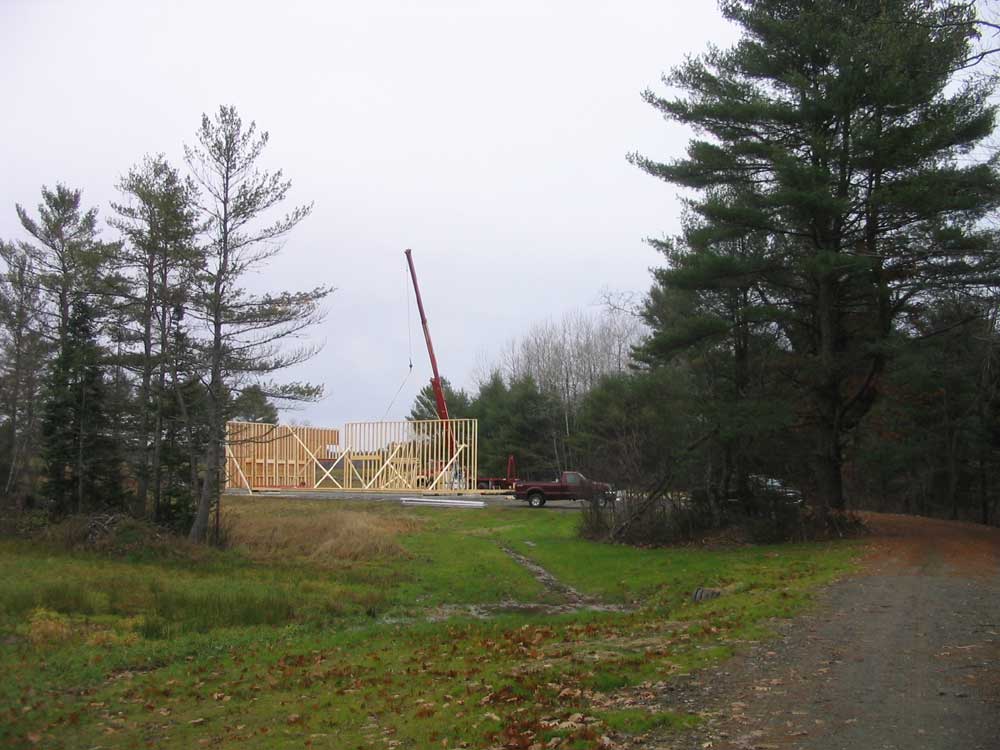
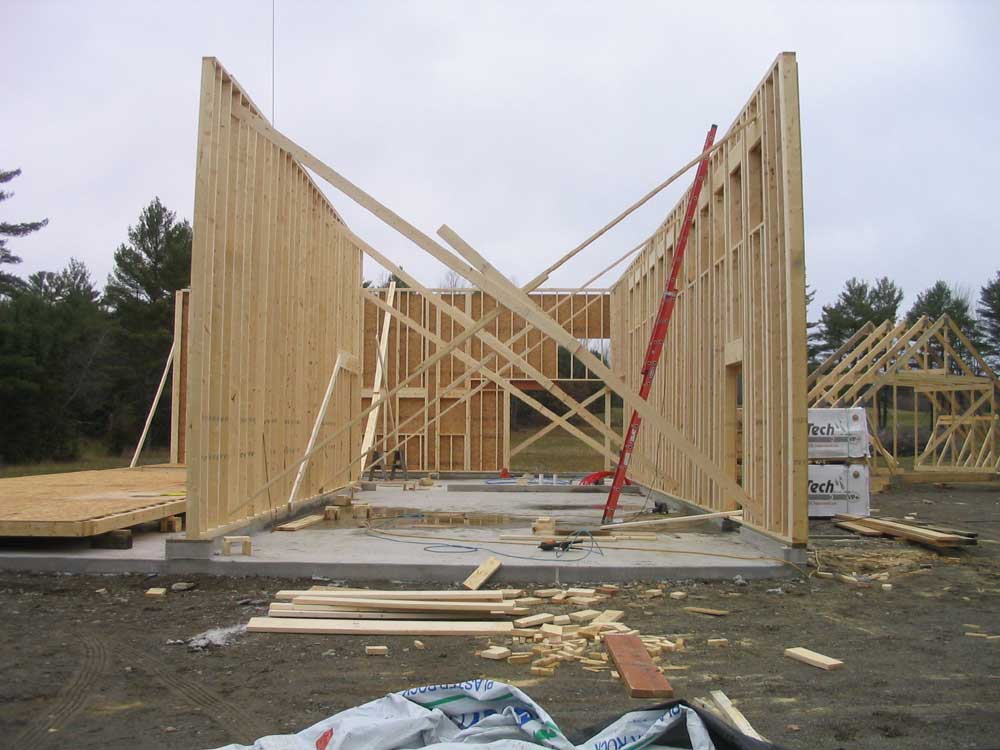
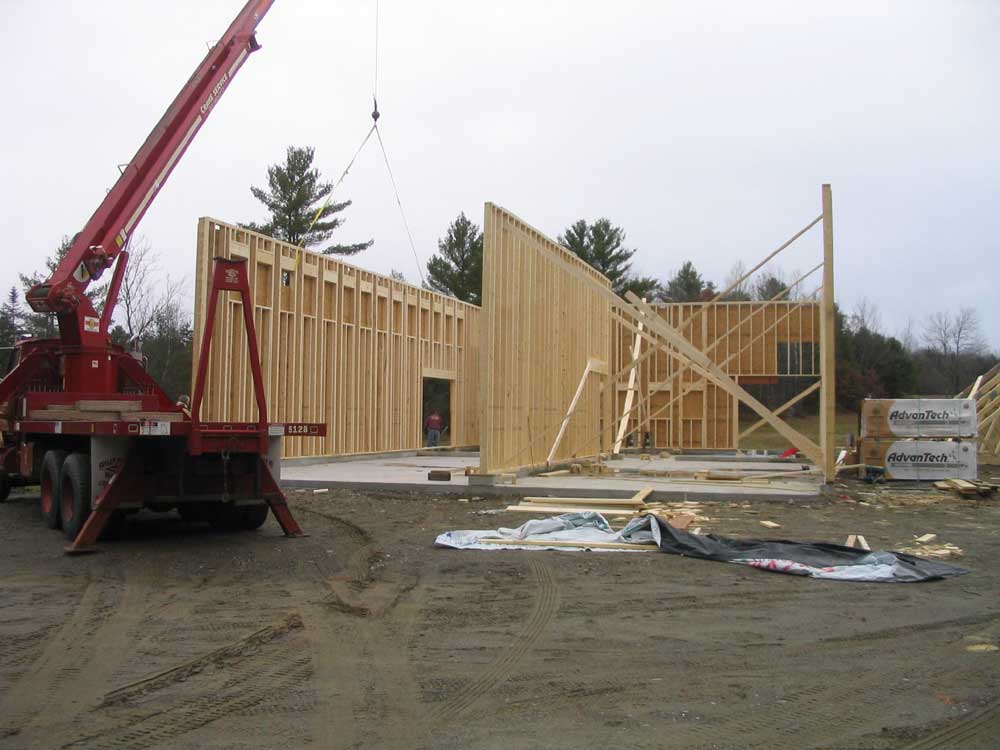
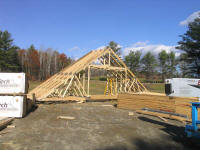
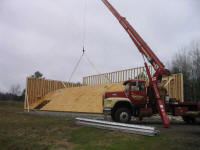
Next, and finally,
it was time for the last wall: the
transverse interior wall that defines the back
wall of the boat bays, and closes off the wood
shop. The two openings near the center are
for large doors that allow access to either boat
bay from the wood shop. |
Bill lifted the wall high above the upright shop
walls. |
Booming back into position. |
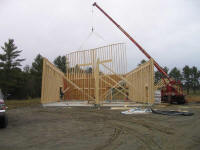
Slowly lowering into place |
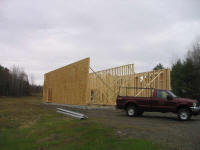
Done, and the crane is already gone! |
Back corner view |

Front corner view |
|
Next: roof trusses.
Click here to continue...
|
|
This page was originally
posted on November 9, 2005.
|
|