Phase 3: Finish
Work
|
Shop Home
Page
Shop
Planning
Phase 1: Site Prep and Foundation
Phase 2: Framing
Phase 3: Finish Work
Phase 4: Shop Setup |
| Electrical Installation
 With a more or less dry
roof overhead, it was time for me to begin the
electrical installation. I planned to do all the
work myself, thereby beginning the series of major
projects that I expected to take care of in order to
complete the shop. With a more or less dry
roof overhead, it was time for me to begin the
electrical installation. I planned to do all the
work myself, thereby beginning the series of major
projects that I expected to take care of in order to
complete the shop.
I began with some rough
planning to determine what my circuits might be, and how
I might go about running them. This also helped me
determine generally how much wire, how many boxes, and
what other materials I should buy. |
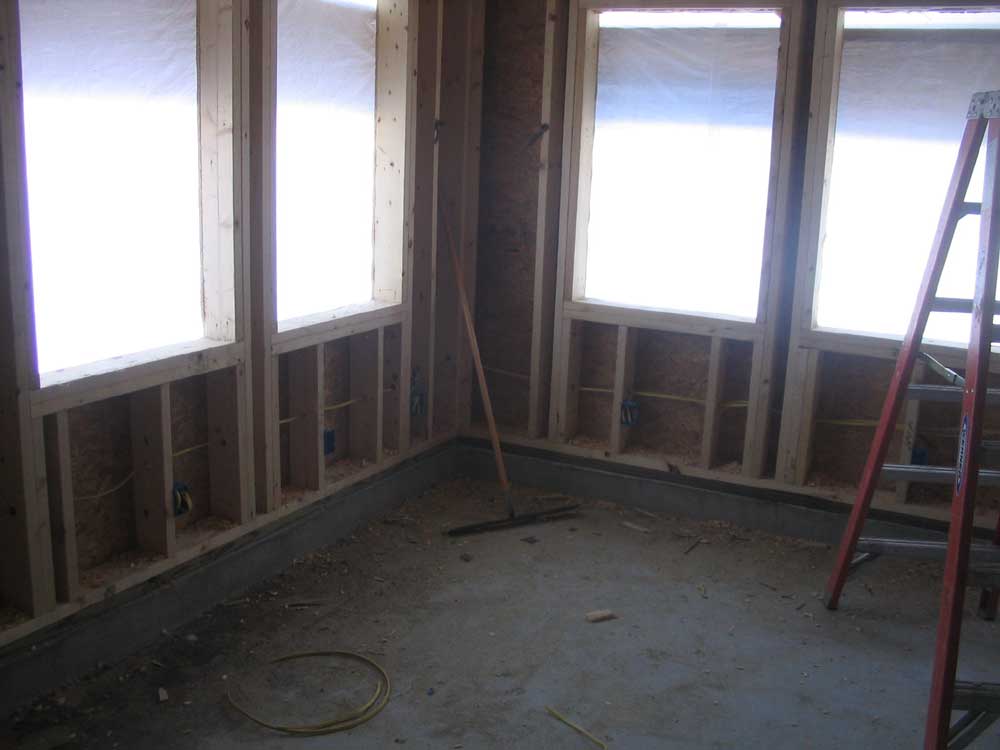
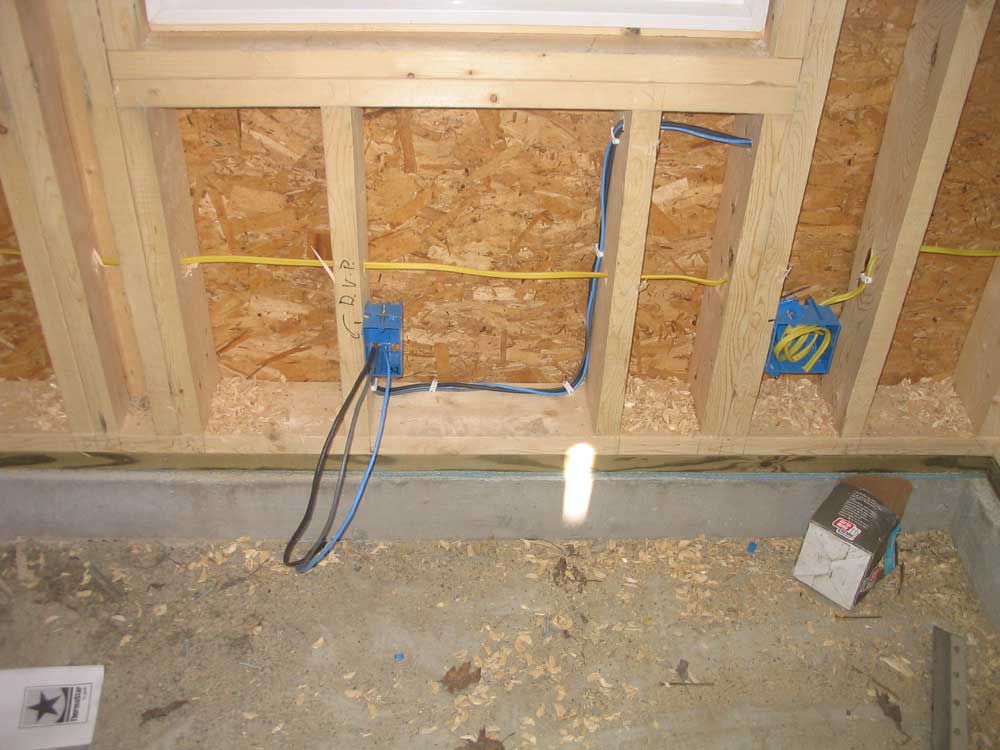
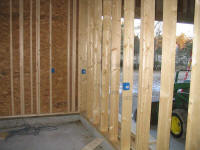
I wasted no time getting ready, and the day after
discovering that the roof was dried in enough for me to
begin, I was onsite armed with materials and ready to
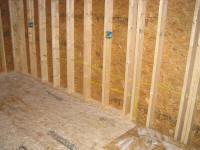
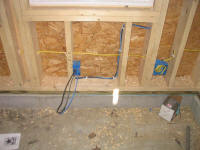
go. I began by installing the plastic boxes in the
walls at all the outlet locations. First, I used a
chalk line to mark a line 48" above the floor in both
boat bays and the shop bay (I left the office for
later). I planned to install all my outlets, as
well as switch boxes, at 48" from the floor. I
located boxes about every six feet along all the walls,
and nailed them in. |
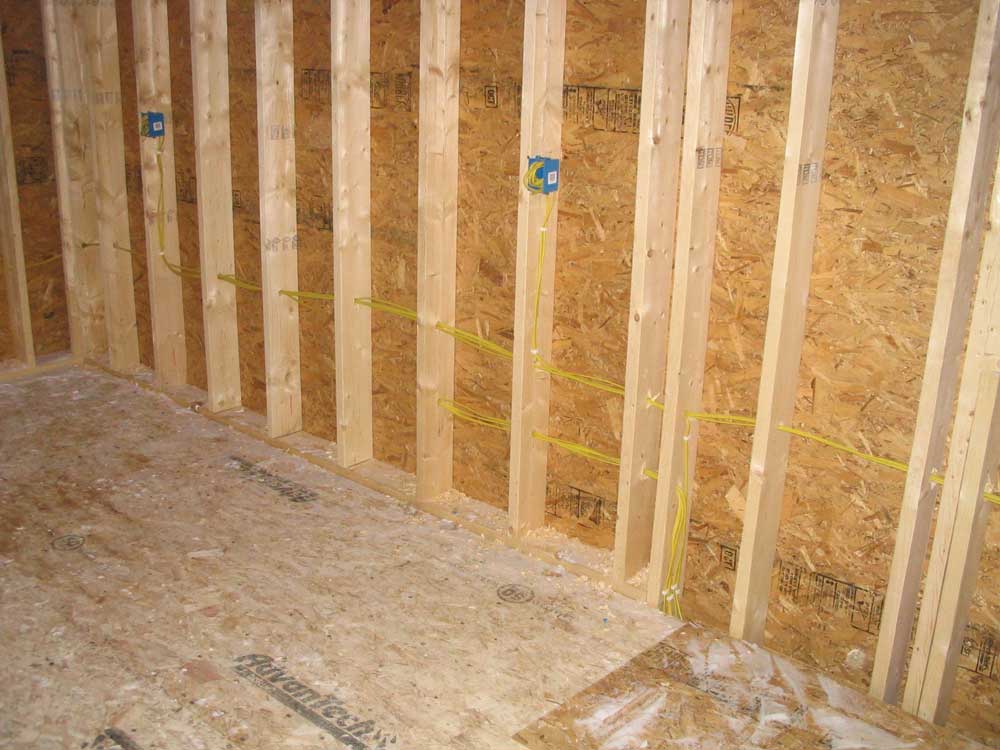
 Next, I drilled holes through the studs in the eastern
wall. The main 200 amp load center would
eventually be installed at the front of the building, on
the eastern wall, near where the trench from the meter
was located. Therefore, all circuits would
eventually need to end up in this location. As it
happened, the eastern wall had more studs in it than any
of the others, thanks to someone's insistence on so many
window openings. Because of the myriad
studs--often 3 or 4 immediately adjacent to each other,
and often closely spaced--drilling was difficult, as the
tool wouldn't fit into the openings between the studs.
This meant that I had to drill many of the holes at an
angle. Next, I drilled holes through the studs in the eastern
wall. The main 200 amp load center would
eventually be installed at the front of the building, on
the eastern wall, near where the trench from the meter
was located. Therefore, all circuits would
eventually need to end up in this location. As it
happened, the eastern wall had more studs in it than any
of the others, thanks to someone's insistence on so many
window openings. Because of the myriad
studs--often 3 or 4 immediately adjacent to each other,
and often closely spaced--drilling was difficult, as the
tool wouldn't fit into the openings between the studs.
This meant that I had to drill many of the holes at an
angle. |
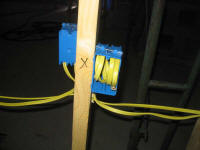
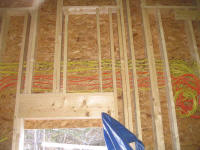 Perhaps I should have bored a couple very large holes
through the studs, but I didn't want to drill out too
much of the structure; additionally, I needed the length
of a ship auger bit to get through the studs that were
closely spaced, and a bit that large would have been
prohibitively expensive. Instead, I drilled a
number of 1/2" holes (the only bit I had on the first
day), and, later, 1" holes (after picking up a new bit
the next day), which allowed me to pull 4 wires through
one hole. Perhaps I should have bored a couple very large holes
through the studs, but I didn't want to drill out too
much of the structure; additionally, I needed the length
of a ship auger bit to get through the studs that were
closely spaced, and a bit that large would have been
prohibitively expensive. Instead, I drilled a
number of 1/2" holes (the only bit I had on the first
day), and, later, 1" holes (after picking up a new bit
the next day), which allowed me to pull 4 wires through
one hole. |
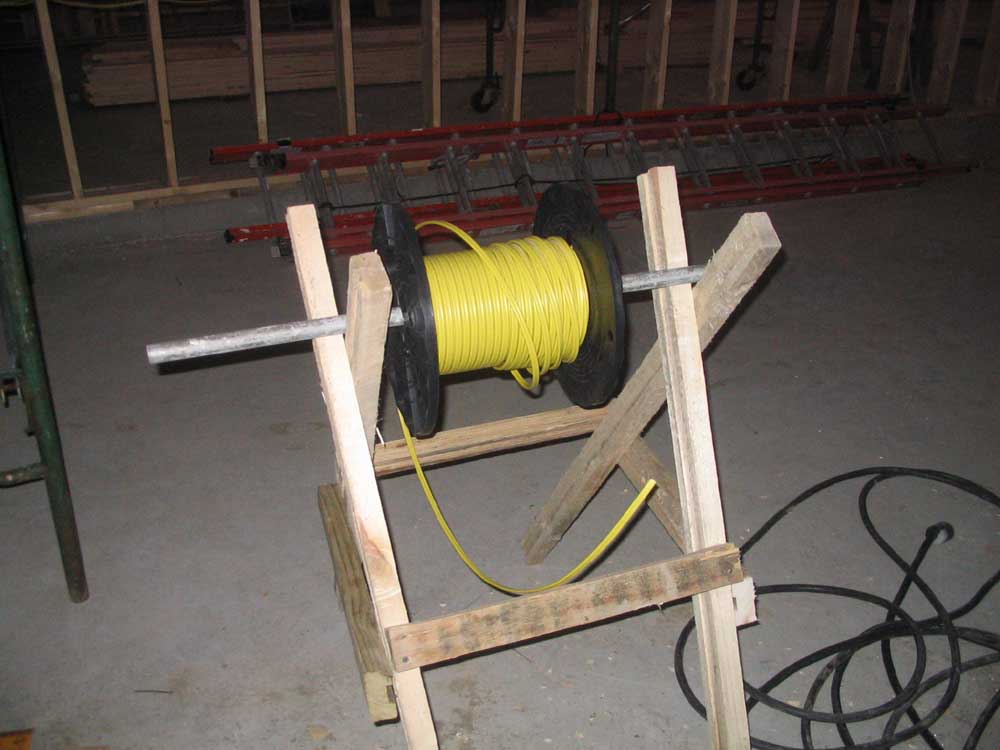
 I
chose to run all lighting and receptacle circuits using
12/2 wire, rather than the smaller 14/2 that is more
common. This allowed bulk purchase of the wire,
and the initial cost for the superior wire was only
slightly higher. I purchased 3, 1000-foot reels of
the wire. In addition, I purchased 350' of heavy
10/3 wire that I needed to a couple dedicated 220-volt
circuits (future tablesaw and compressor), and some 30
amp outdoor receptacles for RV hookup. I
chose to run all lighting and receptacle circuits using
12/2 wire, rather than the smaller 14/2 that is more
common. This allowed bulk purchase of the wire,
and the initial cost for the superior wire was only
slightly higher. I purchased 3, 1000-foot reels of
the wire. In addition, I purchased 350' of heavy
10/3 wire that I needed to a couple dedicated 220-volt
circuits (future tablesaw and compressor), and some 30
amp outdoor receptacles for RV hookup. |
 I
soon found that my initial wiring plan was at best a
general guideline. As I proceeded, I continually
discovered other circuits that I needed, or wanted, to
run, so the plan was fluid, to say the least.
Fortunately, I had plenty of wire on hand, and pressed
onwards with the wiring, running a circuit at a time,
leaving plenty of excess in the boxes and at the future
load panel location, and moving onto the next, drilling
new holes through the studs as the old ones became
filled to capacity. I presently found that it was
just easier to conceive and wire each circuit as the
thought arose, and continued in this manner. I
soon found that my initial wiring plan was at best a
general guideline. As I proceeded, I continually
discovered other circuits that I needed, or wanted, to
run, so the plan was fluid, to say the least.
Fortunately, I had plenty of wire on hand, and pressed
onwards with the wiring, running a circuit at a time,
leaving plenty of excess in the boxes and at the future
load panel location, and moving onto the next, drilling
new holes through the studs as the old ones became
filled to capacity. I presently found that it was
just easier to conceive and wire each circuit as the
thought arose, and continued in this manner. |
|


 |
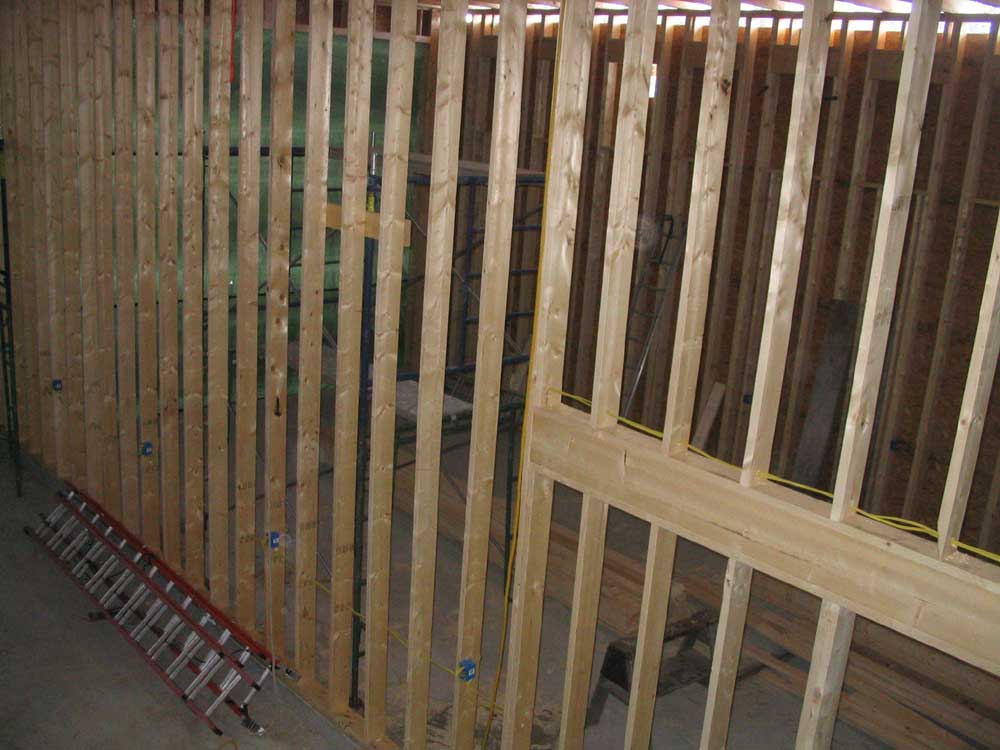
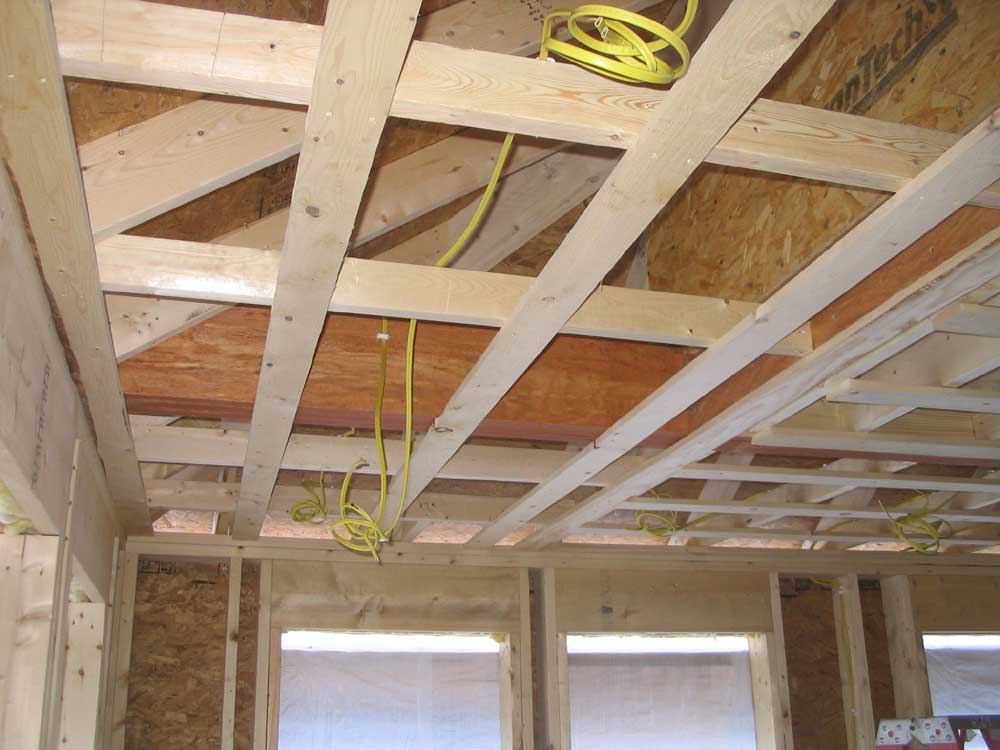
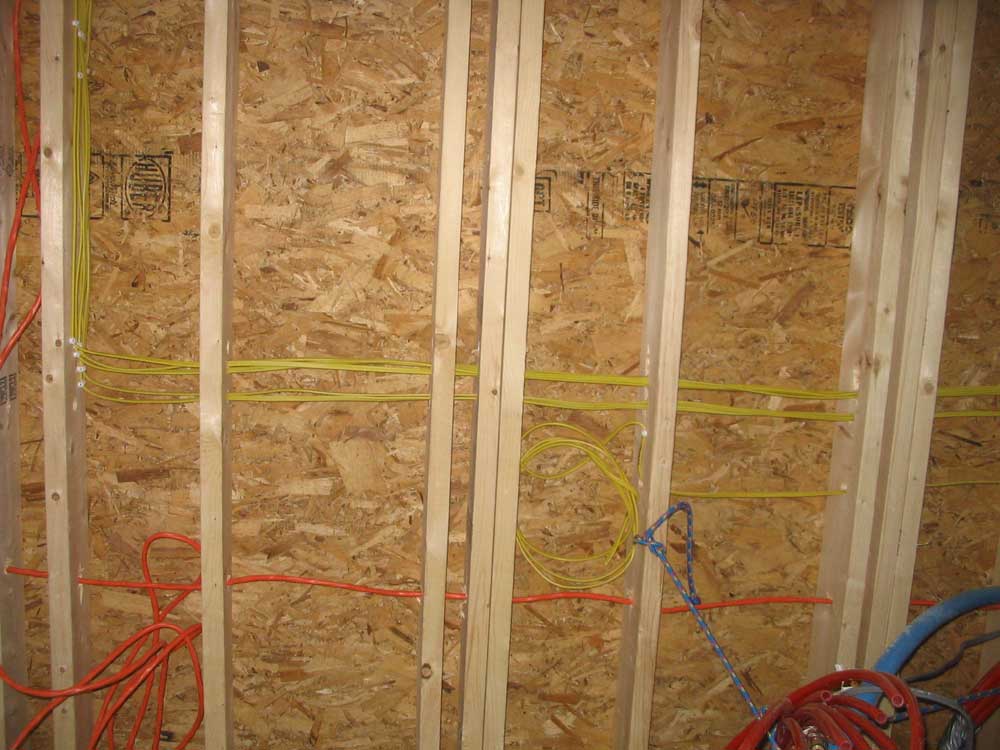
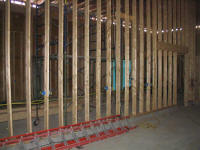
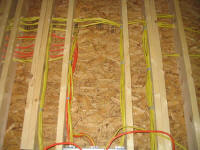
 Running
wires to the far reaches of the building presented
logistical problems, as the ceiling height made working
overhead difficult. I concentrated at first on
running as many circuits as possible through the eastern
wall near floor level, as I determined that despite the
difficulties in drilling holes through the studs, this
was still the most efficient way to run the wires.
Eventually, however, I had no choice but to pull wires
up to the ceiling and across the trusses to the other
side of the building. Happily, this was made
easier by the appearance of some nice pipe staging,
which Bob and the crew were using to install strapping
on the ceiling and for other chores at the time, so I
was able to use this to my advantage, along with some
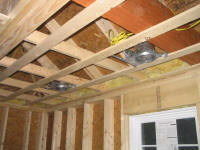
ladder work as required. Running
wires to the far reaches of the building presented
logistical problems, as the ceiling height made working
overhead difficult. I concentrated at first on
running as many circuits as possible through the eastern
wall near floor level, as I determined that despite the
difficulties in drilling holes through the studs, this
was still the most efficient way to run the wires.
Eventually, however, I had no choice but to pull wires
up to the ceiling and across the trusses to the other
side of the building. Happily, this was made
easier by the appearance of some nice pipe staging,
which Bob and the crew were using to install strapping
on the ceiling and for other chores at the time, so I
was able to use this to my advantage, along with some
ladder work as required. |
Pulling the wires was complicated by the fact that the
weather was very cold, which made the already stiff
cable even more difficult to handle. During the
two elapsed weeks that I installed the wiring,
temperatures were often near zero in the mornings, and
on several of the days barely warmed into the teens.
 Over
the course of seven full working days, I pulled the
cabling for 24 circuits, including receptacles, utility
lights, overhead lights, boiler, well, effluent pump,
recessed lighting in the office, and the four heavier
10-gauge circuits mentioned above. I carefully
marked each wire in a few places, particularly at the
panel ends, for future identification. I used
plastic staples to secure the wires near the boxes,
along the studs and trusses, and in other locations as
necessary, trying to keep the job neat and organized. Over
the course of seven full working days, I pulled the
cabling for 24 circuits, including receptacles, utility
lights, overhead lights, boiler, well, effluent pump,
recessed lighting in the office, and the four heavier
10-gauge circuits mentioned above. I carefully
marked each wire in a few places, particularly at the
panel ends, for future identification. I used
plastic staples to secure the wires near the boxes,
along the studs and trusses, and in other locations as
necessary, trying to keep the job neat and organized. |
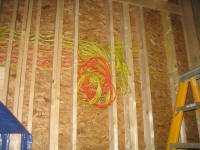
One day, with most of the bulk wiring completed, I spent
the entire day running a number of home-run video, data
network, and phone lines to the office from a central
location. I chose to run individual wires
for each of several receptacle locations in the office
(so-called "home run" wiring), and pulled enough of each
type of cable for multiple hookups as necessary,
anticipating the expected locations of computer and TV
equipment in the office. Because of the
possibility of interference from electrical wiring, I
chose to run the network, phone, and video lines through
the ceiling, above the trusses and far away from the
cables in the walls below. To make this job
easier, I first ran a pull line across the trusses,
standing atop a ladder and throwing a pair of lines
through as many trusses at a time as I could, then
moving the ladder and repeating the process till I
reached the paint room area. With the two lines
run, it was easier to then pull each set of three cables
through the entire truss system to the back of the shop;
the second line allowed me to ensure that there was
always a line in place for pulling the next set of
wires. (I ran a new line through with each set of
cables pulled.)To each of three
locations in the office, I ran a pair of CAT5e cables
(blue for data, gray for phone) and a RG8U quad-shielded
coax cable. Choosing overkill rather than future
regret, I ran a fourth set to a box near my main desk
location, giving myriad potential options for computer
and network hookups. I dead-ended the cables at
the front of the building near the future electrical
panel; later, I planned to install a box to contain the
hookups for these cables. |
|
|
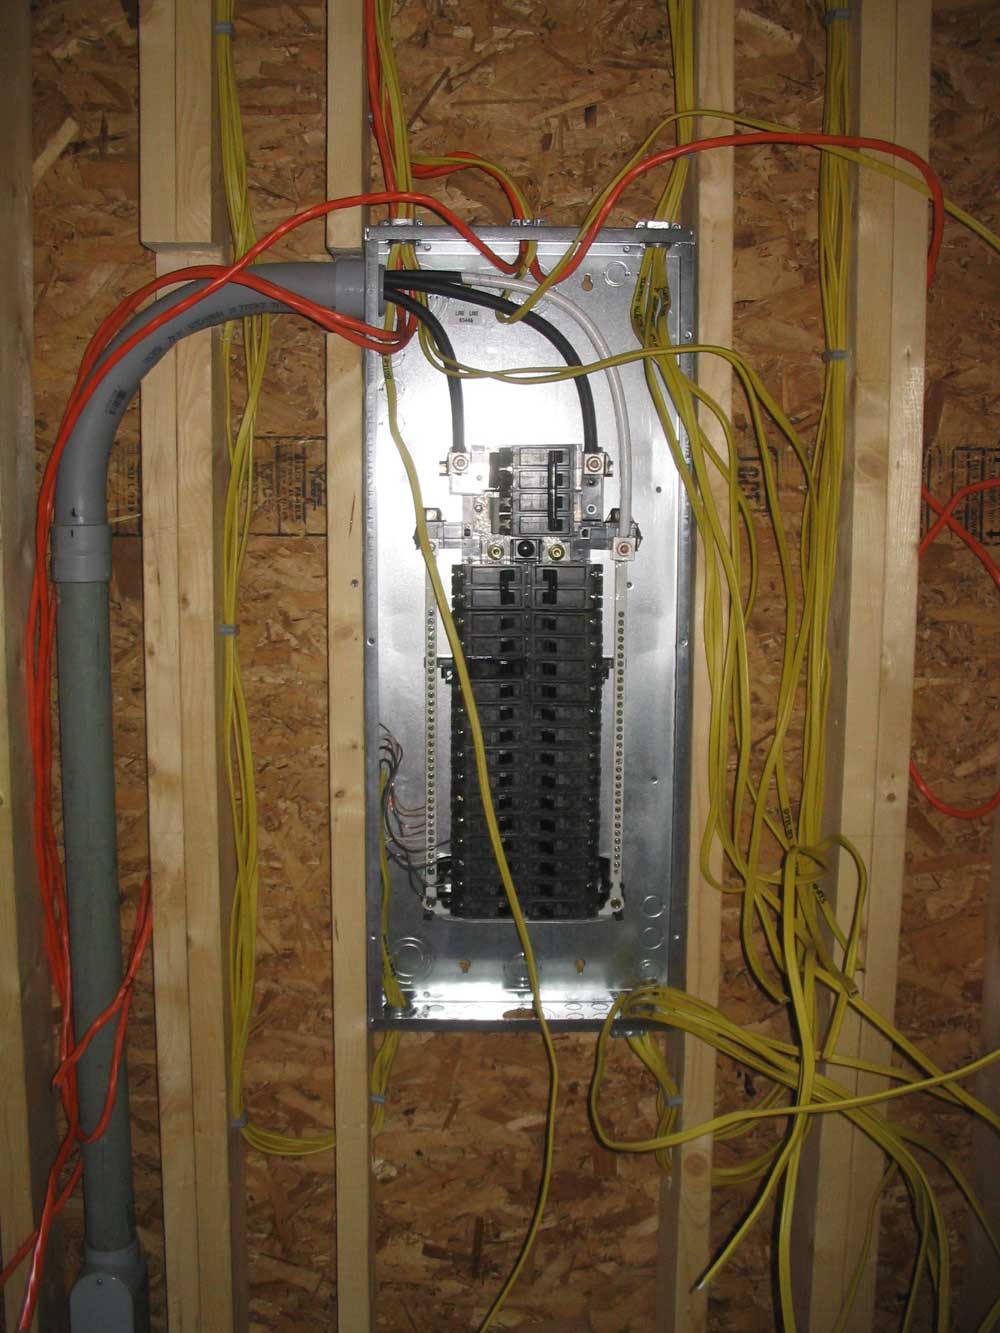
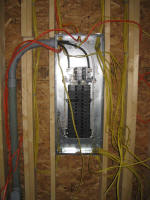
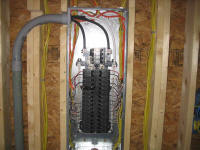
 My
electrician returned near the end of my bulk wiring
phase to install the main service cable into the
building, and to install the raw load center with 200
amp service. This would transfer the power
availability from some temporary outlets on the meter
post to the building itself, and signaled the time for
me to wire up the master panel so that some of the
interior circuits could be used for the remainder of
construction. He did a beautiful job running the
main cabling up into the building from the underground
trench, using plastic conduit for a clean appearance and
protection. My
electrician returned near the end of my bulk wiring
phase to install the main service cable into the
building, and to install the raw load center with 200
amp service. This would transfer the power
availability from some temporary outlets on the meter
post to the building itself, and signaled the time for
me to wire up the master panel so that some of the
interior circuits could be used for the remainder of
construction. He did a beautiful job running the
main cabling up into the building from the underground
trench, using plastic conduit for a clean appearance and
protection. |
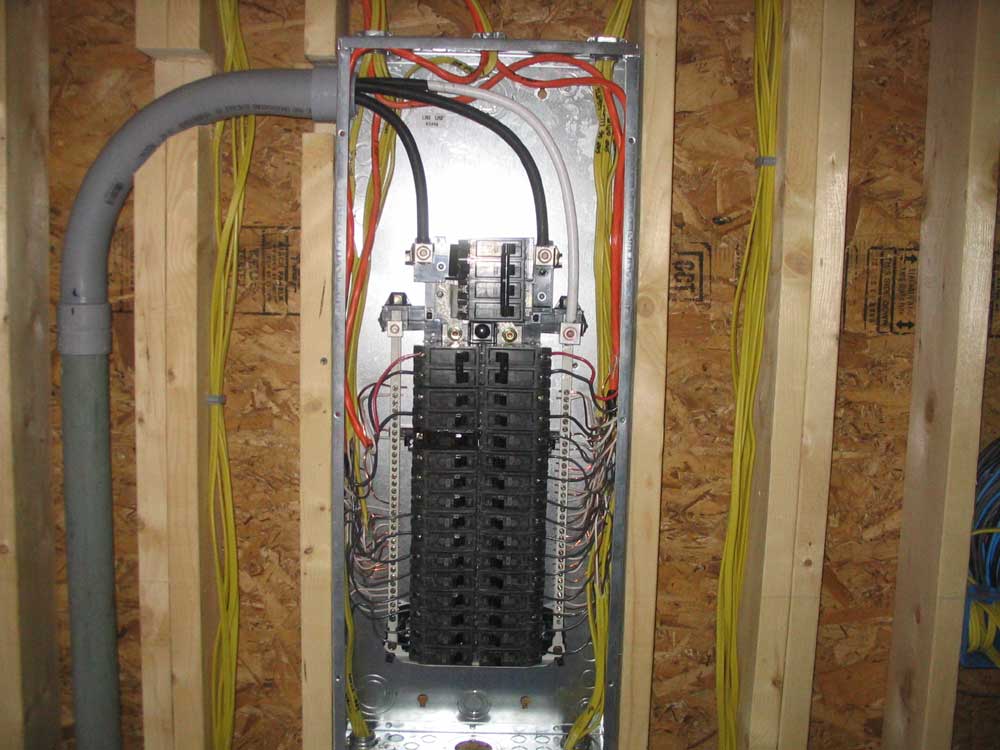
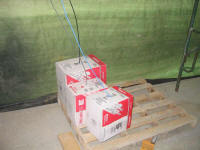
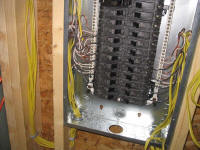 I
purchased the circuit breakers required for the panel,
and then spent the next day and a half working on the
panel, first organizing and routing the 24 cables that I
had coiled up above during installation, running them
into the panel enclosure through a series of clamps
(frustratingly, I had the wrong size on hand, and had to
run several miles down the road to a lumber store to
pick up more), and finally stripping the cable ends and
wiring up the individual circuits. I might have
finished in one day, but the delays caused by having the
wrong parts meant that I needed to spend an hour or two
the next day completing the job. For safety, I
turned off the main breaker located near the power
company's meter, so the panel was dead during my wiring. I
purchased the circuit breakers required for the panel,
and then spent the next day and a half working on the
panel, first organizing and routing the 24 cables that I
had coiled up above during installation, running them
into the panel enclosure through a series of clamps
(frustratingly, I had the wrong size on hand, and had to
run several miles down the road to a lumber store to
pick up more), and finally stripping the cable ends and
wiring up the individual circuits. I might have
finished in one day, but the delays caused by having the
wrong parts meant that I needed to spend an hour or two
the next day completing the job. For safety, I
turned off the main breaker located near the power
company's meter, so the panel was dead during my wiring.
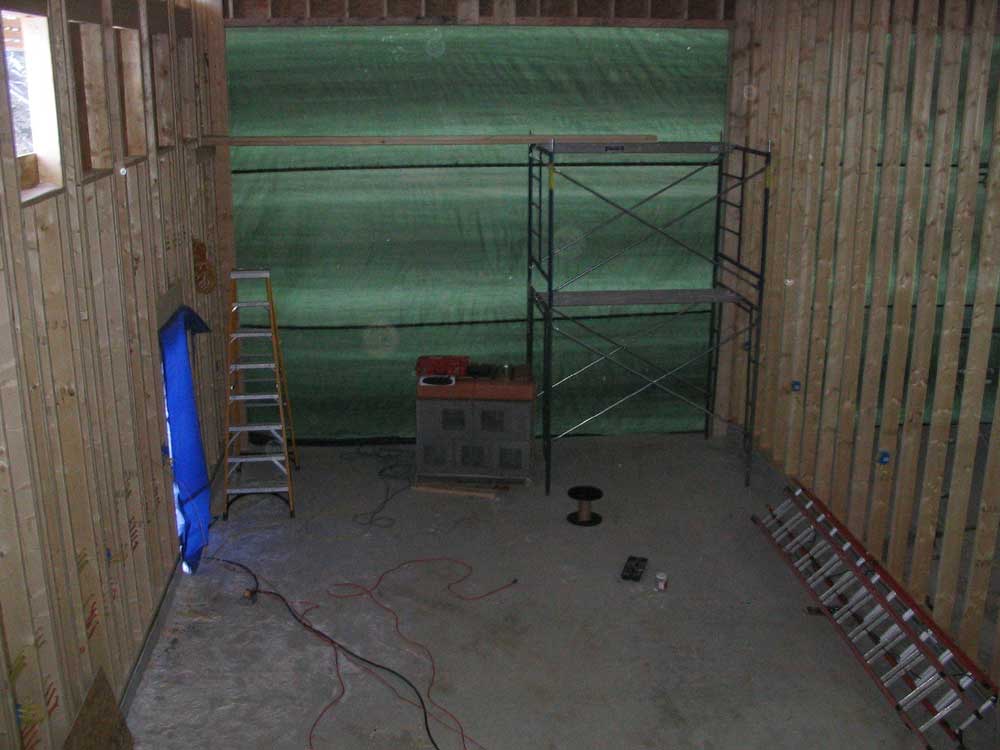
With the temporary outlets
disconnected, time was of the essence for me to finish
the panel, as there was no power onsite during the
process. Bob used a generator during the period as
required, but this was inconvenient, and we all looked
forward to having "real" power inside. |
|
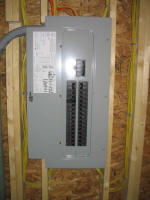 |
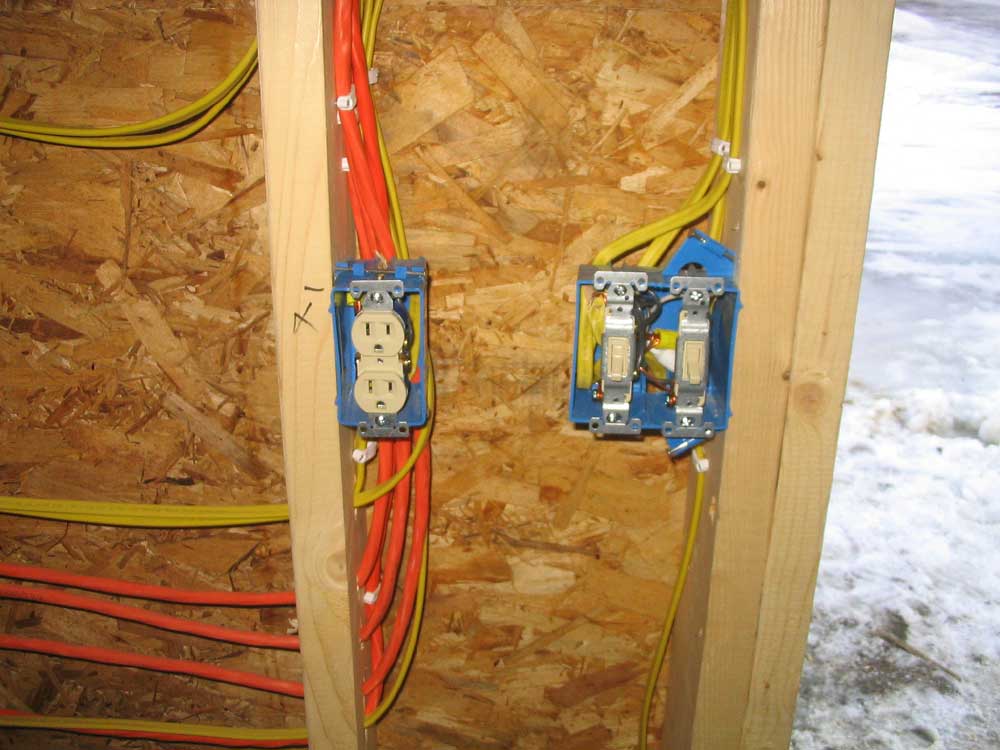
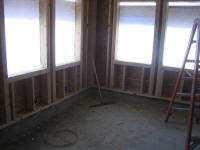
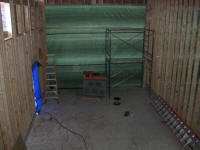
 With
the panel completely wired, I installed about 15
receptacles in two separate circuits in boat bay 2 (the
easternmost bay, which contained the load center),
allowing for plenty of plug-in power for whatever needs
were required. Because the walls would not be
drywalled or covered in other solid material, I could
install the outlets at this early stage, and they would
not be in the way of future construction jobs. With
the panel completely wired, I installed about 15
receptacles in two separate circuits in boat bay 2 (the
easternmost bay, which contained the load center),
allowing for plenty of plug-in power for whatever needs
were required. Because the walls would not be
drywalled or covered in other solid material, I could
install the outlets at this early stage, and they would
not be in the way of future construction jobs. |
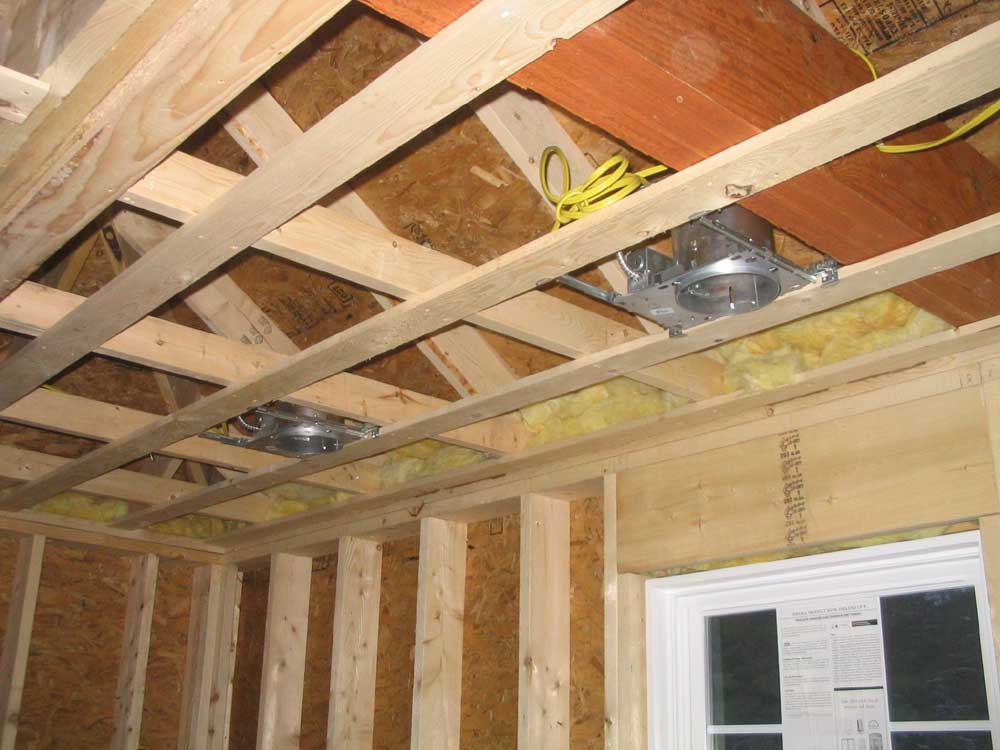
 With
that, the initial phase of wiring was complete. I
had completed all wiring jobs, including installing and
wiring a number of recessed light fixtures in the office
and bathroom, that needed to be done before the building
could be insulated inside, which was scheduled for the
next week or two. With
that, the initial phase of wiring was complete. I
had completed all wiring jobs, including installing and
wiring a number of recessed light fixtures in the office
and bathroom, that needed to be done before the building
could be insulated inside, which was scheduled for the
next week or two.
Wiring Tally:
- 2800' of 12/2
cable
- 300' of 10/3 cable
- 600' of blue Cat5e
- 600' of gray Cat5e
- 600' of RG8U coax
- 40-50 hours' cable
pulling/installing time
- 875 +/- wire
staples
- 24 circuits:
2, 30-amp 110V; 2, 30-amp 220V; 22, 20-amp, 110V
A couple weeks later,
some minor changes in the stair locations necessitated
moving a few of the wires that I had run previously.
Fortunately, this was a simple matter and took about an
hour to complete. However, in the process I did
run out the final spool of 12/2 wire, bringing the total
used to over 3000' (not discounting the myriad scraps
that I stored in a box for possible later use).
Later in the process,
I'll complete the installation of the receptacles,
lighting, and other devices, once the insulation and
some of the wall coverings are complete.
Updates here when that happens! |
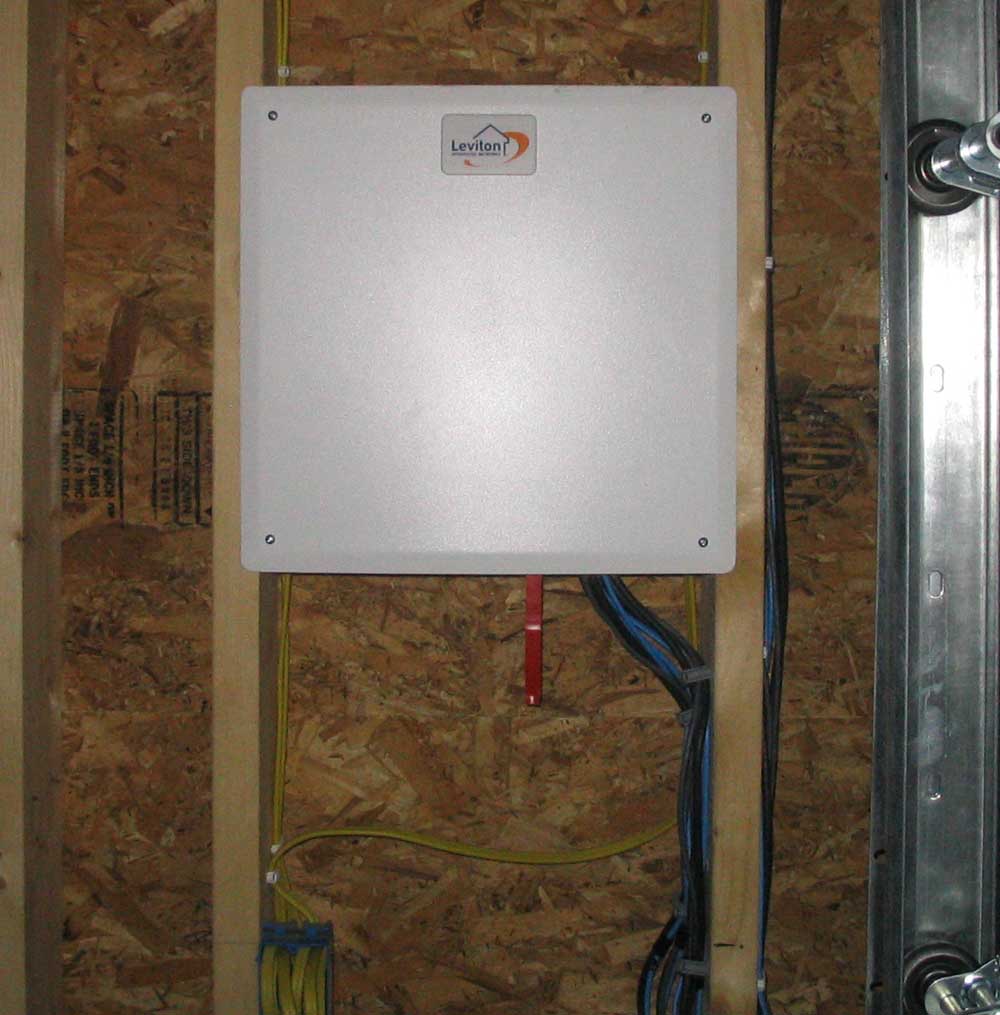
 To
house the connections for phone, data, and video,
whatever they end up being, I purchased an empty box
designed for this purpose. For the time being, I
simply ran all the cable inside the box and installed
the cover for protection; later, I'll make up whatever
connections are required, but that's down the road a
bit. To
house the connections for phone, data, and video,
whatever they end up being, I purchased an empty box
designed for this purpose. For the time being, I
simply ran all the cable inside the box and installed
the cover for protection; later, I'll make up whatever
connections are required, but that's down the road a
bit. |
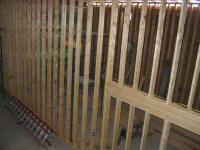
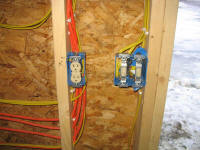
As time allowed, I began
installing the outlets and switches in the shop bays.
Over a widely spread period of days, I eventually
installed most of these outlets, and all were in place
before the wall plastic was hung in late January.
Still, there was work to
be done: once the plastic was hung, forming the
final wall surface everywhere but the office and
bathroom, I began cutting the plastic out in way of each
outlet and switch, where they had been covered during
installation, and installing the plastic face plates on
each. I also finished installing the outlets and
switches in the attic and paint room, completing all the
installation except for the office, which would have to
wait until drywall later on.
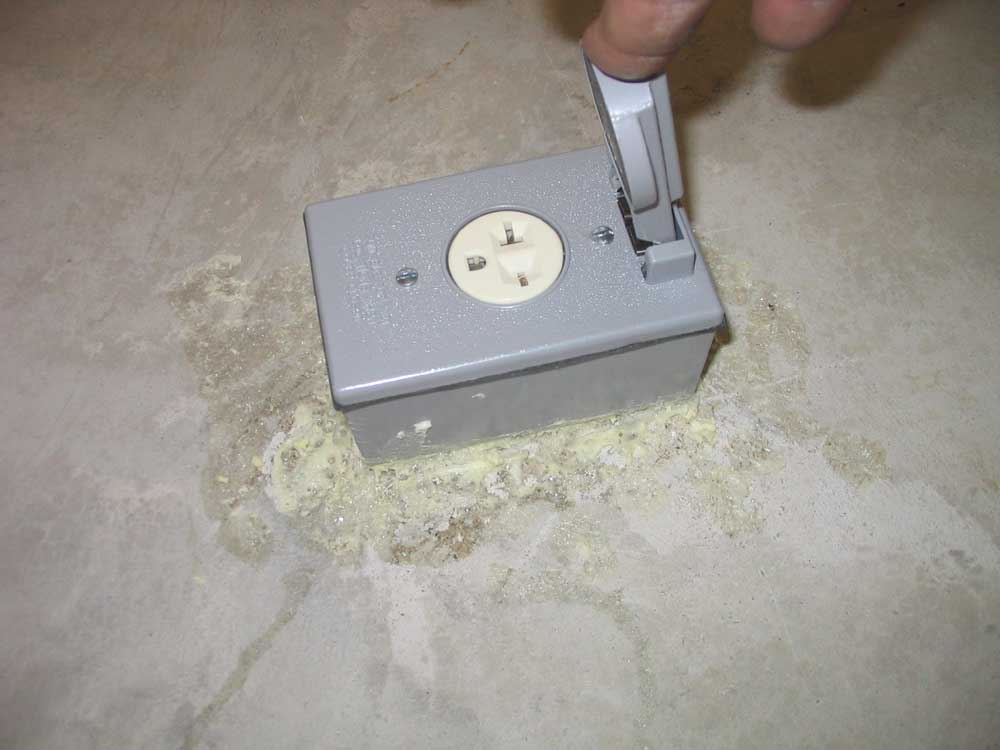
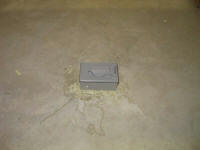
In the workshop, I
installed a watertight box on the floor, directly above
the conduit containing the 10/3 wire needed for the 220V
tablesaw I planned to acquire. To hold the metal
outlet box in place, I splooshed it down in a heavy bed
of spray foam, which, when cured, held it tightly in the
right location. After scoping out the saw I
intended to buy, I installed a 220V receptacle of the
proper type in the box, and covered it with a metal face
plate. |

Click here to continue... |
This page was originally
posted on December 21, 2005.
|
Updates |
12/26/05 |
| |
12/30/05 |
|
1/23/06 |
| |
|
|