|
| |
|
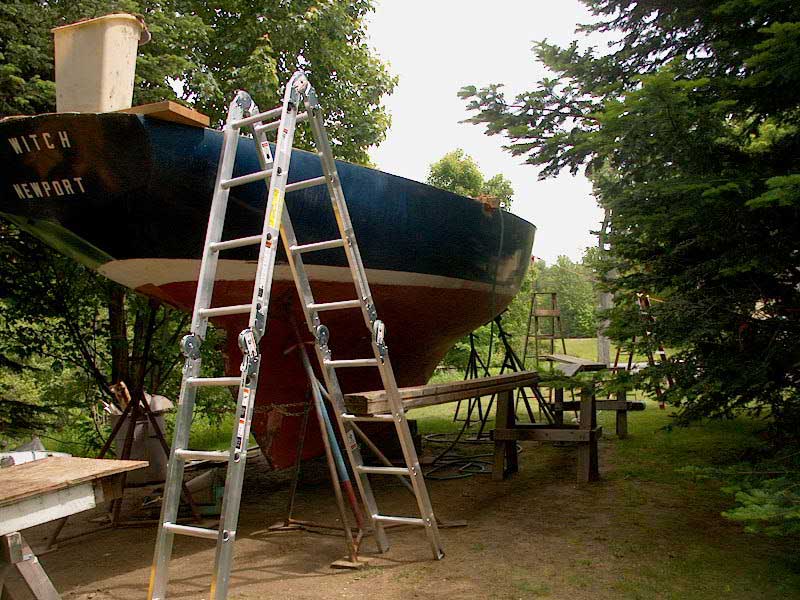
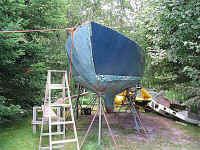
June 22, 2003
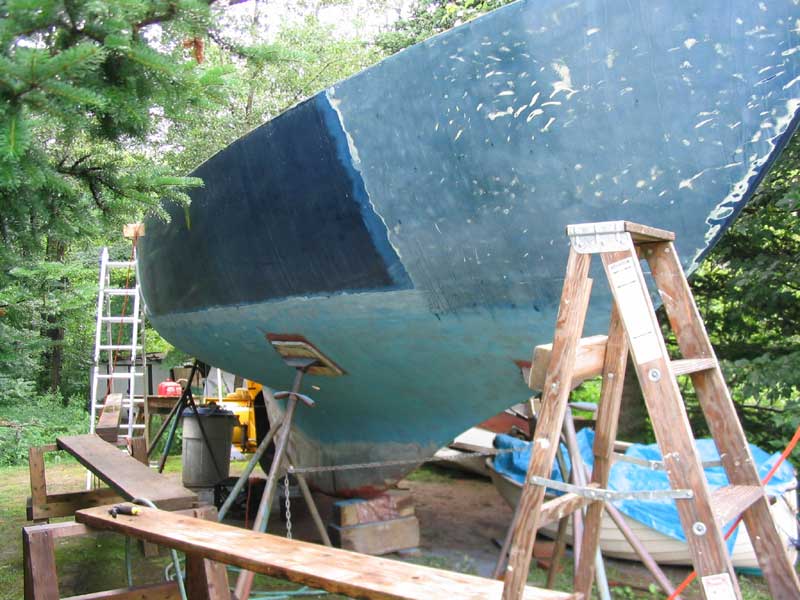
As a trial run, I decided
to start sanding part of the hull. I was sick of working inside the
boat, and thought I'd do something else for a change. To begin, I
set up some staging along one side of the hull, positioned to give me a
good working height on the entire height of the topsides. |
|

|
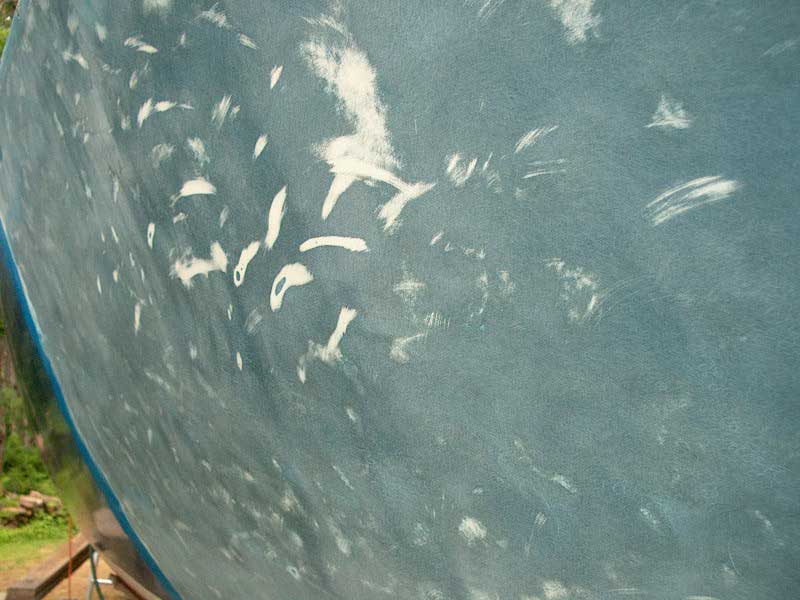
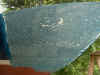
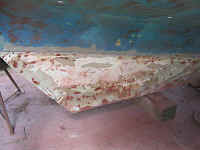
| Not knowing how the paint would
sand, I began at the starboard bow with my trusty Porter Cable 5"
random orbit DA sander equipped with an 80 grit disc. Although the
80 grit worked, it soon became apparent that it was too slow, and I had
difficulty breaking through the outer layers of blue paint easily. |
|
 I
switched to 40 grit paper, tentatively because I didn't want to
create a mess. However, even the 40 grit took a long time to get
through the outer layers of blue paint that were on the hull--it's tough
stuff, whatever it is. Beneath the blue paint I found a layer of
white material--at first I thought it was paint (and it still could be),
but the more I sanded, the more I thought it was some sort of all-over
fairing filler. Beneath the white layer was the original blue
gelcoat. I
switched to 40 grit paper, tentatively because I didn't want to
create a mess. However, even the 40 grit took a long time to get
through the outer layers of blue paint that were on the hull--it's tough
stuff, whatever it is. Beneath the blue paint I found a layer of
white material--at first I thought it was paint (and it still could be),
but the more I sanded, the more I thought it was some sort of all-over
fairing filler. Beneath the white layer was the original blue
gelcoat.
|
|
Not wanting to scar the soft gelcoat too badly with the 40 grit paper, I
only used the coarser paper to break through the paint and into the white
layer. Once I had a section of about 6 linear feet
sanded in this manner, I decided to try some 80 grit to remove the rest of
the material down to bare gelcoat. This worked fairly
well. As I sanded away the white stuff, a series of gouges and half
moons (all filled with white) appeared. It seems that an overzealous
person in the past butchered the hull with an angle grinder, which damage
someone then had to fill with this white fairing material. To their
credit, they seemed to do a pretty good job fairing, as I hadn't noticed
any of these gouges beneath the blue paint.
|
|

|
|
Sanding this 6'-8' area
from gunwale to waterline took me between an hour and an
hour-and-a-half. I would have continued, but it began to rain, so I
had to put the electric tools away. |
|
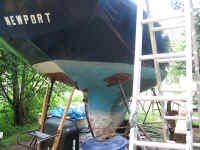
July 22, 2003
Click on the outlined small
photos for a full size image.
 It was mere coincidence
that I happened to next attack hull grinding exactly a month after my
first day. On this day, I decided to plunge ahead with stripping the
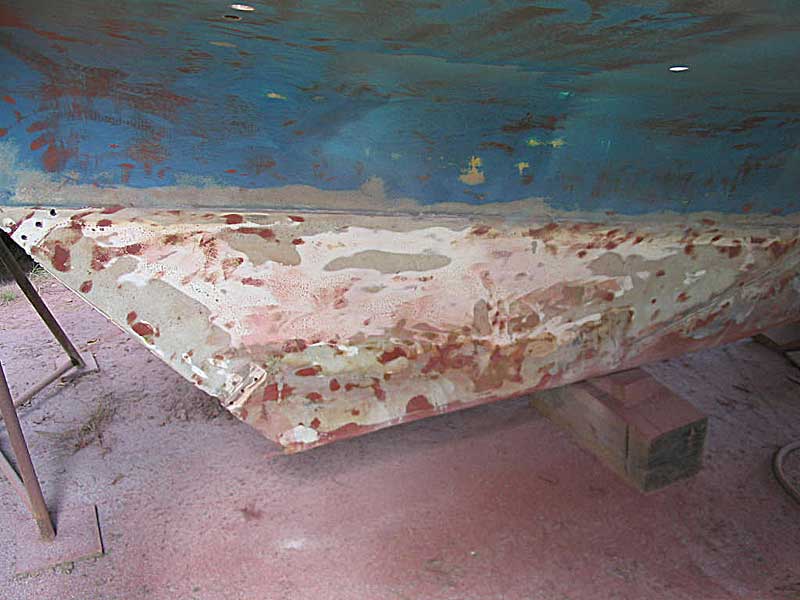
bottom paint--one of the nastiest jobs around, and one that I deemed to be
far easier to handle with the boat outside then closed up in a barn.
A finer, more powdery dust has not been created, I think, than that coming
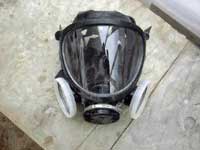
off a grinder against old-fashioned bottom paint. Yuck. I
didn't have any Tyvek suits, and I'm not much of one to wear them anyway
(particularly in summer heat),
so I put on my work shorts and shirt and installed new cartridges in my
trusty 3M full facepiece respirator. This thing is a Godsend. It was mere coincidence
that I happened to next attack hull grinding exactly a month after my
first day. On this day, I decided to plunge ahead with stripping the
bottom paint--one of the nastiest jobs around, and one that I deemed to be
far easier to handle with the boat outside then closed up in a barn.
A finer, more powdery dust has not been created, I think, than that coming
off a grinder against old-fashioned bottom paint. Yuck. I
didn't have any Tyvek suits, and I'm not much of one to wear them anyway
(particularly in summer heat),
so I put on my work shorts and shirt and installed new cartridges in my
trusty 3M full facepiece respirator. This thing is a Godsend.
|
|
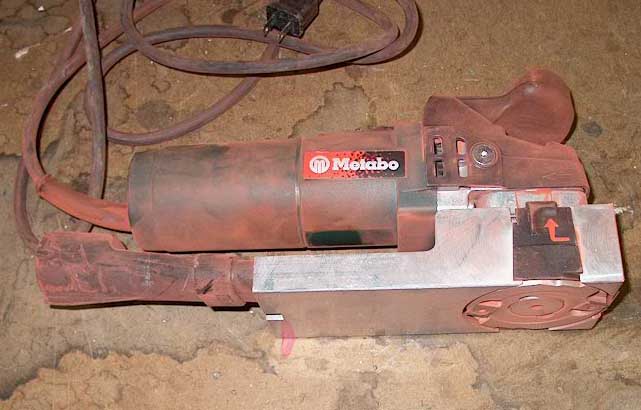
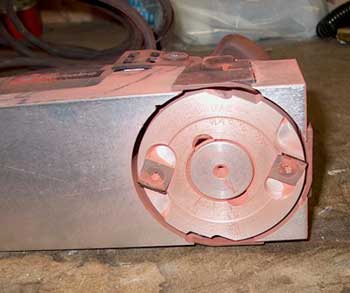
 I began work with no
expectations for how far I might get. It was just a good day for the
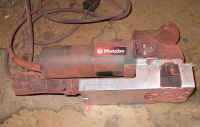
job, and I figured I'd get done whatever I could. I had a new tool
in the arsenal this time: a borrowed Metabo paint stripping tool,
which features a flush disc onto which are installed a pair of tiny, sharp
blades. When the heavy disc spins at high RPMs, the small blades
take off a nice even layer. A few minutes' testing revealed that the
tool worked fairly well on loose, flaking paint with substantial
thickness; the blades like to have a distinct edge to grip onto. The
test also revealed that the thing was much too heavy for its size; I never
determined what made the blasted thing so heavy. Nonetheless, it
worked quite well and, with a Shopvac attached to the dust collection
port, remained as dustless as possible--which is to say, pretty
dusty. But better than without! I began work with no
expectations for how far I might get. It was just a good day for the
job, and I figured I'd get done whatever I could. I had a new tool
in the arsenal this time: a borrowed Metabo paint stripping tool,
which features a flush disc onto which are installed a pair of tiny, sharp
blades. When the heavy disc spins at high RPMs, the small blades
take off a nice even layer. A few minutes' testing revealed that the
tool worked fairly well on loose, flaking paint with substantial
thickness; the blades like to have a distinct edge to grip onto. The
test also revealed that the thing was much too heavy for its size; I never
determined what made the blasted thing so heavy. Nonetheless, it
worked quite well and, with a Shopvac attached to the dust collection
port, remained as dustless as possible--which is to say, pretty
dusty. But better than without!
|
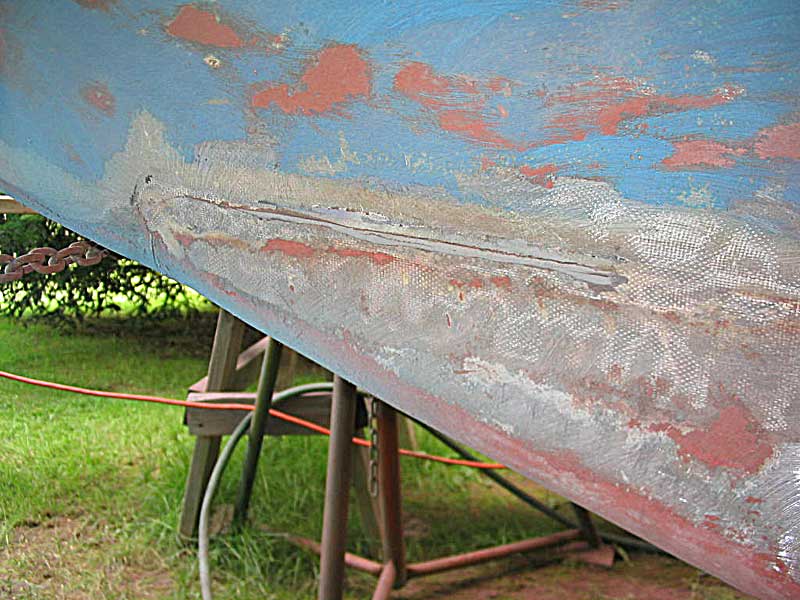
 With the long, flat, heavy
base, the tool is best on flat surfaces. Therefore, it would be best
at stripping barges. Still, there are enough relatively flat
surfaces on a boat hull to enable the tool to work effectively. On
my Triton, I found I could effectively use the tool from the waterline
down to the garboard, where the curvature became too extreme. Other
than the high weight of the tool, it worked very well on this area, and it
didn't take long at all to strip nearly all the paint off the bottom from
the bow to the stern, and down to the garboard. I dug the tool in
too much in one area and shortly thereafter noticed that one blade was
broken--D'OH! Fortunately, I found that there was a
"spare" blade mounted on the tool--a vertically-oriented blade
that I did not need for my current job. Using a silly star-wrench
that came with the kit, I replaced the broken blade. With the long, flat, heavy
base, the tool is best on flat surfaces. Therefore, it would be best
at stripping barges. Still, there are enough relatively flat
surfaces on a boat hull to enable the tool to work effectively. On
my Triton, I found I could effectively use the tool from the waterline
down to the garboard, where the curvature became too extreme. Other
than the high weight of the tool, it worked very well on this area, and it
didn't take long at all to strip nearly all the paint off the bottom from
the bow to the stern, and down to the garboard. I dug the tool in
too much in one area and shortly thereafter noticed that one blade was
broken--D'OH! Fortunately, I found that there was a
"spare" blade mounted on the tool--a vertically-oriented blade
that I did not need for my current job. Using a silly star-wrench
that came with the kit, I replaced the broken blade. |
|
Immediately, the tool
seemed to work better. However, in a few areas, I had some minor
trouble with the tool gouging a bit too far into the hull and
gelcoat--this seemed to be more of a technique issue than a problem with
the tool, however, and I soon got over it. I tried to adjust the
depth of the cut a bit shallower, but amazingly the adjustment required a different
size and type tool (an Allen wrench) than the star wrench included with the kit
for removing the blades (why, oh why, do tool
manufacturers insist on perpetuating this ridiculous habit?), and I didn't
happen to have one of the right size around (figures).
 Ignoring the depth, I
pressed on, and found that a slight adjustment of my technique made all
the difference. The tool made incredibly short work of the dry, flaking
paint. Before long, I had done as much on one side as I could, so I
continued with the other side. Now that I had the hang of the tool,
the second side of the hull went even more quickly, and soon I was
done. The stripping tool removed most of the paint from the hull,
but left a very thin layer right against the gelcoat--a layer that proved
to be very easy to sand off with a grinder. Ignoring the depth, I
pressed on, and found that a slight adjustment of my technique made all
the difference. The tool made incredibly short work of the dry, flaking
paint. Before long, I had done as much on one side as I could, so I
continued with the other side. Now that I had the hang of the tool,
the second side of the hull went even more quickly, and soon I was
done. The stripping tool removed most of the paint from the hull,
but left a very thin layer right against the gelcoat--a layer that proved
to be very easy to sand off with a grinder.
After cleaning myself up a
bit--the dust and grit was thick on my arms and clothing--I decided that,
since I was all covered in red dust anyway, I might as well pull out my
big 8" grinder and see what sort of damage I could do to the
remaining paint on the bottom. At first, though, I thought I'd be
off the hook, as I couldn't find any discs to go with the grinder. I
wasn't altogether unhappy with this, but then I found three 40-grit discs
in the bottom of my sanding box. Sighing inwardly, I realized that I
simply had to sand until my three discs were spent.
 It's funny how things seem
to work. Now, if I'd had a big box of sanding discs, I probably
would have ended up losing a dozen from bad spin-offs, tears, or other
problems, and the paint would have gummed them up at a horrific
rate. Instead, since I had only three, I was slack-jawed in
amazement (or maybe it was a copper dust-induced stupor) to find
that I could remove nearly all the remaining paint from one side of the
hull using only one disc. I concentrated on the lower portions
first--those that the stripper hadn't been able to touch. It's funny how things seem
to work. Now, if I'd had a big box of sanding discs, I probably
would have ended up losing a dozen from bad spin-offs, tears, or other
problems, and the paint would have gummed them up at a horrific
rate. Instead, since I had only three, I was slack-jawed in
amazement (or maybe it was a copper dust-induced stupor) to find
that I could remove nearly all the remaining paint from one side of the
hull using only one disc. I concentrated on the lower portions
first--those that the stripper hadn't been able to touch.
|
|
 When those
areas were close to bare (I refrained from sanding too deeply with the big
grinder, lest I do unnecessary damage to the gelcoat), I lightly ran the
grinder over the stripped areas above, removing much of that thin layer of
remaining paint. Then, with a new disc installed, I attacked the
other side. Finally, with the third--and last--disc, I worked on the
ballast keel and false keel deadwood and the complicated and curvaceous
stern area above the rudder. I tore the disc on a sharp edge
somewhere and was
forced to call it quits, since the tool was badly unbalanced with the asymmetrical
disc. When those
areas were close to bare (I refrained from sanding too deeply with the big
grinder, lest I do unnecessary damage to the gelcoat), I lightly ran the
grinder over the stripped areas above, removing much of that thin layer of
remaining paint. Then, with a new disc installed, I attacked the
other side. Finally, with the third--and last--disc, I worked on the
ballast keel and false keel deadwood and the complicated and curvaceous
stern area above the rudder. I tore the disc on a sharp edge
somewhere and was
forced to call it quits, since the tool was badly unbalanced with the asymmetrical
disc.
|
|
I had a heart-stopping
moment of excitement as I neared the stern while grinding the starboard
side. The large full facepiece respirator tends to block my peripheral vision,
and as I stood up after kneeling to sand near the bottom of the keel, my
shoulder hit the aft jackstand. It tipped over! Quickly, I
grabbed the chain connecting it to the other jackstand which, fortunately,
was on the downhill side (and therefore supporting more weight, I
think). Nothing happened, but for a terrifying moment I was sure the
boat might tip. As fast as I could, I replaced the starboard
jackstand, all the while holding the chain just in case the 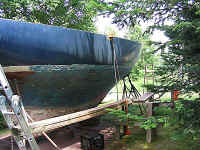 other one (I
keep wanting to call it the "leeward" one and have to stop
myself from typing it) decided to pull away. Apparently, the stern
area of the boat is so light, relative to the lead bulb on which the boat
is actually resting well forward, that the stands have less downward
pressure on them than usual, making them a bit more prone to tipping. other one (I
keep wanting to call it the "leeward" one and have to stop
myself from typing it) decided to pull away. Apparently, the stern
area of the boat is so light, relative to the lead bulb on which the boat
is actually resting well forward, that the stands have less downward
pressure on them than usual, making them a bit more prone to tipping.
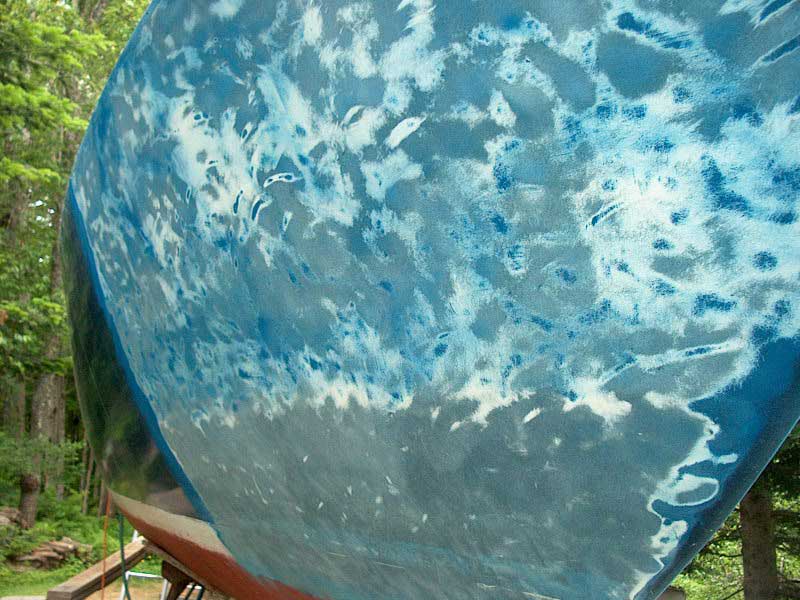
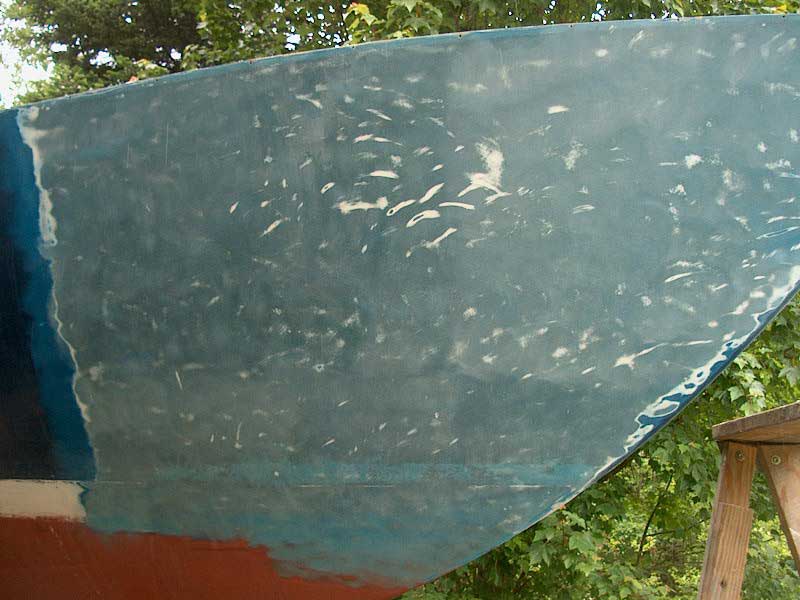
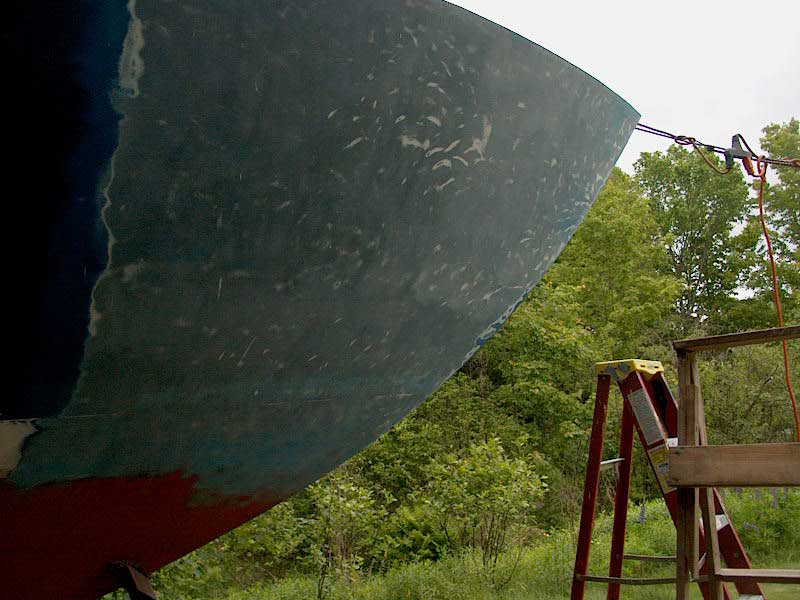
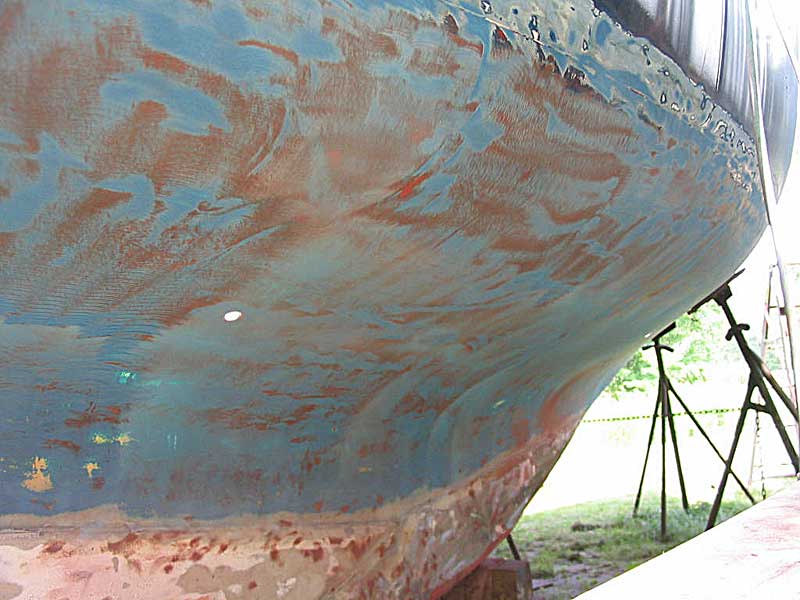
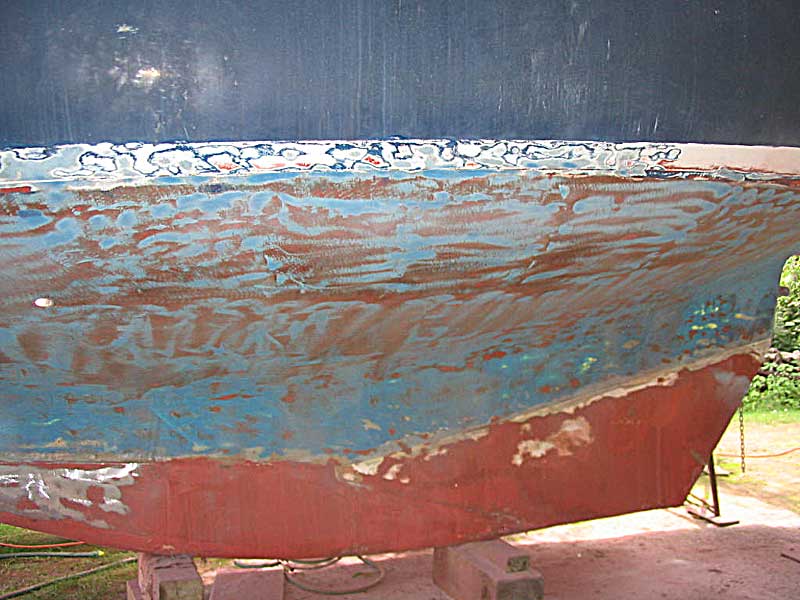
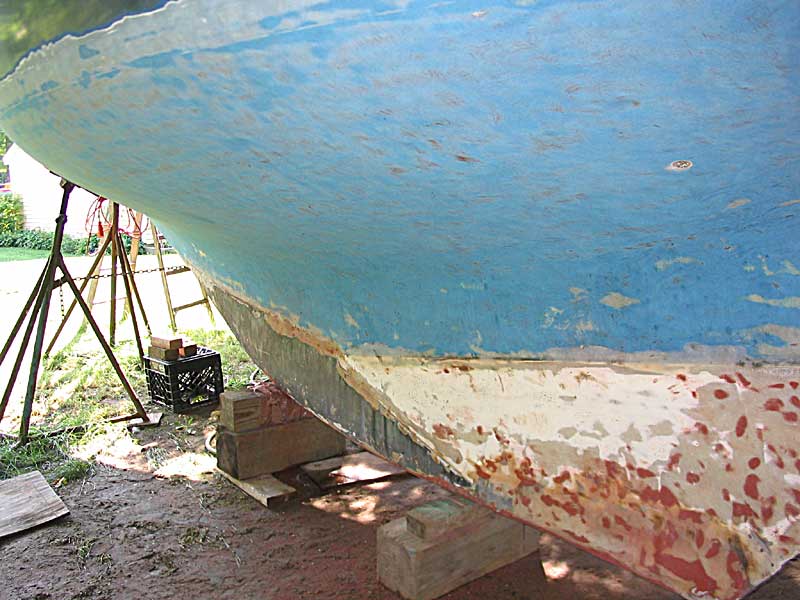
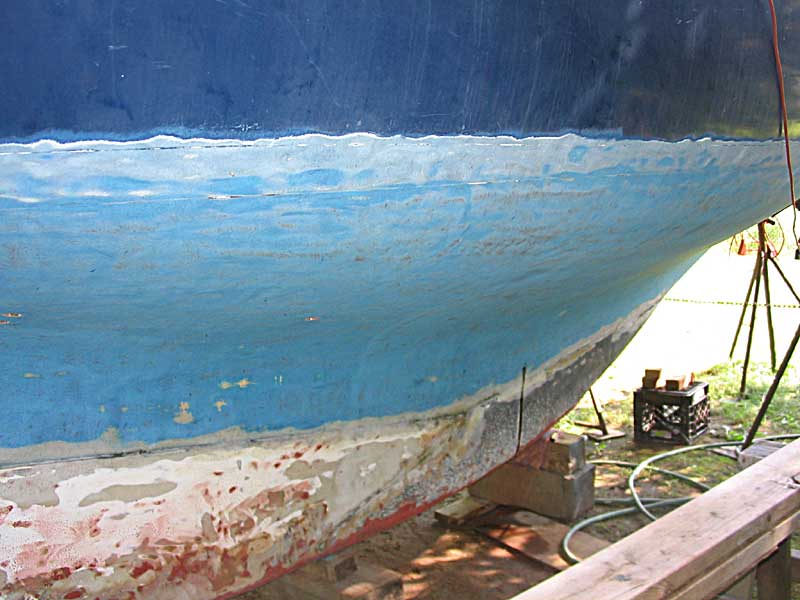
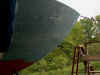
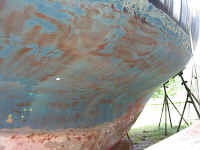
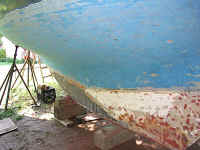
The red paint remaining, as
can be seen in the photos, is but a thin layer, perhaps a single coat or
less, and
will sand off easily with my small, more manageable, 5" DA sander
later. The smaller tool will also allow better control to smooth the
bottom more appropriately for a fair surface. |
|

|
|
July 23, 2003
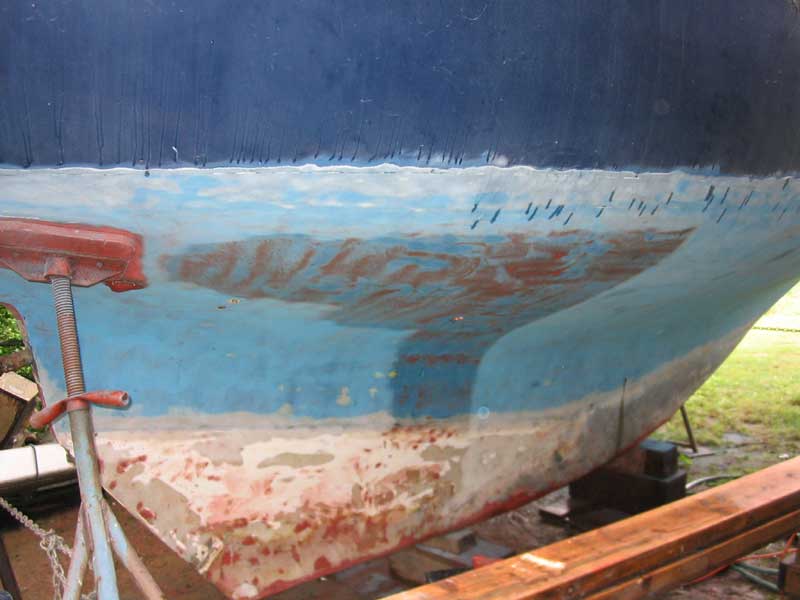
The next day, I began
sanding the bottom again with my smaller sander and 40 grit paper, to
remove the last traces of old bottom paint and to begin the overall
smoothing process. I sanded nearly the entire starboard side of the
boat, starting at the top of the boottop (removing it) and all the way to
the centerline. The random orbit action of the sander left the
surface smoother and more fair than that left behind by the large circular
grinder--though still harshly scratched from the coarse paper.
Underneath the boat, and
wearing my full facepiece respirator and hearing protection, I was in my
own world. I happened to look up just before I would have finished
sanding the entire side, only to notice that we were in the midst of a
downpour! With rainwater beginning to run down the hull, soak the
ground, and fall through the open through hull fittings above where I was
working, I decided it was less important to finish the sanding of the
starboard side rather than risk electrocution when my uninsulated
metal-body sander got inevitably wet, so I was forced to pack up the tools
and run quickly for shelter. The heavy rain shower lasted only a
short while, but by the time it ended the ground was saturated with
standing water, and, as I had been too filthy from sanding dust to do
anything else, I had already taken a shower to clean up, and didn't want
to begin sanding again. I decided it would be OK to finish the small
remaining area on another day, when I sanded the port side.
|
|

|
|

|
July 24, 2003
I finished the bottom
stripping/sanding on the starboard side, and then worked to complete the
40-grit sanding on the port side as well. I had a new shipment of
sandpaper from good ol' McMaster-Carr, so I used the big grinder to finish
removing the bulk of the paint from the port side of the keel as
well. It felt great to have the nasty bottom stripping over
with. In comparison, sanding the hull paint will be almost pleasant.
|
|

|
|
|
Continue>
|
|