
|
|
~MENU~ |
| Home |
| The Concept |
| The Boat |
| Bringing Her Home |
|
Weekly Progress Log |
|
Daysailor Projects |
| The Boat Barn |
| Resources |
| Other Sites |
| Email Tim |
|
|
| From a Bare Hull: Cabin Trunk (Page 5) |
|
After a couple days away from the cabin trunk while I worked on other things, I slowly formed a plan that I figured would work out. It seemed clear to me that the rabbet was badly weakening the thick, short board, and it would remain a weak point if I were to continue in that direction. |
|
I decided to use a slightly thinner 3/4" board with no rabbet, which I could install on the inside of the carlin inside the deck edge. Then, I planned to laminate a 1/4" board on the outside, replicating the basic size and shape of the laminated curved forward section. I thought this plan had a high chance of success; after all, the curve I needed to press the board into was simply not that difficult (which made my previous problems and failures even more discouraging at the time). I also continued with my previous abandonment of the original plan to create the coaming and cabin trunk section in a single piece of wood. |
|
I chose some boards from my stock and made preparations by first measuring the space at hand, and then cutting the board roughly to length, with some excess for later trimming. It probably wasn't strictly necessary, but I kerfed the outside face of the boards (the one which would be covered by the outer 1/4" thick lamination) to help them bend into place, and then made an angle cut at the forward end that approximated that of the after end of the curved section. |
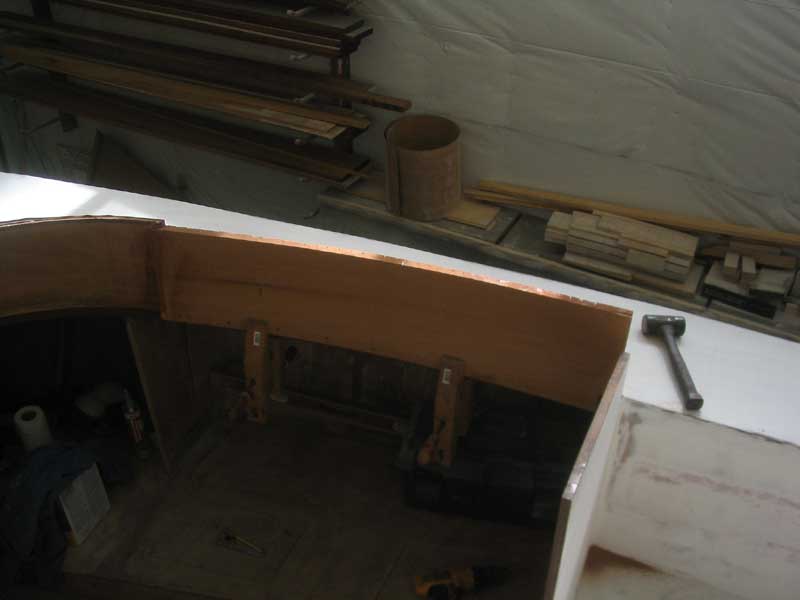 With the preliminary work done, I continued by fine-tuning the forward cut so
that the seam would be as minimal as possible, at least on the inside face.
After some sanding, the boards fit together closely, and I moved on to final
installation. I used the same jack setup and clamps that I used earlier to
pull the board into position during these test fits. With the preliminary work done, I continued by fine-tuning the forward cut so
that the seam would be as minimal as possible, at least on the inside face.
After some sanding, the boards fit together closely, and I moved on to final
installation. I used the same jack setup and clamps that I used earlier to
pull the board into position during these test fits. |
 I installed the board in a bed of thickened epoxy; I chose epoxy in this
instance (as opposed to the 5200 that I used earlier) because I wanted the epoxy
on the joint between the various adjacent pieces of the cabin trunk for a solid
structure. I also installed a number of large bronze screws through the
wooden cabin sides into the carlins. The boards bent into place with no
problems, happily. I installed the board in a bed of thickened epoxy; I chose epoxy in this
instance (as opposed to the 5200 that I used earlier) because I wanted the epoxy
on the joint between the various adjacent pieces of the cabin trunk for a solid
structure. I also installed a number of large bronze screws through the
wooden cabin sides into the carlins. The boards bent into place with no
problems, happily. |
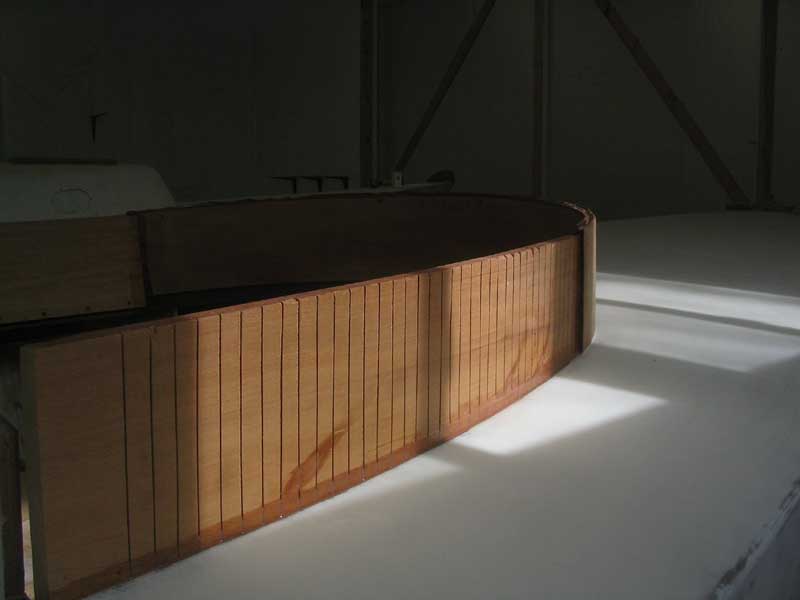
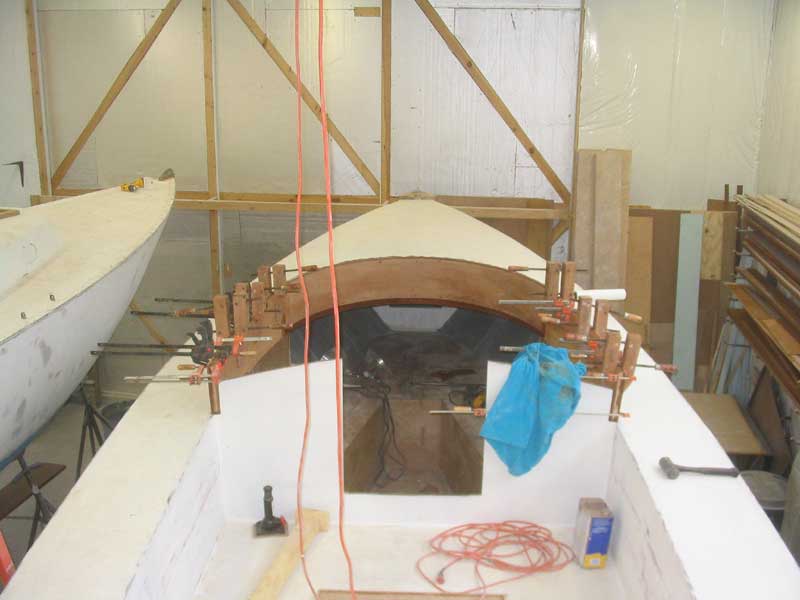
 Because I didn't want to disturb the curing epoxy in the carefully-aligned bevel
joint at the forward end, I had to delay further work on the cabin trunk till
the epoxy cured sufficiently. When the epoxy was cured--in this case, the
next day--I continued work by cutting and fitting a 1/4" board over the outside
of the cabin trunk, covering the kerfed side and evening up the new section with
the curved section before it. Because I didn't want to disturb the curing epoxy in the carefully-aligned bevel
joint at the forward end, I had to delay further work on the cabin trunk till
the epoxy cured sufficiently. When the epoxy was cured--in this case, the
next day--I continued work by cutting and fitting a 1/4" board over the outside
of the cabin trunk, covering the kerfed side and evening up the new section with
the curved section before it. |
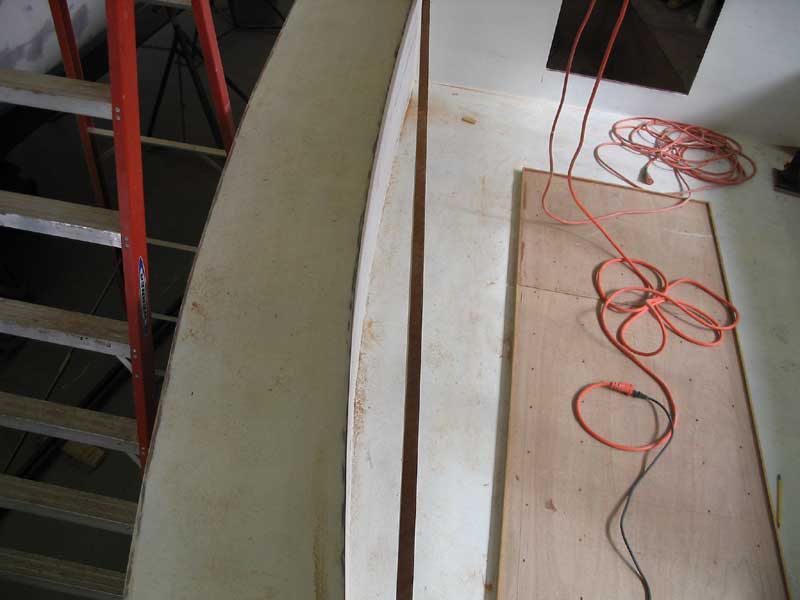
 With a few test fits, I honed the joint at the forward end--which would be
exposed outside the boat, so I wanted it to look as good as possible. When
I was pleased with the fit, I trimmed any excess board away and prepared to
laminate it to the outside of the inner board. I used thickened epoxy for
this; at the forward end, where some epoxy might be visible in the joint, I
mixed a quantity of mahogany dust into the epoxy to color it and hopefully
camouflage the joint. When the outer piece was tightly clamped in place, I
cleaned up the epoxy spillout and left it to cure. I repeated this entire
process on the opposite side later in the day, when I could steal a clamp or two
from the first side. With a few test fits, I honed the joint at the forward end--which would be
exposed outside the boat, so I wanted it to look as good as possible. When
I was pleased with the fit, I trimmed any excess board away and prepared to
laminate it to the outside of the inner board. I used thickened epoxy for
this; at the forward end, where some epoxy might be visible in the joint, I
mixed a quantity of mahogany dust into the epoxy to color it and hopefully
camouflage the joint. When the outer piece was tightly clamped in place, I
cleaned up the epoxy spillout and left it to cure. I repeated this entire
process on the opposite side later in the day, when I could steal a clamp or two
from the first side. |
|
|
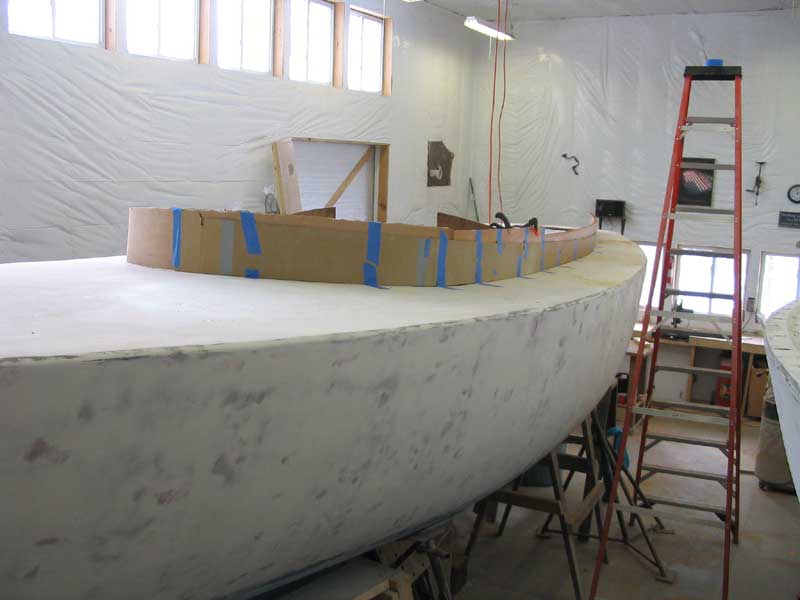
 After a day in the clamps, the raw installation of the
cabin trunk was finally complete. It had been a long, discouraging road to
this point, but I was pleased with how things looked. The raw sections of
the trunk looked a bit odd, as they were still running wild at the top edge and
required trimming; plus, the inside of the three pieces were misaligned, though
I had a plan for that well in advance and knew that it would come together
nicely in the near future. After a day in the clamps, the raw installation of the
cabin trunk was finally complete. It had been a long, discouraging road to
this point, but I was pleased with how things looked. The raw sections of
the trunk looked a bit odd, as they were still running wild at the top edge and
required trimming; plus, the inside of the three pieces were misaligned, though
I had a plan for that well in advance and knew that it would come together
nicely in the near future. |
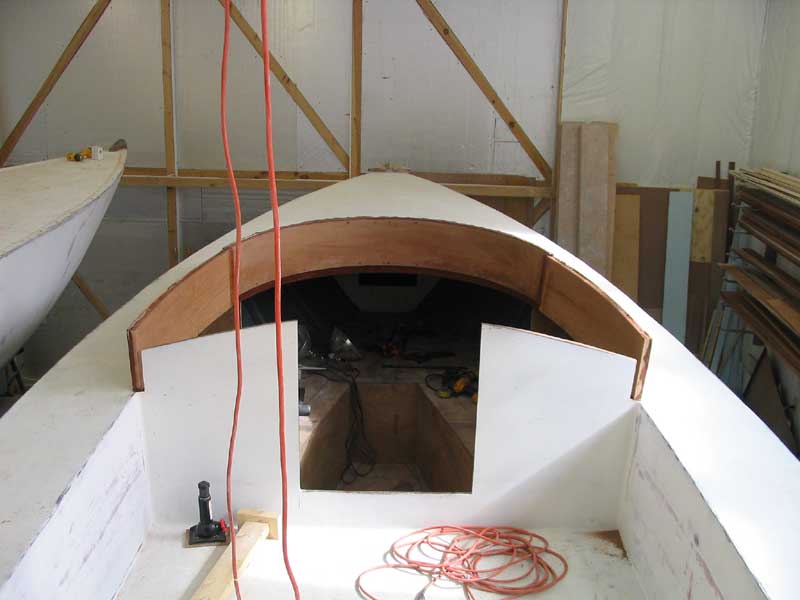
 With the basic structure of the cabin trunk in place, I turned my attention to
the coamings, which would more or less sweep smoothly into the cabin trunk
shape. Before making any cuts, I needed to install the coamings, so that I
could transfer my templated marks
to the wooden structures for fine-tuning and eventual trimming. With the basic structure of the cabin trunk in place, I turned my attention to
the coamings, which would more or less sweep smoothly into the cabin trunk
shape. Before making any cuts, I needed to install the coamings, so that I
could transfer my templated marks
to the wooden structures for fine-tuning and eventual trimming. |
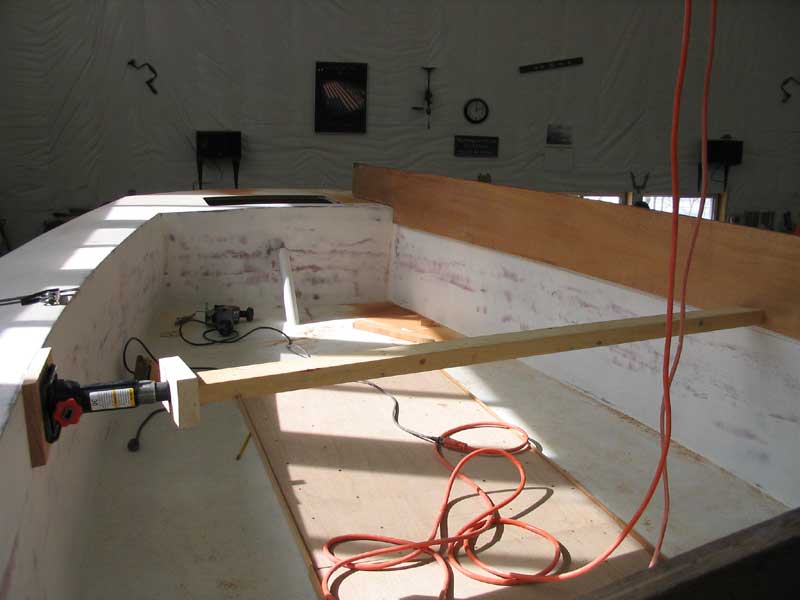 With the port coaming already cut to the basic shape and size needed, I only had
to deepen the relief cuts at the ends, so that the coaming could drop about 3"
into the cockpit well for greater security and strength. With that done, I
pressed the coaming into the curvature of the cockpit using a jack stolen from
my truck and a rickety rig adapted from that used during the installation of the
cabin trunk sides. With the port coaming already cut to the basic shape and size needed, I only had
to deepen the relief cuts at the ends, so that the coaming could drop about 3"
into the cockpit well for greater security and strength. With that done, I
pressed the coaming into the curvature of the cockpit using a jack stolen from
my truck and a rickety rig adapted from that used during the installation of the
cabin trunk sides. |
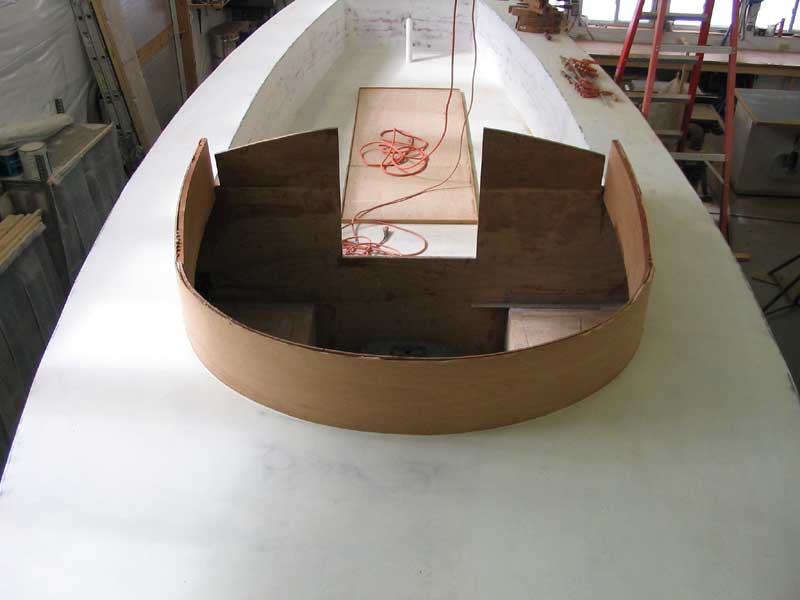
 With the screws I had ordered delayed a bit longer than I had expected, I had no
way to permanently (in a temporary fashion, of course) secure the coaming in
place, so I could only deal with one side at a time. With the port side
tightly in place, I installed the cardboard templates I had made during my
earlier mockup and, after eyeing the line for a while, transferred the shape of
the template to the port side of the cabin trunk and coaming with a pencil.
I then removed the template and the coaming, and tested the fit of the coaming
on the starboard side to see if the shapes were similar enough to use the
already-cut port coaming as a template for cutting the starboard side.
With the minor exception of a 1/2" difference at the forward end, the fit was
fine, so with the coaming back on the bench I made the rough cuts in my last
remaining 17' board to create a coaming for the starboard side. With the screws I had ordered delayed a bit longer than I had expected, I had no
way to permanently (in a temporary fashion, of course) secure the coaming in
place, so I could only deal with one side at a time. With the port side
tightly in place, I installed the cardboard templates I had made during my
earlier mockup and, after eyeing the line for a while, transferred the shape of
the template to the port side of the cabin trunk and coaming with a pencil.
I then removed the template and the coaming, and tested the fit of the coaming
on the starboard side to see if the shapes were similar enough to use the
already-cut port coaming as a template for cutting the starboard side.
With the minor exception of a 1/2" difference at the forward end, the fit was
fine, so with the coaming back on the bench I made the rough cuts in my last
remaining 17' board to create a coaming for the starboard side. |
 I made several attempts, in a fit of impatience, to press both coamings out into
place simultaneously with my jacking rig, but the wobbly coamings, coupled with
the fact that each needed to be moved out 6-8" or so in order to meet the curve,
complicated matters, and again and again I would near the end of a tedious
jacking procedure (God forbid I ever needed to use this useless jack to actually
change a truck tire...perish the thought) only to have the instability of the
rig cause the jack to slip out and crash to the cockpit floor. This was
very fun. I made several attempts, in a fit of impatience, to press both coamings out into
place simultaneously with my jacking rig, but the wobbly coamings, coupled with
the fact that each needed to be moved out 6-8" or so in order to meet the curve,
complicated matters, and again and again I would near the end of a tedious
jacking procedure (God forbid I ever needed to use this useless jack to actually
change a truck tire...perish the thought) only to have the instability of the
rig cause the jack to slip out and crash to the cockpit floor. This was
very fun. |
|
I finally called it quits after about four futile attempts and vowed to await the arrival of the screws needed to secure the coamings. The screws arrived late that day, so I was ready for the next day's work. |
|
|