
|
|
~MENU~ |
| Home |
| The Concept |
| The Boat |
| Bringing Her Home |
|
Weekly Progress Log |
|
Daysailor Projects |
| The Boat Barn |
| Resources |
| Other Sites |
| Email Tim |
|
|
|
Systems: Cockpit Scuppers |
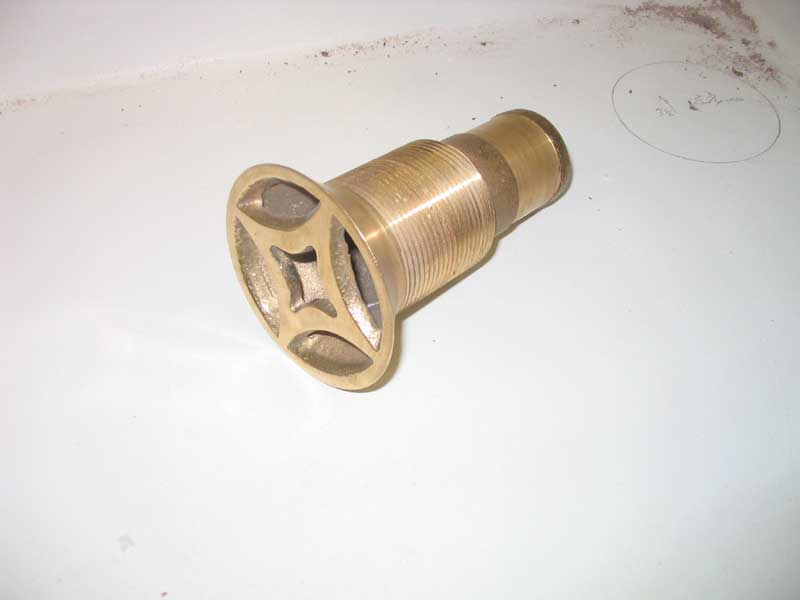 For
the cockpit scuppers, I chose some handsome fittings from Spartan Marine,
item # D255PB. These solid bronze fittings required a flush mount with
a countersink, and for a while I wondered about the best way to install
them. For
the cockpit scuppers, I chose some handsome fittings from Spartan Marine,
item # D255PB. These solid bronze fittings required a flush mount with
a countersink, and for a while I wondered about the best way to install
them. |
 Eventually,
I decided to bore a larger hole and set the fittings in flush with the
sole, filling the remaining void as necessary with structural epoxy.
First, though, I needed to choose their ultimate location at the forward
end of the cockpit sole; during construction, I had pitched the cockpit
sole towards the forward end to promote drainage. Eventually,
I decided to bore a larger hole and set the fittings in flush with the
sole, filling the remaining void as necessary with structural epoxy.
First, though, I needed to choose their ultimate location at the forward
end of the cockpit sole; during construction, I had pitched the cockpit
sole towards the forward end to promote drainage. |
|
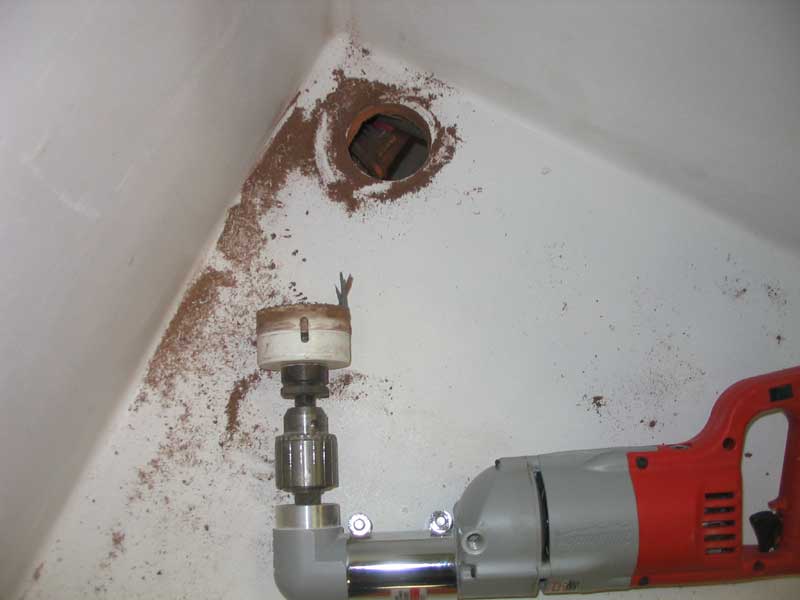
Using the fittings and a spare length of scrap hose that I had around, I mocked up the fittings in several locations from inside the engine room, looking for a lack of obstructions and a clear hose run to the scupper seacocks. I settled on the outer cockpit corners, which met all the criteria well. After double-checking some measurements from below, to ensure that I would not drill into the cockpit beams or previously-installed wiring or hoses, I drilled a 2" hole using my big right angle Milwaukee and a hole saw. |
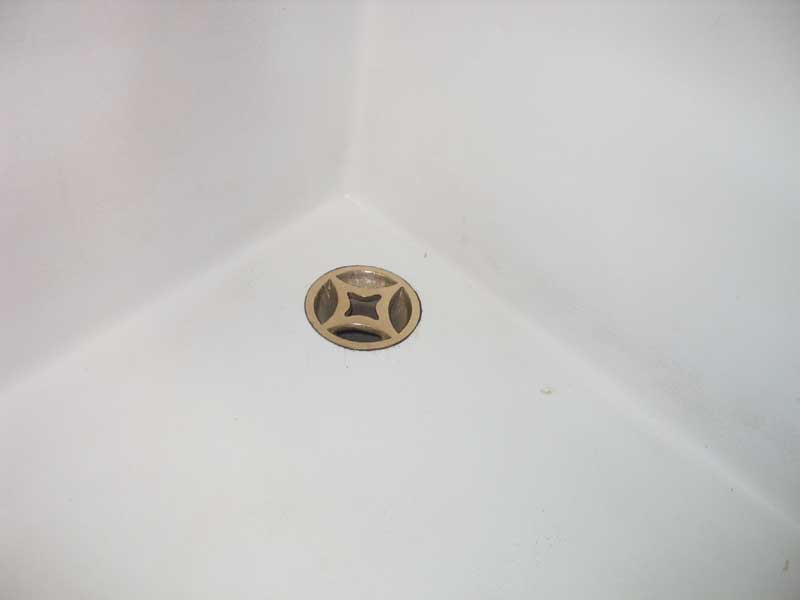
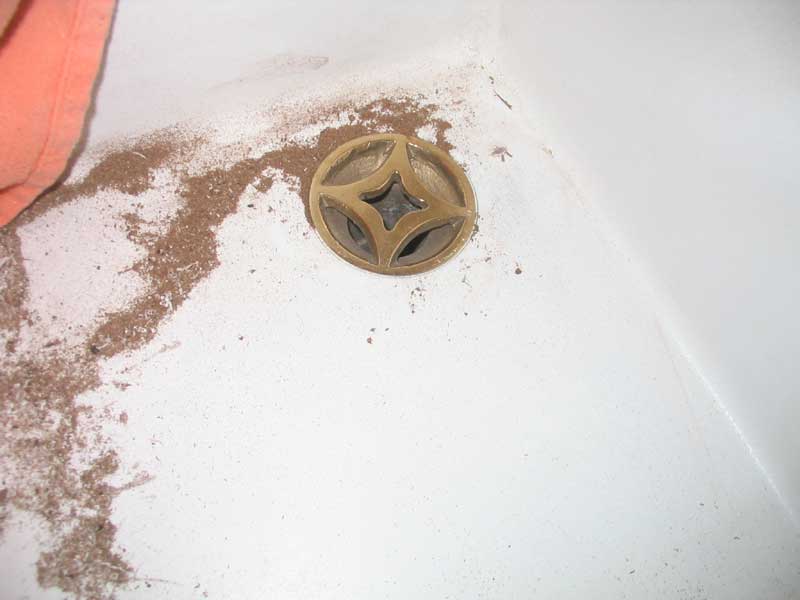 I
was pleased to discover that the scuppers fit nearly flush in this hole,
but remained supported by the very edge of the cast bevels on the
fittings. With some very minor sanding around the top edges of the
holes, creating a small bevel there, I managed to fit the scuppers
perfectly flush, and with very little work. I
was pleased to discover that the scuppers fit nearly flush in this hole,
but remained supported by the very edge of the cast bevels on the
fittings. With some very minor sanding around the top edges of the
holes, creating a small bevel there, I managed to fit the scuppers
perfectly flush, and with very little work. |
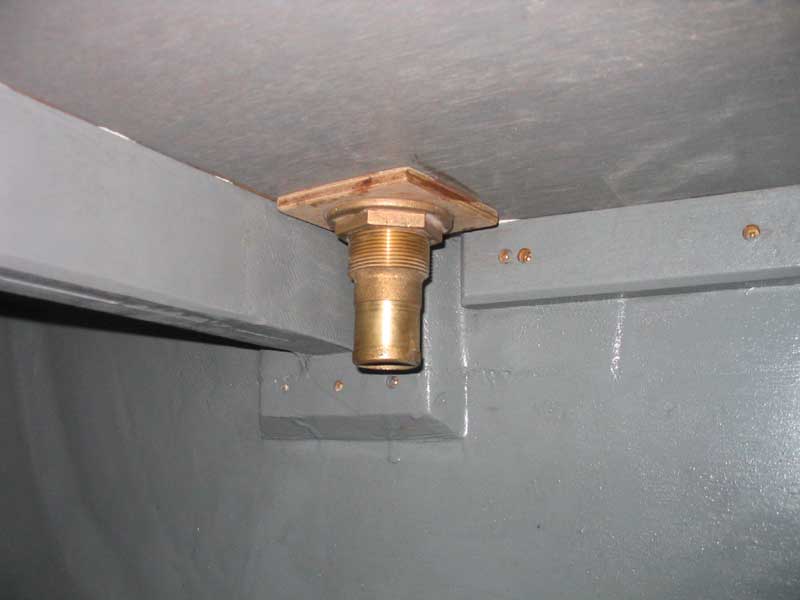 To
install the fittings, I first cut some backing plates of 9mm plywood, in
which I cut a hole about the same size as the threaded portion of the
scupper fitting. This helped close off the opening of the larger
hole from below, allowing me to fill the voids with epoxy, and also
provided good support for the nut that secured the fitting in place. To
install the fittings, I first cut some backing plates of 9mm plywood, in
which I cut a hole about the same size as the threaded portion of the
scupper fitting. This helped close off the opening of the larger
hole from below, allowing me to fill the voids with epoxy, and also
provided good support for the nut that secured the fitting in place. |
 I
mixed a batch of epoxy stiffened with cabosil to a very thick
consistency, and covered the bottom of the scupper fitting bevel, and
then pressed the fitting into the hole. From beneath, I worked the epoxy
further, cleaning it up, and then installed the backing plate and nut.
Finally, from above, I ensured that the scupper cross bars (a grate cast
into the fitting) were properly aligned parallel to the centerline of
the boat. I left the epoxy to cure overnight. I
mixed a batch of epoxy stiffened with cabosil to a very thick
consistency, and covered the bottom of the scupper fitting bevel, and
then pressed the fitting into the hole. From beneath, I worked the epoxy
further, cleaning it up, and then installed the backing plate and nut.
Finally, from above, I ensured that the scupper cross bars (a grate cast
into the fitting) were properly aligned parallel to the centerline of
the boat. I left the epoxy to cure overnight. |
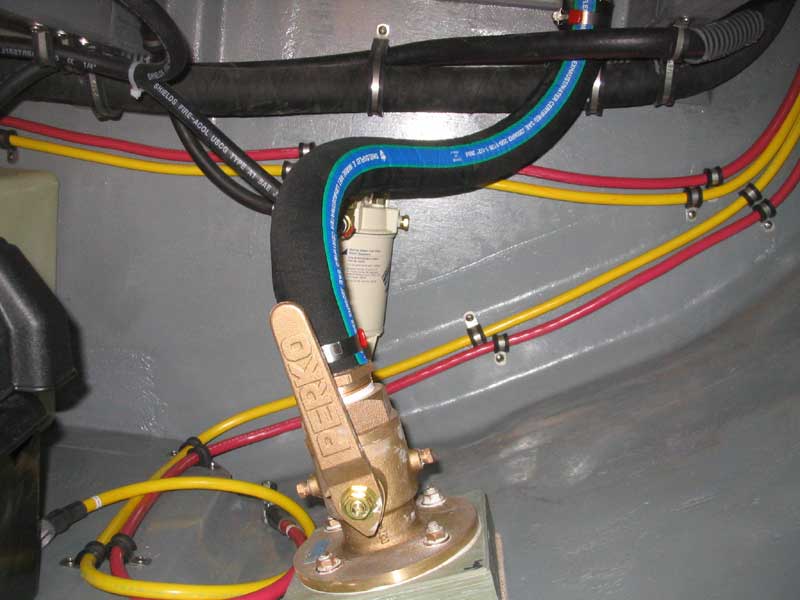
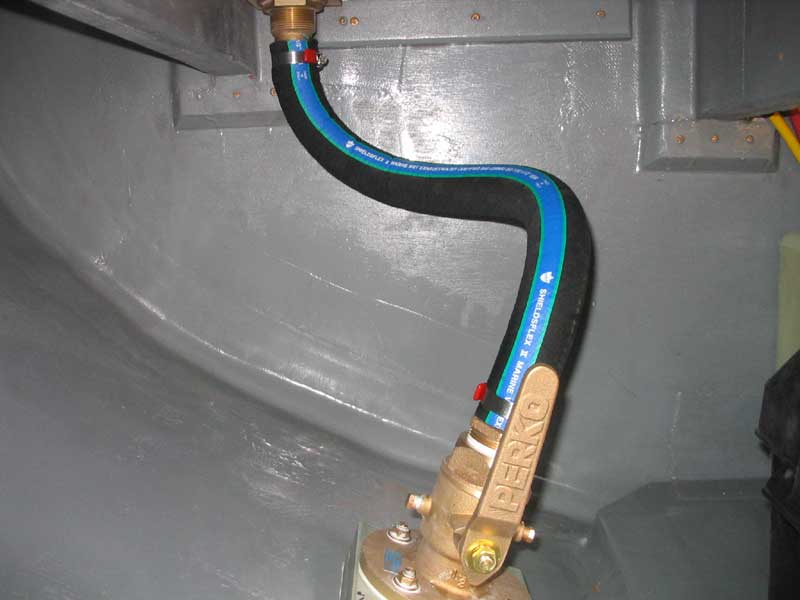 To
complete the installation, I cut lengths of 1-1/2" wire-reinforced water
hose to fit and secured it in place between the scupper fittings and the
nearby seacocks. At the seacocks, I applied Teflon tape to the
threads of a straight tailpiece and secured that in place before
attaching the scupper hose. I secured the hose with clamps,
finished off with silly little clamp tip ends, and the job was complete. To
complete the installation, I cut lengths of 1-1/2" wire-reinforced water
hose to fit and secured it in place between the scupper fittings and the
nearby seacocks. At the seacocks, I applied Teflon tape to the
threads of a straight tailpiece and secured that in place before
attaching the scupper hose. I secured the hose with clamps,
finished off with silly little clamp tip ends, and the job was complete. |
 Back to the Main
Menu> Back to the Main
Menu> |