|
|
~MENU~ |
| Home |
| The Concept |
| The Boat |
| Bringing Her Home |
|
Weekly Progress Log |
|
Daysailor Projects |
| The Boat Barn |
| Resources |
| Other Sites |
| Email Tim |
|
|
|
Systems: Diesel Engine: Engine Foundation and Engine Installation |
|
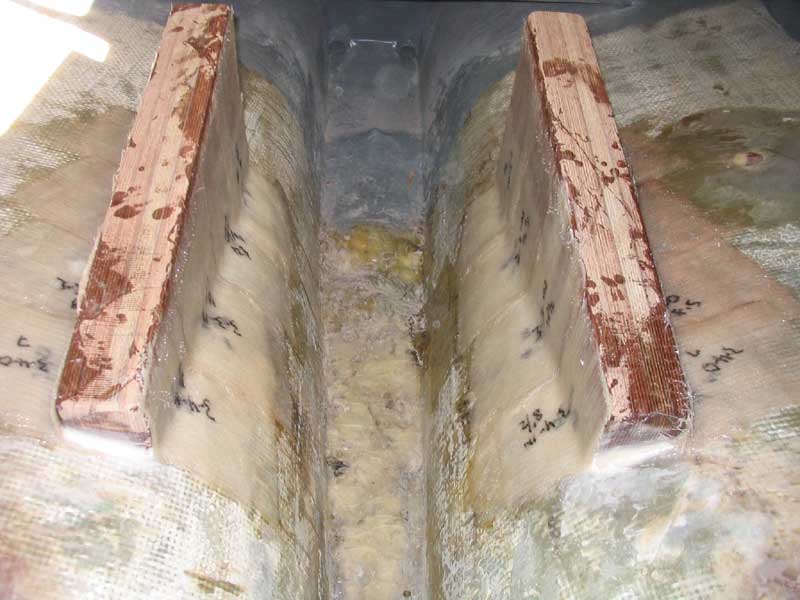
Engine Foundations: Final Installation
|
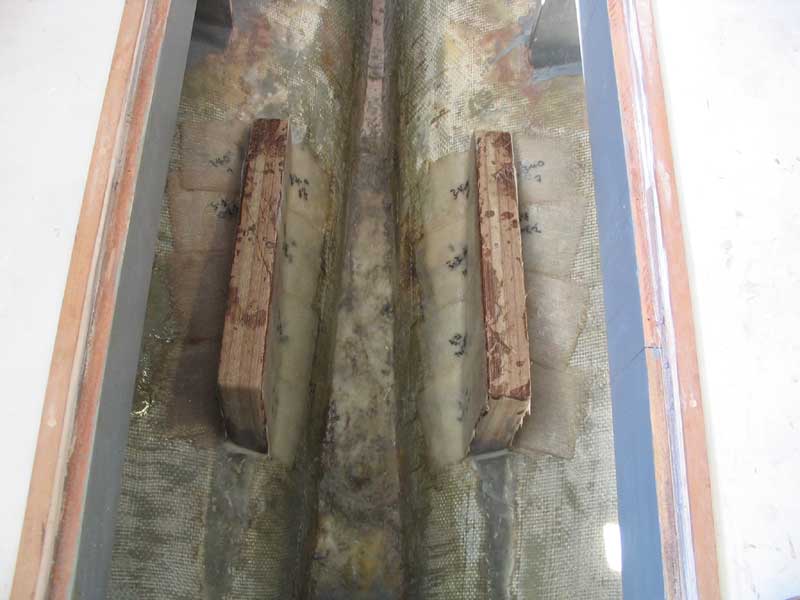 With all the pieces cut to the proper size
(each subsequent piece overlapped the one previous by a couple inches), I
installed all the tabbing in epoxy resin over the next several hours,
carefully rolling out each layer to ensure the best bonding. The
final layers extended all the way up the wooden foundations to the top
edge for ultimate strength, and also to begin the planned full
encapsulation of the foundations in fiberglass. With all the pieces cut to the proper size
(each subsequent piece overlapped the one previous by a couple inches), I
installed all the tabbing in epoxy resin over the next several hours,
carefully rolling out each layer to ensure the best bonding. The
final layers extended all the way up the wooden foundations to the top
edge for ultimate strength, and also to begin the planned full
encapsulation of the foundations in fiberglass. |
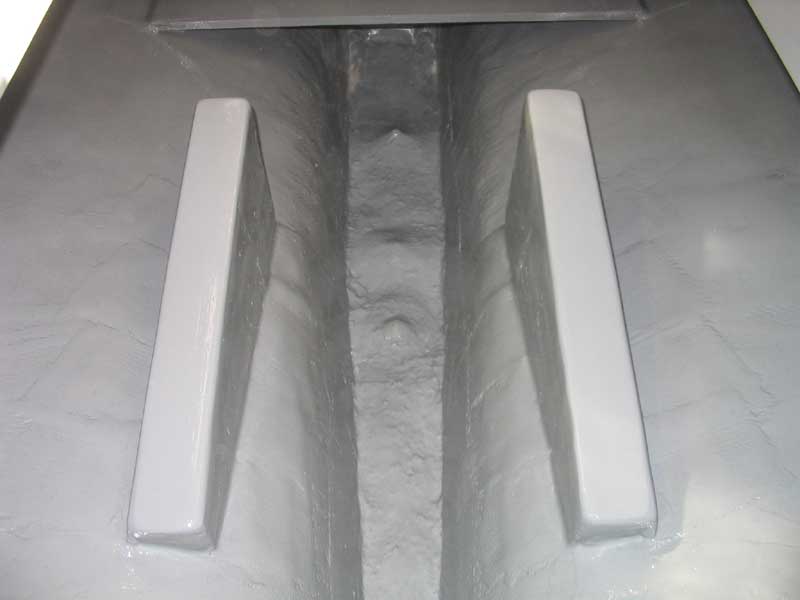
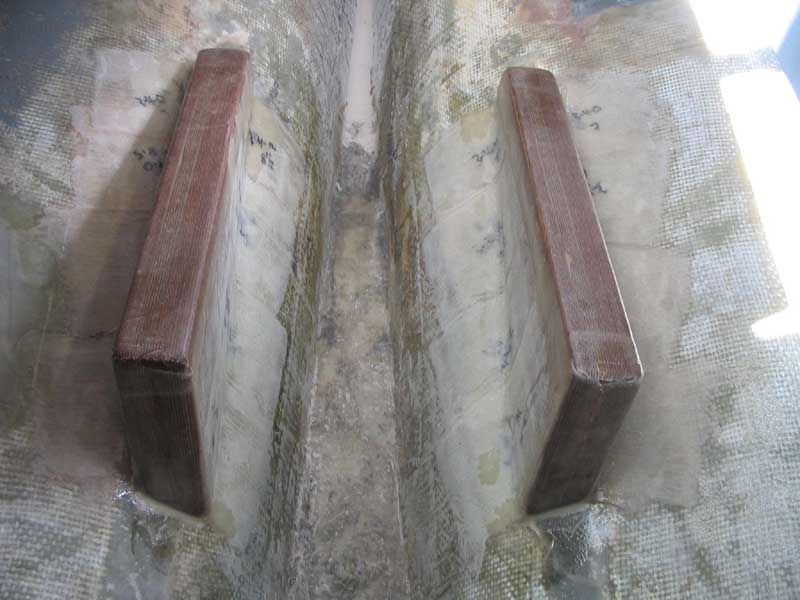 The next day, I cleaned and sanded the new fiberglass, and proceeded with
the final fiberglassing steps. With the main tabbing done, the
remaining fiberglass was for protection and encapsulation purposes only,
and was not intended to add much in the way of structural strength;
mainly, it would clean up the top edges of the foundations, and serve as a
first defense against surface moisture. I used a double layer of 10
oz. cloth over the top, running it over the edges to cover the top edge of
the heavy tabbing beneath, and a single layer of cloth on the forward and
after ends and corners. The next day, I cleaned and sanded the new fiberglass, and proceeded with
the final fiberglassing steps. With the main tabbing done, the
remaining fiberglass was for protection and encapsulation purposes only,
and was not intended to add much in the way of structural strength;
mainly, it would clean up the top edges of the foundations, and serve as a
first defense against surface moisture. I used a double layer of 10
oz. cloth over the top, running it over the edges to cover the top edge of
the heavy tabbing beneath, and a single layer of cloth on the forward and
after ends and corners. |
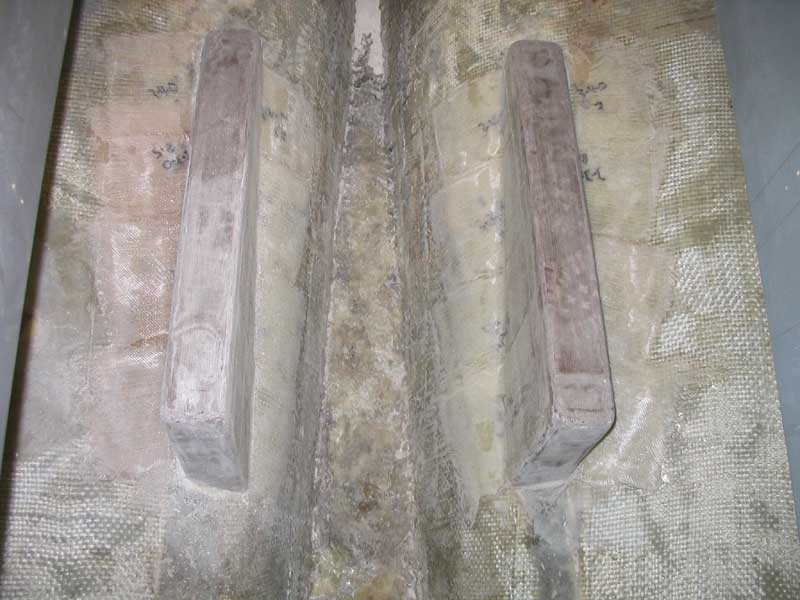 When
the fiberglass was cured, and after sanding, I was able to paint out the
new foundations and surrounding bilge areas in the engine room, completing
the bulk of that job. I left a small area around the stern tube
unpainted, since I had yet to permanently install the stern tube.
That would come later, when I installed the engine. When
the fiberglass was cured, and after sanding, I was able to paint out the
new foundations and surrounding bilge areas in the engine room, completing
the bulk of that job. I left a small area around the stern tube
unpainted, since I had yet to permanently install the stern tube.
That would come later, when I installed the engine.Next: engine installation. |
|
|
|
Preparing for Engine Installation
|
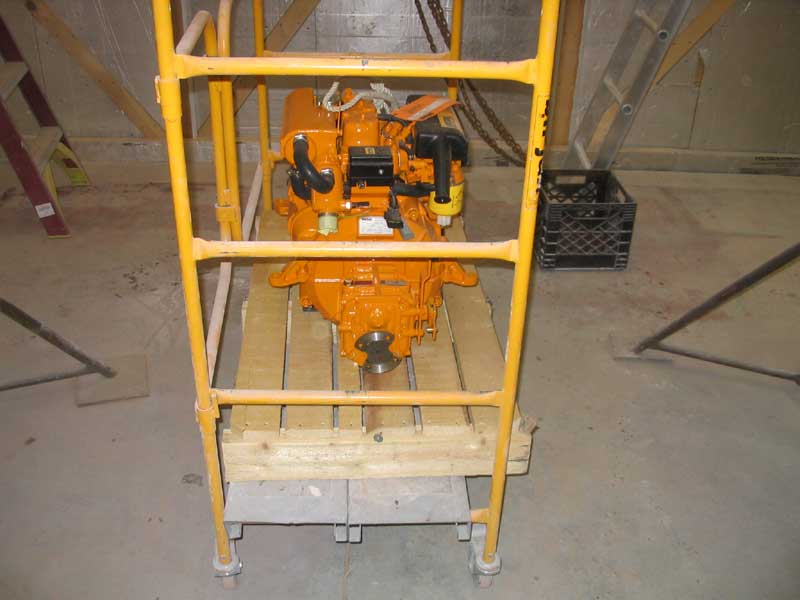
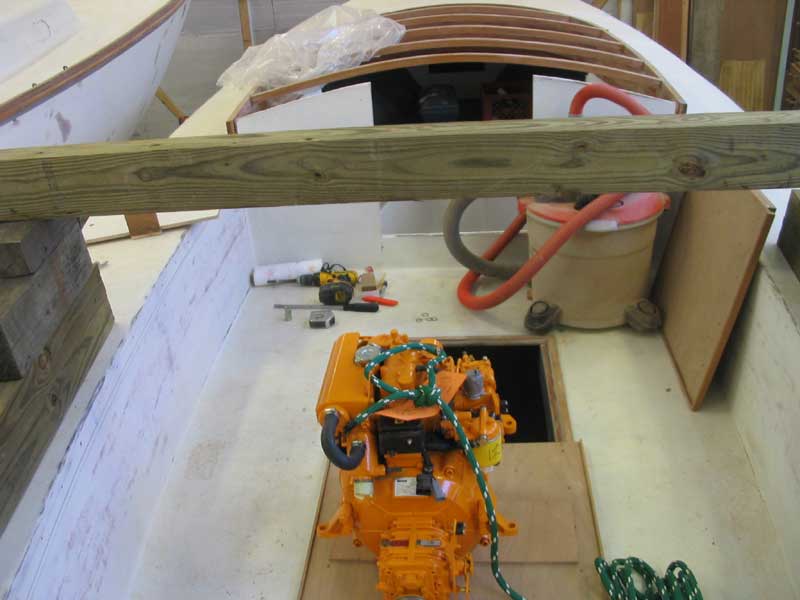
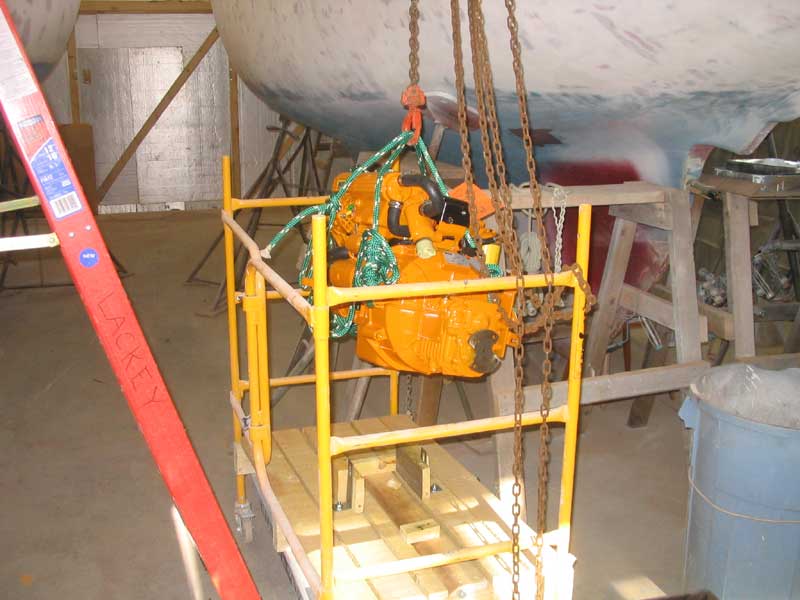 Using
a pair of ladders and a heavy 4x6 beam, along with my trusty chain hoist,
we managed to successfully lift the engine the 8' needed to safely
ensconced it in the cockpit. Using
a pair of ladders and a heavy 4x6 beam, along with my trusty chain hoist,
we managed to successfully lift the engine the 8' needed to safely
ensconced it in the cockpit. 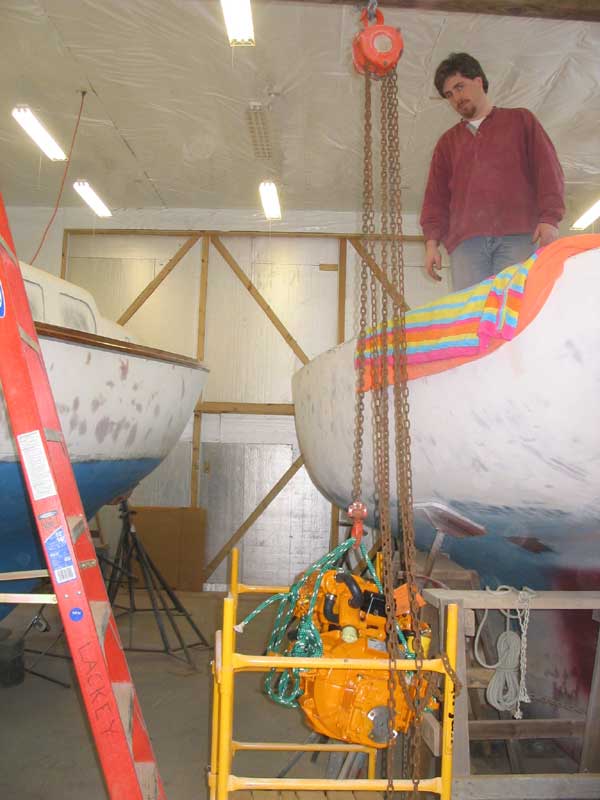 |
 Lifting
an engine into a relatively finished boat is always a somewhat tricky
task, particularly with less-than-ideal rigs, but we accomplished the feat
with no real problems. It felt good to have the engine up in the
cockpit, where I left it for a day or so while I made the final
preparations for its installation on the new foundations. Lifting
an engine into a relatively finished boat is always a somewhat tricky
task, particularly with less-than-ideal rigs, but we accomplished the feat
with no real problems. It felt good to have the engine up in the
cockpit, where I left it for a day or so while I made the final
preparations for its installation on the new foundations. |
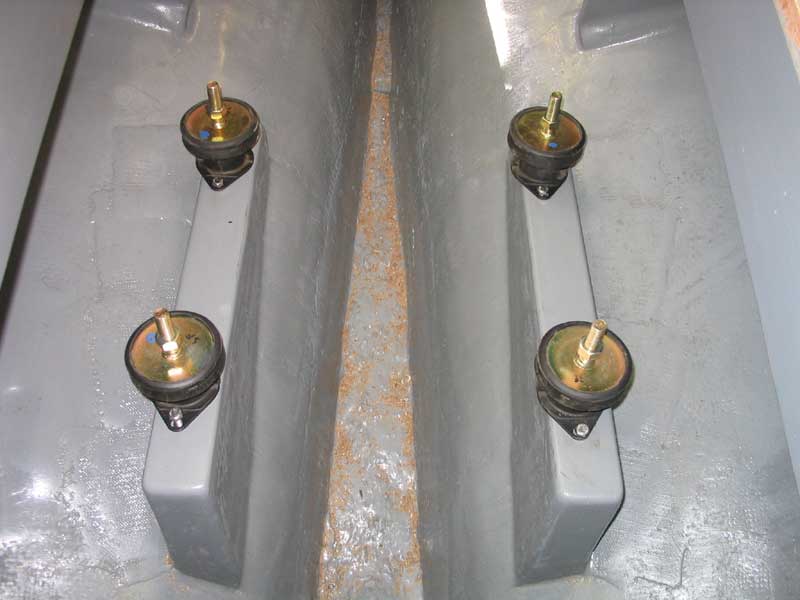
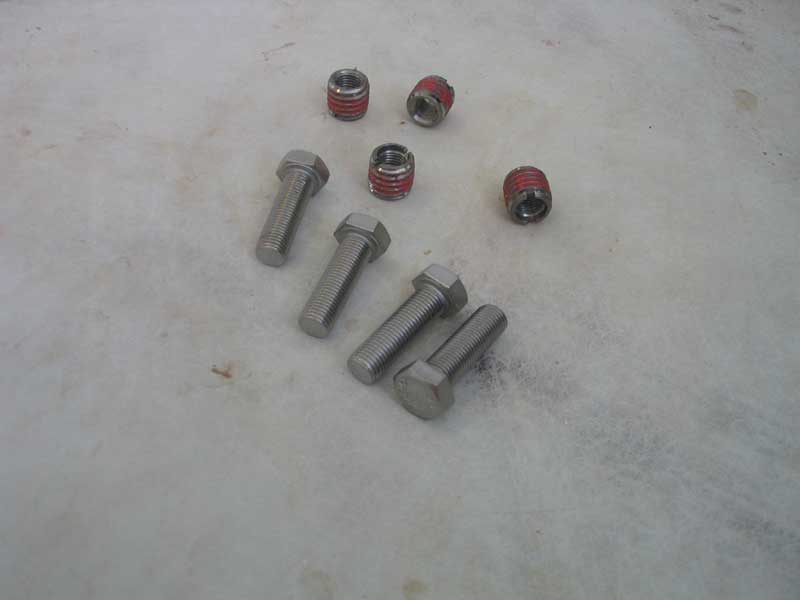 After a long web search, I located some 316 stainless steel threaded
inserts, which I wanted to use in the plywood foundations. I planned
to epoxy the threaded inserts in place, which would provide a secure and
effective means of attaching the engine to the foundations; I thought the
threaded inserts would make for a stronger installation than by simply
using lag screws into the plywood. Plywood is very strong, but does
not excel at holding fasteners in its end grain. After a long web search, I located some 316 stainless steel threaded
inserts, which I wanted to use in the plywood foundations. I planned
to epoxy the threaded inserts in place, which would provide a secure and
effective means of attaching the engine to the foundations; I thought the
threaded inserts would make for a stronger installation than by simply
using lag screws into the plywood. Plywood is very strong, but does
not excel at holding fasteners in its end grain.I chose 3/8-24 threaded inserts and fine thread bolts, both 316 stainless, for the task. I bought 1-1/4" bolts since the 1" ones I really wanted were not available in a reasonable amount of time. To begin, I set my engine base template on the foundations, with the four flexible mounts installed, and after positioning the template properly, marked the locations of the boltholes in each of the mounts. Then, I removed the template and got to work. |
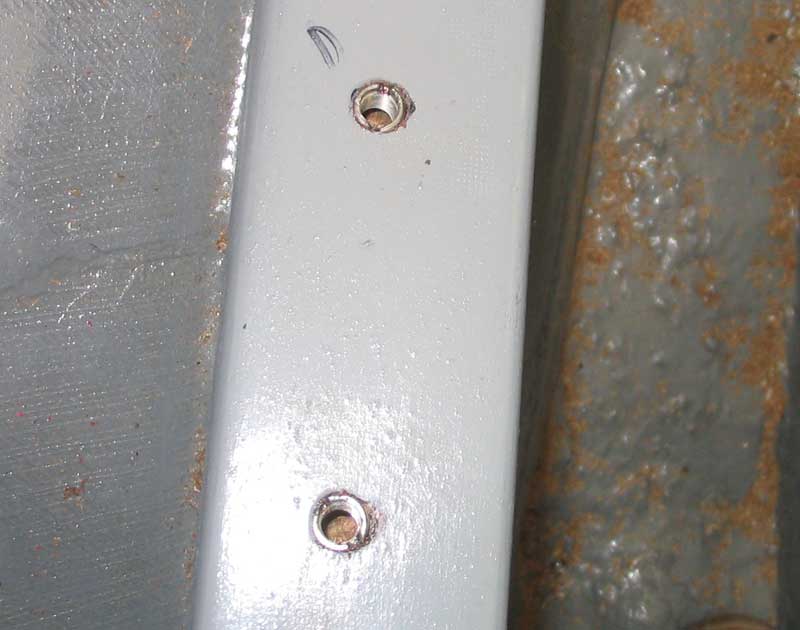 To
install the inserts, I first drilled a 31/64" pilot hole, then carefully
self-tapped the inserts into the foundations with my largest screwdriver.
I looked for a 9/16-12 tap (the size of the outer threads on the inserts)
at a local store, but they didn't have one, so I figured I could give it a
try without the tap. The tap would have made the installation job
easier, but in the end I succeeded, though installing eight of the inserts
took nearly two hours all told. To
install the inserts, I first drilled a 31/64" pilot hole, then carefully
self-tapped the inserts into the foundations with my largest screwdriver.
I looked for a 9/16-12 tap (the size of the outer threads on the inserts)
at a local store, but they didn't have one, so I figured I could give it a
try without the tap. The tap would have made the installation job
easier, but in the end I succeeded, though installing eight of the inserts
took nearly two hours all told.
Once I had threaded the holes with the inserts, I removed them and then reinstalled them permanently with a thin coat of epoxy on the threads to lock them in place. |
 Finally,
I loosely installed the flexible engine mounts in their new inserts,
leaving the mounting bolts relatively loose to allow for adjustment as
needed. Then, I prepared to move and lower the engine into place. Finally,
I loosely installed the flexible engine mounts in their new inserts,
leaving the mounting bolts relatively loose to allow for adjustment as
needed. Then, I prepared to move and lower the engine into place. |
 The
engine was already in the cockpit, but was at the after end, far from the
actual engine beds. To get it into position, I carefully
lifted/dragged it (on a protective blanket) up onto the after engine
hatch, which I had reinstalled for the occasion. Once on the hatch,
I could easily pull the engine up towards the forward end, where it ended
up directly above the new foundations. The
engine was already in the cockpit, but was at the after end, far from the
actual engine beds. To get it into position, I carefully
lifted/dragged it (on a protective blanket) up onto the after engine
hatch, which I had reinstalled for the occasion. Once on the hatch,
I could easily pull the engine up towards the forward end, where it ended
up directly above the new foundations.
|
 Then,
it was a simple task to lower the engine the couple feet onto its
pre-installed mounts, which thankfully turned out to be in the correct
locations and lined up properly with the engine mount flanges. In
only a few minutes, the engine was secured in place, though all bolts were
still loose for later adjustment and alignment. Then,
it was a simple task to lower the engine the couple feet onto its
pre-installed mounts, which thankfully turned out to be in the correct
locations and lined up properly with the engine mount flanges. In
only a few minutes, the engine was secured in place, though all bolts were
still loose for later adjustment and alignment. |
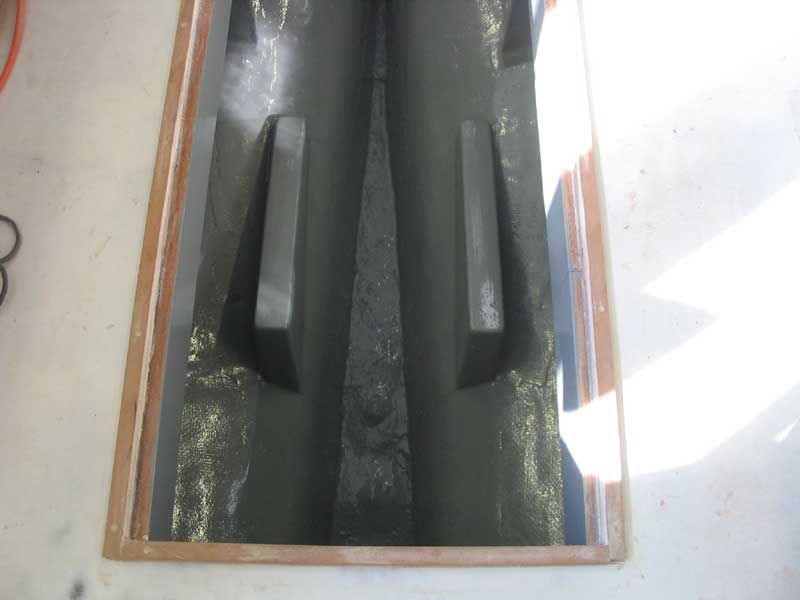
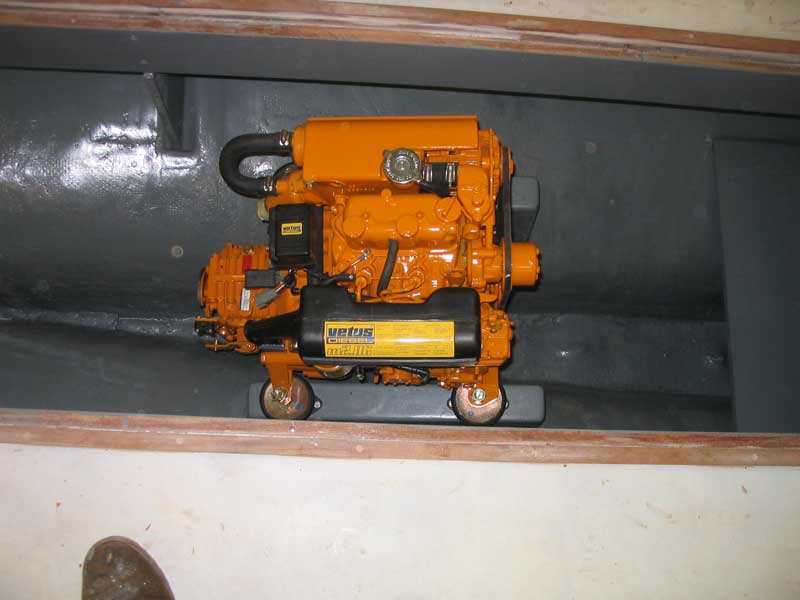 I
was further pleased to confirm that there was lots of room a round the
engine for maintenance, and that the engine hatch easily cleared the top
of the engine. Of course this was not an accident, as I had
carefully planned and located everything to ensure that this particular
engine would fit, but it was still heartening to have my calculations
confirmed. I
was further pleased to confirm that there was lots of room a round the
engine for maintenance, and that the engine hatch easily cleared the top
of the engine. Of course this was not an accident, as I had
carefully planned and located everything to ensure that this particular
engine would fit, but it was still heartening to have my calculations
confirmed.Please click here to continue with the engine and related systems.> |