|
|
~MENU~ |
| Home |
| The Concept |
| The Boat |
| Bringing Her Home |
|
Weekly Progress Log |
|
Daysailor Projects |
| The Boat Barn |
| Resources |
| Other Sites |
| Email Tim |
|
|
|
From a Bare Hull: Interior Basics |
|
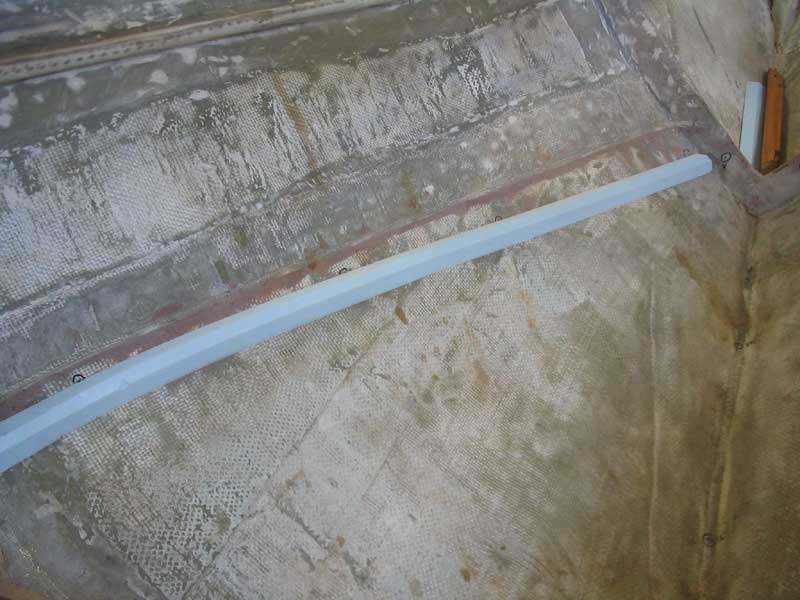
Forward Cabin Support Structure Forward of the forwardmost bulkhead, I planned the traditional vee berth, which is easy to install, versatile in use, and expected in just about any sailboat. The forward bulkhead was approximately six feet aft of the chain locker, and during its installation I had determined the eventual height of the vee berth platform, which corresponds with the height of the horizontal cut on the bulkhead. With that as a guide, I set up my inexpensive laser level (which was proving to be an invaluable tool--especially for $19.95 on Ebay) and used it to mark a series of reference points at an equal, and level, height with the bulkhead.
|
 To secure the strips, I fiberglassed over them with a single layer of
6" wide, 24 oz. biaxial tape and epoxy resin. This provided
ample strength and support for the vee berth platform, which I expected to
be supported from beneath by these small ledges, and tabbed to the hull
above.
To secure the strips, I fiberglassed over them with a single layer of
6" wide, 24 oz. biaxial tape and epoxy resin. This provided
ample strength and support for the vee berth platform, which I expected to
be supported from beneath by these small ledges, and tabbed to the hull
above.
Later, when the resin was cured, I sanded the new fiberglass to remove any rough edges and prepare the area for eventual painting. More on the vee berth platform will be coming soon. |
|
|
|
|
|
|
|
|
|
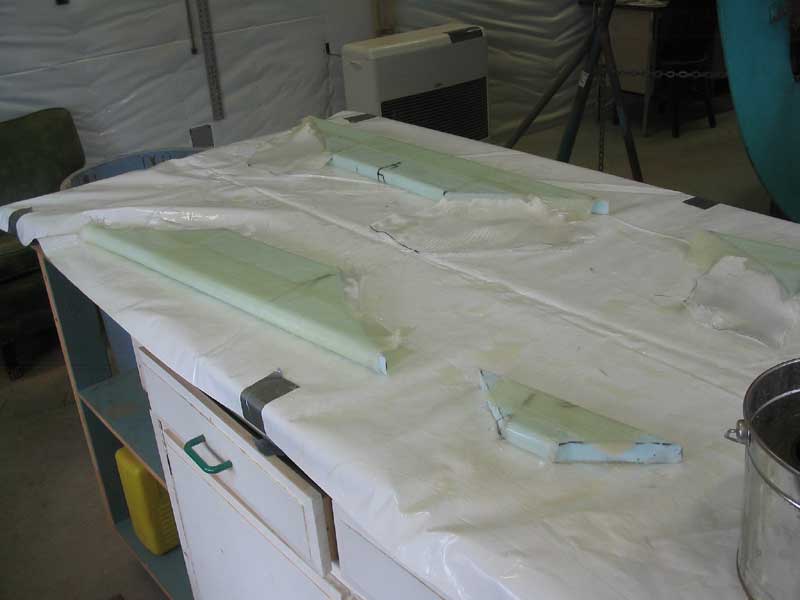
There was a substantial amount of excess resin on the floors that I had to deal with once I pulled them away from the plastic. Basically, far more resin had pooled beneath the pieces than I had expected, and the slight wrinkles and contours in the plastic had allowed some interesting ripple-y shapes to form in the cured resin. I sanded these areas as smooth as I could, but in order to get the more or less smooth finish I wanted, I had to apply some filler to the low spots, or else I would have had to sand for hours--cured, unadulterated epoxy is very hard stuff!. This slowed me down, as I had to leave the pieces overnight for the filler to cure. |
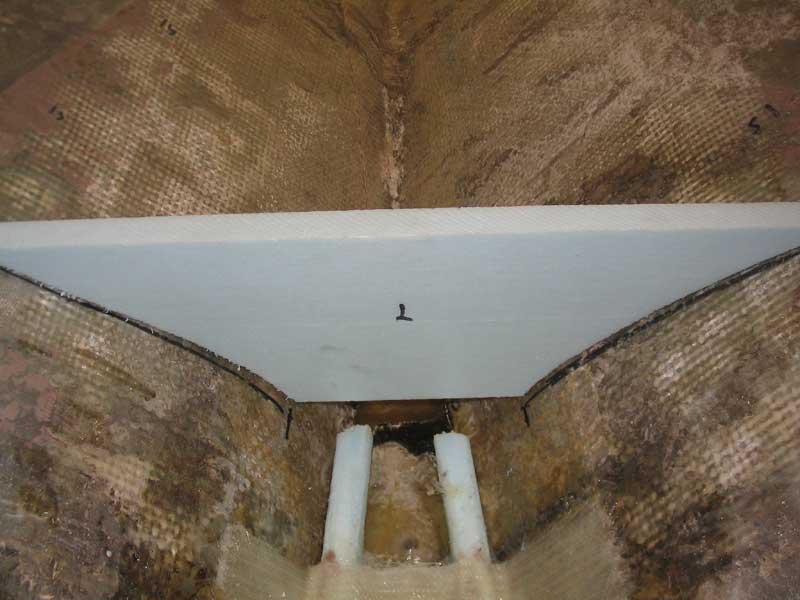
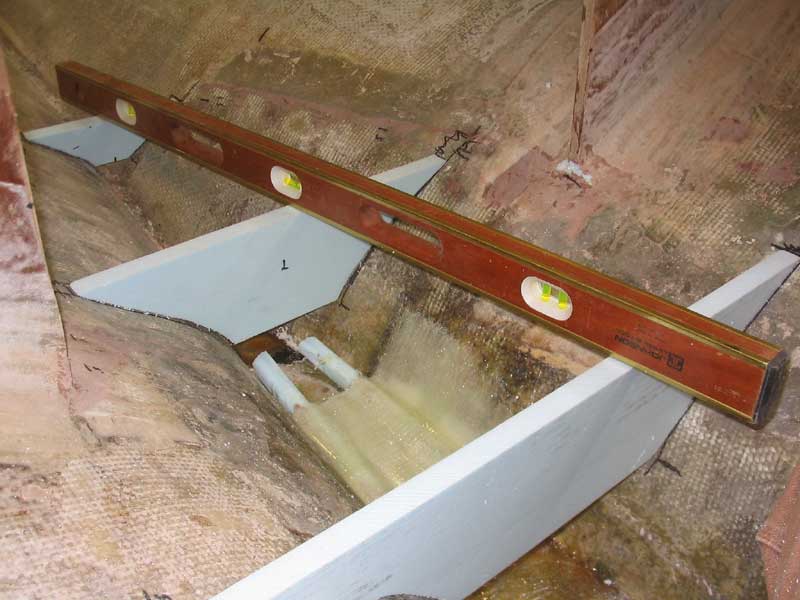
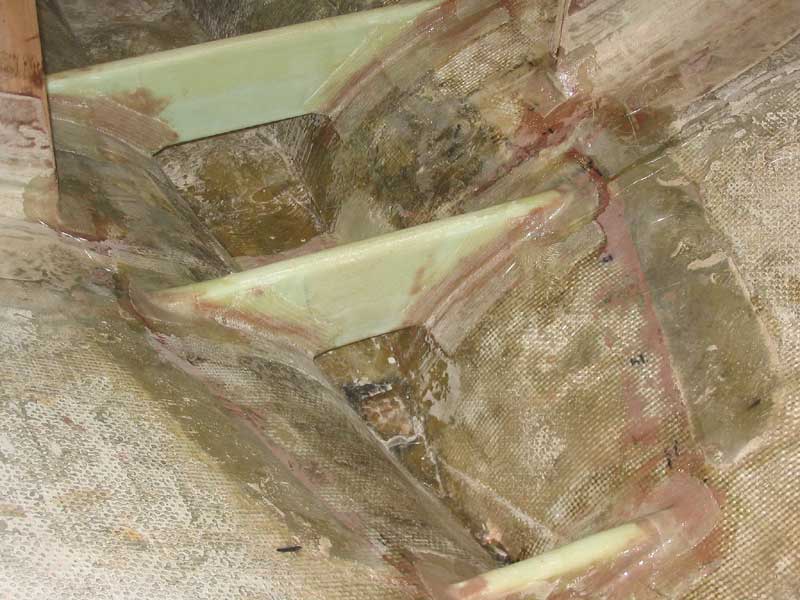 After
sanding the fill smooth, I continued by gluing the floors in place inside
the boat. I temporarily secured them with hot glue, ensuring that
they were level from side to side, evenly spaced fore and aft, level with
each other, and plumb
up and down. With the hot glue holding them in place, I
mixed some epoxy filleting material and formed fillets around the edges,
between the floors and the hull, making a smooth curve that I would be
able to glass over easily. After
sanding the fill smooth, I continued by gluing the floors in place inside
the boat. I temporarily secured them with hot glue, ensuring that
they were level from side to side, evenly spaced fore and aft, level with
each other, and plumb
up and down. With the hot glue holding them in place, I
mixed some epoxy filleting material and formed fillets around the edges,
between the floors and the hull, making a smooth curve that I would be
able to glass over easily.
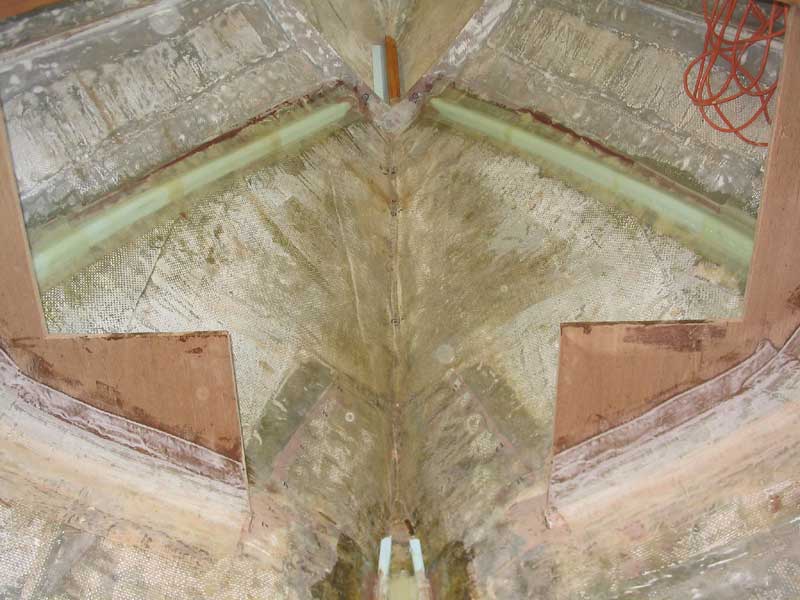
When that was done, and while the epoxy was still curing, I fiberglassed the floors in place with a single layer of 24 oz. biaxial tape, glassing both sides of each section. I left this to cure overnight. |
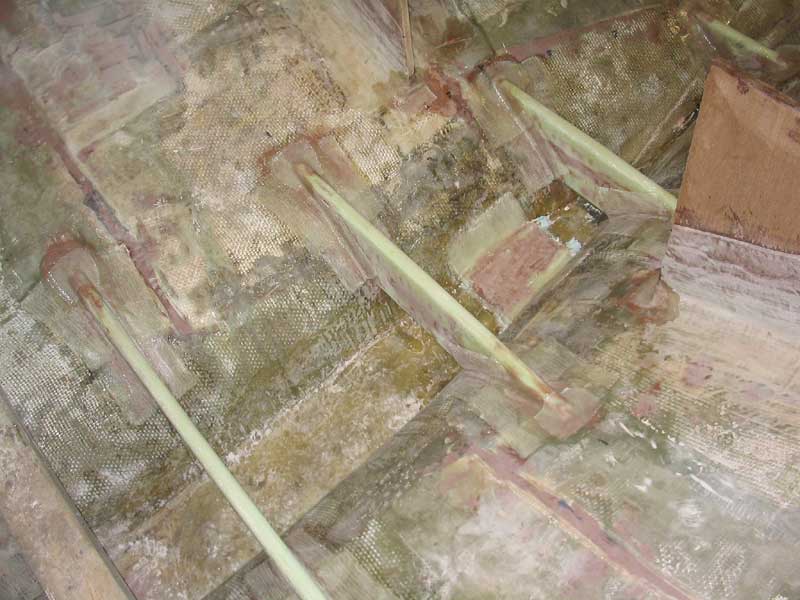 When
the tabbing was cured, I spent an hour or so sanding the new fiberglass
smooth to remove bumps and raw edges. At the same time, I also
sanded the fiberglass over the vee berth supports forward, since I hadn't
done that previously. After cleaning up the dust and washing the
fiberglass with acetone, I added a double layer of 10 oz. cloth to the top
portion of the transition between hull and floor, to finish off that area
and fully encapsulate the foam core. I hadn't used the heavy biaxial
material for this because it tends to be too difficult to lay down over a
complex shape such as these areas. When
the tabbing was cured, I spent an hour or so sanding the new fiberglass
smooth to remove bumps and raw edges. At the same time, I also
sanded the fiberglass over the vee berth supports forward, since I hadn't
done that previously. After cleaning up the dust and washing the
fiberglass with acetone, I added a double layer of 10 oz. cloth to the top
portion of the transition between hull and floor, to finish off that area
and fully encapsulate the foam core. I hadn't used the heavy biaxial
material for this because it tends to be too difficult to lay down over a
complex shape such as these areas. |
|
|