|
|
~MENU~ |
| Home |
| The Concept |
| The Boat |
| Bringing Her Home |
|
Weekly Progress Log |
|
Daysailor Projects |
| The Boat Barn |
| Resources |
| Other Sites |
| Email Tim |
|
|
|
From a Bare Hull: The Cockpit (Page 9) |
|
Cockpit Bulkhead Trim From the start, I had threatened to create a raised panel effect on the bulkhead in the cockpit. Now, with little time remaining in the project and the remainder of the cockpit more or less complete, it was time to fish or cut bait. With the cockpit seats complete, the final shape of the exposed bulkhead was finally revealed. After contemplating the size and shape for a time, I decided to mill a series of 2" wide rails and stiles from solid mahogany. After milling a board into a few lengths of the appropriately-sized stock, I prepared to make the actual pieces.
|
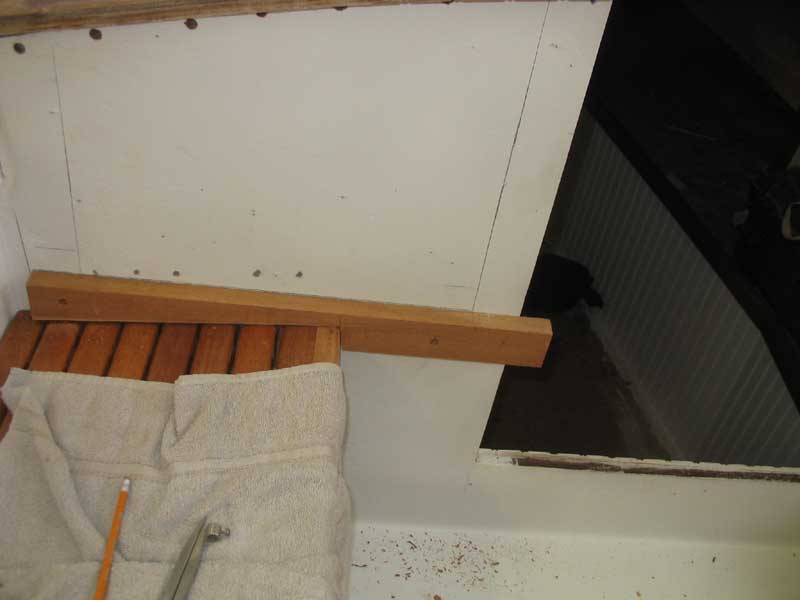
 With
the first rails in place, the remainder of the process went quite
quickly. With the horizontal rail to work from, it was easy to cut
and piece in the remaining rails: a top piece that followed the
angle formed by the camber of the cabin trunk overhead, a short
vertical piece on the outboard side (leaving room to allow for clearance
for the coamings later), and a long vertical piece that I held flush
with the companionway opening and led down to almost cockpit level. With
the first rails in place, the remainder of the process went quite
quickly. With the horizontal rail to work from, it was easy to cut
and piece in the remaining rails: a top piece that followed the
angle formed by the camber of the cabin trunk overhead, a short
vertical piece on the outboard side (leaving room to allow for clearance
for the coamings later), and a long vertical piece that I held flush
with the companionway opening and led down to almost cockpit level.
|
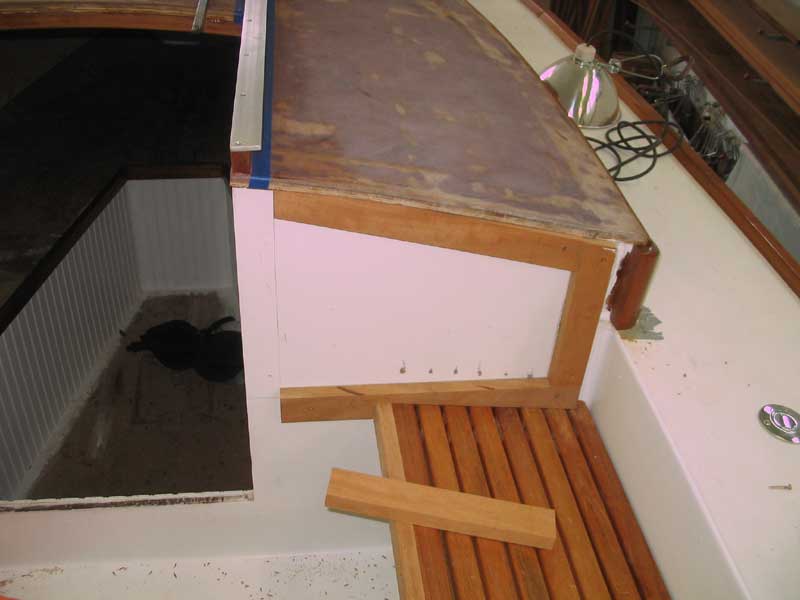
 At
the bottom of the bulkhead, near the cockpit sole, I placed a long rail
across the entire span, held above the sole by 7/8" to prevent any
pooling water from ruining the varnish or rotting the wood, and butted
the long vertical stiles (along the companionway) tightly to the lower
rail. Beneath the companionway opening, I filled in the remaining
space with a final piece of mahogany cut to fit. At
the bottom of the bulkhead, near the cockpit sole, I placed a long rail
across the entire span, held above the sole by 7/8" to prevent any
pooling water from ruining the varnish or rotting the wood, and butted
the long vertical stiles (along the companionway) tightly to the lower
rail. Beneath the companionway opening, I filled in the remaining
space with a final piece of mahogany cut to fit. |
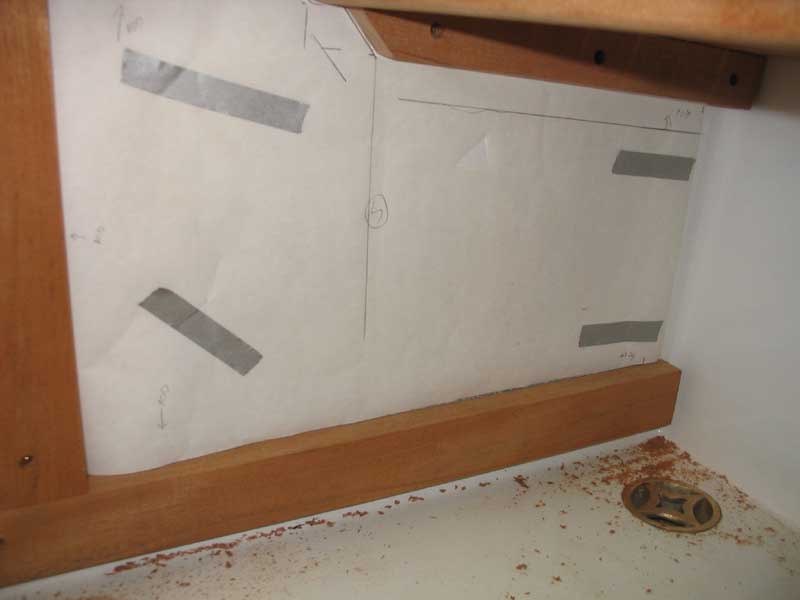 This
completed the frame. With all pieces tacked in place with screws,
I measured for the upper panels, which would be raised from solid
mahogany. Beneath the seats, I chose flat panels made from
mahogany plywood. Because of some intricate shapes caused by the
cockpit seat supports and the seat angle, I made paper patterns of the
lower panels to ensure a proper fit. This
completed the frame. With all pieces tacked in place with screws,
I measured for the upper panels, which would be raised from solid
mahogany. Beneath the seats, I chose flat panels made from
mahogany plywood. Because of some intricate shapes caused by the
cockpit seat supports and the seat angle, I made paper patterns of the
lower panels to ensure a proper fit. |
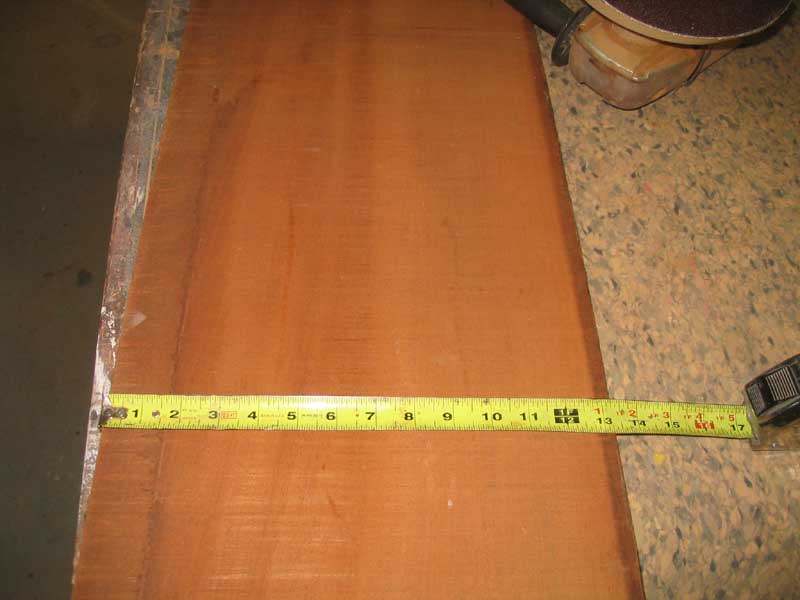 After
allowing additional material on each panel to accommodate their
installation in rabbets in the frame material, I cut two blanks for the
upper panels. I was fortunate in that I had on hand a 13.5" wide
board, from which I cut the panels (which were about 13" in maximum
height). This eliminated the need to glue up a panel to the
correct width, saving precious time. The wide board was too wide
to go through my 12" planer, so I used my big grinder with a soft pad to
quickly surface the material and remove the coarse saw cuts from the
sawmill, after which I finish sanded with more traditional sanding
tools. After laying out the panel shape, I cut out the raw blanks. After
allowing additional material on each panel to accommodate their
installation in rabbets in the frame material, I cut two blanks for the
upper panels. I was fortunate in that I had on hand a 13.5" wide
board, from which I cut the panels (which were about 13" in maximum
height). This eliminated the need to glue up a panel to the
correct width, saving precious time. The wide board was too wide
to go through my 12" planer, so I used my big grinder with a soft pad to
quickly surface the material and remove the coarse saw cuts from the
sawmill, after which I finish sanded with more traditional sanding
tools. After laying out the panel shape, I cut out the raw blanks. |
|
|
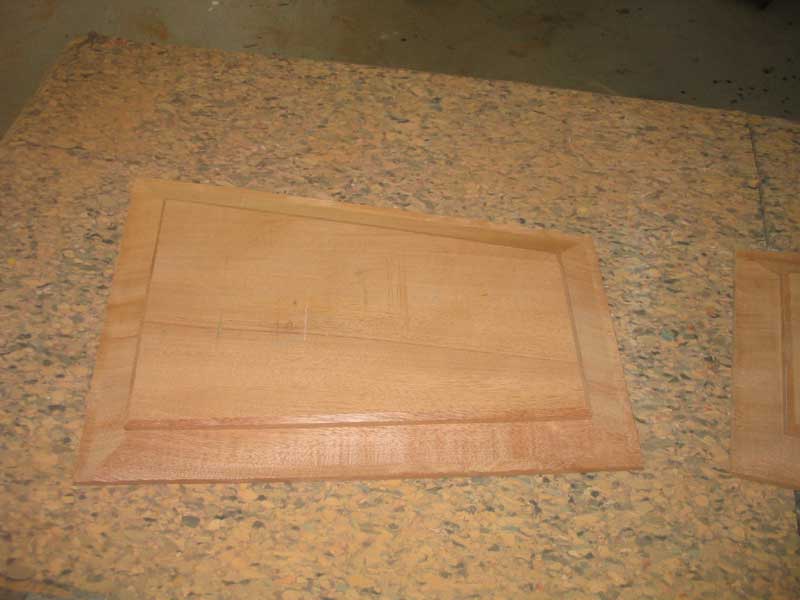 I
raised the panels in two passes, first with the temporary 1/4" table top
installed, and then with it removed to make a deeper pass. At the
end, I had two panels with a large raised section in the middle, and
reduced edges designed to fit into a slot or rabbet. The panel bit
profile left a hard square edge on the raised portion that I didn't
like, so I used a block plane to create a chamfer there to ease the edge
and add more dimension to the profile. I
raised the panels in two passes, first with the temporary 1/4" table top
installed, and then with it removed to make a deeper pass. At the
end, I had two panels with a large raised section in the middle, and
reduced edges designed to fit into a slot or rabbet. The panel bit
profile left a hard square edge on the raised portion that I didn't
like, so I used a block plane to create a chamfer there to ease the edge
and add more dimension to the profile. |
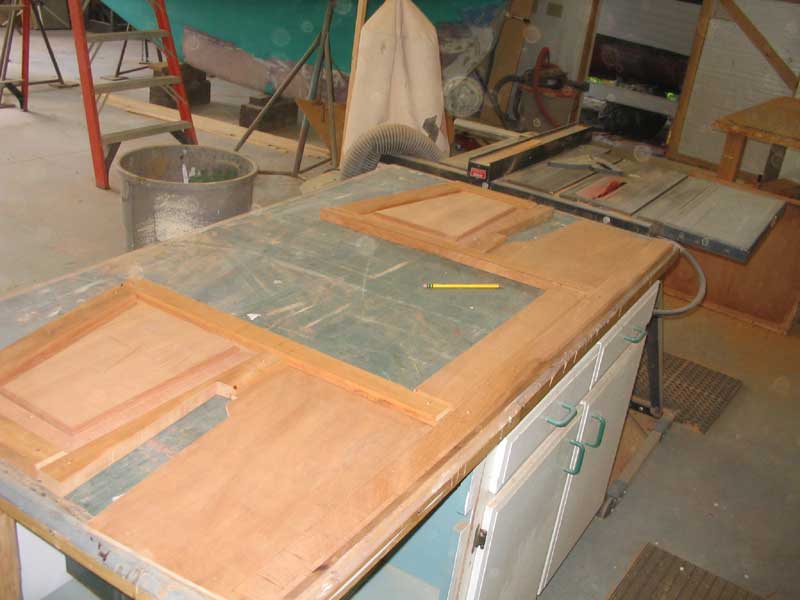 Next,
I cut the lower flat panels from a sheet of plywood, using my patterns
as a guide and adding material as needed to allow for the panel to
slide into the rabbets that would hold it in place. With that
done, I removed the rails and stiles from the boat and set them up in
the proper orientation on my bench to keep things straight. Next,
I cut the lower flat panels from a sheet of plywood, using my patterns
as a guide and adding material as needed to allow for the panel to
slide into the rabbets that would hold it in place. With that
done, I removed the rails and stiles from the boat and set them up in
the proper orientation on my bench to keep things straight. |
 I
milled a series of chamfers on the rail sides and ends. Since the
frame would not be glued together, and because wood movement is
inevitable, I chose to highlight the seams between pieces with chamfers
on both sides, rather than attempt a flush fit that would probably
shrink away over time. As they say, if you can't hide the joint,
highlight it. I also milled chamfers along the inside edges of the
rails, into the panel openings, and then milled 3/8" deep by 5/16" wide
rabbets along the inside edges of the panel openings to accept the panel
edges. After checking the fit, I was ready for installation, once
I had sanded all the pieces smooth. First, though, I applied a
seal coat of varnish to the back sides of all the pieces. I
milled a series of chamfers on the rail sides and ends. Since the
frame would not be glued together, and because wood movement is
inevitable, I chose to highlight the seams between pieces with chamfers
on both sides, rather than attempt a flush fit that would probably
shrink away over time. As they say, if you can't hide the joint,
highlight it. I also milled chamfers along the inside edges of the
rails, into the panel openings, and then milled 3/8" deep by 5/16" wide
rabbets along the inside edges of the panel openings to accept the panel
edges. After checking the fit, I was ready for installation, once
I had sanded all the pieces smooth. First, though, I applied a
seal coat of varnish to the back sides of all the pieces. |
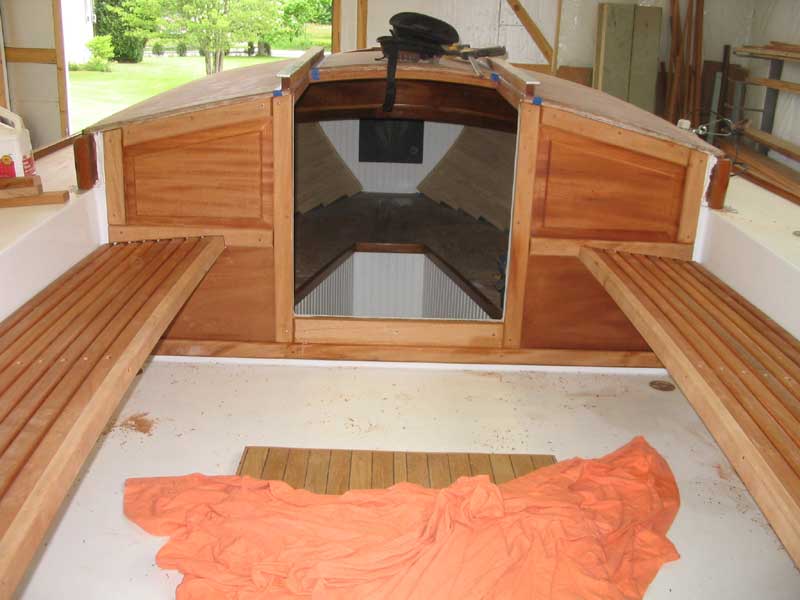
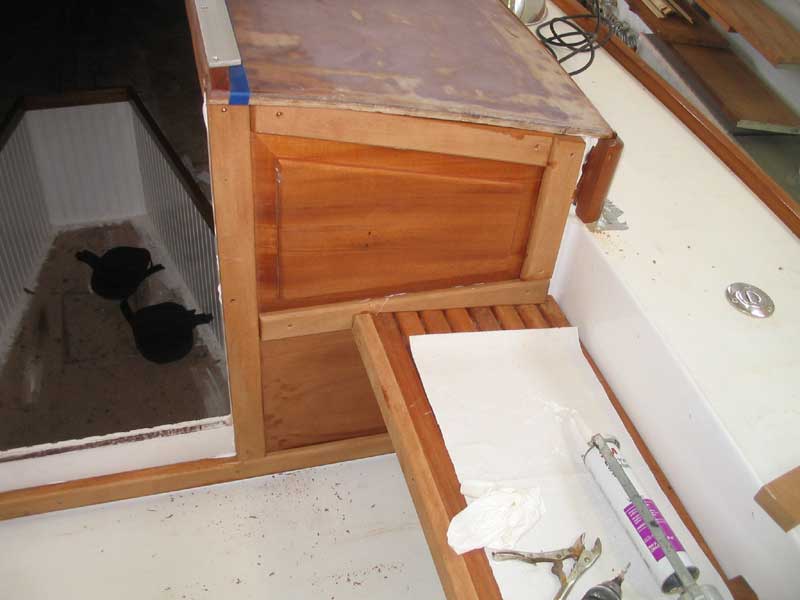 I
installed the frame pieces with bronze screws and polysulfide sealant at
the screw locations to prevent water ingress into the bulkhead.
After installing the outer rim of the frame, I added more polysulfide to
the panel area, to help tack it in place without firmly securing it, and
slid in the panels before installing the final vertical stile along the
companionway that held both panels (on each side) in place. I
cleaned up any excess sealant (which I tried to avoid), and then plugged
the screw holes with mahogany plugs. I
installed the frame pieces with bronze screws and polysulfide sealant at
the screw locations to prevent water ingress into the bulkhead.
After installing the outer rim of the frame, I added more polysulfide to
the panel area, to help tack it in place without firmly securing it, and
slid in the panels before installing the final vertical stile along the
companionway that held both panels (on each side) in place. I
cleaned up any excess sealant (which I tried to avoid), and then plugged
the screw holes with mahogany plugs.This completed the bulkhead trim. All that remained was application of many coats of varnish. Click here to go on to the companionway trim, which truly finished off the bulkhead area.> |
|
Back to Main Menu> |