|
|
~MENU~ |
| Home |
| The Concept |
| The Boat |
| Bringing Her Home |
|
Weekly Progress Log |
|
Daysailor Projects |
| The Boat Barn |
| Resources |
| Other Sites |
| Email Tim |
|
|
|
From a Bare Hull: Cabin Trunk Carlin |
|
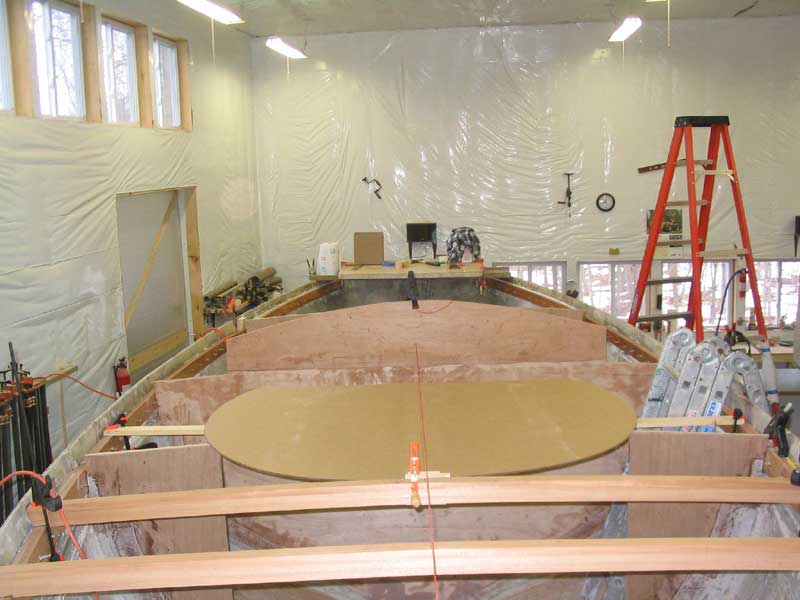
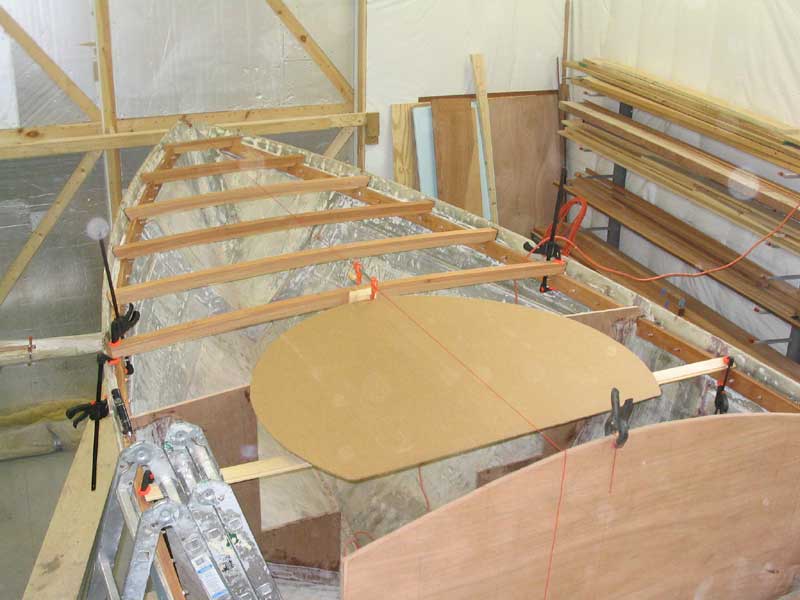
With the six full-width foredeck beams cut and fit, I could proceed no further without determining the shape and position of the curved forward edge of the cabin. All other decisions hung in the balance--the exact positioning of the cockpit carlins, the installation and fitting of the remaining short deck beams, and just about everything else. |
 The
plan called for the curved carlin to be tangent to the aft edge of the
last full-width deck beam. The 2.5' radius drawn on my plan actually
represented the inside edge of the carlin, so to properly locate my
template I clamped a temporary block against the back side of the deck
beam to represent the planned thickness of the laminated carline
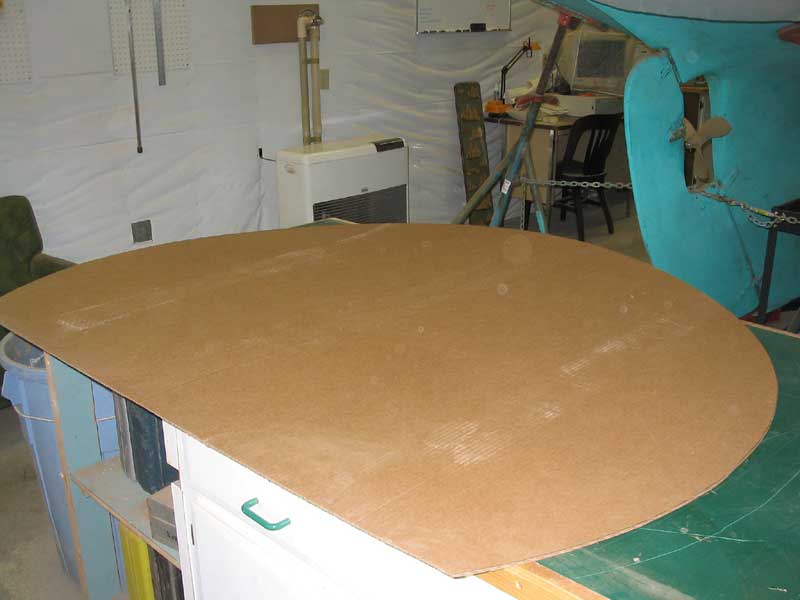
(2-1/4"). From a large piece of corrugated cardboard, I cut an
initial template to the proper size and diameter, carrying the curve well
beyond where the cockpit carlins would eventually join. Then, I
supported it up on the boat in the approximate position where the real
thing would end up later, and adjusted it till it was centered. This
provided an excellent visual representation of what the cabin trunk was
going to look like, and approximately where the tangential points where
the remaining carlins would conjoin would be. More on this
later...but don't be confused by the shape of the after end of the
cardboard template, as it does not represent the actual shape of the
carlin. Only the forward portion was important for this purpose. The
plan called for the curved carlin to be tangent to the aft edge of the
last full-width deck beam. The 2.5' radius drawn on my plan actually
represented the inside edge of the carlin, so to properly locate my
template I clamped a temporary block against the back side of the deck
beam to represent the planned thickness of the laminated carline
(2-1/4"). From a large piece of corrugated cardboard, I cut an
initial template to the proper size and diameter, carrying the curve well
beyond where the cockpit carlins would eventually join. Then, I
supported it up on the boat in the approximate position where the real
thing would end up later, and adjusted it till it was centered. This
provided an excellent visual representation of what the cabin trunk was
going to look like, and approximately where the tangential points where
the remaining carlins would conjoin would be. More on this
later...but don't be confused by the shape of the after end of the
cardboard template, as it does not represent the actual shape of the
carlin. Only the forward portion was important for this purpose. |
|
|
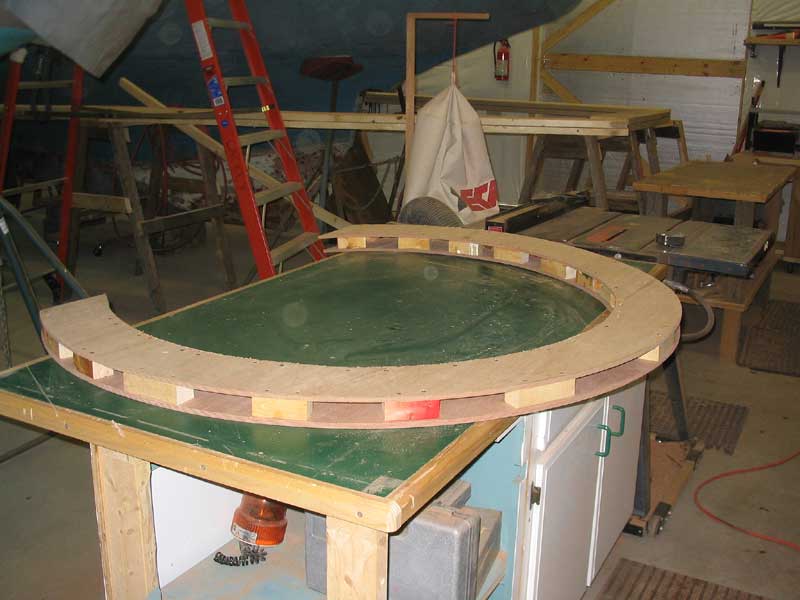
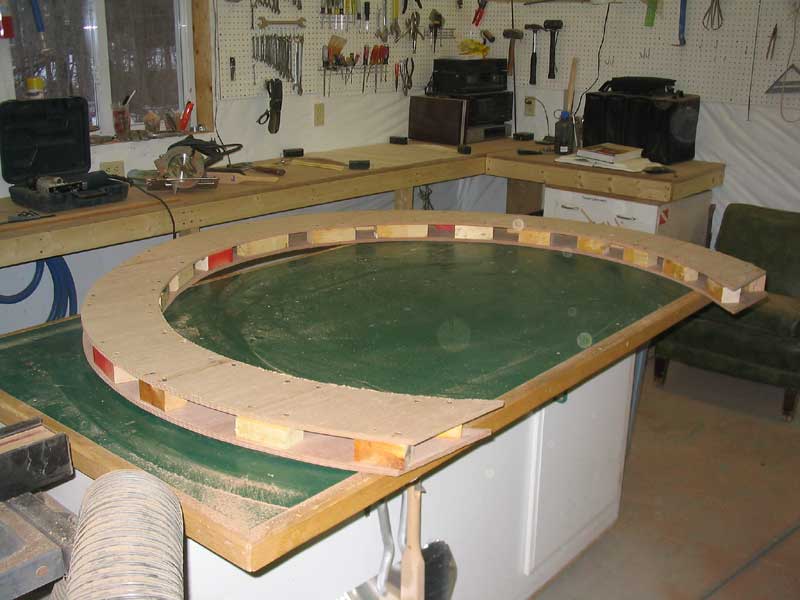
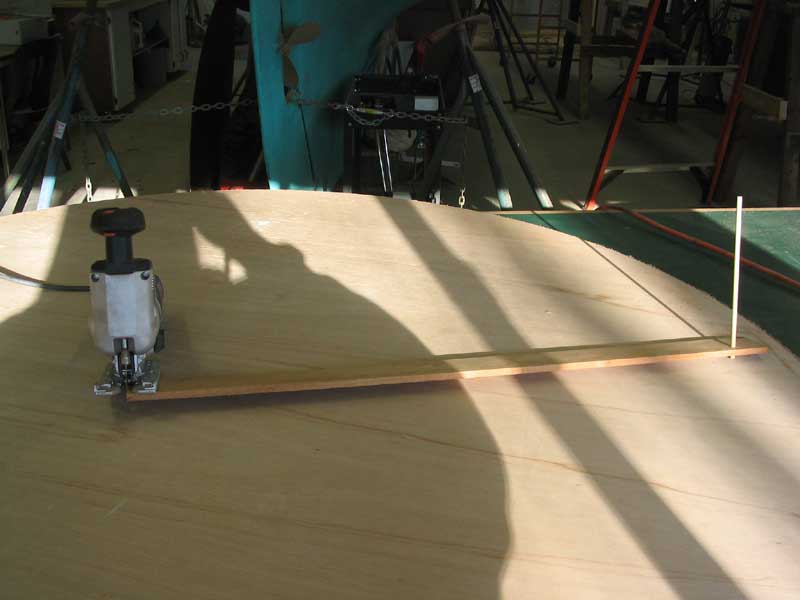 I liked what I saw, and noted that the curve
also appeared well within the realm of cold molding (laminating).
Thusly, I proceeded with constructing an actual template from which I
would laminate the final piece. To make the template, I cut two
identical circular (or at least the forward 75% of a circle) pieces out of
3/8" plywood, using a simple circle-cutting jig I threw together for
my jigsaw. With some hot-melt glue, I secured the saw base to a
scrap of 1/4" mahogany, and created a pivot point with a dowel
located the appropriate distance away (2.5' in this case). It was
easy to cut out an accurate circular shape in this manner. I liked what I saw, and noted that the curve
also appeared well within the realm of cold molding (laminating).
Thusly, I proceeded with constructing an actual template from which I
would laminate the final piece. To make the template, I cut two
identical circular (or at least the forward 75% of a circle) pieces out of
3/8" plywood, using a simple circle-cutting jig I threw together for
my jigsaw. With some hot-melt glue, I secured the saw base to a
scrap of 1/4" mahogany, and created a pivot point with a dowel
located the appropriate distance away (2.5' in this case). It was
easy to cut out an accurate circular shape in this manner. |
|
Once the outer (and the critical) cut was complete, I marked a new line roughly 6" inside the outer one, and cut that out freehand. This left me with a 6" wide circular shape (two pieces, top and bottom), which I secured together with a number of 1-1/2" spacers between the two layers of plywood to make the template the proper height for gluing up the 2-1/4" boards from which the carline would be laminated. I secured the spacers carefully to allow them to be used as clamping supports on the inside. |
|
|
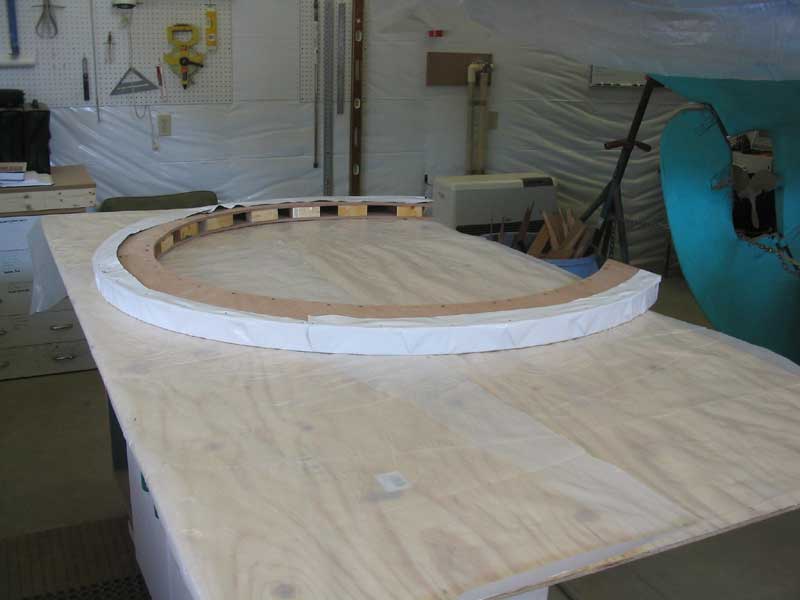 To
complete the template, I covered the bearing (outer) surface with plastic,
and mounted the circular assembly to a sheet of plywood (which I also
covered in plastic). This provided a sturdy surface on which to
actually laminate the carlin. I prepared my clamps for the glueup,
ensuring that I had then all at the ready and opened sufficiently to make
their use easier during the time-sensitive lamination. To
complete the template, I covered the bearing (outer) surface with plastic,
and mounted the circular assembly to a sheet of plywood (which I also
covered in plastic). This provided a sturdy surface on which to
actually laminate the carlin. I prepared my clamps for the glueup,
ensuring that I had then all at the ready and opened sufficiently to make
their use easier during the time-sensitive lamination.
|
|
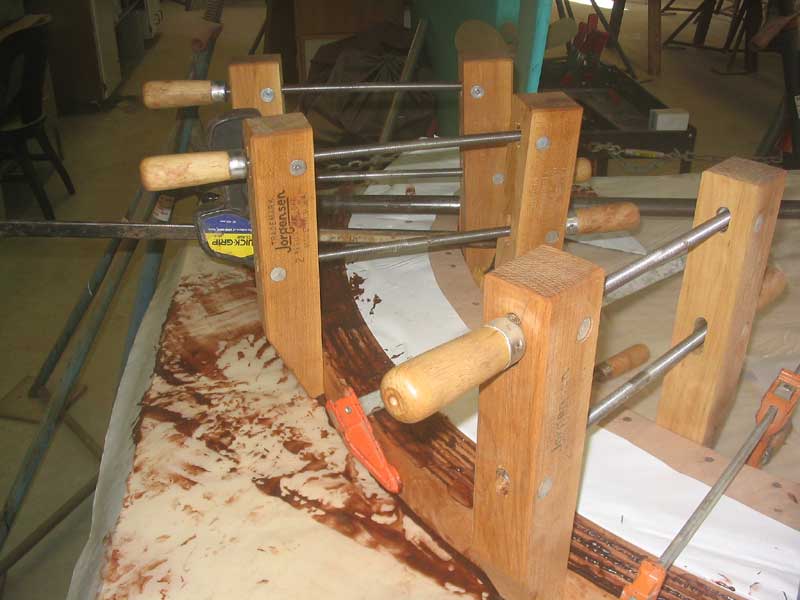
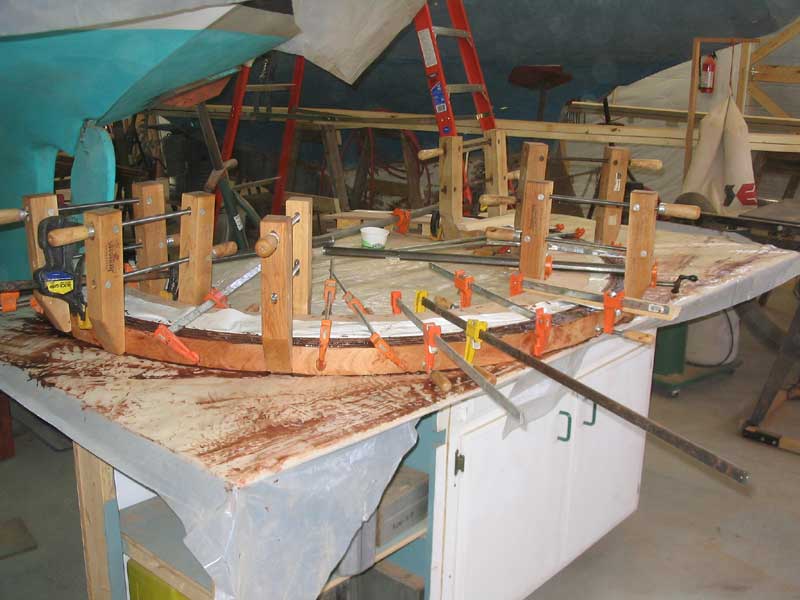
I milled 9 lengths of mahogany, each about 10 feet long, to 2-1/4" wide and 1/4" thick. These nine laminations would add up to the required 2-1/4" thickness when laminated together, which was what I was going for. The 10' length was overlong for what I needed (and the wooden template was also longer than the ultimate, finished piece needed to be), but the extra length would allow me to decide exactly where I wanted the cockpit carlins to join into the curved forward section, and allow some leeway for adjustment, etc. I was pretty sure that the thin strips would bend around the form without too much difficulty, but to be sure I bent one board around dry, and was pleased when it bent easily. For the lamination, I chose resorcinol, since there was no way I could ever wet out and clamp such long and a large number of boards in place by myself using epoxy; the open time simply isn't long enough. Even with the resorcinol, however, I would have to move quickly, and I realized from the onset that laminating so many boards at once would be tough. Still, I thought it would be possible, and I stubbornly went forward with the plan, as I really hoped to have the whole arrangement glued so that I could leave it in the clamps for the rest of the day and for the full following day, when I planned to be away from the shop anyway. And with an hour or so to work with the glue (at least once it was spread and the boards were stacked), it seemed like there should be no severe problems. I mixed up a large batch of the glue, using a scale to measure it out by weight--4 parts resin to 1 part catalyst powder. My first batch used 1/4 lb. of powder and a pound of resin, and was enough material to thoroughly cover both sides of the first five boards; I spread the glue with a 2" chip brush. At that point, I had a decision to make a decision: whether to glue up just the first five boards, and to glue on the final four later, or to continue. I decided to continue, and mixed up another batch of glue to allow me to finish. Quickly, I finished spreading the glue, and carried the pile of drippy boards to the mold, where I clamped the centers in place at once. I discovered that bending the nine
laminations into place against the mold was extremely difficult, in part
because the glue on the bottom edges was slightly tacky, and was sticking to
the plastic. Also, the force required to move the boards into the
tight mold was enough that It was at this point that I truly wondered if I was going to lose the whole glueup, or if I would be able to pull the pieces in in time. |
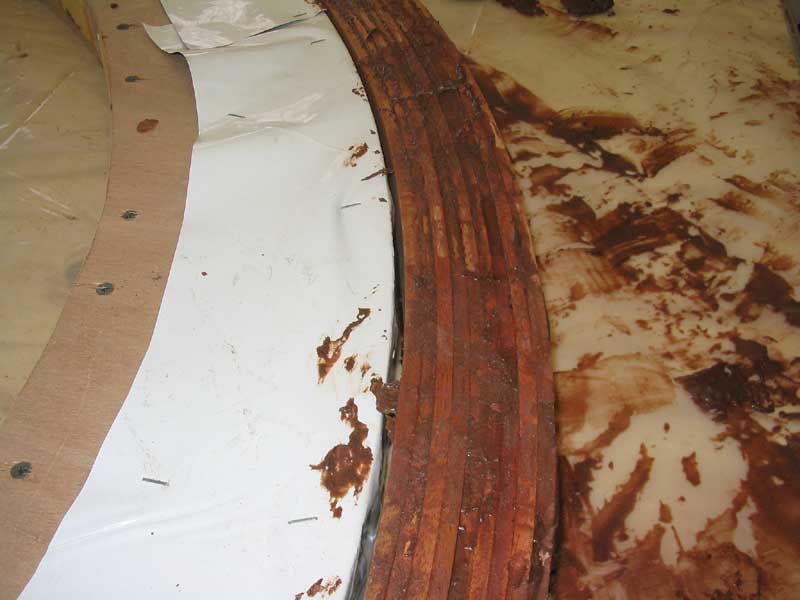
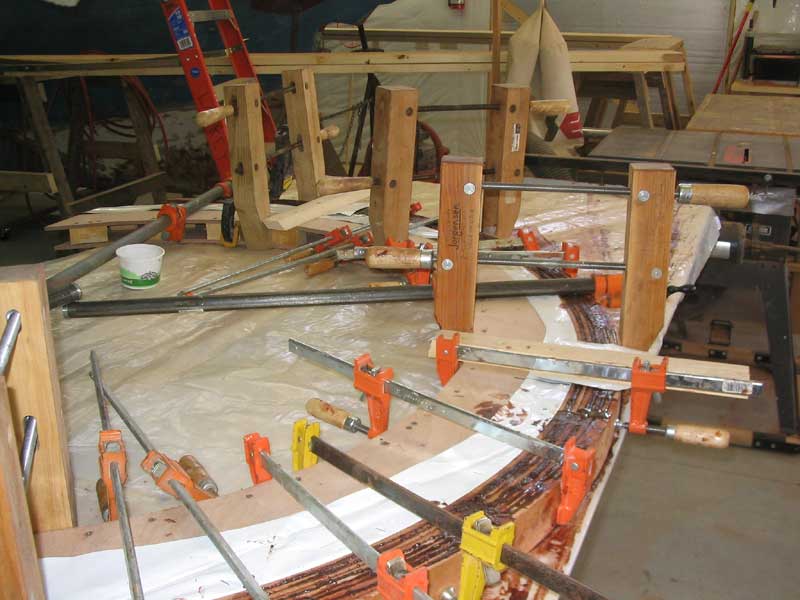 In
the end, I prevailed, and I clamped the assembly nine ways to Sunday to hold
the boards tightly in place both top and bottom against the mold. My
wooden screw clamps were invaluable, and I made a mental note to buy about
10,000 of them. (I had six.) The pictures fail to show the
trauma that was involved in pulling these nine laminations into the mold,
but, sadly, they're the best I can do. I cranked all the clamps
tightly, checked for gaps, and left the assembly to cure for a long time,
as I planned to take no risks with unclamping it too soon. I cranked
the shop heat up to 70 to help the glue cure properly, and later in the
afternoon I scraped some of the excess glue squeezeout away from the
assembly once it had started to partially cure. This would make
sanding the piece smooth easier later on. In
the end, I prevailed, and I clamped the assembly nine ways to Sunday to hold
the boards tightly in place both top and bottom against the mold. My
wooden screw clamps were invaluable, and I made a mental note to buy about
10,000 of them. (I had six.) The pictures fail to show the
trauma that was involved in pulling these nine laminations into the mold,
but, sadly, they're the best I can do. I cranked all the clamps
tightly, checked for gaps, and left the assembly to cure for a long time,
as I planned to take no risks with unclamping it too soon. I cranked
the shop heat up to 70 to help the glue cure properly, and later in the
afternoon I scraped some of the excess glue squeezeout away from the
assembly once it had started to partially cure. This would make
sanding the piece smooth easier later on.
|
|
|
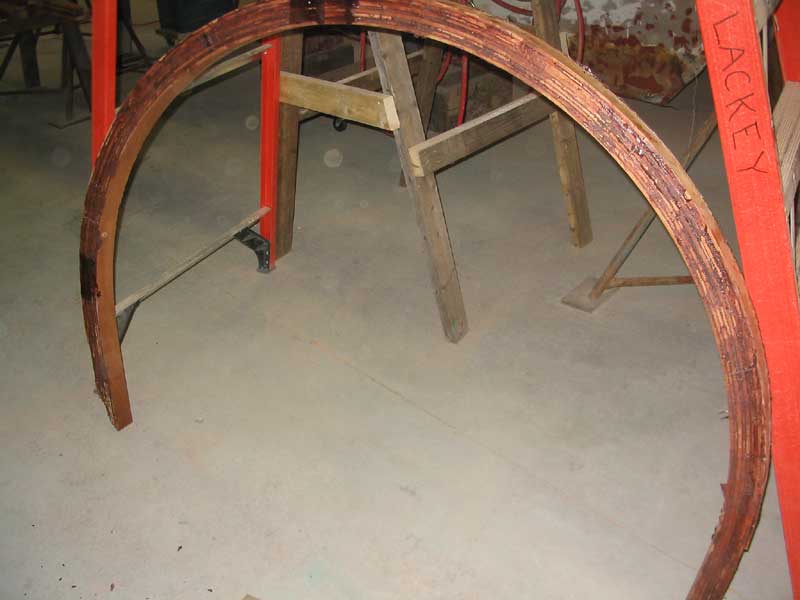
 After
leaving the assembly in the clamps for nearly two full days, I unclamped it
and was pleased to find minimal springback, small enough as to be negligible
for my purposes. The glued assembly held its circular shape nicely and
looked great--or would look great, in any event, once I had a chance to
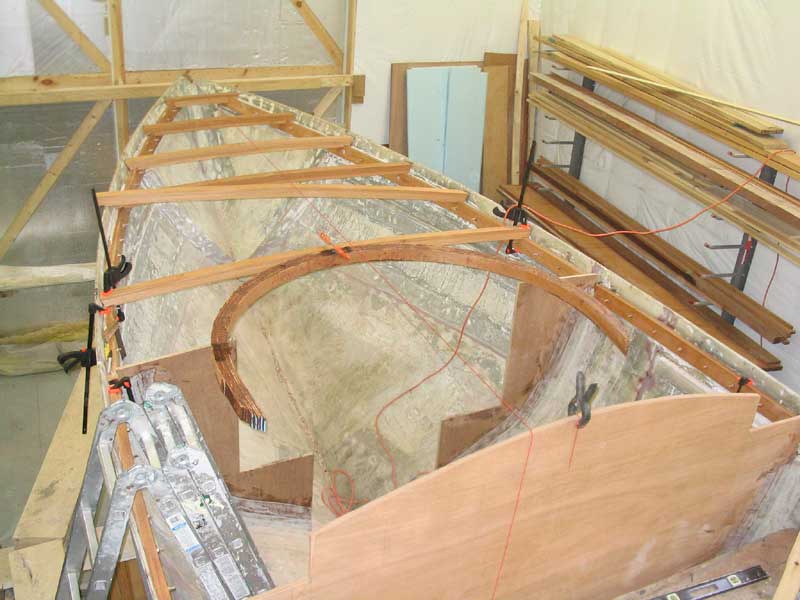
smooth it and clean off the unevenness and excess glue. I test fit the
piece on board to get a general idea of how it would fit and what it would
look like. After
leaving the assembly in the clamps for nearly two full days, I unclamped it
and was pleased to find minimal springback, small enough as to be negligible
for my purposes. The glued assembly held its circular shape nicely and
looked great--or would look great, in any event, once I had a chance to
smooth it and clean off the unevenness and excess glue. I test fit the
piece on board to get a general idea of how it would fit and what it would
look like.
|
|
|