|
|
~MENU~ |
| Home |
| The Concept |
| The Boat |
| Bringing Her Home |
|
Weekly Progress Log |
|
Daysailor Projects |
| The Boat Barn |
| Resources |
| Other Sites |
| Email Tim |
|
|
| From a Bare Hull: Cabin Trunk (Page 3) |
|
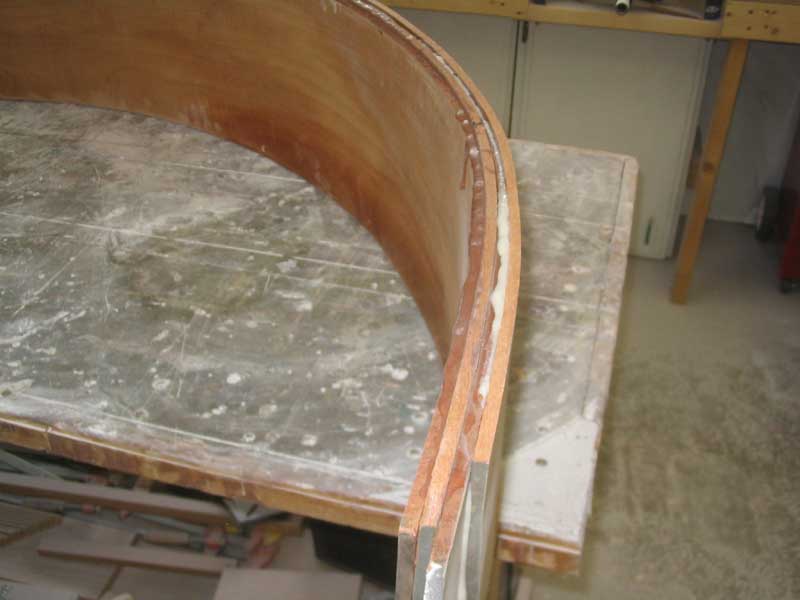
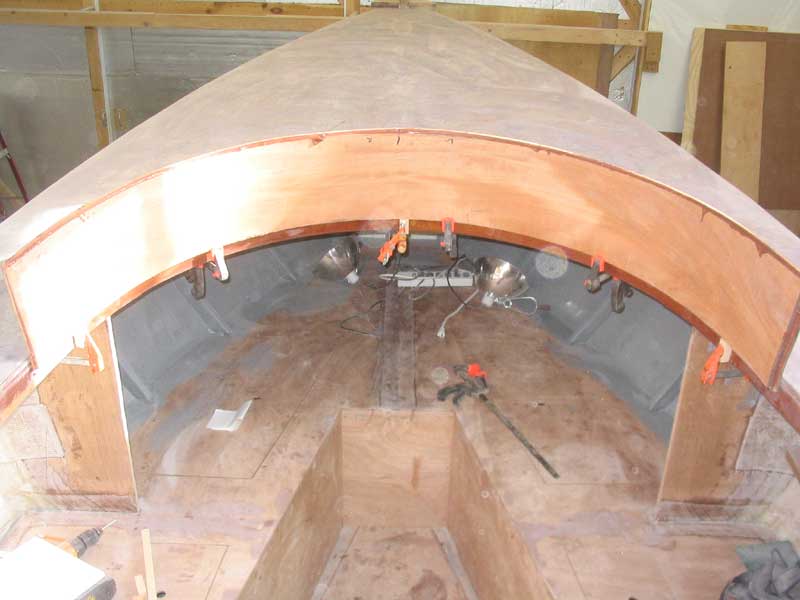
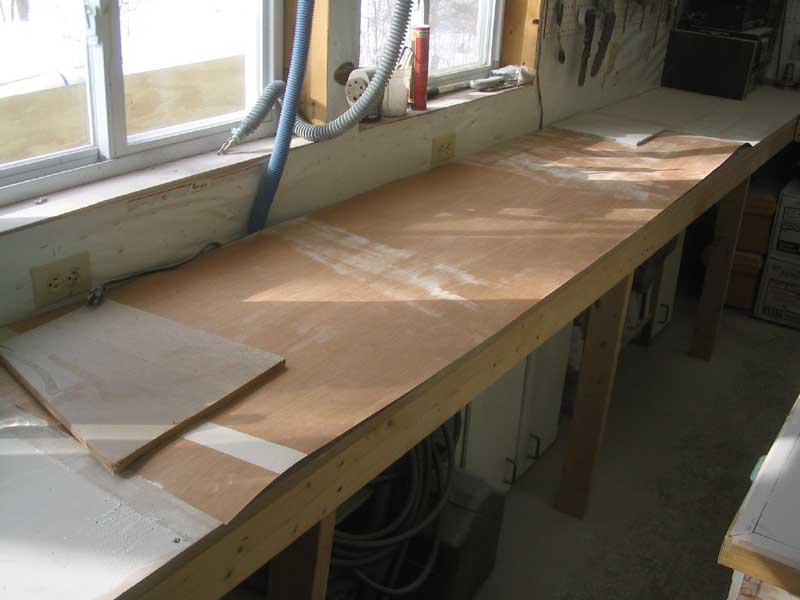
Cabin Trunk: Outer Laminations Before continuing with the cabin trunk construction, I had to refine the placement of the initial cold-molded lamination. Inside the boat, I clamped some small blocks of scrap pine to the carlin at a set height--one in the forward center, and one on each side near the after ends of the piece--that would help support it in the proper position now and during future steps. This allowed me to create an even overlap inside the boat, with about an inch or so of the cabin trunk extending inside the opening created by the carlins and deck. To pull the laminated piece tightly into position, I secured a few clamps as needed to bend it tightly into the curve created by the carlins. |
|
|
 Because of the curvature of the deck, I initially
thought I might need to scribe the new outer lamination to fit properly.
Therefore, with the cabin trunk clamped in place, I decided to pull a slab
around as a dry run, after which I would scribe it as necessary. Using my
ratchet straps, I pulled the board I intended to use around. I should have
stopped when I determined that the board was actually following the deck
contours and would not need scribing, but I continued pulling it in tightly.
Towards the end, one edge hung up slightly on the deck, and I managed to split
the slab. This was unfortunate, since I had chosen the best piece for this
outer lamination; however, I had another slab from the same original piece of
wood that was nearly as nice, but my error in allowing the first board to split
was annoying nonetheless. Because of the curvature of the deck, I initially
thought I might need to scribe the new outer lamination to fit properly.
Therefore, with the cabin trunk clamped in place, I decided to pull a slab
around as a dry run, after which I would scribe it as necessary. Using my
ratchet straps, I pulled the board I intended to use around. I should have
stopped when I determined that the board was actually following the deck
contours and would not need scribing, but I continued pulling it in tightly.
Towards the end, one edge hung up slightly on the deck, and I managed to split
the slab. This was unfortunate, since I had chosen the best piece for this
outer lamination; however, I had another slab from the same original piece of
wood that was nearly as nice, but my error in allowing the first board to split
was annoying nonetheless. |
 Now, I unclamped everything and removed the curved
lamination back to the floor of the shop, where I prepared the mold for the
gluing process. Since the new board to be bent around would need to be an
inch or so above the bottom edge (as described above), I decided to glue some
small scrap blocks in place to hold the bottom of the board at the proper
location during installation; I installed the blocks with a hot glue gun. Now, I unclamped everything and removed the curved
lamination back to the floor of the shop, where I prepared the mold for the
gluing process. Since the new board to be bent around would need to be an
inch or so above the bottom edge (as described above), I decided to glue some
small scrap blocks in place to hold the bottom of the board at the proper
location during installation; I installed the blocks with a hot glue gun. |
 Next, I actually screwed the original 3-lam piece to
the mold, attaching it through the bottom one inch or so--the area that would
remain exposed after gluing. My reasons for this were twofold:
first, and obviously, it held the piece tightly in place; second, there was a
short area where the original three boards had not been pulled together
tightly during the first glue-up, so I stuffed some thickened epoxy adhesive
into the gaps and pulled it tightly together into the mold when I screwed the
piece in place. I covered the screw heads with tape just to keep excess
epoxy from fouling the threads. Next, I actually screwed the original 3-lam piece to
the mold, attaching it through the bottom one inch or so--the area that would
remain exposed after gluing. My reasons for this were twofold:
first, and obviously, it held the piece tightly in place; second, there was a
short area where the original three boards had not been pulled together
tightly during the first glue-up, so I stuffed some thickened epoxy adhesive
into the gaps and pulled it tightly together into the mold when I screwed the
piece in place. I covered the screw heads with tape just to keep excess
epoxy from fouling the threads. |
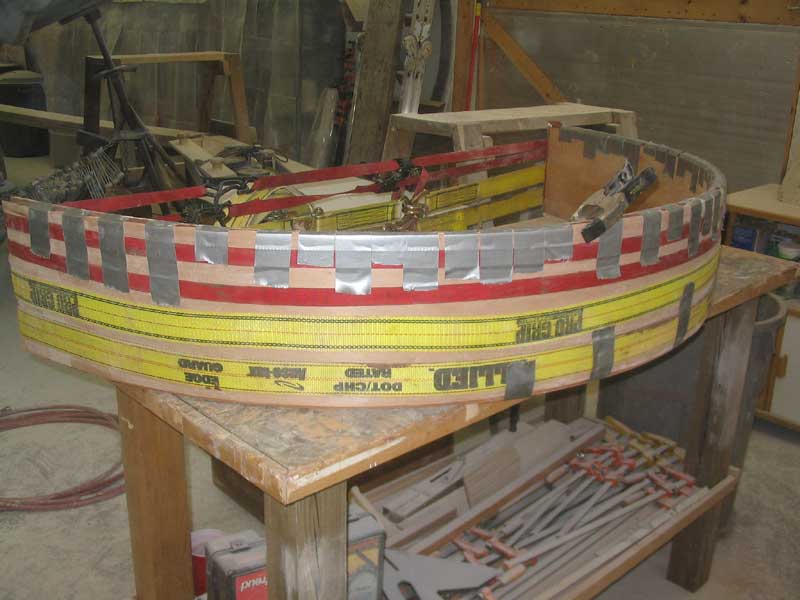
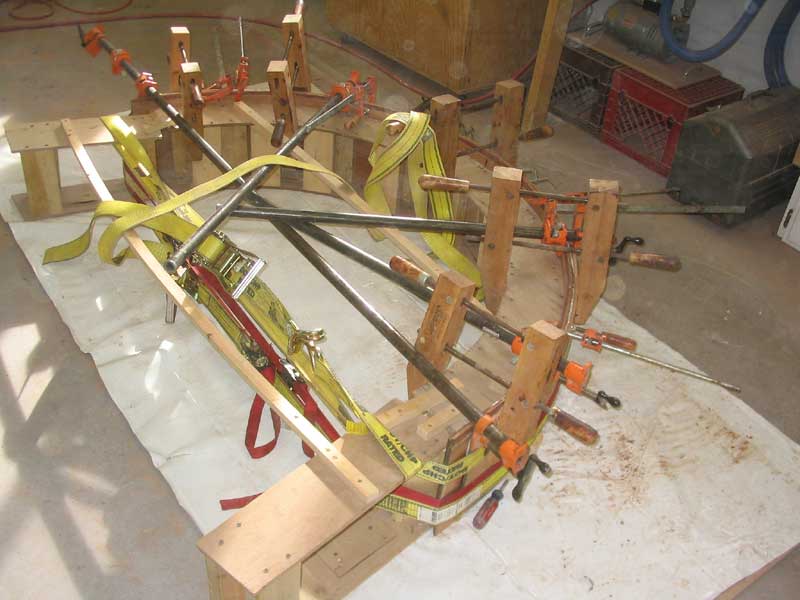 Finally,
I filled the splits and gaps in the outer lamination (from when it broke during
the first clamping) with thickened epoxy, just before mixing up more thickened
epoxy (I was out of resorcinol) with which to glue the final lamination.
With the same techniques used during the original lamination, I bent the last
piece around the form, clamping it tightly with the straps and numerous bar and
pipe clamps. I had to fight along the way to keep the outer lamination
from hanging up on the small wooden blocks I had installed as spacers, so
constant vigilance was required. Unfortunately, towards the end, I managed
to create yet another split, this time from one of those dumb spacer blocks.
there was nothing I could do but finish up the clamping and hope for the best
when the piece was unclamped later. Finally,
I filled the splits and gaps in the outer lamination (from when it broke during
the first clamping) with thickened epoxy, just before mixing up more thickened
epoxy (I was out of resorcinol) with which to glue the final lamination.
With the same techniques used during the original lamination, I bent the last
piece around the form, clamping it tightly with the straps and numerous bar and
pipe clamps. I had to fight along the way to keep the outer lamination
from hanging up on the small wooden blocks I had installed as spacers, so
constant vigilance was required. Unfortunately, towards the end, I managed
to create yet another split, this time from one of those dumb spacer blocks.
there was nothing I could do but finish up the clamping and hope for the best
when the piece was unclamped later. |
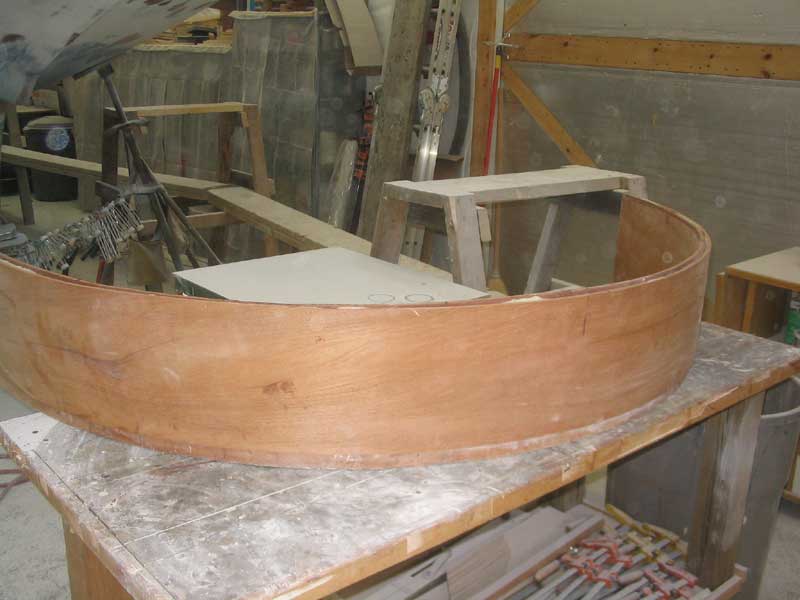 After curing overnight, I removed the piece from the form. It seems that I
forgot to take any pictures of the completed piece, so you'll have to wait to
see those. It looked like the piece would be salvageable, despite the
split caused at the end of the clamp-up. After curing overnight, I removed the piece from the form. It seems that I
forgot to take any pictures of the completed piece, so you'll have to wait to
see those. It looked like the piece would be salvageable, despite the
split caused at the end of the clamp-up.
|
|
|
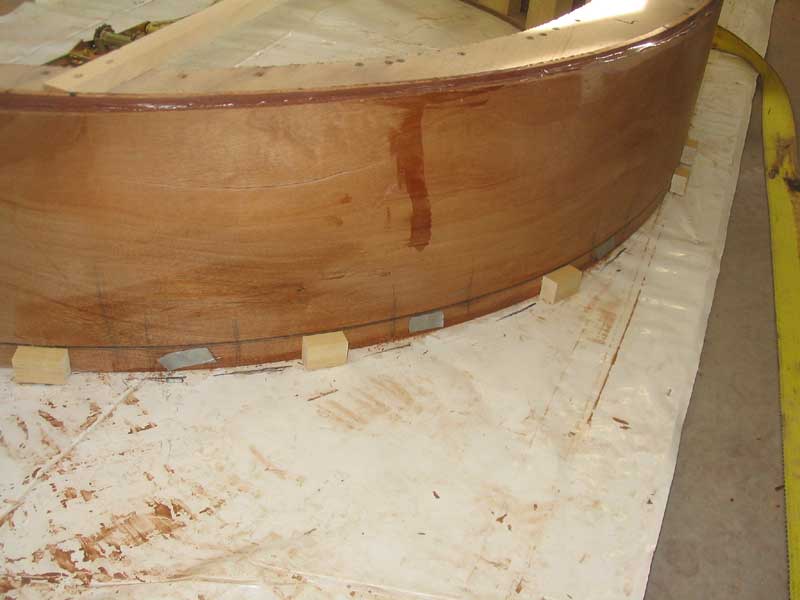
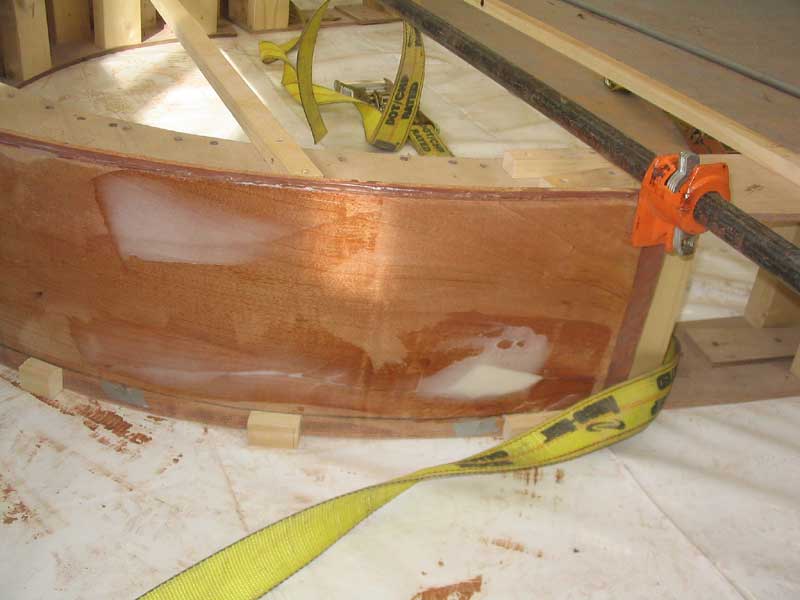
 In
the end, I elected to install a layer of mahogany veneer over the outside of the
cabin trunk. I just wasn't satisfied with the appearance of the underlying
piece, so I installed the veneer in a bed of epoxy to cover the sections
beneath. I used several straps to pull the veneer tightly into the lamination,
and added lots of duct tape at the top edge to pull that in as well. I
left the arrangement to cure overnight before removing the clamps and tape. In
the end, I elected to install a layer of mahogany veneer over the outside of the
cabin trunk. I just wasn't satisfied with the appearance of the underlying
piece, so I installed the veneer in a bed of epoxy to cover the sections
beneath. I used several straps to pull the veneer tightly into the lamination,
and added lots of duct tape at the top edge to pull that in as well. I
left the arrangement to cure overnight before removing the clamps and tape. |
|
|
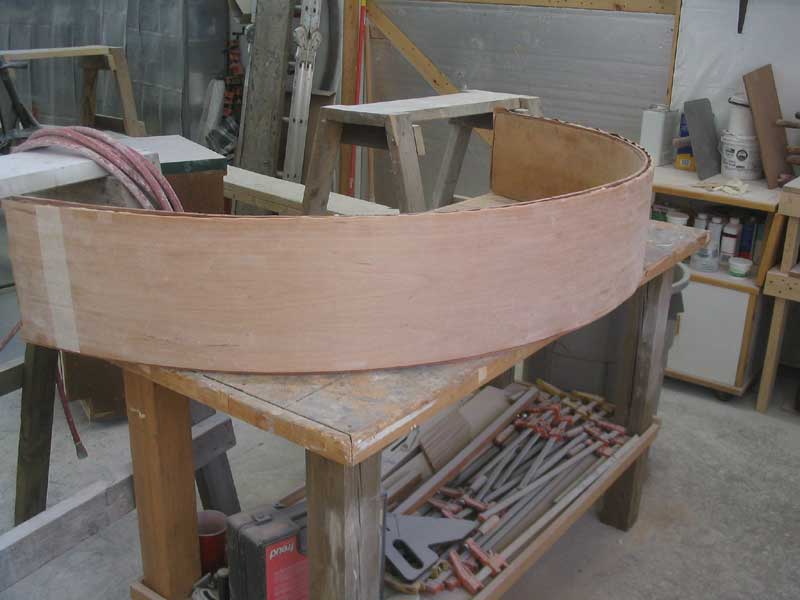 With
some minor trimming, the curved section was ready for temporary installation and
fitting to the coamings and after sections of the cabin trunk. With
some minor trimming, the curved section was ready for temporary installation and
fitting to the coamings and after sections of the cabin trunk.That's next. Click here to continue> |