~MENU~

Home
The Concept
The Boat
Bringing Her Home
Weekly
Progress Log
Daysailor
Projects
     
The Boat Barn
Resources
Other Sites
Email Tim


Boat Barn:  Insulation, Windows, and Doors 

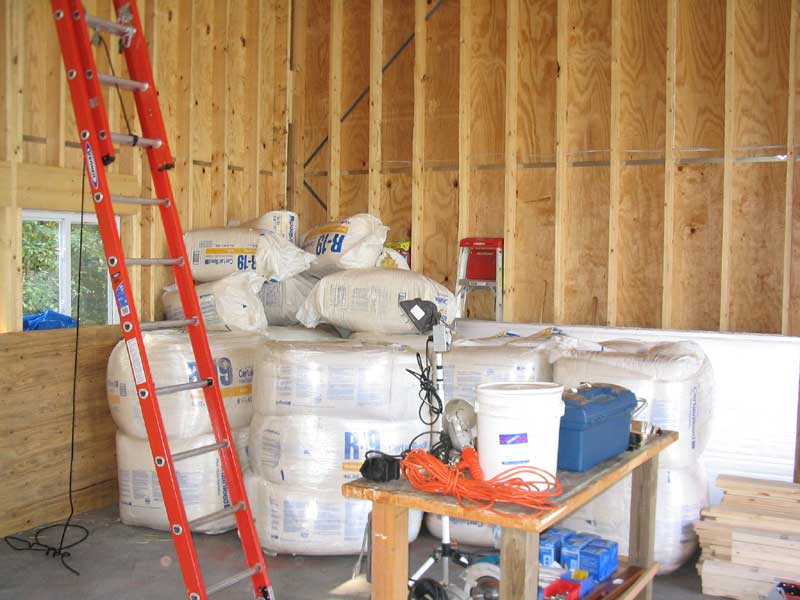
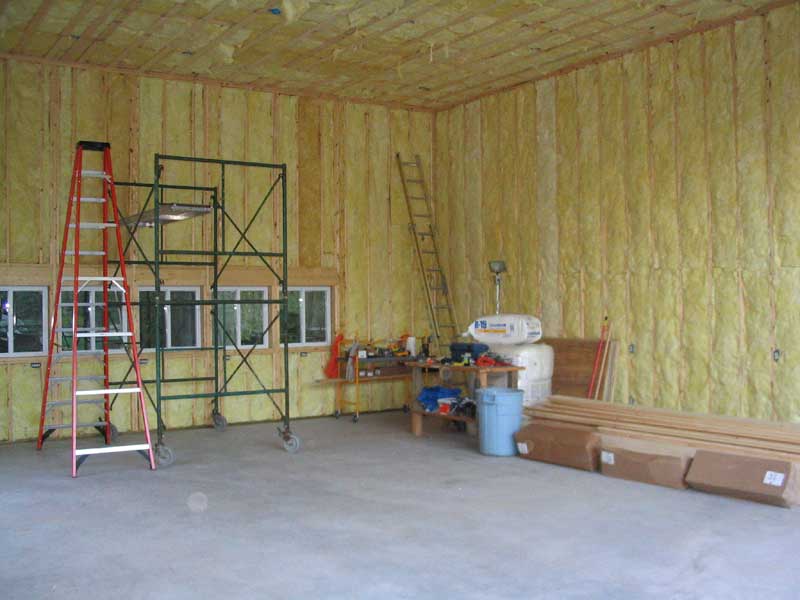
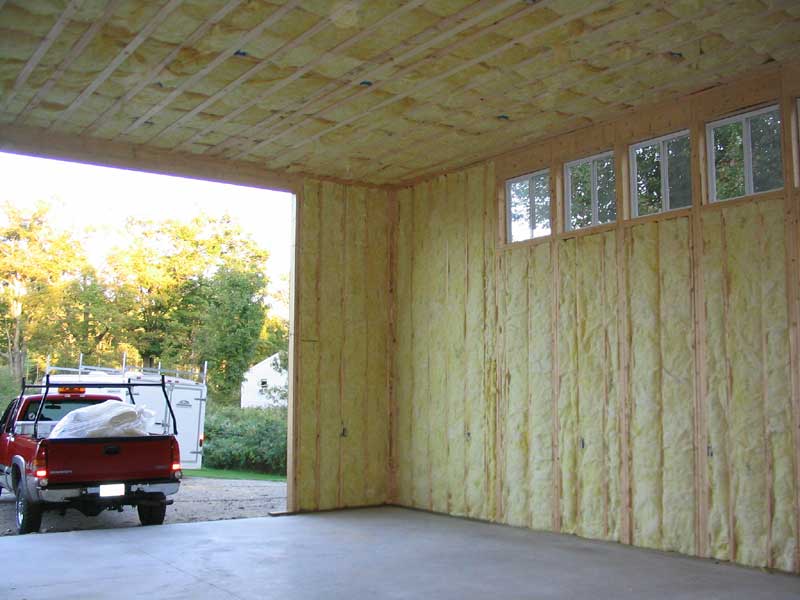
Along with the electrical installation and wiring, I chose to do all the work on the windows, doors, and insulation in the barn.
Framing          
Raising the Walls           
Roof and Trim
Electrical
  Insulation/Windows/Doors 
     
Clerestory Windows
       
Back Windows
        Man Door
       
Insulation
        Vapor Barrier Plastic

       
Rolling Barn Doors
 
Barn Home Page

Insulation

pileoinsulation-o.jpg (59280 bytes)I began with a depressingly large pile of insulation rolls.  To contemplate the entire thing at once was too much, so instead I simply turned to the task at hand, however unpleasant.  The insulation is unfaced because I intended to install a full vapor barrier of white plastic over it when complete.

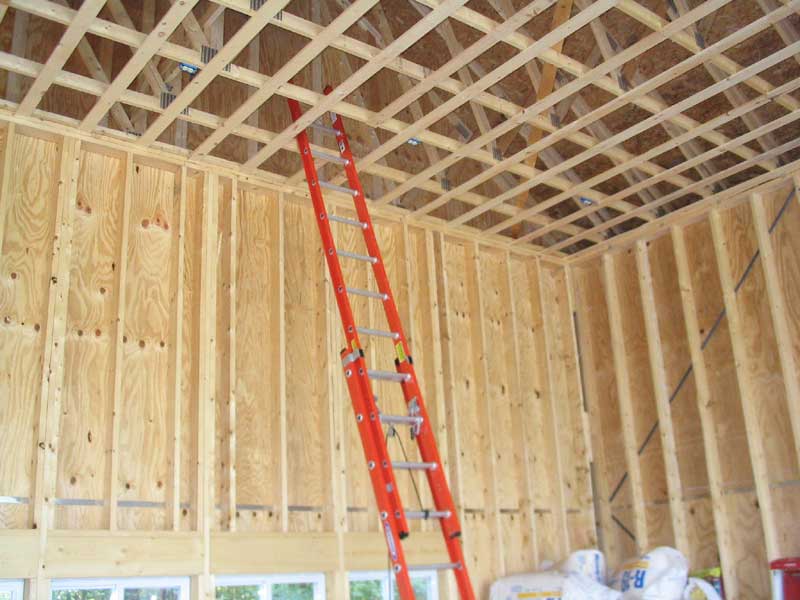
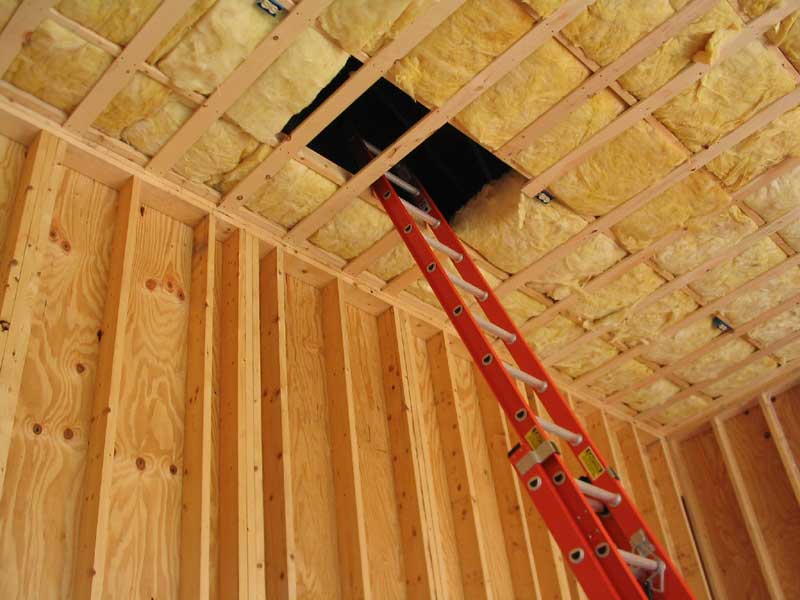
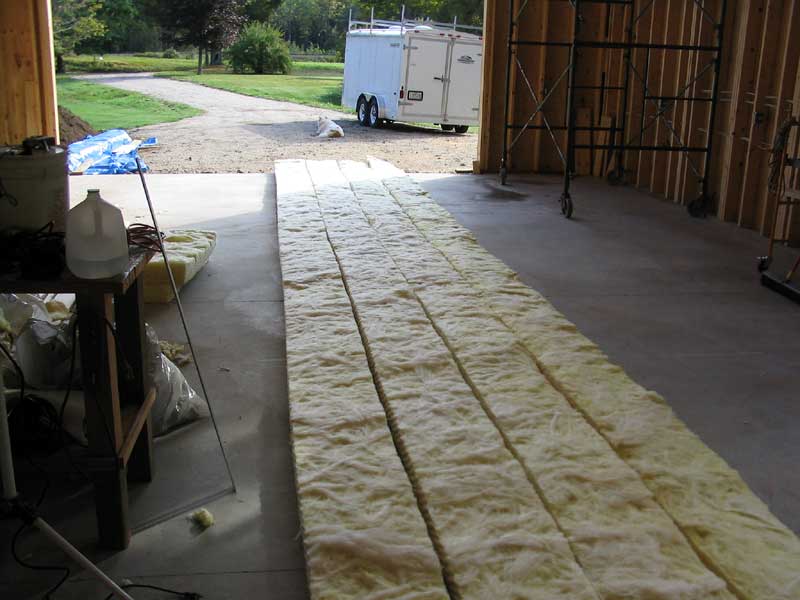
The biggest hurdle to the insulation job was simply the height of the ceiling.  There were no two ways around it:  getting the insulation up there was not going to be fun.  There are 20 bays in the ceiling, each of which is about 30 feet in length (the width of the barn).  The ceiling insulation rolls came in 39'-2" lengths.  I mused that it was a pity that the bays didn't run lengthwise instead, so that the full rolls would fit uncut.


access-o.jpg (58275 bytes)I was faced with a small access hole in the strapping, though I found I had to cut an adjacent piece later on so as to get the insulation through.  To make my job easier, I decided to first install insulation in the outermost sections of the bays--running from the first chord out to the eaves, a distance of about 84".  To prepare, I cut 40 pieces of insulation (that's 20 per side) to the proper length.  This was a chore in and of itself.  I got five pieces out of each large roll of insulation, and rolled up the cut pieces and stacked them for later use.  


rollsready-o.jpg (43849 bytes)


With all 40 pieces ready to go, and my back screaming in protest from kneeling and bending over the floor to cut and roll them, it was time to lug them up into the attic.  I placed four of the rolls on a small tarp, bundled it up like Santa Claus, and climbed the 16' into the attic on the ladder.  It was a chore pushing and pulling the big bundle of insulation thorugh the small access hole, made all the worse because of the unfortunate location of a ceiling outlet right in the hole; of course everything tended to catch on this.  Once up in the attic, I temporarily stored the rolls in the adjacent bays, intending to heave them all up there first and then distribute them.

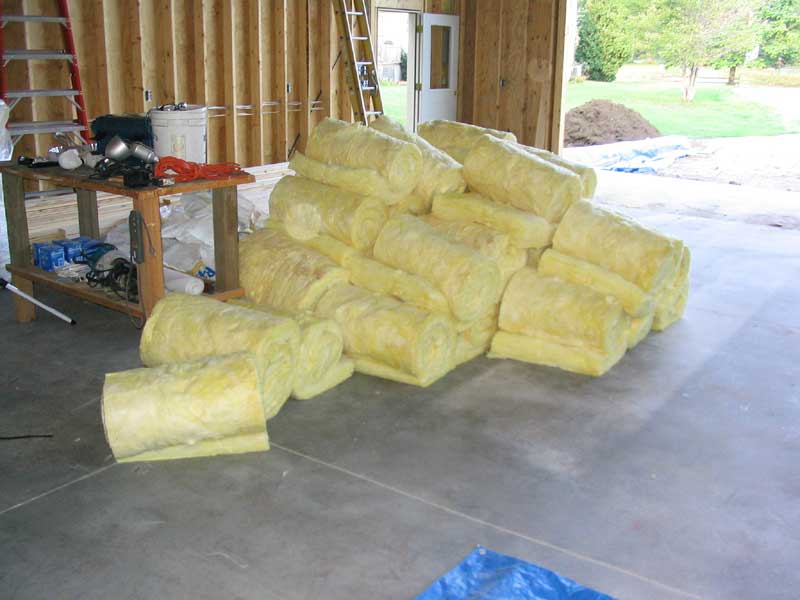
10 exhausting trips later, all the cut insulation was up in the attic.  I took a short break for rehydration (a later visit to the bathroom scale when all was said and done indicated I had lost over 10 pounds of water weight), then climbed once again into the attic to unroll the insulation in the bays.  I found that this part was much less of a pain than the grunt work of hauling the rolls up in the first place, and it went quickly.  I used a stick to increase my reach and help carefully stuff the insulation into each bay.  There was plenty of room to walk inside the trusses, being careful to step only on the chords and not on any of the strapping--or worse, on any of the empty spaces!  As I finished, darkness was fast encroaching, so I set up a work light.

workinglate-o.jpg (26191 bytes)I wasn't ready to quit yet, so I decided to go ahead and prepare the 16' rolls required to fill the center portion of the bays the next day.  I cut 20 pieces as required, rolled them, and hauled them (only two at a time--so another 10 trips) into the attic, where I stored them in the bays.  By now, it was 1930, I had been at the chore for four hours, and it was getting too shadowy in the attic to continue (plus I was exhausted; don't ever underestimate the toll 40 or 50 trips up and down a 16' ladder, half with a load in hand, can take!).


lastceilingpiece.jpg (51737 bytes) I began the next morning at 0745 and with all the rolls of insulation already up in the attic, the ceiling was done within an hour and a half.  I discovered that my measurement was a bit short, leaving gaps at the end of the middle section of insulation, so I had to cut some short (i.e. less than a foot) pieces to fill in the gaps.  No harm done.

With great fanfare (not really), I lowered the extension ladder and, from my big stepladder, laid the last piece of insulation in over the access hole.  Ceiling--done!  I had two short scraps of material left over--well planned!


rolledoutinsulation.jpg (51687 bytes) I moved on directly to the walls.  I decided to begin by filling all the full-width, full-height bays around the room, and then to fill in the smaller areas that required additional cutting.  First, I measured the length of the bays, and marked this as needed on the floor with chalk.  I then rolled out three batts side by side (each batt is 39' long) and cut across all three at the appropriate marks.  This gave me enough batts to fill six full-length bays,  and three 9' batts left over that I could use elsewhere.  I know:  the picture shows four rolls.  I only did this once before deciding that three worked better.


nfrontinsulate.jpg (59216 bytes) In this manner, I worked steadily around the room, cutting and installing the batts as I went. I won't bother describing the process: you either already know, or have no particular desire to know.   With a few short breaks, I worked until the job was done, at about 1545.  The stack of new batts shrank steadily, while the trash pile in the middle of the room grew large.  I ended up with 10 packages left over (Bob had estimated the amount when he ordered it from the lumber company).


trashpile.jpg (52041 bytes)

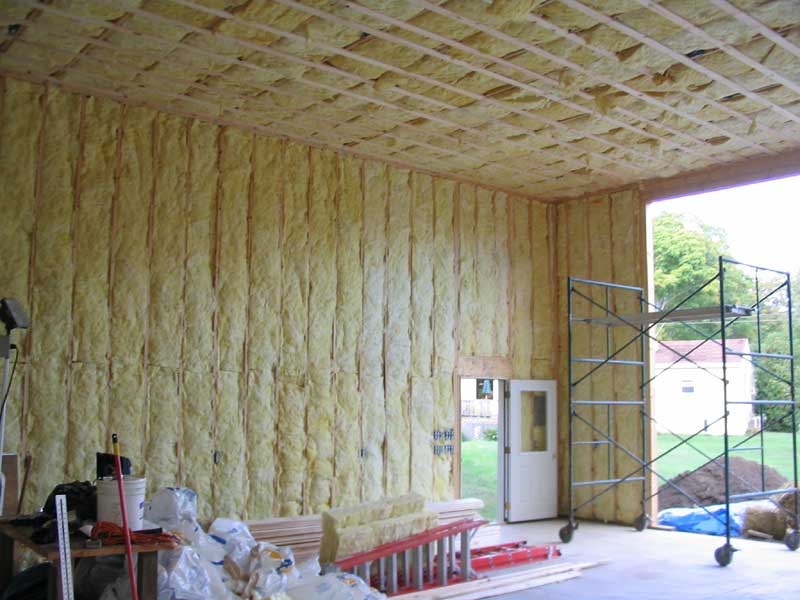
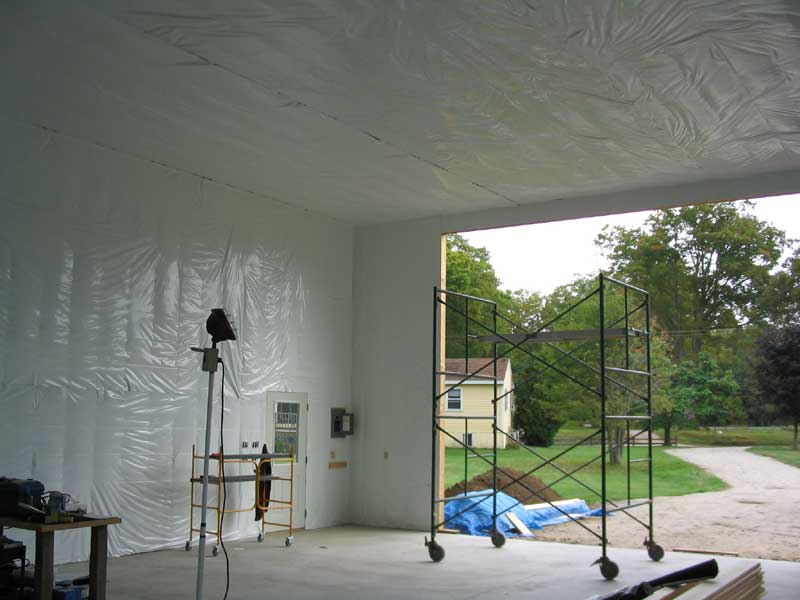
The insulation was warm, fuzzy and cozy to nuzzle up into.  No it wasn't.  Fortunately, fiberglass doesn't tend to irritate my skin the way it can for many people, so I didn't have to deal with the added unpleasantness of a biohazard suit or some such.  By the end of the full day working on the walls--which involved a lot of intimacy with the batts, including peeling sections apart so as to encapsulate wiring--I was feeling minor effects from the itchy fibers, but a well-deserved shower took care of that.  Afterwards, I cleaned up the shop and swept the floor thoroughly in preparation for the next day's work:  installing the vapor barrier and, in this case, the final interior surface of the shop.

nbackinsulate.jpg (44933 bytes)     sfrontcornerinsulate.jpg (51933 bytes)


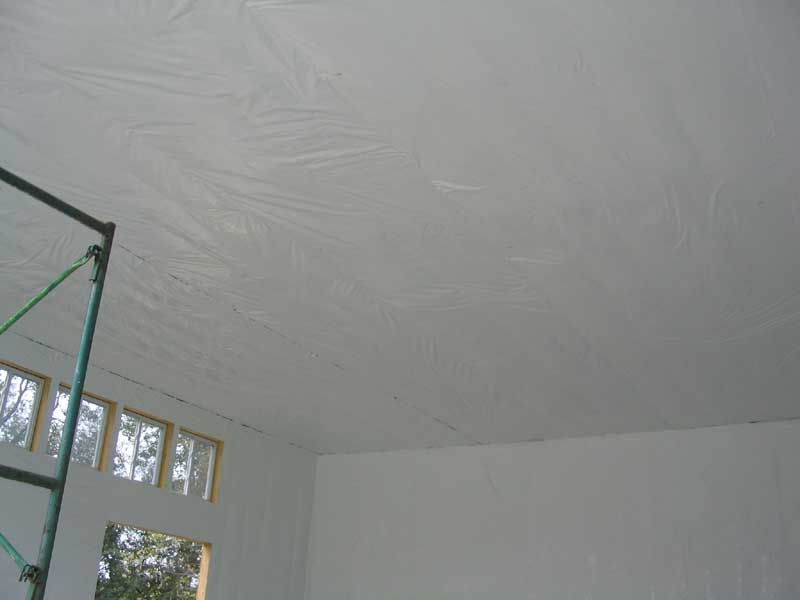
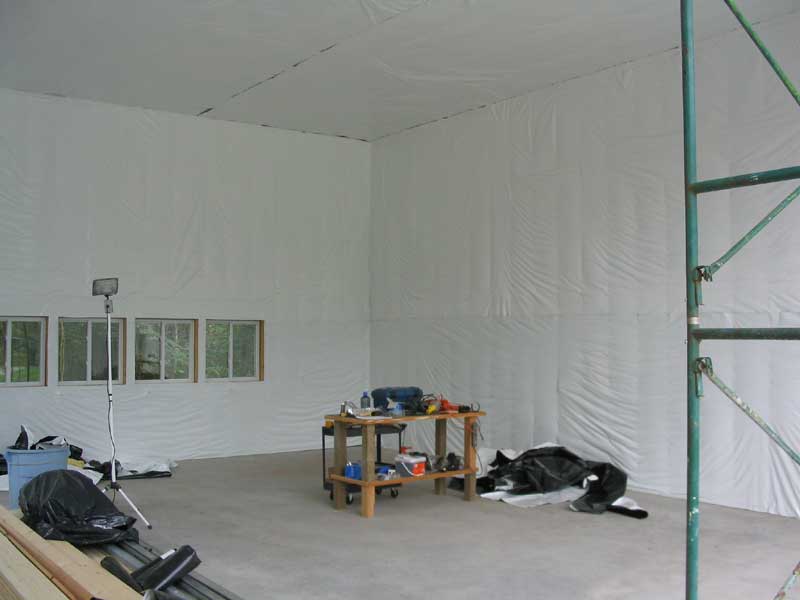
Vapor Barrier/Interior Surface

Since it is only a shop, I saw no reason to fully sheathe the inside of the walls with a permanent material.  Drywall would have been extremely expensive and difficult to do, what with the height of the walls and ceiling.  (I prefer not even to think about that.)  Any other options were nonexistent or cost prohibitive, not to mention unnecessary.

I wanted a reflective, bright surface on the interior.  In my old (present) shop located in my garage, I installed standard 6 mil "clear" plastic over the insulation.  This worked fine, but the semi-transparent nature of the plastic was unattractive, and the shop was always dark.  Foil-faced insulation batts were recommended to me, but these are tough to find locally and require substantial work to properly install (the little tabs are supposed to be stapled to the studs on each side of every bay--a step that is frequently ignored with pre-faced insulation).

I thought a bright white plastic sheeting was the way to go.  The problem became where to find this stuff.  I figured it would be easy enough to find white plastic of a similar nature to the black or clear poly that you can find in any hardware store.  Nope.  I couldn't seem to find anything like what I was looking for, except for a white plastic with black back that was sold by greenhouse suppliers.  At first, I passed these by, as the material seemed more expensive than I had hoped to find at $89 per roll.

Soon, however, it became obvious that this was going to be my only option for the material I wanted--and, when it was broken down, the material didn't seem so expensive, given that it was doubling as my interior finish, so I ordered four rolls of the stuff.  It's called Sunleaves Black & White Poly, and comes in a 10' x 100' roll in 6 mil thickness.   It's nice stuff, actually, and a relative bargain compared to other interior finish options.  I ordered it online from Worm's Way.

I installed the vapor barrier alone, over a period of two days.  It was a big job, and one that would have been many levels more difficult without the rolling pipe staging that Bob had loaned me.  As it was, it was something of a challenge to secure the plastic to the ceiling.

firstceilingpanel.jpg (26832 bytes)I began my unrolling a length of the material that was a couple feet longer than the inside of the room, and cut the length free.  Beginning at the back end of the room, I stapled a portion of the plastic to the strapping with a hammer tacker, securing enough of the plastic to hold it in place without tearing.  Then, I gradually moved along the length of the room, stapling as I went.  With the heavy plastic hanging down to the floor, I had to be careful not to let it tear away from the staples.  After the first row was complete, I modified my technique a little and rolled up the plastic on the floor first, then brought the roll up on the staging with me to eliminate the weight and hanging problem.  This worked much better, though the job remained a challenge.  It took three rows of the 10' plastic to cover the ceiling; I began with one right down the center, then filled in each side with the other pieces.  This left a short overlap on the edges down the wall.  As I covered each ceiling outlet with plastic, I found it convenient to mark the location with a pen to make finding the outlets easier later on, when it came time to remove the plastic and trim out the outlets.


ceilingplastic.jpg (17351 bytes)Because the stack of lumber on one side of the room was in the way of the staging, and would need to be moved, I decided to install the top row of plastic on the south wall first, before completing the last ceiling panel on the other side of the room.  Hanging the material on the walls was much easier than overhead, though the sheets were still unwieldy.  I stapled the material on each stud down as far as I could reach; later, I stapled the bottom portion of the plastic from the floor and from my small set of rolling staging that I bought, before moving on to the lower part of the walls.


nbackcorner.jpg (26957 bytes)After moving the lumber pile, I finished the last ceiling panel and the top of the other side wall.  This brought me nearly to the end of the first day, but I pressed on and installed the lower section on the south wall as well (installing the final 6' to the floor was easy, as all the work could be done from the ground).  With that, I called it quits for the day.

The next day, I finished the remaining areas that needed to be covered:  the back wall from top to bottom, the front walls from top to bottom, and the lower half of the north wall.  This took a few hours to complete.  I cleaned up and then installed all the plastic coverplates on the outlets and switch boxes around the room.


nfrontcorner.jpg (44748 bytes)The white plastic made a huge difference inside.  The room looked huge, and was very bright even without any lighting.  It was everything I had hoped for.  I determined that I used about 13,000 staples to secure the plastic throughout the room.


vbcomplete.jpg (36752 bytes)


Continue>


All photos and text on this site ©2002-2009 by Timothy C. Lackey and Lackey Sailing, LLC
All rights reserved.