|
| |
| Barn
Home Page |
Click
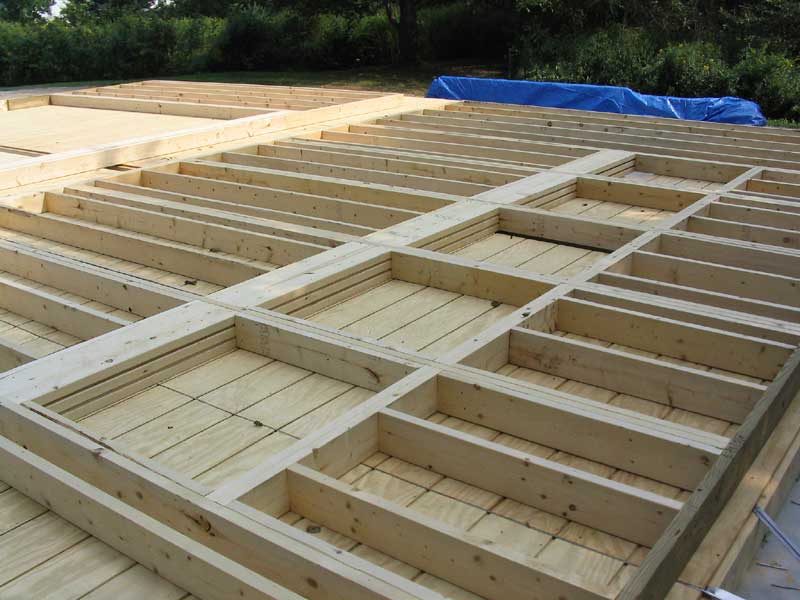
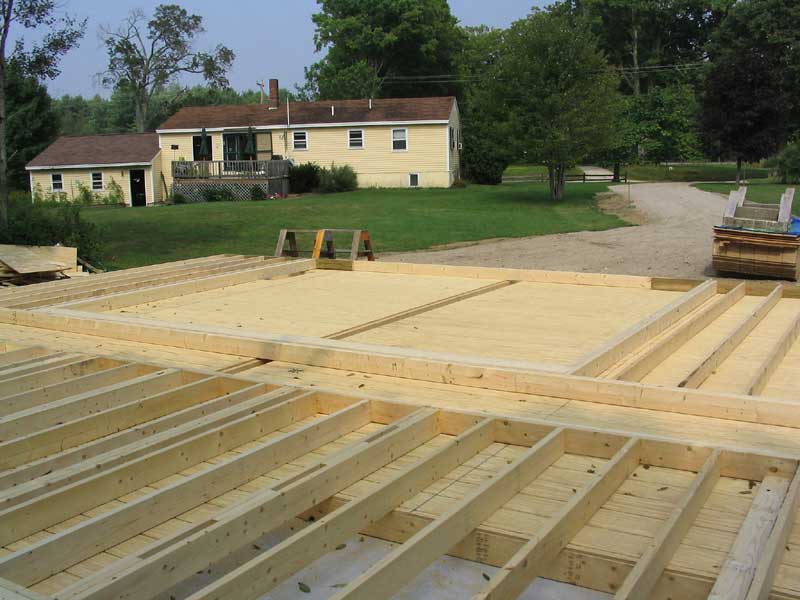
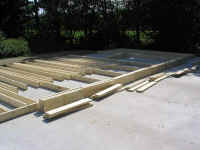
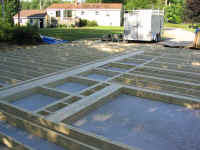
here to see some of the specific framing details. |
|
Getting Oriented
For your
convenience during this and subsequent discussions of the barn, It might
be useful for me to give you, dear reader, some directional references
concerning the barn. I will generally refer to the walls by the
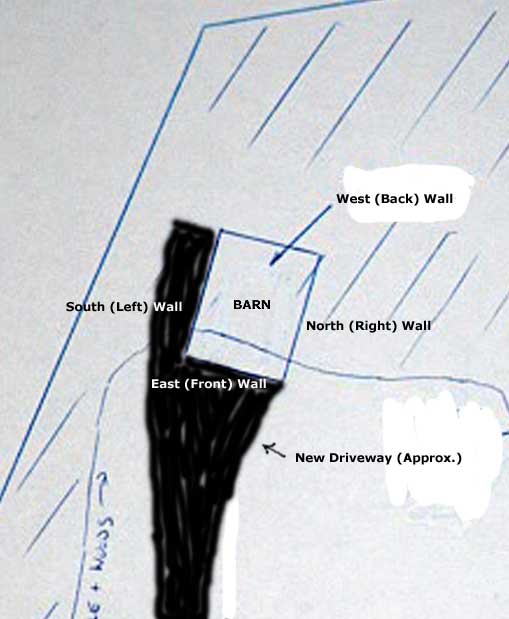
direction they face, so knowing which is which could be helpful.  East
Wall: The front wall, featuring a large 18' wide door opening.
This wall obviously faces the driveway; it doesn't face directly east, but
it's the closest cardinal reference. East
Wall: The front wall, featuring a large 18' wide door opening.
This wall obviously faces the driveway; it doesn't face directly east, but
it's the closest cardinal reference.
South
Wall: Facing the front of the building from the driveway, this
is the lefthand wall. It's the wall that runs along the gravel boat
storage pad next to the slab. For maximum natural light, I plan on
installing a series of windows high up in this wall. There is also a
6' wide by 10' high utility door planned near the back side of this wall
for easy access to and from the pad. North
Wall: Facing the front of the building from the driveway, this
is the right-hand wall. This is a basic, blank wall, broken up only
by a 3' wide entry door near the front (east) corner. West
Wall: The back wall. The design calls for a row of five
windows, located a little over 3' above the floor and centered in the
wall. This wall backs up closely to the trees behind the site. |
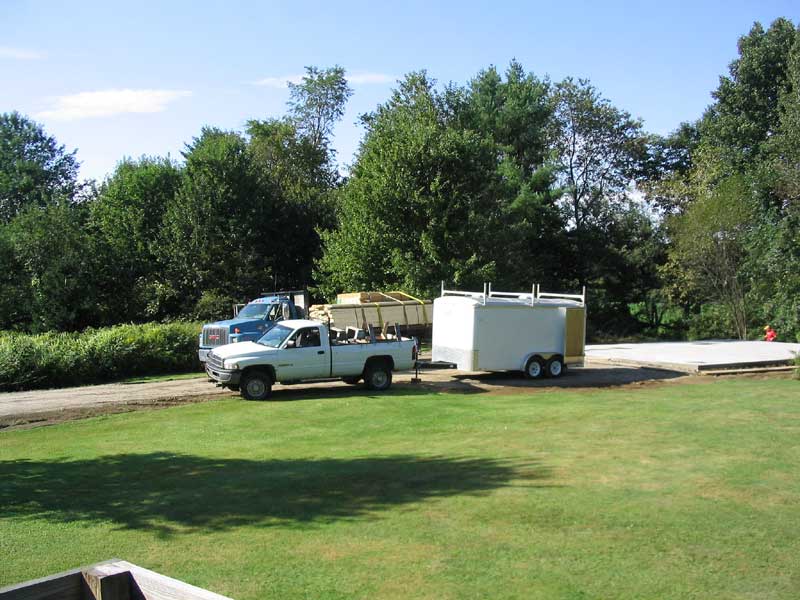
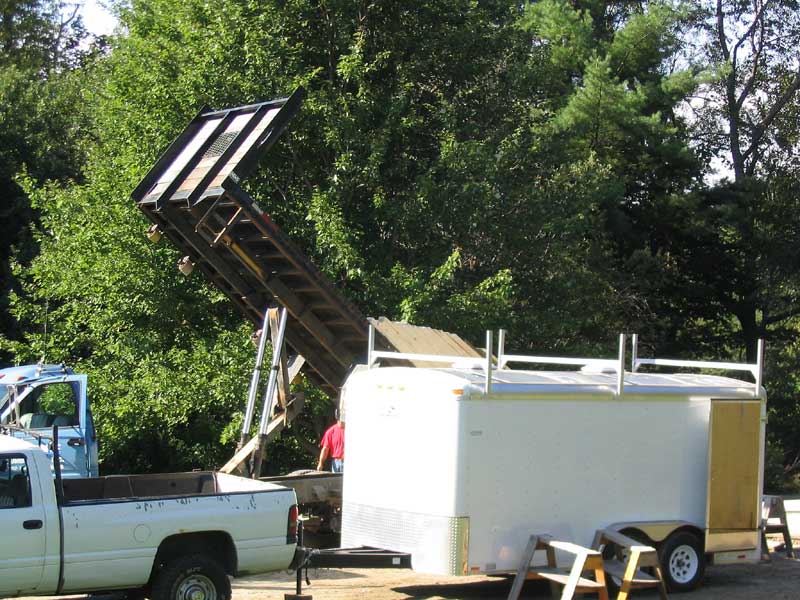
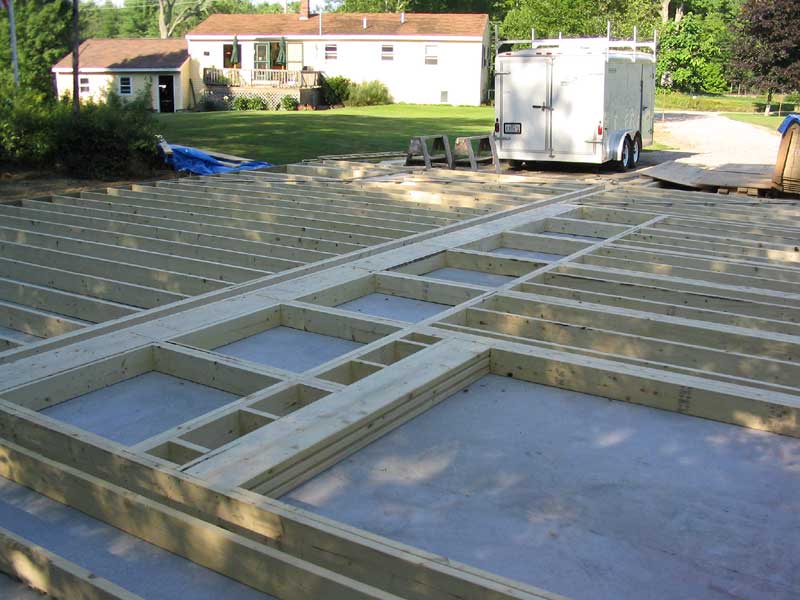
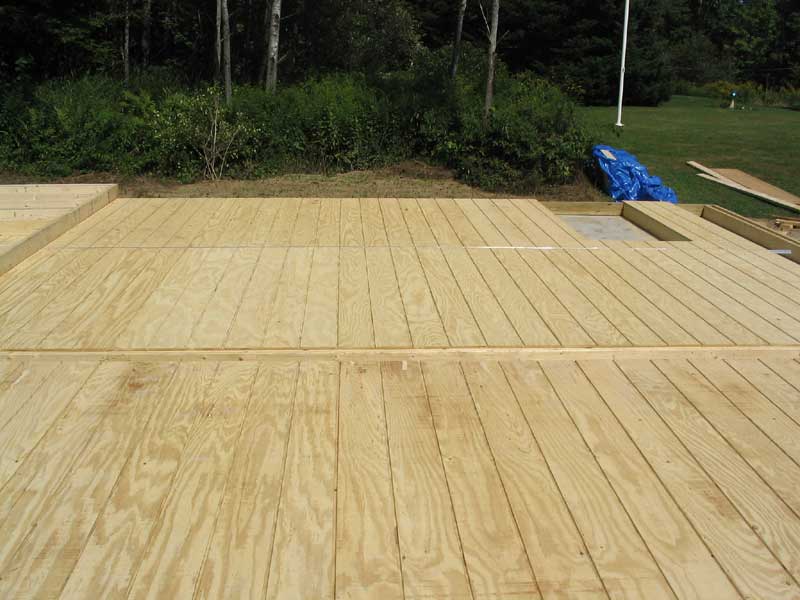
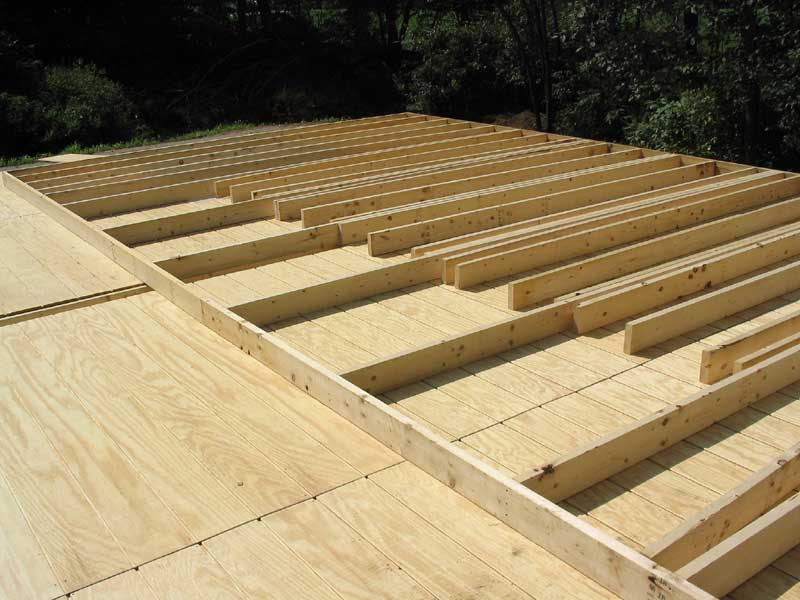
Monday, August 18, 2003
Framing Day 1 It
was a leisurely start on the site this day for Bob and Lee. They
rolled in about 0845 followed shortly by a flatbed lumber
delivery truck piled high with 2x6s, 2x10s, and a large stack of T-111
plywood siding. I went out and discussed with Bob the final details
on the rough openings for some framed windows and doors. The lumber
truck tipped its load onto the driveway in front of the barn and took off. It
was a leisurely start on the site this day for Bob and Lee. They
rolled in about 0845 followed shortly by a flatbed lumber
delivery truck piled high with 2x6s, 2x10s, and a large stack of T-111
plywood siding. I went out and discussed with Bob the final details
on the rough openings for some framed windows and doors. The lumber
truck tipped its load onto the driveway in front of the barn and took off.
|
|
 I
was gone most of the day, after Bob and I talked over a little more of the
nitty-gritty, but when I got home in the afternoon there were signs of
progress--though the crew had already gone home. I
was gone most of the day, after Bob and I talked over a little more of the
nitty-gritty, but when I got home in the afternoon there were signs of
progress--though the crew had already gone home.
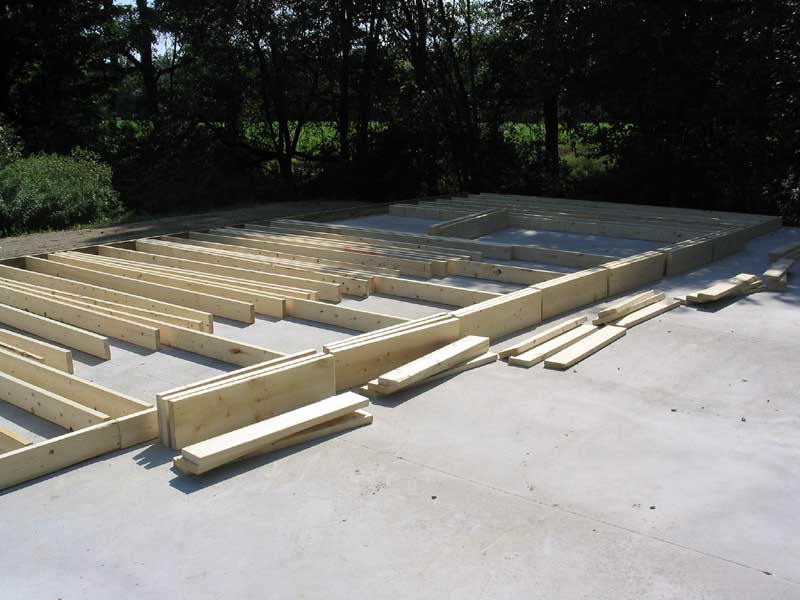
No walls were actually
completed, but it looked like a substantial amount of pre-cutting had
occurred, and the south wall, which is the most complex of the four walls
since it contains window and door openings, was all laid loosely out with
all parts cut to size, but not nailed together. I made a few quick
measurements of the openings and such to ensure that all was as
designed--no mistakes were evident. When I had my garage on the
house built in 1996, the crew screwed up royally on the first day, framing
all the walls over a foot too short. Duh. So I was careful to
ensure that the framing--and other parts of the barn job--went according
to plan from the getgo. |
|
|
|
Tuesday, August 19, 2003
Framing Day 2
 Another
hot, beautiful, clear day--perfect for framing. Bob and Lee got
right to work, beginning where the left off the day before: nailing
up the first (south) wall. I was away most of the day, but when I
returned in the midafternoon both side (long) walls were complete, all
nailed up and lying on the slab. The south wall contains a series of
openings for windows, as designed, plus a large side door opening near the
back; the north wall is unadorned and very simple, except for a normal man
(ingress) door near the front corner, nearest the house. The walls
are framed with 2x6 lumber over 2x6 pressure-treated bottom plates, with
slim metal angle bracing at the end corners. With roof trusses
not scheduled for delivery here until the 28th, I don't think Bob felt any
particular pressure to (ahem) bang the framing out as quickly as possible,
so they aren't tending to work particularly long days. Bob and I
were both hopeful that the trusses might get delivered earlier and keep
things moving along. Another
hot, beautiful, clear day--perfect for framing. Bob and Lee got
right to work, beginning where the left off the day before: nailing
up the first (south) wall. I was away most of the day, but when I
returned in the midafternoon both side (long) walls were complete, all
nailed up and lying on the slab. The south wall contains a series of
openings for windows, as designed, plus a large side door opening near the
back; the north wall is unadorned and very simple, except for a normal man
(ingress) door near the front corner, nearest the house. The walls
are framed with 2x6 lumber over 2x6 pressure-treated bottom plates, with
slim metal angle bracing at the end corners. With roof trusses
not scheduled for delivery here until the 28th, I don't think Bob felt any
particular pressure to (ahem) bang the framing out as quickly as possible,
so they aren't tending to work particularly long days. Bob and I
were both hopeful that the trusses might get delivered earlier and keep
things moving along.
|
|
|
|
For my own future reference
and interest--and anyone else's, of course--I decided to catalog many of
the specific framing details as they occur, creating a photographic
instruction manual, of sorts, from which to draw information at some later
date. Click
here to see some of the specific framing details. |
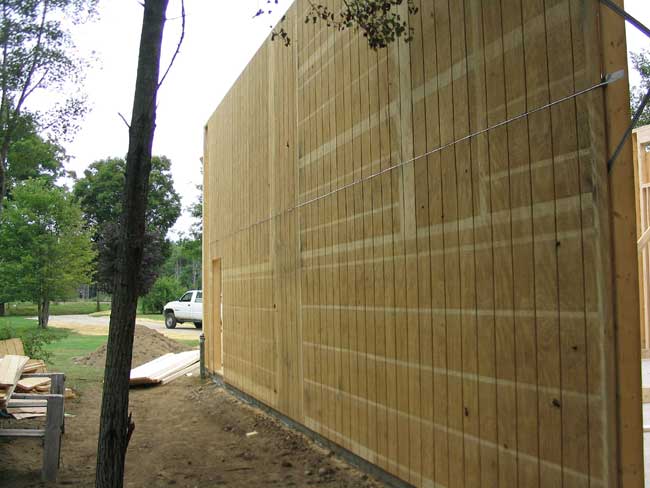
Thursday, August 21, 2003
Framing Day 3
After a day away from the site so he could
tend to some personal business, Bob was back bright and early at about
0630. The forecast for the day was for some pretty intense heat, so
obviously he figured it would be best to get started early in the day
before the heat was too bad (it gets very hot out on the slab, as it is
directly in the sun during all of the morning and through the hottest part
of the afternoon before finally beginning to get shaded at about 1500).  Bob
and Lee set right to work tacking on the sheathing onto the two wall
sections already built. I'm using T-111 plywood sheathing, which
doubles as siding because of its grooved external finish. It's a
budget choice--I'd enjoy having cedar clapboards and shingles--but it gets
the job done quickly and efficiently, and doesn't look too bad. I
vastly prefer it to vinyl siding, which was the other budget choice.
When painted up and trimmed properly, the plywood looks decent. One
benefit to T-111 is that is forms a good base should I choose, at some
later date, to install shingles or claps over the top, should desire and
current budget dictate such a change. Bob
and Lee set right to work tacking on the sheathing onto the two wall
sections already built. I'm using T-111 plywood sheathing, which
doubles as siding because of its grooved external finish. It's a
budget choice--I'd enjoy having cedar clapboards and shingles--but it gets
the job done quickly and efficiently, and doesn't look too bad. I
vastly prefer it to vinyl siding, which was the other budget choice.
When painted up and trimmed properly, the plywood looks decent. One
benefit to T-111 is that is forms a good base should I choose, at some
later date, to install shingles or claps over the top, should desire and
current budget dictate such a change.
|
|
 The got the sheathing installed on both sidewalls, and then began laying
out the back wall on top. By about 1130, I guess it was too hot,
because they knocked off. When I went out later to check out the new
work, I noticed immediately that they had begun to frame the windows shown
on the back of the barn in the wrong place; they had begun to frame them
as clerestory windows (like the ones on the south wall) instead of down
lower in the wall as shown on the plan. Fortunately, the windows
were not completely framed in--only the bottom edges of all the studs were
nailed, and no headers or jambs had been installed yet.
The got the sheathing installed on both sidewalls, and then began laying
out the back wall on top. By about 1130, I guess it was too hot,
because they knocked off. When I went out later to check out the new
work, I noticed immediately that they had begun to frame the windows shown
on the back of the barn in the wrong place; they had begun to frame them
as clerestory windows (like the ones on the south wall) instead of down
lower in the wall as shown on the plan. Fortunately, the windows
were not completely framed in--only the bottom edges of all the studs were
nailed, and no headers or jambs had been installed yet.
|
|
 This mistake got me thinking long and hard about whether I wanted the
windows moved down, as planned, or whether it made sense to leave them up
high as framed. Both options made sense, but in the end I thought the lower
windows might be nice to allow some views outside when working at floor
level in the barn--always an important consideration. The windows'
designed location is such that their sills will be several inches above a
bench I planned to build along the back wall.
This mistake got me thinking long and hard about whether I wanted the
windows moved down, as planned, or whether it made sense to leave them up
high as framed. Both options made sense, but in the end I thought the lower
windows might be nice to allow some views outside when working at floor
level in the barn--always an important consideration. The windows'
designed location is such that their sills will be several inches above a
bench I planned to build along the back wall.
|
|
Friday, August 22, 2003
Framing Day 4
I had to leave early in the
morning, so I didn't have a chance to chat with Bob about the window
framing. So I left a note on his trailer to let him know, and when I
returned later in the day he had reframed all the openings as
needed. As it turned out, it was just as well, as Bob related to me
later: yesterday, he had framed the window openings with the wrong
measurements to begin with, reversing the width and height measurements,
so the windows had to be reframed anyway. He explained that this
unknown quantity, in addition to the general heat of the day before, was
why they had knocked off early, and had even gone to the store to measure
the windows physically to ensure which way was which.
 The
newly-framed openings and back wall looked great, and by the end of the
day they also had the front wall framed up; this was a relatively easy
wall, as it features a large door opening (18' W by full height, minus the
10" header at the top). They left the front and back walls
unsheathed, saying they preferred to apply the sheathing once the walls
were standing because it made framing the gables easier, etc.
Whatever they like is fine with me! The
newly-framed openings and back wall looked great, and by the end of the
day they also had the front wall framed up; this was a relatively easy
wall, as it features a large door opening (18' W by full height, minus the
10" header at the top). They left the front and back walls
unsheathed, saying they preferred to apply the sheathing once the walls
were standing because it made framing the gables easier, etc.
Whatever they like is fine with me!
Click
here to see a series of detailed photos of the framing. |
|
 With
that, the basic framing was done, and work was over until the roof trusses
arrived. The trusses were scheduled for delivery in just under a
week, the next Thursday, August 28. The walls and trusses will be
raised in one day with a crane on site; the crane was scheduled for the
following Tuesday, September 2. With
that, the basic framing was done, and work was over until the roof trusses
arrived. The trusses were scheduled for delivery in just under a
week, the next Thursday, August 28. The walls and trusses will be
raised in one day with a crane on site; the crane was scheduled for the
following Tuesday, September 2.
|
Continue>
|
|
|