|
|||
|
|
~ The bLog Home ~ |
||
MONDAY, JULY 31, 2006 |
|||
|
It seems like only yesterday that I
was lamenting the passing of the month of June...and here we are,
ready to enter August tomorrow. Wow: time flies. I took the weekend off. We had guests visiting, and even though they left around noontime on Sunday, I stayed away from the house and enjoyed some absolutely perfect weather. Needless to say, though, I was raring to go this morning, and had a short--albeit time-consuming--punch list to take care of before tomorrow's scheduled window installation. |
|||
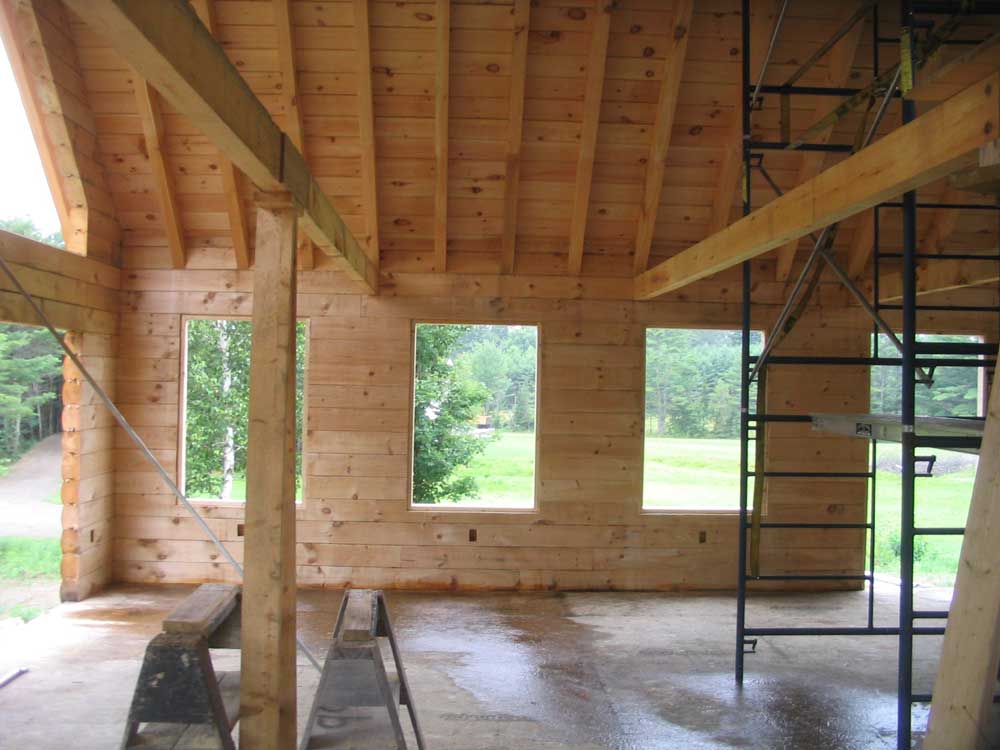
 I
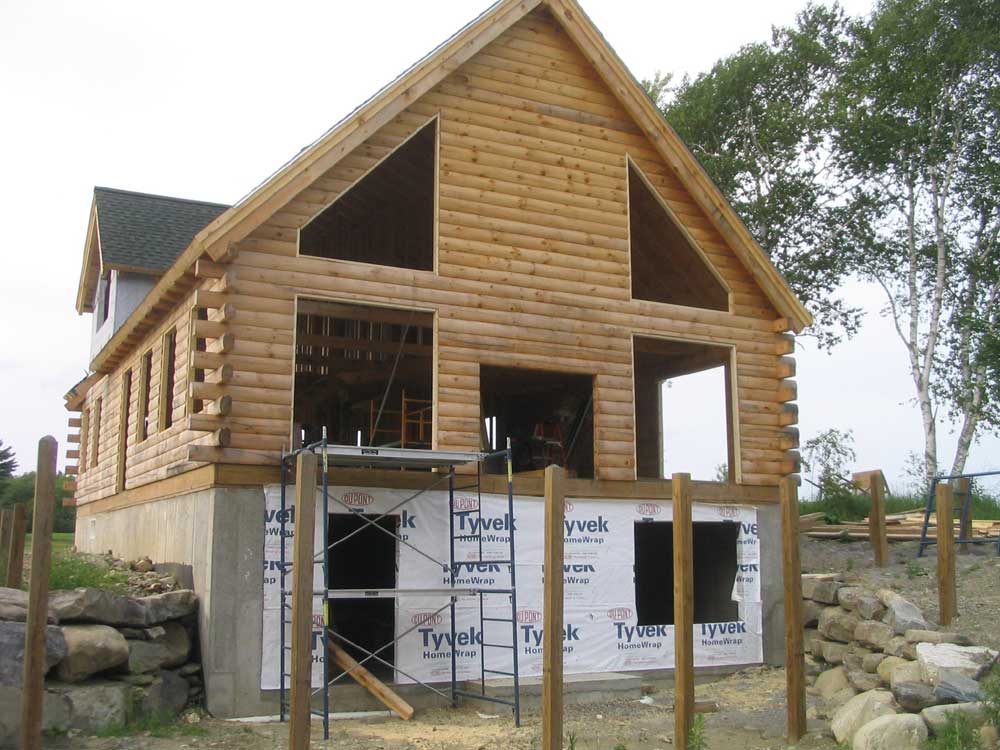
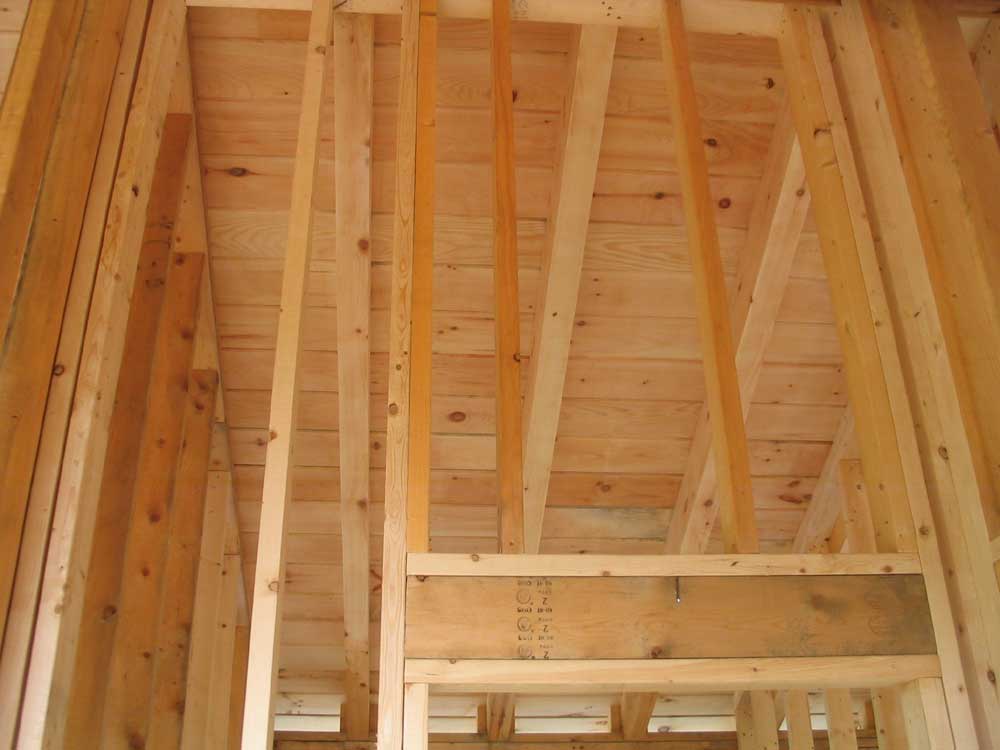
still had a few window and door bucks to install--those for the
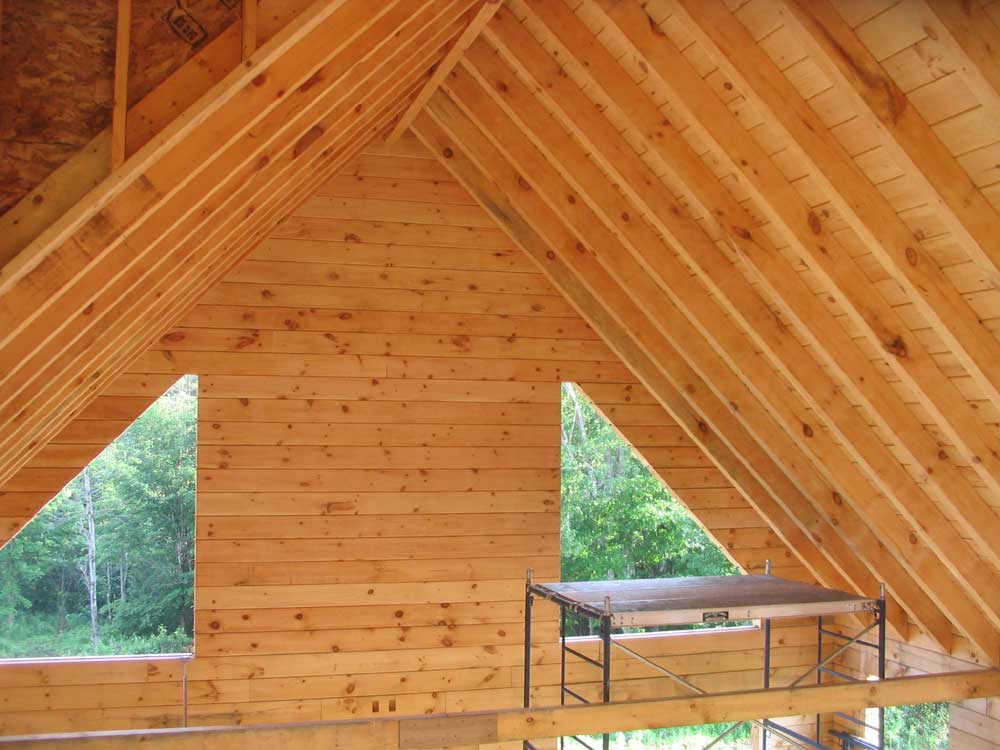
three patio doors in the great room, and the trapezoidal windows in
the south gable. I had avoided these at first because they
required staging set up outside in order to cut out the logs as
required to enlarge the openings, and at the time the staging was
well ensconced indoors as part of my sanding and finishing fest. I
still had a few window and door bucks to install--those for the
three patio doors in the great room, and the trapezoidal windows in
the south gable. I had avoided these at first because they
required staging set up outside in order to cut out the logs as
required to enlarge the openings, and at the time the staging was
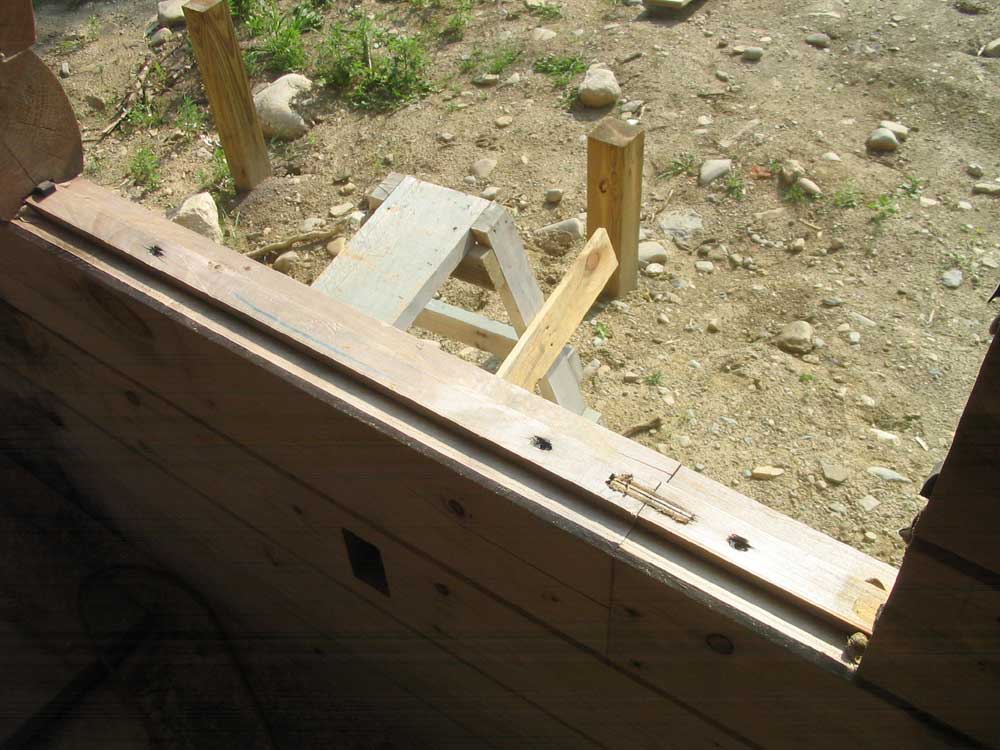
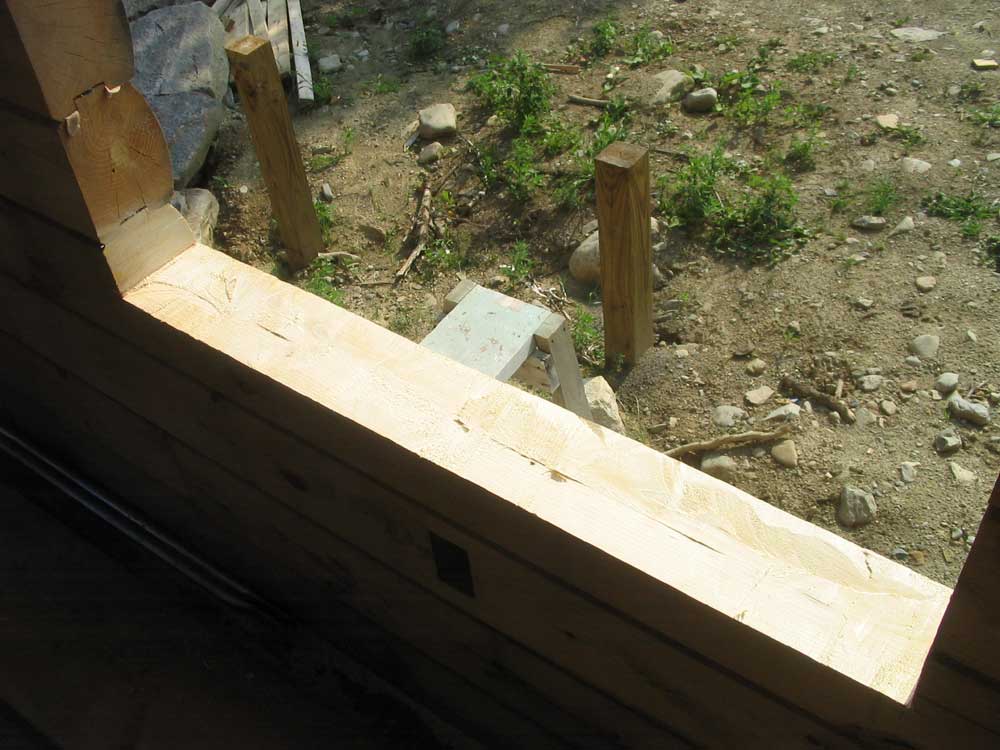
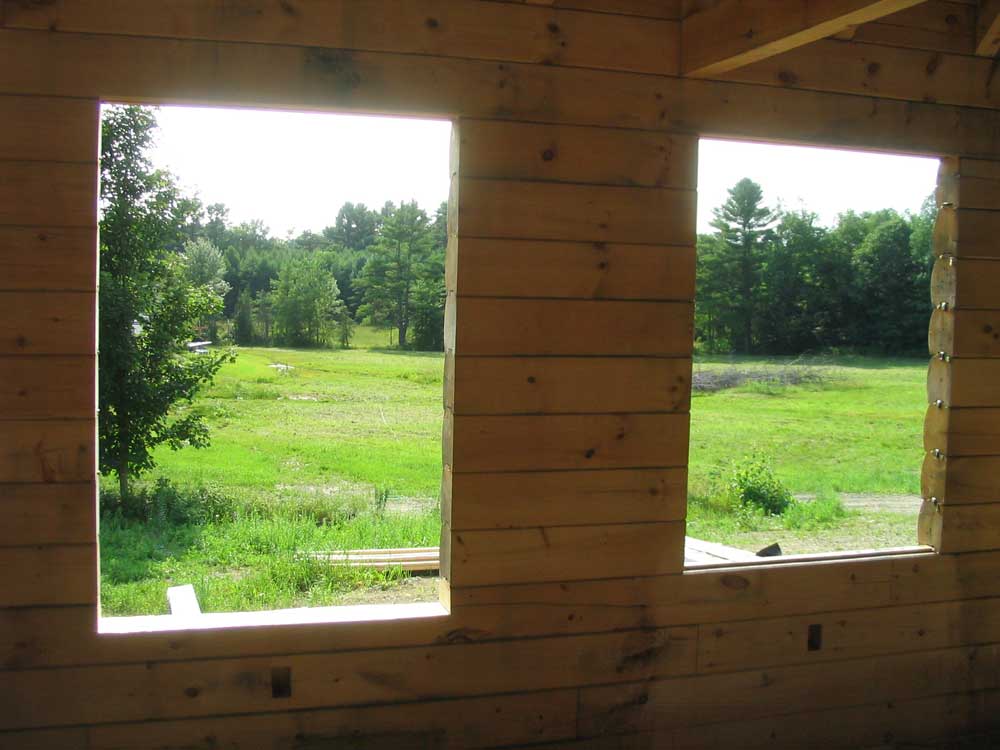
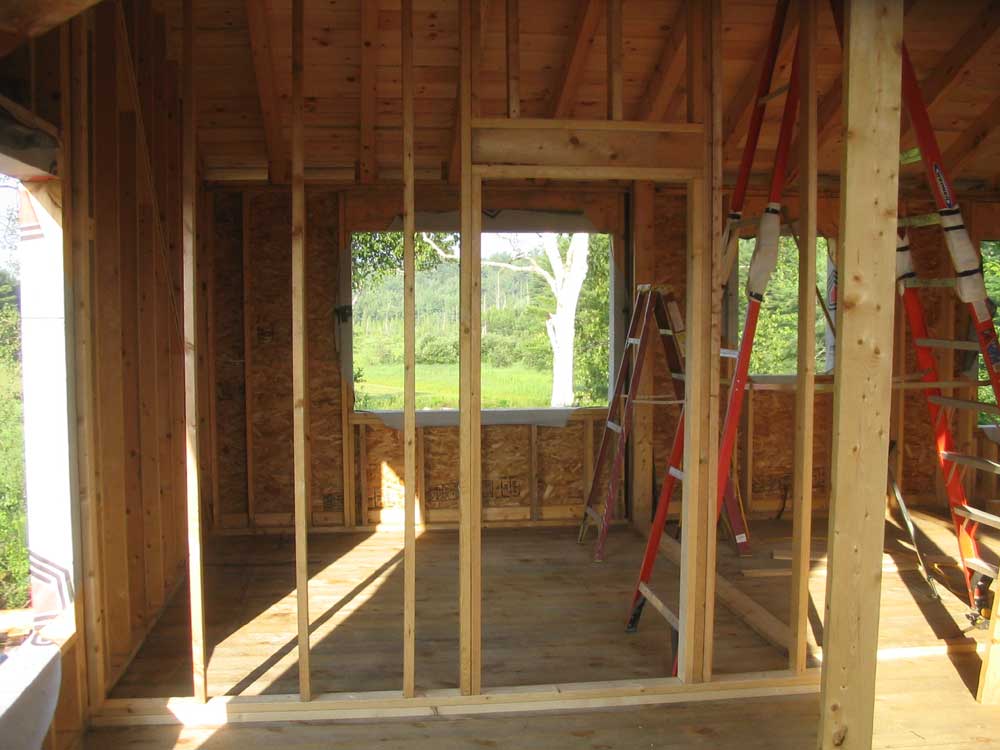
well ensconced indoors as part of my sanding and finishing fest.However, I had wrapped up the staged part of the sanding last week, as desired, and now the staging was available. I set up two lifts inside of one of the trapezoid windows and prepared to go to work. I was pleased to find that I only had to cut out the top part of the opening, and not any of the log forming the bottom of the opening--very good news. Still, I had to remove the log tongue inside the opening at the bottom, which I did with my power planer. Then, I extended the cuts of the angled and straight sides of the window up to their natural intersection, which of course also coincided with the location required to fit the window. |
|||
 I
completed one window first, and cut and installed the window bucks.
Then, I cut the inside cut required for the patio door directly
beneath, before moving the staging across the room tot he other
trapezoid, where I repeated the process. Finally, I moved on
to the last patio door on the back of the house. I
completed one window first, and cut and installed the window bucks.
Then, I cut the inside cut required for the patio door directly
beneath, before moving the staging across the room tot he other
trapezoid, where I repeated the process. Finally, I moved on
to the last patio door on the back of the house.With all the inside work done for the moment, I moved the staging outside and began, one patio door at a time, to set up the staging and make the saw cut on the outside of the logs, which would correspond with the inside cut. When I reached the third and final opening, I left the staging in place in case it would be handy for installing the actual door. |
|||
|
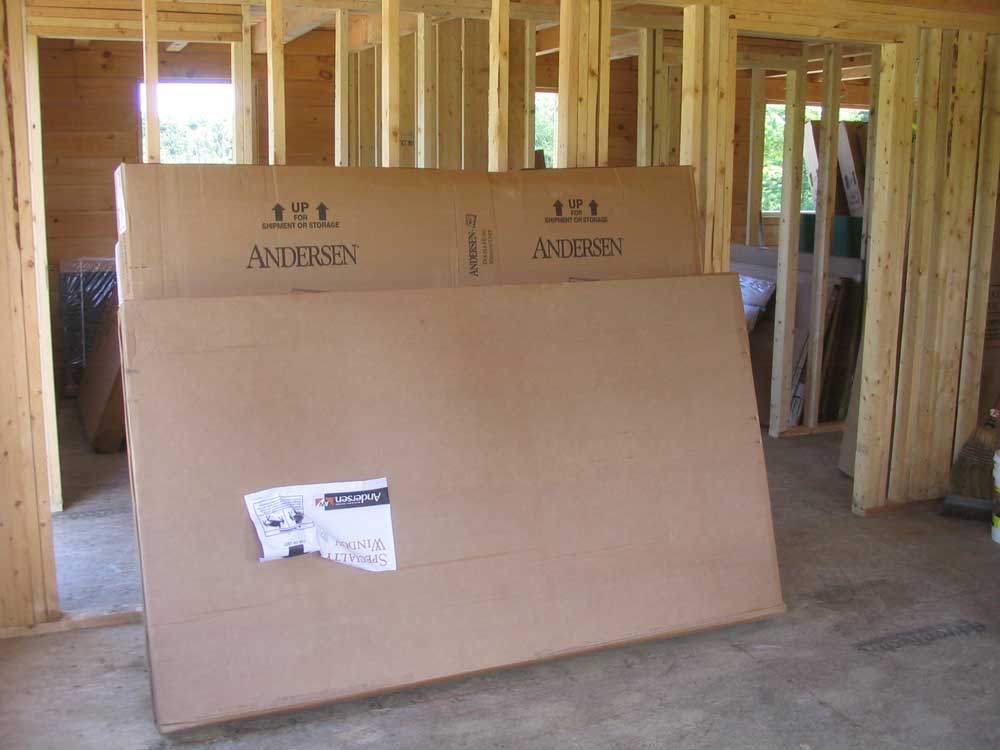
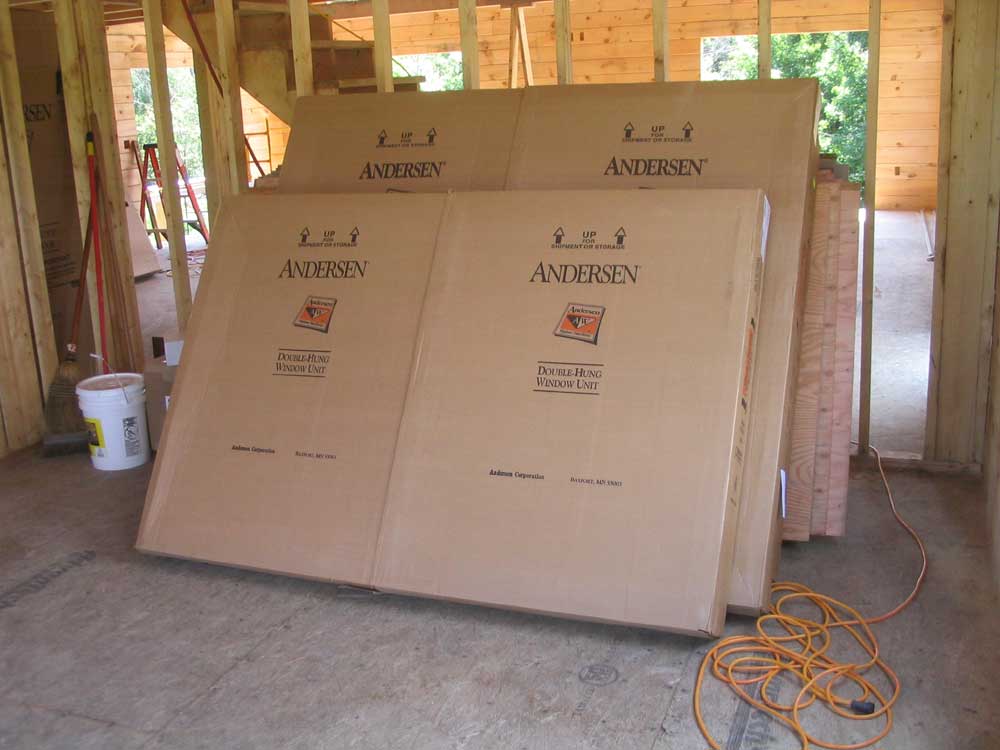
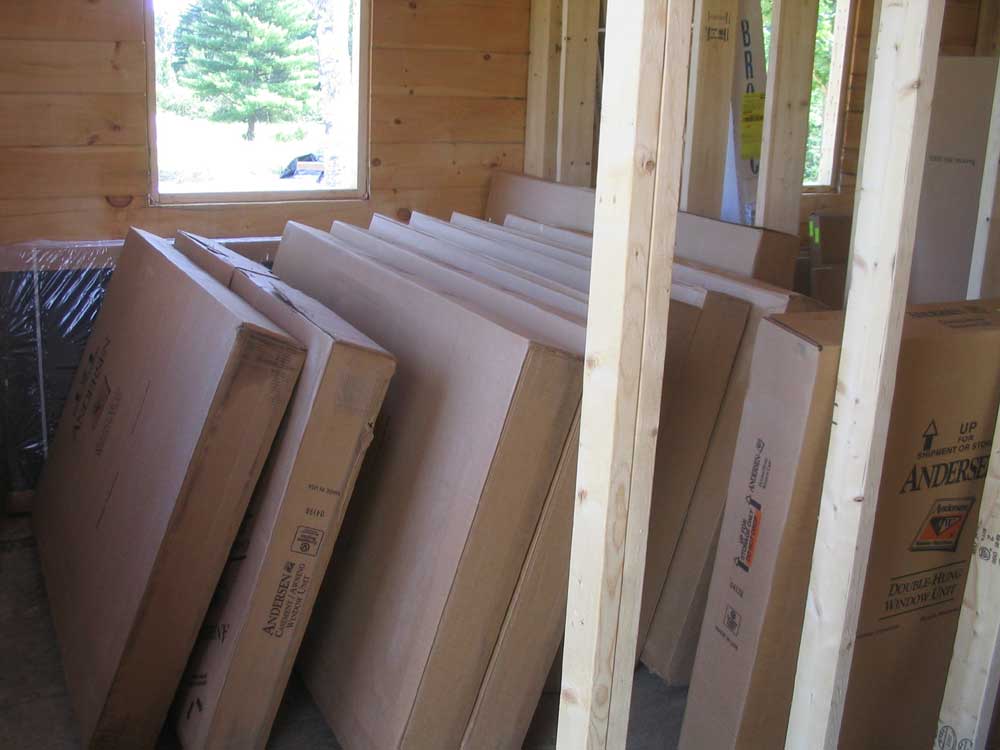
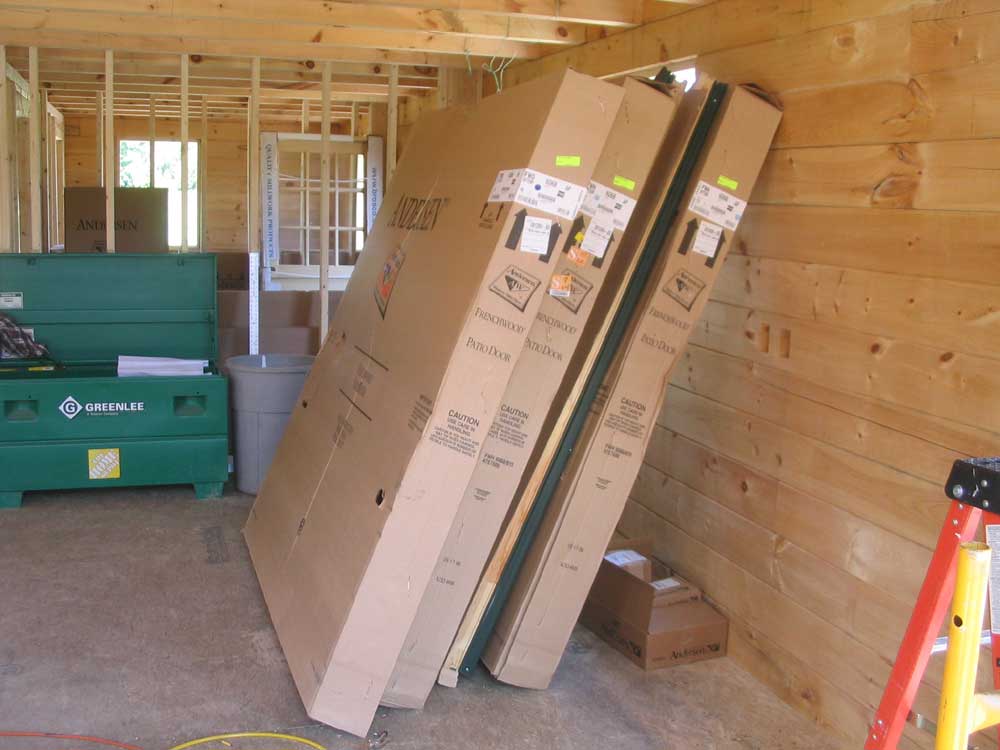
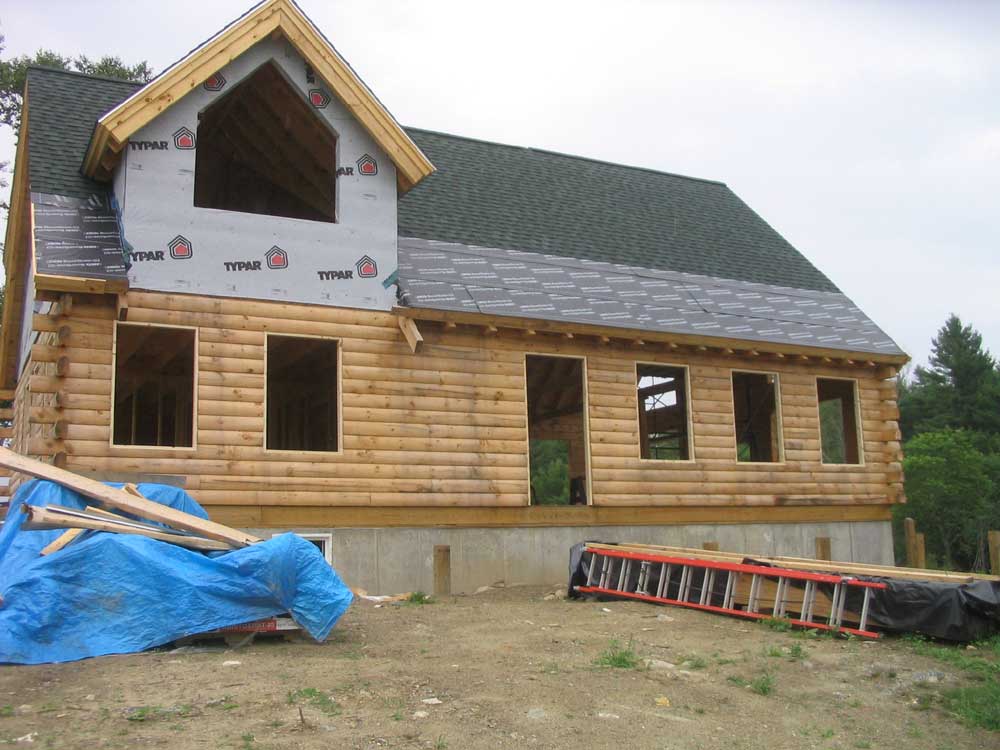
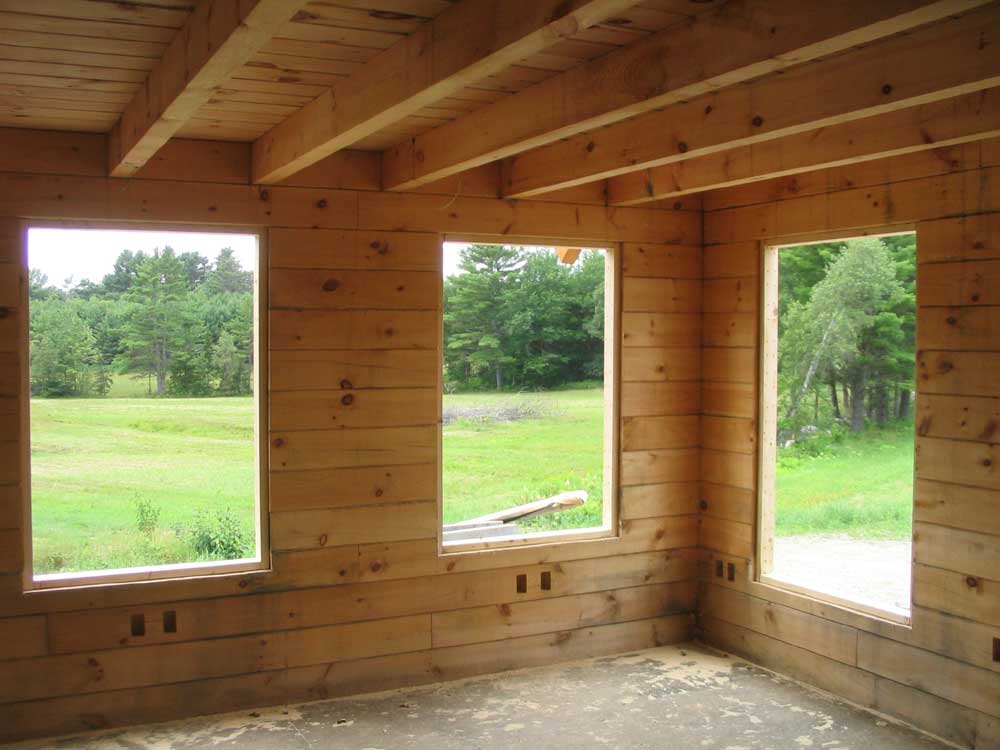
Right around lunchtime, the windows arrived, packed tightly in the Moose Creek rack truck. We really have a lot of windows and doors. The driver and I unloaded them all and stored them inside the house, along with box after box of window grilles, screens, hardware, and other accessories. The piles of boxes were somehow daunting, though I looked forward to getting the windows in. |
|||
|
|
|||
|
Cutting the openings and installing the window bucks in these five locations took pretty much the whole day, save for the time required to unload the window truck. Tomorrow, it's window time! |
|||
FRIDAY, JULY 28, 2006 |
|||
|
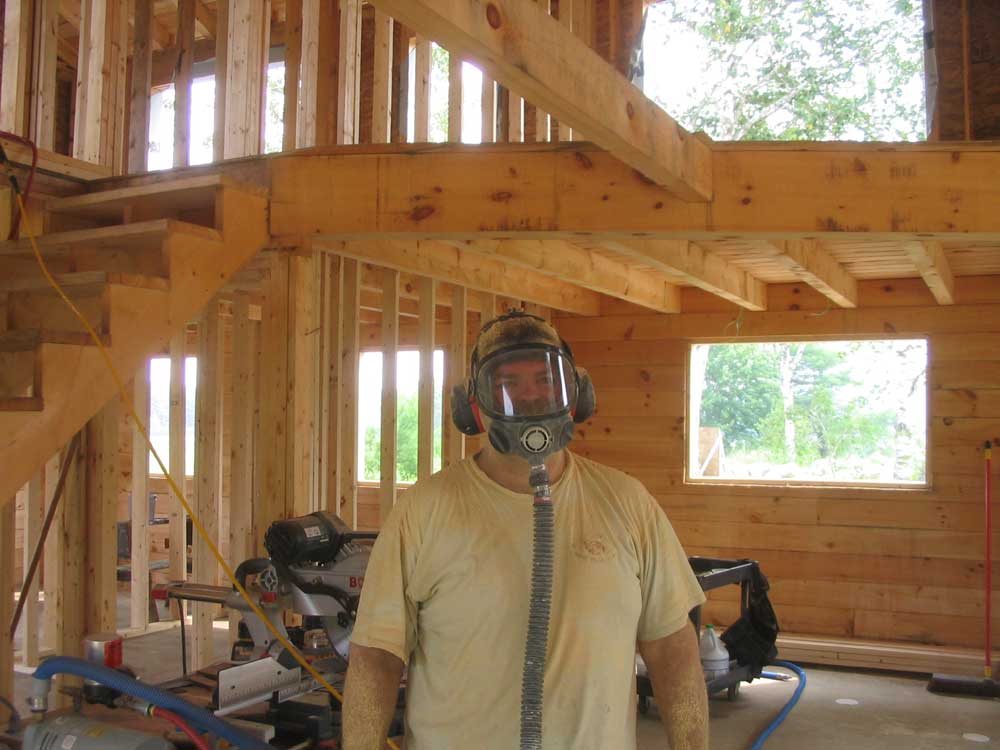
Time for a pop quiz! Get out
your #2 pencils. Q: What do you think I did today?
Turn your screen over in order to view the correct answer.
|
|||
 Today,
I attacked the last portions of the great room ceiling--the areas
just above the wall intersection, which I could not reach from the
staging during the earlier sanding phase. Faithful readers, of
course, will know that I set the staging up in preparation for this
chore last night. No, the task was not exactly what I wanted
to do more than anything, particularly on a sultry day where you
could just about wring the moisture out of the air with your hands.
But alas, I didn't see any little elves or anyone else lined up to
do the job, so off I went. Today,
I attacked the last portions of the great room ceiling--the areas
just above the wall intersection, which I could not reach from the
staging during the earlier sanding phase. Faithful readers, of
course, will know that I set the staging up in preparation for this
chore last night. No, the task was not exactly what I wanted
to do more than anything, particularly on a sultry day where you
could just about wring the moisture out of the air with your hands.
But alas, I didn't see any little elves or anyone else lined up to
do the job, so off I went. |
|||
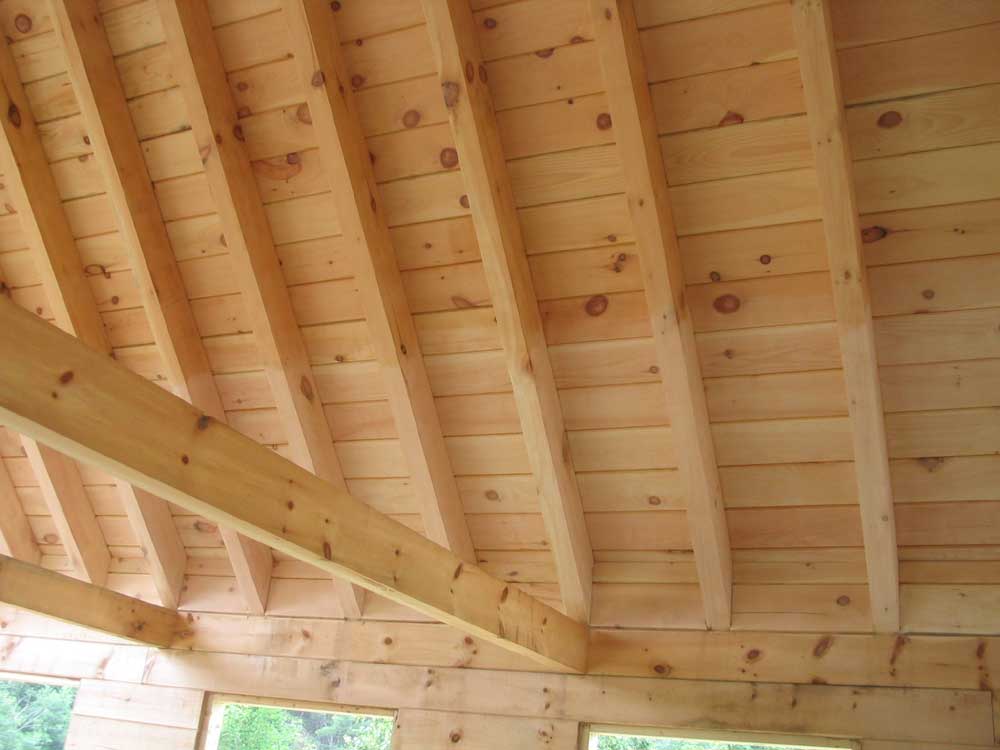 It
took several hours to sand the front side of the house. There
were 7 ceiling boards up from the wall that needed to be sanded,
plus the rafters in the same area, plus I also sanded the two short
log pieces that I had earlier cut and fit between the rafters.
This meant that all the ceiling and rafter-infiltrated areas would
be done, which would streamline the job later when I had to sand the
log walls. It
took several hours to sand the front side of the house. There
were 7 ceiling boards up from the wall that needed to be sanded,
plus the rafters in the same area, plus I also sanded the two short
log pieces that I had earlier cut and fit between the rafters.
This meant that all the ceiling and rafter-infiltrated areas would
be done, which would streamline the job later when I had to sand the
log walls. |
|||
 Afterwards,
I applied the usual two coats of polyurethane. (Perhaps I
should just copy and paste the same text into each day's log, since
they all seem to be so similar...). This took me through
lunchtime. Afterwards,
I applied the usual two coats of polyurethane. (Perhaps I
should just copy and paste the same text into each day's log, since
they all seem to be so similar...). This took me through
lunchtime.In the afternoon, I repeated the process on the back part of the ceiling, which fortunately was a shorter area, only about 2/3 as long. I repeated the process, and managed to finish up right around 5, after which I cleaned up the mess and called it a day. |
|||
 This
was just in time once again, as by 6 we were embroiled in a strong
thunderstorm that, while not producing hail or strong winds,
developed some of the heaviest rain I can recall seeing in a long
time--and long-lasting, too. We had more before the
evening was done. This
was just in time once again, as by 6 we were embroiled in a strong
thunderstorm that, while not producing hail or strong winds,
developed some of the heaviest rain I can recall seeing in a long
time--and long-lasting, too. We had more before the
evening was done. |
|||
THURSDAY, JULY 27, 2006 |
|||
 Back
to the (ha!) grind today. I got a bit of a late start since I
had an errand to take care of in the morning, but by 10 I was
applying the first coat of poly to the bathroom ceiling that I
sanded last night. By the time I finished the first coat, it
was almost time to begin a second coat, but I waited a little while
to make sure. Then I applied the second coat just before
lunch. Back
to the (ha!) grind today. I got a bit of a late start since I
had an errand to take care of in the morning, but by 10 I was
applying the first coat of poly to the bathroom ceiling that I
sanded last night. By the time I finished the first coat, it
was almost time to begin a second coat, but I waited a little while
to make sure. Then I applied the second coat just before
lunch. |
|||
|
After lunch, I shifted the staging over to the walk-in closet upstairs and sanded the ceiling there. This was the last high ceiling in the house, and I couldn't wait to get it done. As with most of the ceilings so far, I stopped short of sanding all the way down to the wall intersection because of the way the staging heights worked out. Later, I'll sand all these remaining areas from my small staging or other supports as necessary, but that seemed like a minor task after the abundant sanding already completed. |
|||
 By
the time I got two coats of finish on the closet ceiling, the day
was nearly done, as I had a number of things to do around the
property--mundane things that had been put off too long and now
needed to be done. Life, beyond that of the house
construction, goes on, after all. See: this is why I
spent extra time yesterday, as I knew that today would be less
intense. By
the time I got two coats of finish on the closet ceiling, the day
was nearly done, as I had a number of things to do around the
property--mundane things that had been put off too long and now
needed to be done. Life, beyond that of the house
construction, goes on, after all. See: this is why I
spent extra time yesterday, as I knew that today would be less
intense. |
|||
 Before
knocking off, I moved the staging downstairs and set it up along the
front wall, so that I could get to work in the morning sanding the
remaining ceiling boards and the top portion of the logs between the
rafters--stuff I really wanted to get done before the windows went
in. I figured I might as well take advantage of the pipe
staging while I still had it. Before
knocking off, I moved the staging downstairs and set it up along the
front wall, so that I could get to work in the morning sanding the
remaining ceiling boards and the top portion of the logs between the
rafters--stuff I really wanted to get done before the windows went
in. I figured I might as well take advantage of the pipe
staging while I still had it. |
|||
WEDNESDAY, JULY 26, 2006 |
|||
| In the nearly two weeks of working on the ceilings in the house, I was sort of amused to discover late today that I actually dreaded the sanding less than the finishing. The sanding is not real fun, particularly when awkward contortions or far reaches are necessary to complete a certain area, but it is what it is, and, prepared as I am with my supplied air mask and hearing protection, it's a lot less unpleasant than it could be without the proper equipment. | |||
 The
finishing, however, has become a misery for me, at least in these
overhead areas. I touched on my reasons for this in
yesterday's log, and needn't repeat them now, but I actually think I
prefer the sanding to the finishing now. Go figure.
Perhaps it's because, other than creating a necessary seal and
barrier against discoloration and staining, the ceiling finish is
wholly unsatisfying to one used to soothingly laying on thick coats
of spar varnish--not that I'd want to apply spar varnish here
either! The
finishing, however, has become a misery for me, at least in these
overhead areas. I touched on my reasons for this in
yesterday's log, and needn't repeat them now, but I actually think I
prefer the sanding to the finishing now. Go figure.
Perhaps it's because, other than creating a necessary seal and
barrier against discoloration and staining, the ceiling finish is
wholly unsatisfying to one used to soothingly laying on thick coats
of spar varnish--not that I'd want to apply spar varnish here
either! |
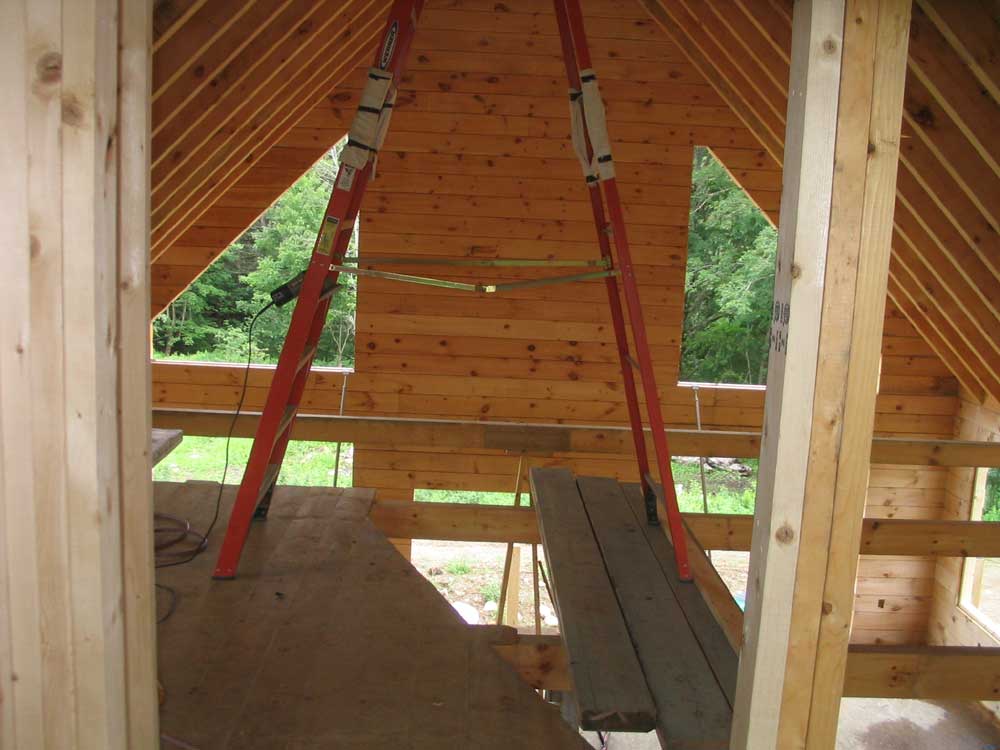
|||
 Today,
I got started on the front dormer, and sanded as much as I could
comfortably from the staging that I had set up inside. This
left a few feet worth at the bottom edges that I would have to take
care of later from my little staging. Once the sanding was
done, I applied the usual two coats of polyurethane. Today,
I got started on the front dormer, and sanded as much as I could
comfortably from the staging that I had set up inside. This
left a few feet worth at the bottom edges that I would have to take
care of later from my little staging. Once the sanding was
done, I applied the usual two coats of polyurethane. |
|||
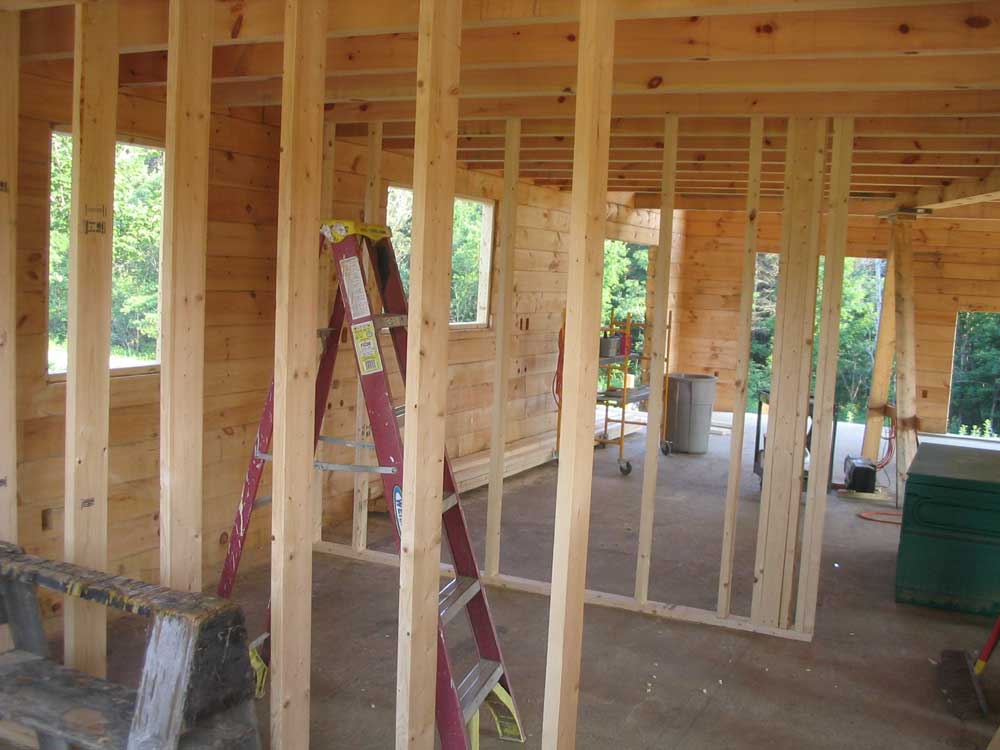
 In
between coats of polyurethane, and afterwards, I built the last wall
downstairs--the long wall that defined the hallway. I had to
build this wall in place, toenailing the studs into place once I
installed the top and bottom plates, but that was no problem.
The wall incorporated two doorways, one for each room at the back of
the house. In
between coats of polyurethane, and afterwards, I built the last wall
downstairs--the long wall that defined the hallway. I had to
build this wall in place, toenailing the studs into place once I
installed the top and bottom plates, but that was no problem.
The wall incorporated two doorways, one for each room at the back of
the house. |
|||
|
|
|||
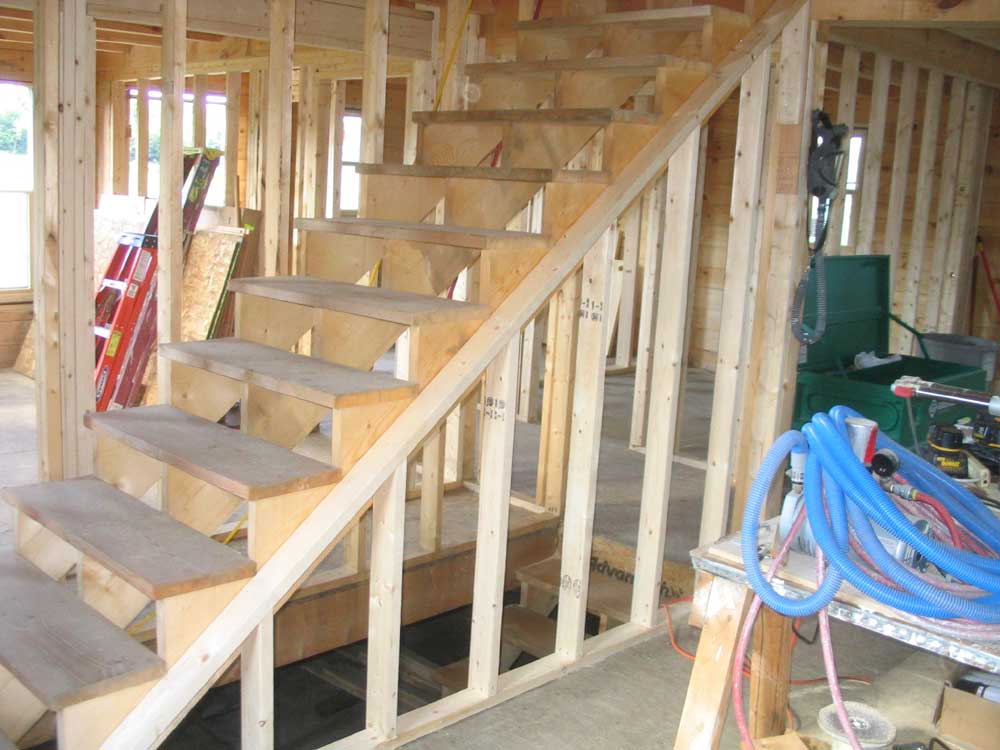
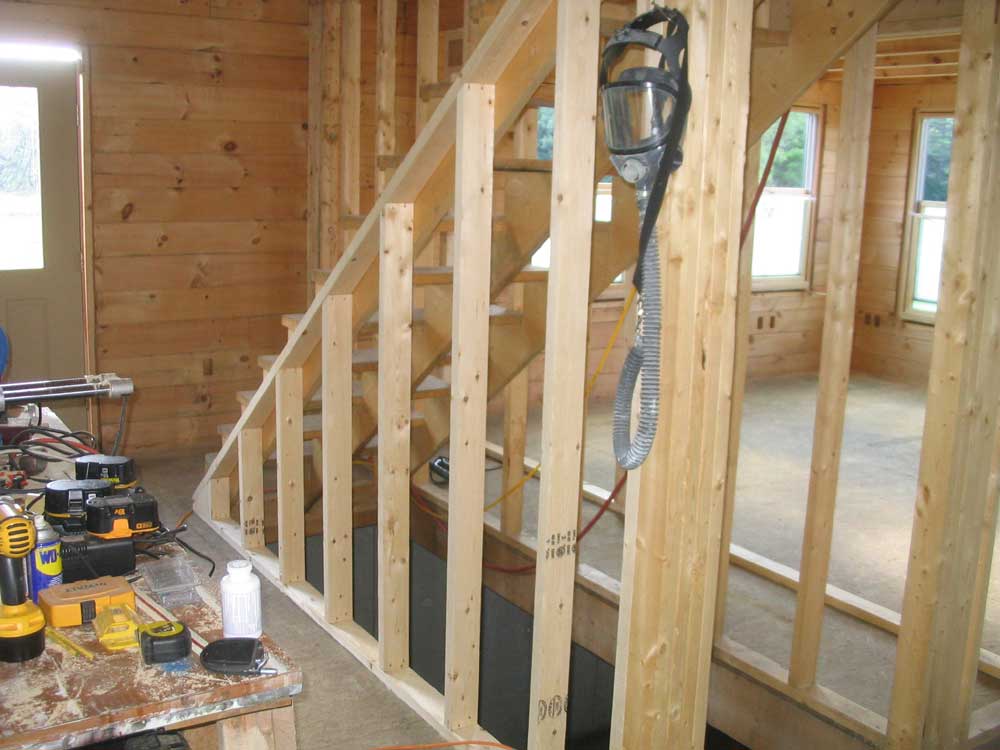
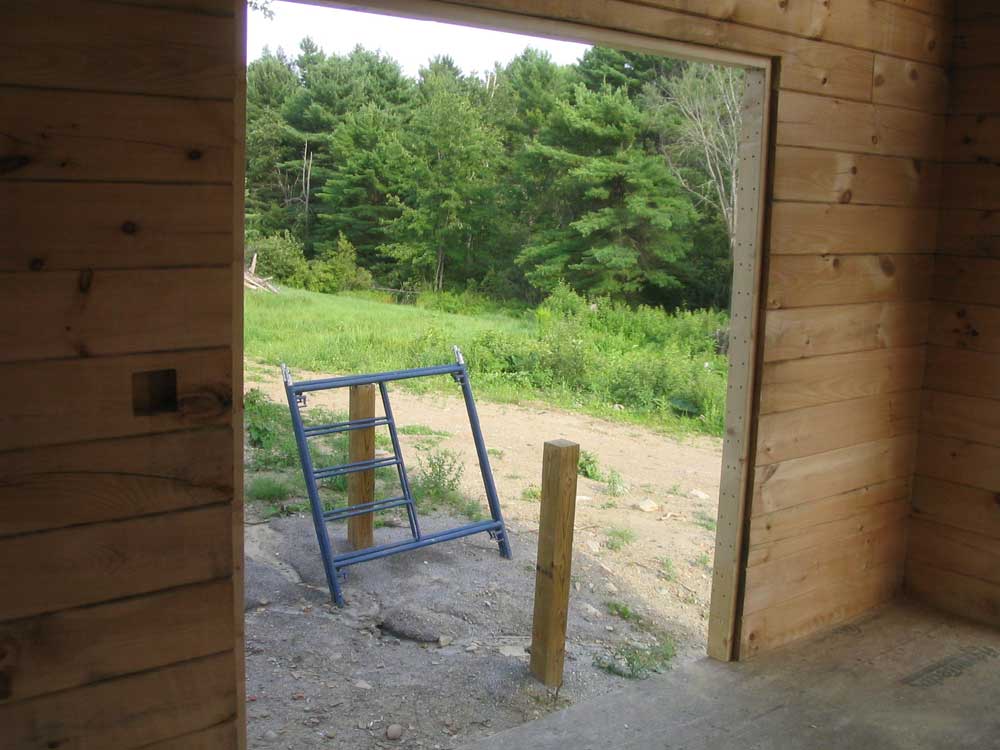
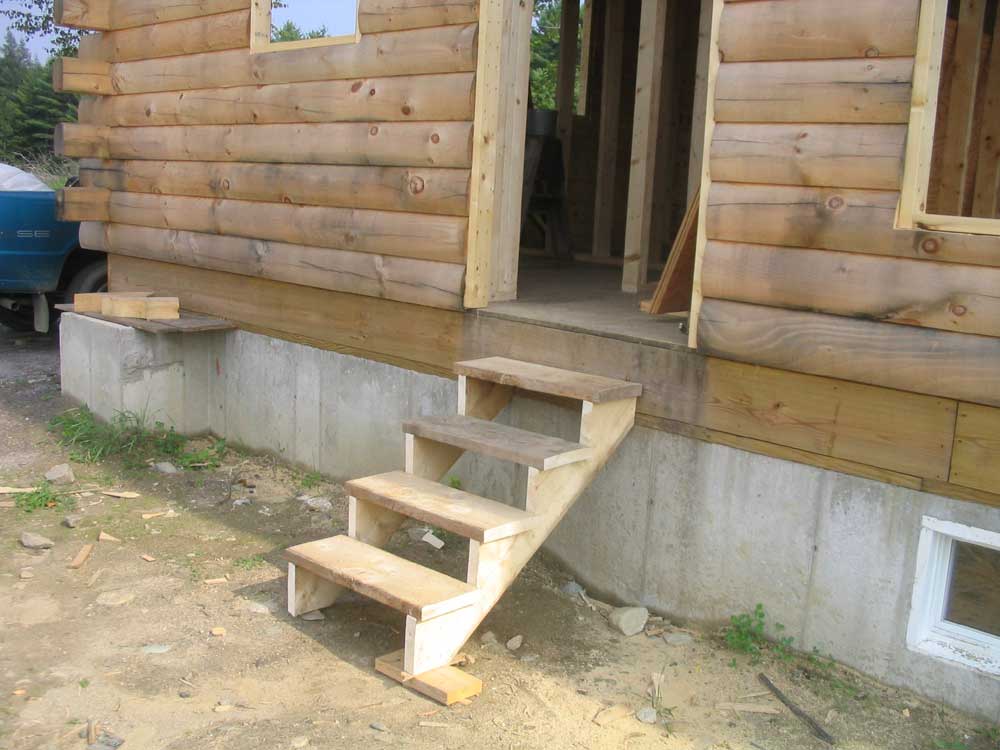 By
the time I cleaned up after completing the wall, it was late.
However, after months of climbing ladders to get into the house, I
decided I'd had enough, and that it was just about time to build
some steps. I banged together a rudimentary set of stairs off
the side entrance that would make entry easier going forward.
Nothing fancy, but effective. By
the time I cleaned up after completing the wall, it was late.
However, after months of climbing ladders to get into the house, I
decided I'd had enough, and that it was just about time to build
some steps. I banged together a rudimentary set of stairs off
the side entrance that would make entry easier going forward.
Nothing fancy, but effective.but being a glutton for punishment I decided to work longer. After a break with the dogs, I went back up to sand the master bathroom ceiling, which I completed in about two hours. I figured this would put me that much further ahead tomorrow. I was quite exhausted by the end and left the cleanup for the morning. |
|||
TUESDAY, JULY 25, 2006 |
|||
 In
what seemed to be becoming an unfortunate pattern, I continued today
with more of the same: I began the day in the master bedroom,
sanding the ceiling. The area I planned to sand was
deceptively small; because it contained part of the valley rafters
for the front dormer, there were many surfaces to sand. The
job was further complicated (as all jobs in this house seem to be)
by the relatively tight space in which to place the staging.
There was just enough room, and the height, using two lifts, was
somewhat awkward. But I made do. I had to partially
disassemble the staging in order to move it past the dormer to
complete the job--and then again to move it back later. I also
used my tall stepladder to finish sanding a couple areas in the loft
that I had not done yesterday--a small bay right at the top of the
stairs, and the rafter bay at the far side of the loft, both of
which had been unreachable from yesterday's staging. In
what seemed to be becoming an unfortunate pattern, I continued today
with more of the same: I began the day in the master bedroom,
sanding the ceiling. The area I planned to sand was
deceptively small; because it contained part of the valley rafters
for the front dormer, there were many surfaces to sand. The
job was further complicated (as all jobs in this house seem to be)
by the relatively tight space in which to place the staging.
There was just enough room, and the height, using two lifts, was
somewhat awkward. But I made do. I had to partially
disassemble the staging in order to move it past the dormer to
complete the job--and then again to move it back later. I also
used my tall stepladder to finish sanding a couple areas in the loft
that I had not done yesterday--a small bay right at the top of the
stairs, and the rafter bay at the far side of the loft, both of
which had been unreachable from yesterday's staging. |
|||
|
After several hours of sanding, it was time for the finish. The first coat goes on hard, as the wood soaks up the polyurethane quickly and it's necessary to dip the brush frequently. With the grooves in the V-match boards, there's a lot of surface area to cover. The second coat goes on much more smoothly and quickly, though, as the brush glides over the cured first coat with relative ease. 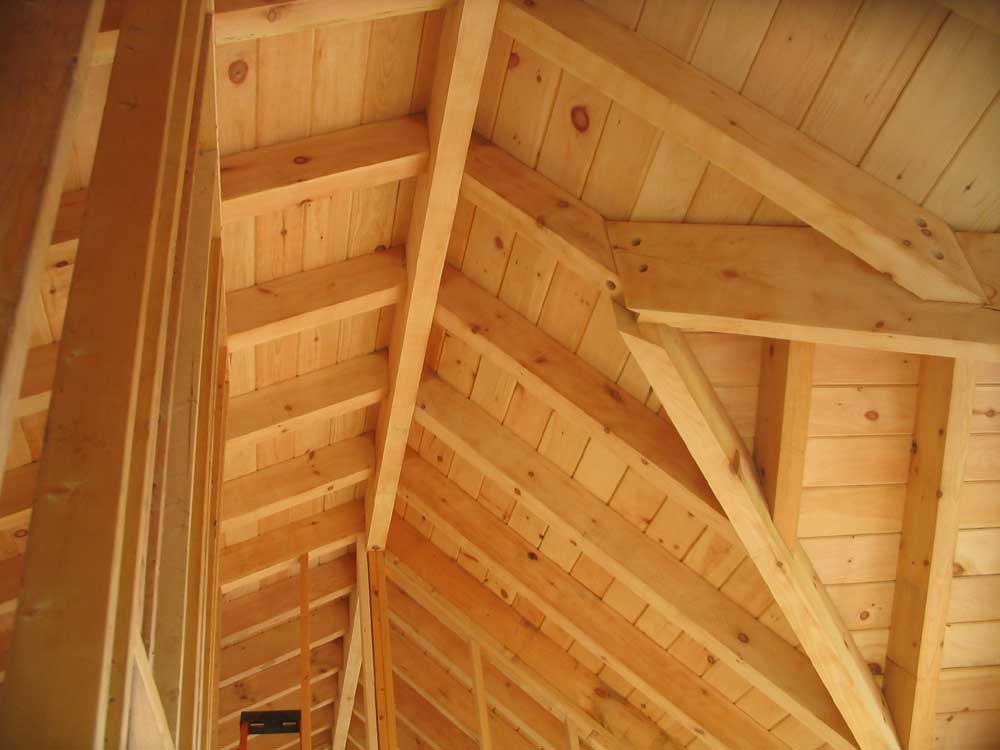 I
found that the brushes I was using did poorly after being washed out
at night: the bristles didn't take kindly to this, apparently,
and after the first days' use of any new brush I discovered that the
brush would let finish just pour right out of it, oozing down over
the ferule and onto the handle--and onto the unfortunate operator.
Of course the problem was exacerbated by the fact that most of the
work was overhead. I had to wear safety glasses to keep the
drips out of my eyes; many was the time that drips fell right on the
glasses. What a mess. Worse, the brushes were not
particularly cheap, either--I bought the best 4" brush Lowes had to
offer for this sort of finish, but I guess at $12 for this size they
actually are cheap brushes, aren't they. When I can get to a
real store, I'll look for some better brushes. I hate junky
brushes, and will want something nicer for doing the finish on the
walls, which will take a bit more finesse than the ceilings since
they are at eye- and touch-level. I
found that the brushes I was using did poorly after being washed out
at night: the bristles didn't take kindly to this, apparently,
and after the first days' use of any new brush I discovered that the
brush would let finish just pour right out of it, oozing down over
the ferule and onto the handle--and onto the unfortunate operator.
Of course the problem was exacerbated by the fact that most of the
work was overhead. I had to wear safety glasses to keep the
drips out of my eyes; many was the time that drips fell right on the
glasses. What a mess. Worse, the brushes were not
particularly cheap, either--I bought the best 4" brush Lowes had to
offer for this sort of finish, but I guess at $12 for this size they
actually are cheap brushes, aren't they. When I can get to a
real store, I'll look for some better brushes. I hate junky
brushes, and will want something nicer for doing the finish on the
walls, which will take a bit more finesse than the ceilings since
they are at eye- and touch-level. |
|||
 During
the afternoon, in between coats of polyurethane upstairs, I built a
second wall downstairs--the one defining the second side of the
pantry, which is sandwiched between the bathroom in the house corner
and the kitchen. The large pantry was a luxury we were
fortunate to be able to allow ourselves in the design of this house,
as we didn't need the space for anything else, really. The
pantry is something like 8' x 10', and when we fill it with shelving
and other storage solutions, as well as countertop, it should be an
outstanding place to store our extra dishes, serving stuff,
appliances, and bulk food. The pantry also means that we don't
have a huge need for overhead cabinets in the kitchen, which is good
because our design doesn't allow much wall space for these anyway.
But that's getting ahead of things a bit. Seeing the space
defined for the first time, however, illustrated just how large it
was--bigger than I had expected. During
the afternoon, in between coats of polyurethane upstairs, I built a
second wall downstairs--the one defining the second side of the
pantry, which is sandwiched between the bathroom in the house corner
and the kitchen. The large pantry was a luxury we were
fortunate to be able to allow ourselves in the design of this house,
as we didn't need the space for anything else, really. The
pantry is something like 8' x 10', and when we fill it with shelving
and other storage solutions, as well as countertop, it should be an
outstanding place to store our extra dishes, serving stuff,
appliances, and bulk food. The pantry also means that we don't
have a huge need for overhead cabinets in the kitchen, which is good
because our design doesn't allow much wall space for these anyway.
But that's getting ahead of things a bit. Seeing the space
defined for the first time, however, illustrated just how large it
was--bigger than I had expected. |
|||
 Tomorrow
should be a similar version of today: more sanding and
finishing in the master bedroom (in the front dormer this time), and
building the last wall downstairs--the one defining the side of the
hallway and closing off the bathroom and pantry walls that I just
framed. Tomorrow
should be a similar version of today: more sanding and
finishing in the master bedroom (in the front dormer this time), and
building the last wall downstairs--the one defining the side of the
hallway and closing off the bathroom and pantry walls that I just
framed. |
|||
MONDAY, JULY 24, 2006 |
|||
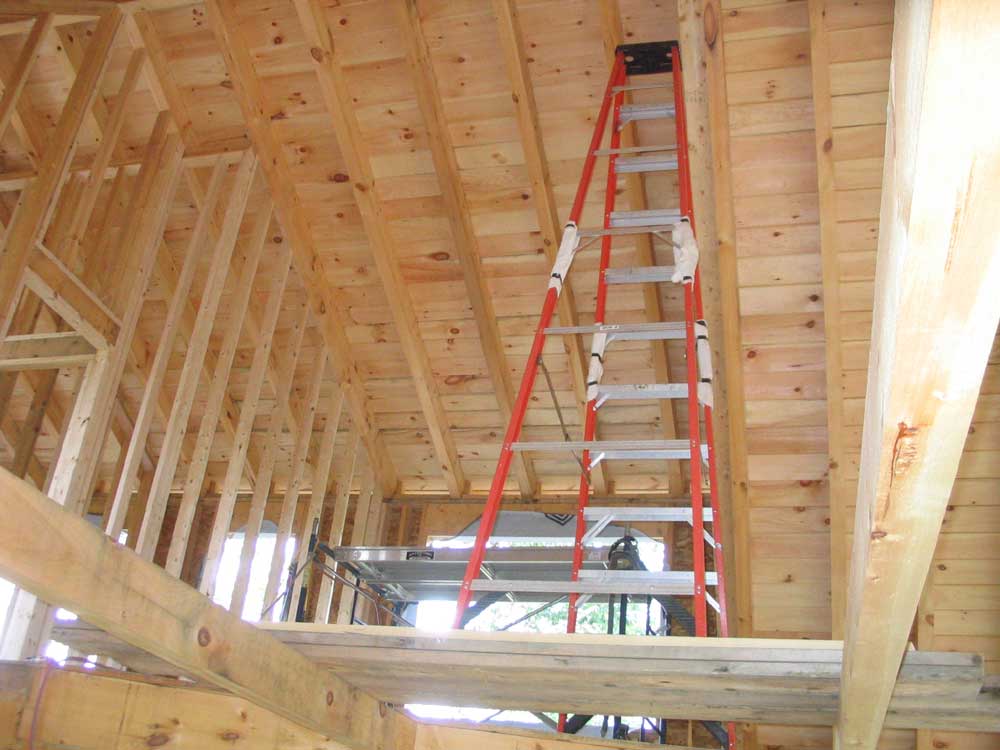
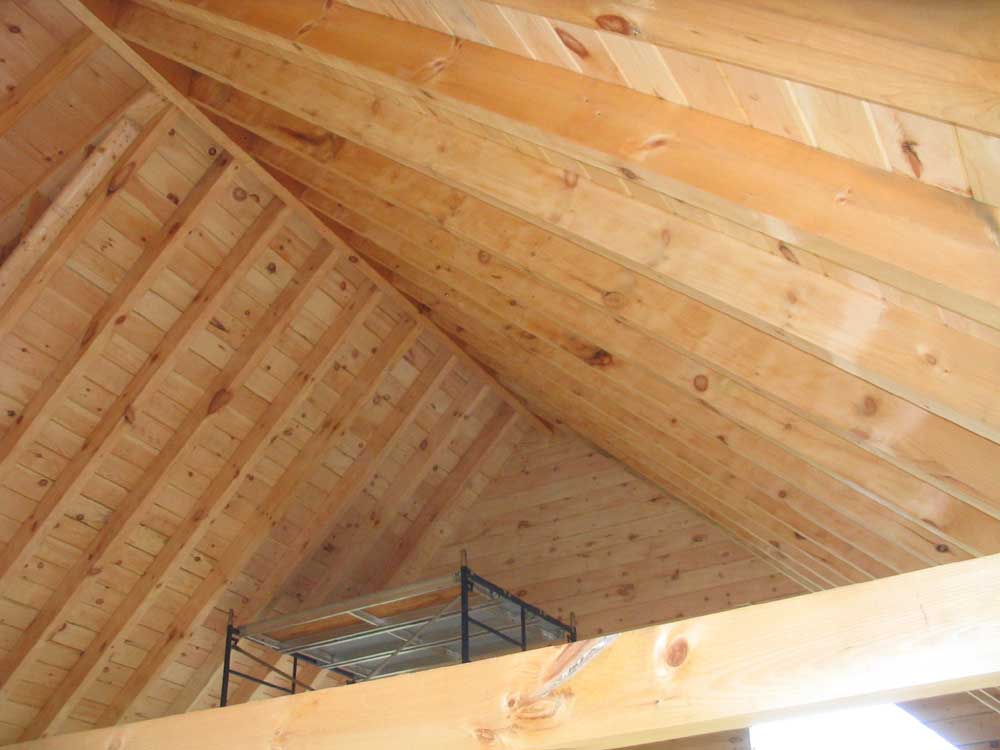
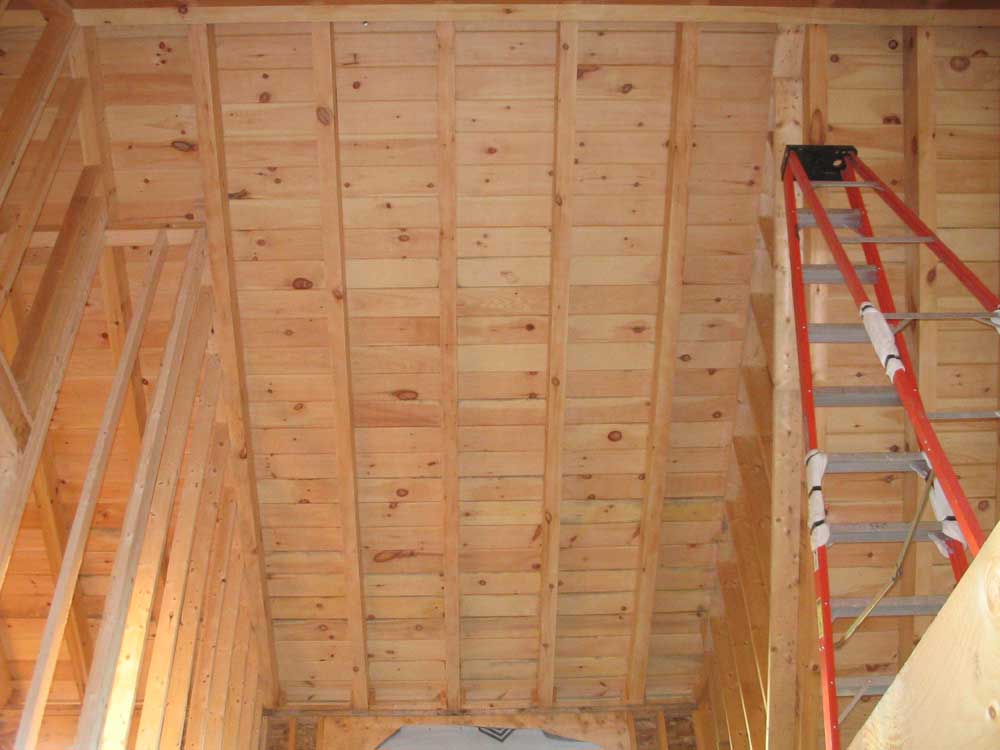 Over
a period of about 5 hours, I sanded the entire loft ceiling, and
then applied the first of two coats of polyurethane. The job
was complicated by the need to use a ladder for the highest areas up
by the ridge. There was a lot of reaching with the sander
involved, as of course I wanted to reach as much as possible before
having to move the setup, and reaching with the sander tends to be
tiring. Over
a period of about 5 hours, I sanded the entire loft ceiling, and
then applied the first of two coats of polyurethane. The job
was complicated by the need to use a ladder for the highest areas up
by the ridge. There was a lot of reaching with the sander
involved, as of course I wanted to reach as much as possible before
having to move the setup, and reaching with the sander tends to be
tiring.Once I had the highest areas sanded, the job went more quickly since I could work from the staging, which almost filled the room, though I still had to move it twice to reach all areas--once side-to-side, and once to reach the very lower ends of the rafter bays at the exterior wall. |
|||
 After
a break for lunch, I applied the second coat to the ceiling,
completing yet another difficult and fairly large area of the house
ceiling. I couldn't face any more sanding, so I decided to
shift directions and save the sanding for tomorrow. Breaking
it up in this way makes it much more tolerable. After
a break for lunch, I applied the second coat to the ceiling,
completing yet another difficult and fairly large area of the house
ceiling. I couldn't face any more sanding, so I decided to
shift directions and save the sanding for tomorrow. Breaking
it up in this way makes it much more tolerable.I spent some time cleaning out the area downstairs where the bathroom and pantry would eventually be, since I wanted to begin framing up these last interior walls. For weeks, this open area had been a good storage area for tools and materials, as well as my workbench/saw table, but now I moved everything out to clear the area for framing. Then, I laid out the locations of the three walls--one defining the hallway, and the other two defining the bathroom and pantry. |
|||
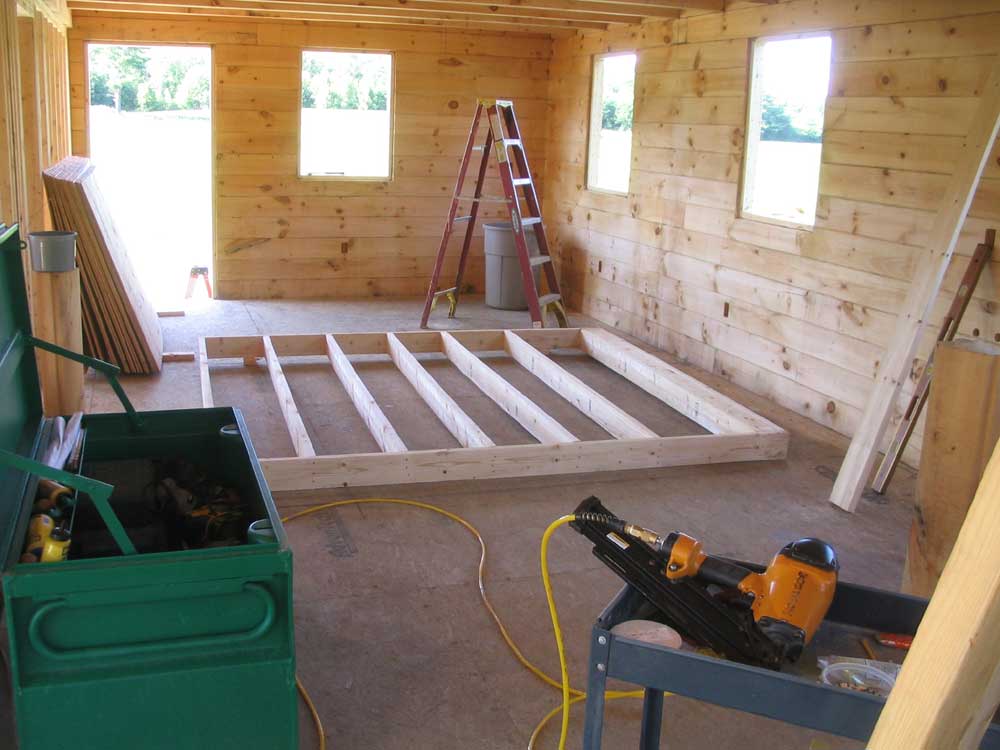
 I
framed up the first wall--the one separating the bathroom from the
adjacent pantry--on the floor, since it was a straight wall without
any special cuts. I kept the studs just a little shorter than
the overall height to help make it easier to stand the wall into
place between the ceiling and floor. Then, I stood the wall
into place, after attaching one top plate to the underside of the
ceiling in the proper position. Despite my efforts to shorten
the wall height, it still took some persuasion to get the wall into
place. I
framed up the first wall--the one separating the bathroom from the
adjacent pantry--on the floor, since it was a straight wall without
any special cuts. I kept the studs just a little shorter than
the overall height to help make it easier to stand the wall into
place between the ceiling and floor. Then, I stood the wall
into place, after attaching one top plate to the underside of the
ceiling in the proper position. Despite my efforts to shorten
the wall height, it still took some persuasion to get the wall into
place.
The end of the wall adjacent to the log wall contained additional studs to act as a wall stiffener; I installed lags through the stiffener and into the logs as prescribed. I see from the photo that I must have nailed the top of one of the studs on the wrong side of my layout line, as it's crooked. Hardly the end of the world, and I doubt I'll bother changing it. |
|||
 It
was too late to begin another wall, but I prepared some materials
for tomorrow, loading additional framing lumber into the house for
easy access, and moved the pipe staging into the upstairs bedroom,
where I planned to sand the ceiling in the morning. It
was too late to begin another wall, but I prepared some materials
for tomorrow, loading additional framing lumber into the house for
easy access, and moved the pipe staging into the upstairs bedroom,
where I planned to sand the ceiling in the morning. |
|||
SUNDAY, JULY 23, 2006 |
|||
| I allowed myself a leisurely start today, being Sunday after all, but was up on the staging ready to sand around 9. Since the built=up staging was something I only wanted to dismantle and move once, I sanded the highest areas above the stairs as far as I could on the staging, cleaned the area, and applied two coats of polyurethane. This took all morning and into the afternoon, elapsed time. | |||
 Once
I had finished the second coat, I dismantled the staging and lowered
it so that I could finish the last area above the stairs. As
soon as the polyurethane above was dry enough, I began sanding the
lower area, and then applied the two coats of polyurethane there as
well. This officially finished up the great room ceiling,
finally. You've seen enough nondescript pictures of the
ceiling, so I'm not including one here as the one I took is
uninspired. Once
I had finished the second coat, I dismantled the staging and lowered
it so that I could finish the last area above the stairs. As
soon as the polyurethane above was dry enough, I began sanding the
lower area, and then applied the two coats of polyurethane there as
well. This officially finished up the great room ceiling,
finally. You've seen enough nondescript pictures of the
ceiling, so I'm not including one here as the one I took is
uninspired. |
|||
|
In between coats, while waiting, I took care of a few odds and ends, including sealing around the insides of the window and door bucks with more Sikaflex, and installing some Tyvec house wrap on the daylight basement wall. |
|||
 At
the end of the day, I prepared for tomorrow's work by setting up
some planks to support a ladder in the loft so that I could reach
the ridge and top portion of the ceiling there. I decided
against using the staging here because the heights just didn't work
out right--one lift wasn't high enough, but two lifts would have
placed me too close to the ceiling to work. I thought the
ladder would be quicker and easier for this portion. At
the end of the day, I prepared for tomorrow's work by setting up
some planks to support a ladder in the loft so that I could reach
the ridge and top portion of the ceiling there. I decided
against using the staging here because the heights just didn't work
out right--one lift wasn't high enough, but two lifts would have
placed me too close to the ceiling to work. I thought the
ladder would be quicker and easier for this portion. |
|||
 Lots
more sanding and finishing in the week ahead. Hopefully, I
will manage to find time to do some other, more interesting,
projects as well. I'd really like to build the remaining
interior walls downstairs, so we'll just see how it goes.
Bob's going to want his staging back next week, so I'm trying to
finish up with it this week. Lots
more sanding and finishing in the week ahead. Hopefully, I
will manage to find time to do some other, more interesting,
projects as well. I'd really like to build the remaining
interior walls downstairs, so we'll just see how it goes.
Bob's going to want his staging back next week, so I'm trying to
finish up with it this week. |
|||
SATURDAY, JULY 22, 2006 |
|||
 Today,
I decided to wash all the interior log walls with my cleaning
solution of bleach and TSP. It seemed like the best time to do
it and get it over with; I felt it was worthwhile because it might
make sanding easier by cleaning some of the dirt and weathering out
of the grooves in the logs, which would be difficult to sand. Today,
I decided to wash all the interior log walls with my cleaning
solution of bleach and TSP. It seemed like the best time to do
it and get it over with; I felt it was worthwhile because it might
make sanding easier by cleaning some of the dirt and weathering out
of the grooves in the logs, which would be difficult to sand.First, I finished removing the caulk squeezeout from between the remaining logs, those which I hadn't done previously. This included most of the back wall of the house, and all of Heidi's craft room/office. I used my new favorite tool--the bent screwdriver--to remove the caulk. |
|||
 I
briefly tried the garden sprayer again, but it just wouldn't
spray--the same problem I experienced when I tried it on the
ceiling. I guess the TSP crystals clogged the thing, or maybe
the bleach ate something. In any event, I abandoned it and
hand-applied the cleaning solution to the walls with a scotch brite
pad, which worked pretty well. I applied the solution and let
it sit for several minutes before rinsing it off. I
briefly tried the garden sprayer again, but it just wouldn't
spray--the same problem I experienced when I tried it on the
ceiling. I guess the TSP crystals clogged the thing, or maybe
the bleach ate something. In any event, I abandoned it and
hand-applied the cleaning solution to the walls with a scotch brite
pad, which worked pretty well. I applied the solution and let
it sit for several minutes before rinsing it off. |
|||
 In
this manner, I worked my way around the inside of the house. I
was pleased with the effect the cleaning had--well worth the effort,
as it removed most of the weathering and many of the stains from the
logs. Of course, I'd still have to sand everything later. In
this manner, I worked my way around the inside of the house. I
was pleased with the effect the cleaning had--well worth the effort,
as it removed most of the weathering and many of the stains from the
logs. Of course, I'd still have to sand everything later.The process took a while since it was necessary to move things out of the way and then clean up the rinse water, pushing it out of the house with a squeegee bought for the purpose (and which I could have used when the house was wide open during all that rain earlier this year). |
|||
 During
the afternoon, after some residual cleanup from the morning, I set
up some new staging over the stairwell. There was no way to
get the pipe staging directly beneath the last part of the great
room ceiling that needed to be sanded and finished, and I had
wondered over the past week how to handle it. Eventually, I
decided that I'd have to run planks between the pipe staging, which
I'd set up as close as possible, and the wall in the stairwell.
This led me to build the wall in the stairwell early in the week. During
the afternoon, after some residual cleanup from the morning, I set
up some new staging over the stairwell. There was no way to
get the pipe staging directly beneath the last part of the great
room ceiling that needed to be sanded and finished, and I had
wondered over the past week how to handle it. Eventually, I
decided that I'd have to run planks between the pipe staging, which
I'd set up as close as possible, and the wall in the stairwell.
This led me to build the wall in the stairwell early in the week. |
|||
 Now,
it was time to put the idea to the test. I dismantled the
staging from where it was and moved it over to the bay nearest the
stairs, where I set it back up to its full height. Then, I
placed one of the aluminum staging planks on the top level, and then
measured from the second floor up to the plank so that I could add a
crosspiece at the same height on the stud wall next to the stairs.
Then, I ran four double staging planks that I use in the boatshop
across the gap (which I had previously measured to determine if the
10' planks would work), placing one plank in each of four stud bays.
Then I added a piece of OSB to the top, which I screwed in place. Now,
it was time to put the idea to the test. I dismantled the
staging from where it was and moved it over to the bay nearest the
stairs, where I set it back up to its full height. Then, I
placed one of the aluminum staging planks on the top level, and then
measured from the second floor up to the plank so that I could add a
crosspiece at the same height on the stud wall next to the stairs.
Then, I ran four double staging planks that I use in the boatshop
across the gap (which I had previously measured to determine if the
10' planks would work), placing one plank in each of four stud bays.
Then I added a piece of OSB to the top, which I screwed in place.
|
|||
 The
end result was quite satisfactory, and I looked forward to getting
going on the sanding in the morning. I prepared my tools,
cords, and hoses, and planned to sand and finish the top section of
ceiling in one fell swoop before disassembling the staging and
moving to a lower level to finish the rafter bays over the ceiling.
Only then would I move the staging somewhere else entirely to
continue with the finishing work. I was a bit under the gun,
as I had only a week or so to finish my work with the staging before
Bob needed it back. The
end result was quite satisfactory, and I looked forward to getting
going on the sanding in the morning. I prepared my tools,
cords, and hoses, and planned to sand and finish the top section of
ceiling in one fell swoop before disassembling the staging and
moving to a lower level to finish the rafter bays over the ceiling.
Only then would I move the staging somewhere else entirely to
continue with the finishing work. I was a bit under the gun,
as I had only a week or so to finish my work with the staging before
Bob needed it back.Windows are scheduled for installation beginning a week from Tuesday on August 1. |
|||
FRIDAY, JULY 21, 2006 |
|||
 I
spent the entire day working on the window and door bucks, and
completed all except the large door and window openings in the south
gable wall; I hoped that maybe Bob would bring his man lift to make
this job easier a little later on, since accessing the outside of
these openings was difficult, given their height from the ground.
So I left those for later. I
spent the entire day working on the window and door bucks, and
completed all except the large door and window openings in the south
gable wall; I hoped that maybe Bob would bring his man lift to make
this job easier a little later on, since accessing the outside of
these openings was difficult, given their height from the ground.
So I left those for later. |
|||
 I
followed the same process I described yesterday, and worked my way
around the house. By lunchtime, I had finished the front of
the house, and I attacked the back wall openings during the
afternoon. While things went smoothly all morning, for some
reason I had worse luck in the afternoon--some days are just like
that sometimes. I
followed the same process I described yesterday, and worked my way
around the house. By lunchtime, I had finished the front of
the house, and I attacked the back wall openings during the
afternoon. While things went smoothly all morning, for some
reason I had worse luck in the afternoon--some days are just like
that sometimes. |
|||
 Each
of the 4 windows I worked on during the afternoon seemed more
difficult than the larger, more numerous windows in the front of the
house. I'm not sure why, but the cuts were more difficult, and
the reciprocating saw just didn't want to follow the circular saw
cut lines, particularly to get it started. Eventually I
succeeded in each case, but without the relative ease of the windows
I finished during the morning. I tried a new blade in the saw,
but it was actually working less well than the used blade, so I
switched back. Each
of the 4 windows I worked on during the afternoon seemed more
difficult than the larger, more numerous windows in the front of the
house. I'm not sure why, but the cuts were more difficult, and
the reciprocating saw just didn't want to follow the circular saw
cut lines, particularly to get it started. Eventually I
succeeded in each case, but without the relative ease of the windows
I finished during the morning. I tried a new blade in the saw,
but it was actually working less well than the used blade, so I
switched back. |
|||
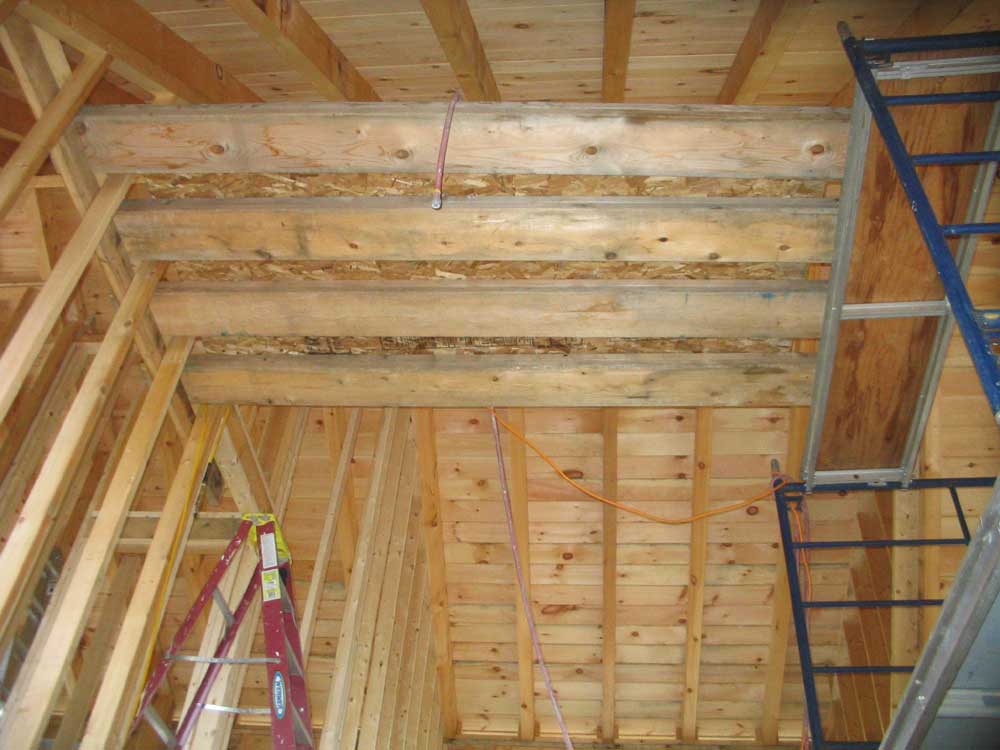
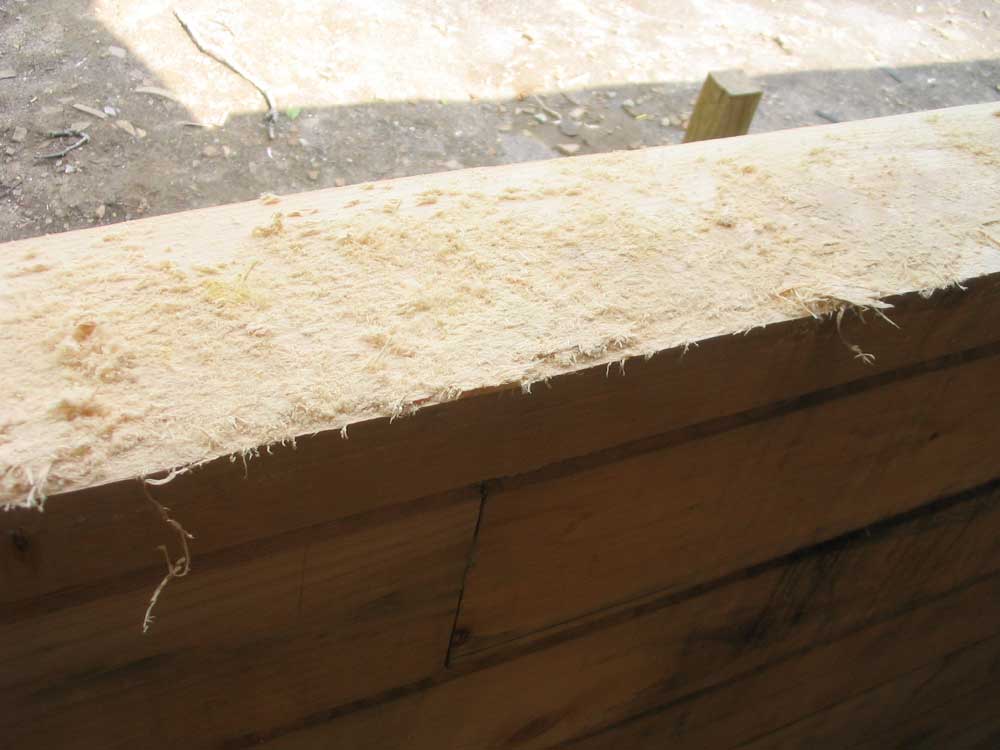 In
particular, the cut for the kitchen window was exceedingly
difficult. The log was full of pitch and the texture was
extremely stringy, and the reciprocating saw would barely cut
through the mess. Of course, this also happened to be the
widest window in the house, meaning that the cut was the longest.
It must have taken 45 minutes to finally cut through this log,
revealing this mess inside. In
particular, the cut for the kitchen window was exceedingly
difficult. The log was full of pitch and the texture was
extremely stringy, and the reciprocating saw would barely cut
through the mess. Of course, this also happened to be the
widest window in the house, meaning that the cut was the longest.
It must have taken 45 minutes to finally cut through this log,
revealing this mess inside. |
|||
 I
finished up right around 5, which was good timing because by 5:30 we
were in the midst of heavy rain from a thunderstorm. Heidi and
I drove to Lowes to order her tub for the bathroom, which we had
been somehow postponing for weeks. We thought the special
order might take several weeks to arrive, and were surprised to find
an anticipated delivery (to the store) date of only a week hence. I
finished up right around 5, which was good timing because by 5:30 we
were in the midst of heavy rain from a thunderstorm. Heidi and
I drove to Lowes to order her tub for the bathroom, which we had
been somehow postponing for weeks. We thought the special
order might take several weeks to arrive, and were surprised to find
an anticipated delivery (to the store) date of only a week hence. |
|||
|
I tried to get hold of Bob earlier in the day to see about scheduling his time for the window installation, but I didn't get hold of him. He must have gone up to camp with Rod, as that's the only time I don't get a return call within a reasonable time. Either that, or he's avoiding me so that he doesn't have to come back! In any event, the house was now ready for windows, or at least for most of them. Now I just need to get them delivered and actually installed! |
|||
THURSDAY, JULY 20, 2006 |
|||
|
I got going first thing with the
upstairs framing again this morning, as I wanted to finish up the
framing and remove the braces so that the area would be clear for
later steps.
|
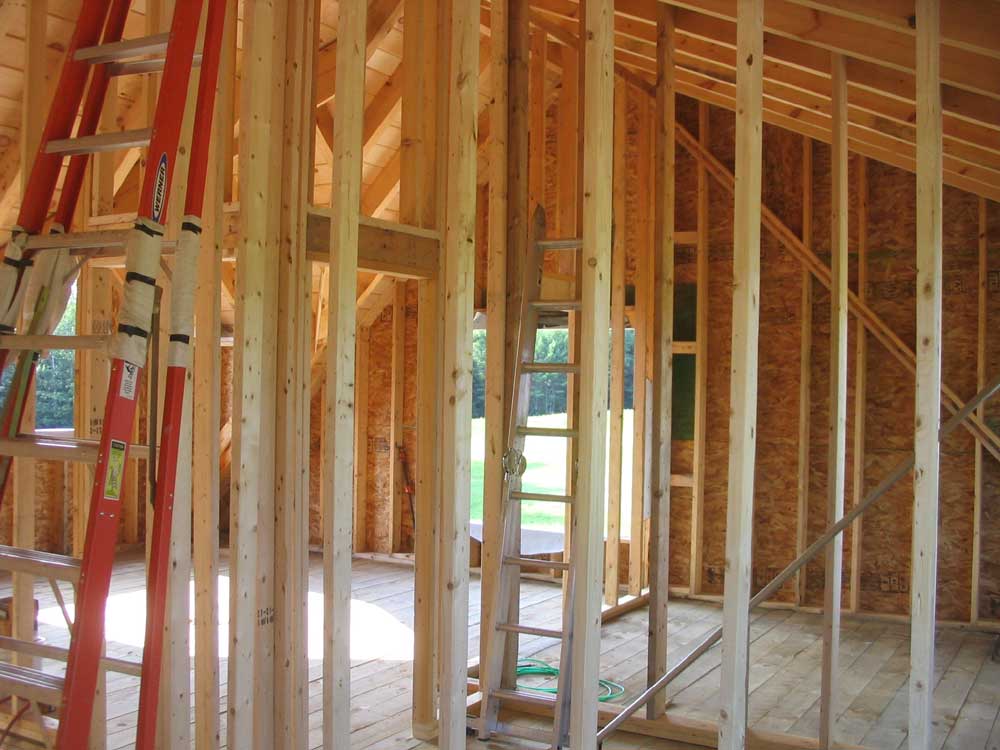
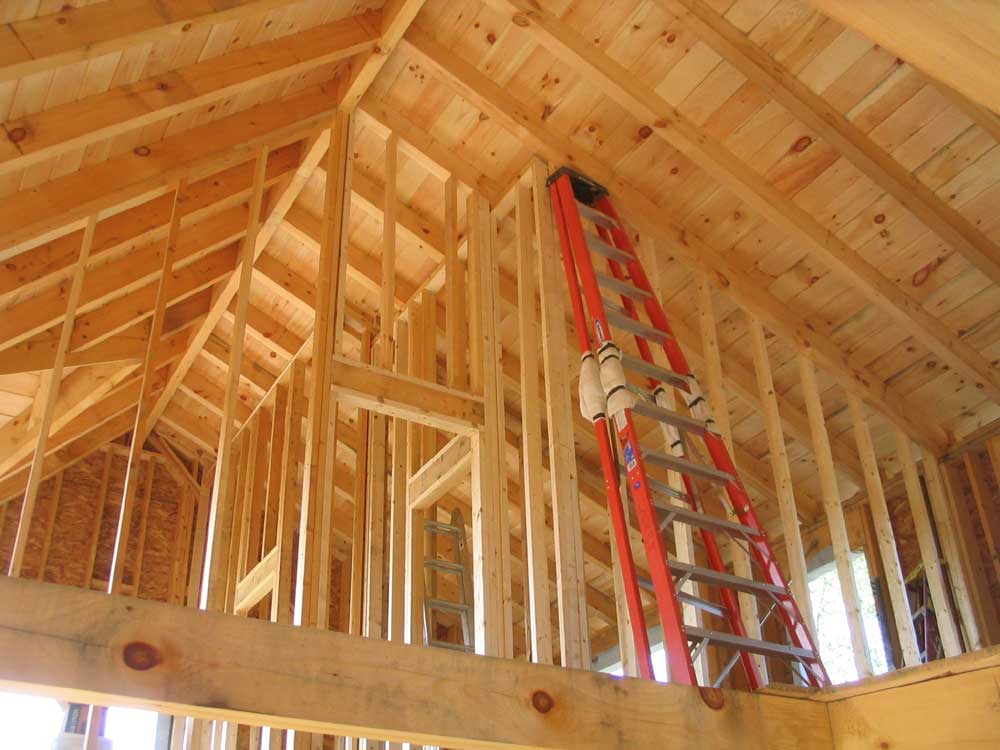
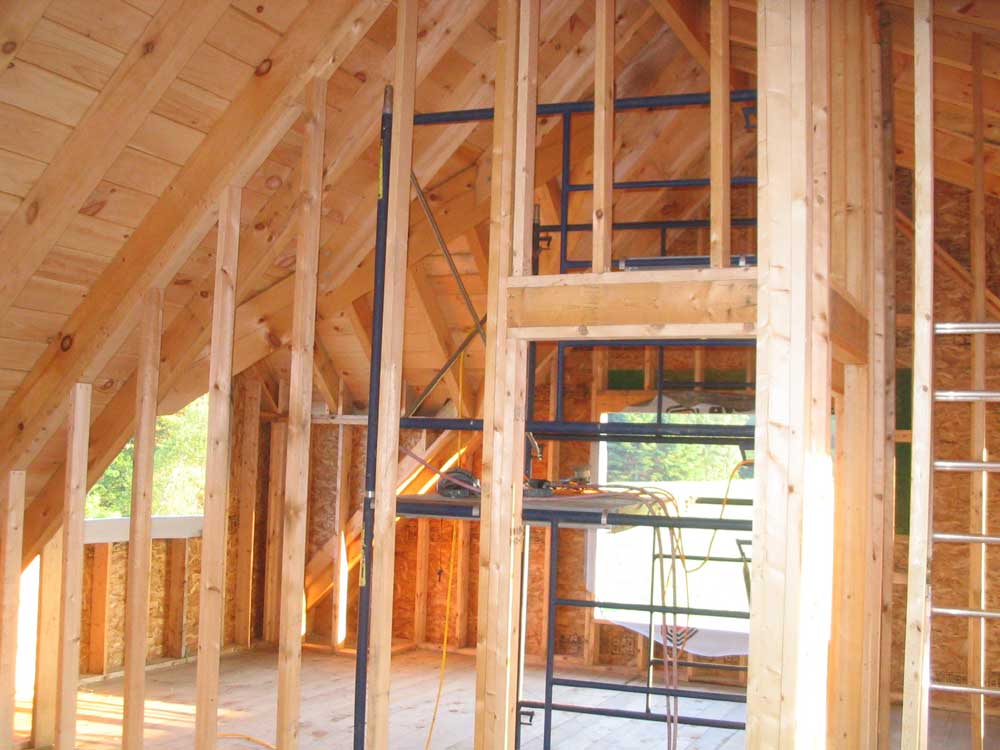
|||
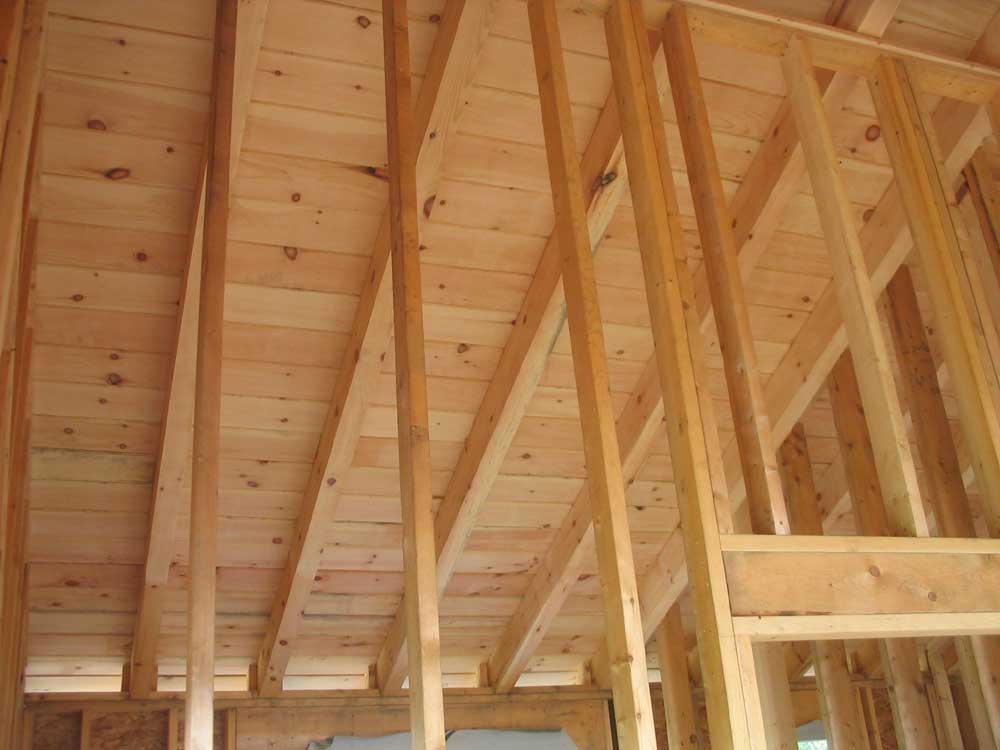
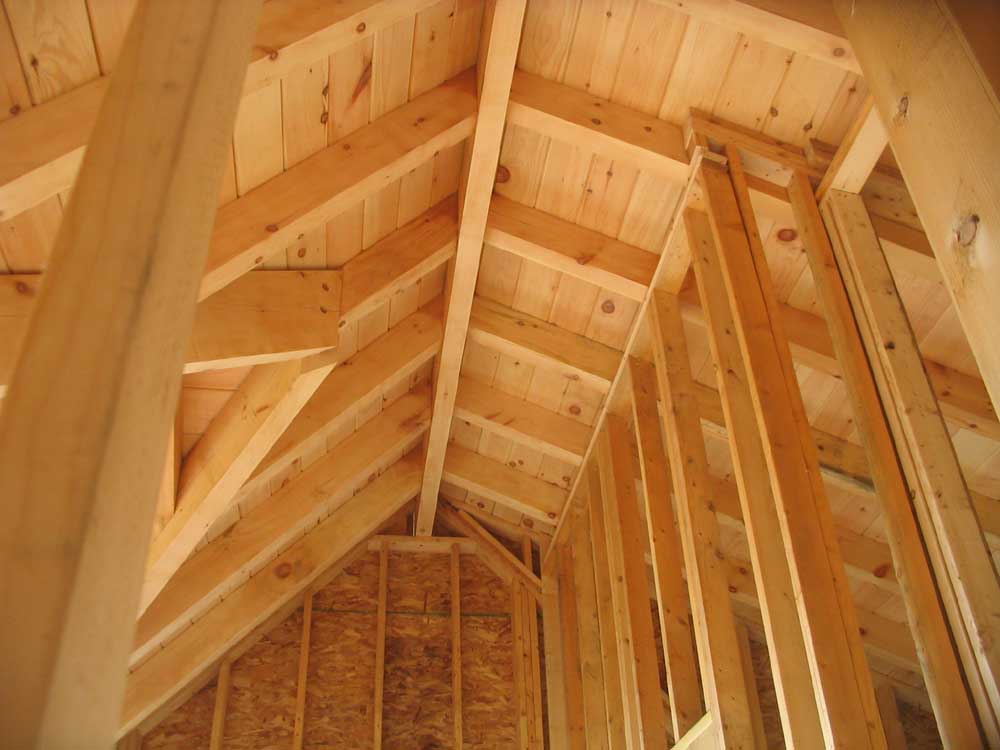
|
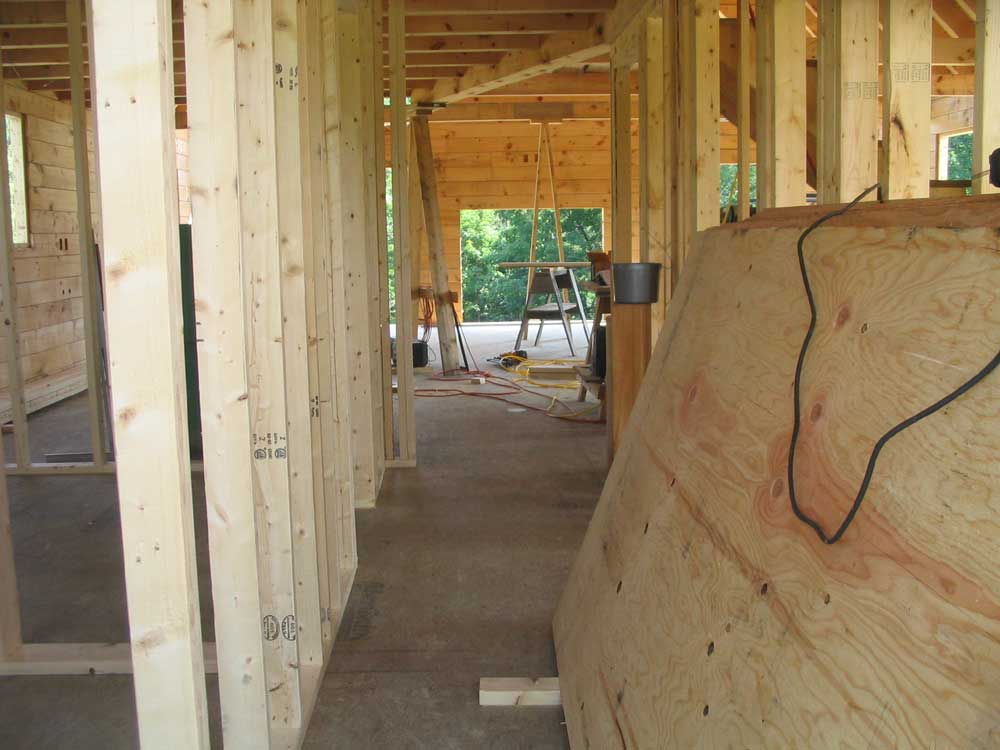
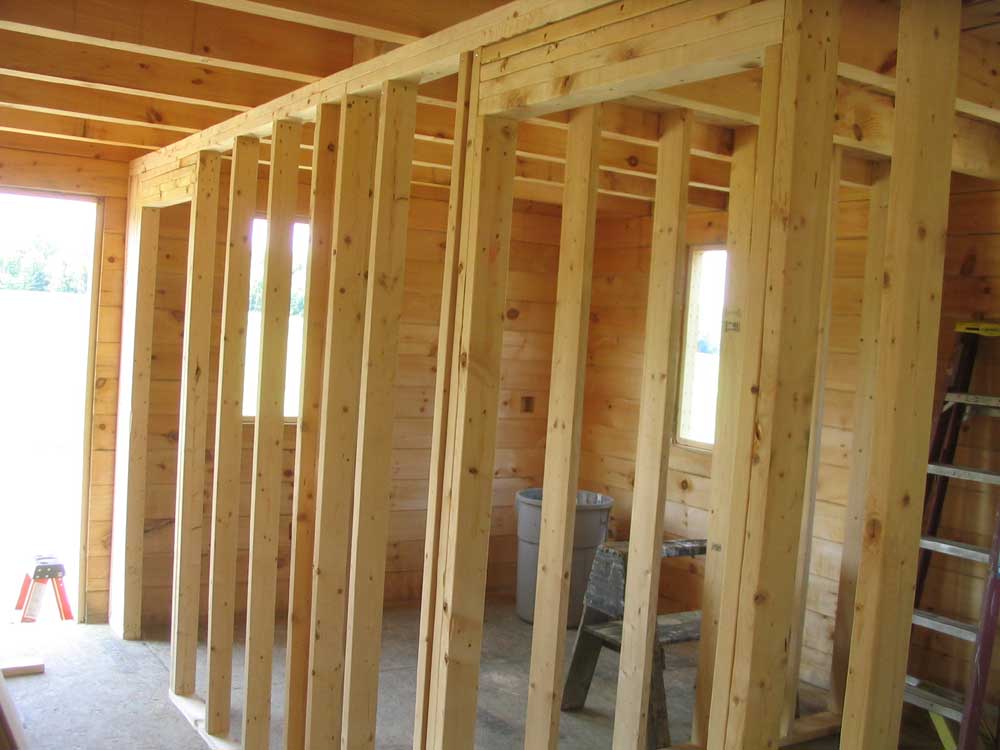
I was pleased to finish the walls, and finally got a good sense of the spaces upstairs. Both the bathroom and the closet seemed larger than I had expected, while the bedroom seemed a bit smaller. Here are some boring framing pictures for you. |
|||
|
|
|||
|
Once I finished, I cleaned up a bit, removing the detritus (eat your heart out, Heidi!) and cutting waste and preparing for the next job. I also moved a lot of material to the basement for safekeeping, particularly the clean pine exterior trim for the windows and doors that had been delivered yesterday. I didn't want it to twist or weather. |
|||
|
After a few minutes trying to figure out what to do next, I decided to tackle the door and widow bucks--2x4 frames that go inside the log openings to create the true rough opening for the windows and doors. I wasn't looking forward to this, because most of the openings in the logs needed to be enlarged heightwise since the openings didn't fall exactly in place with the heights of the log courses. |
|||
 I
consulted my window spec sheet and determined that the top edge of
all the openings was all set--no need to cut higher. But every
window required an additional cut down into the log beneath the
existing opening, and I knew I'd have to freehand this with a
circular saw from both inside and out, and then finish off the cut
with a reciprocating saw--a tool guaranteed to shake the life out of
you! I
consulted my window spec sheet and determined that the top edge of
all the openings was all set--no need to cut higher. But every
window required an additional cut down into the log beneath the
existing opening, and I knew I'd have to freehand this with a
circular saw from both inside and out, and then finish off the cut
with a reciprocating saw--a tool guaranteed to shake the life out of
you! |
|||
 I
laid out the cut on the first opening and checked, double-checked,
and obsessively checked again to be sure I was doing the right
thing. A mistake in this process could be tough to hide.
Once I was convinced, I made the cuts--first from the inside, then
from the outside, using my circular saw. It wasn't too
terrible to follow the line. I
laid out the cut on the first opening and checked, double-checked,
and obsessively checked again to be sure I was doing the right
thing. A mistake in this process could be tough to hide.
Once I was convinced, I made the cuts--first from the inside, then
from the outside, using my circular saw. It wasn't too
terrible to follow the line. |
|||
 Next,
I fired up the reciprocating saw and plunged it through the opening,
using the circular saw cuts to guide the blade. I had to
realign a couple times, but overall the cut came out fairly well.
All in all the process was better than expected, and I was pleased
that it hadn't taken too long. Suddenly, it seemed like I
could be ready for windows sooner than I thought. Next,
I fired up the reciprocating saw and plunged it through the opening,
using the circular saw cuts to guide the blade. I had to
realign a couple times, but overall the cut came out fairly well.
All in all the process was better than expected, and I was pleased
that it hadn't taken too long. Suddenly, it seemed like I
could be ready for windows sooner than I thought.
|
|||
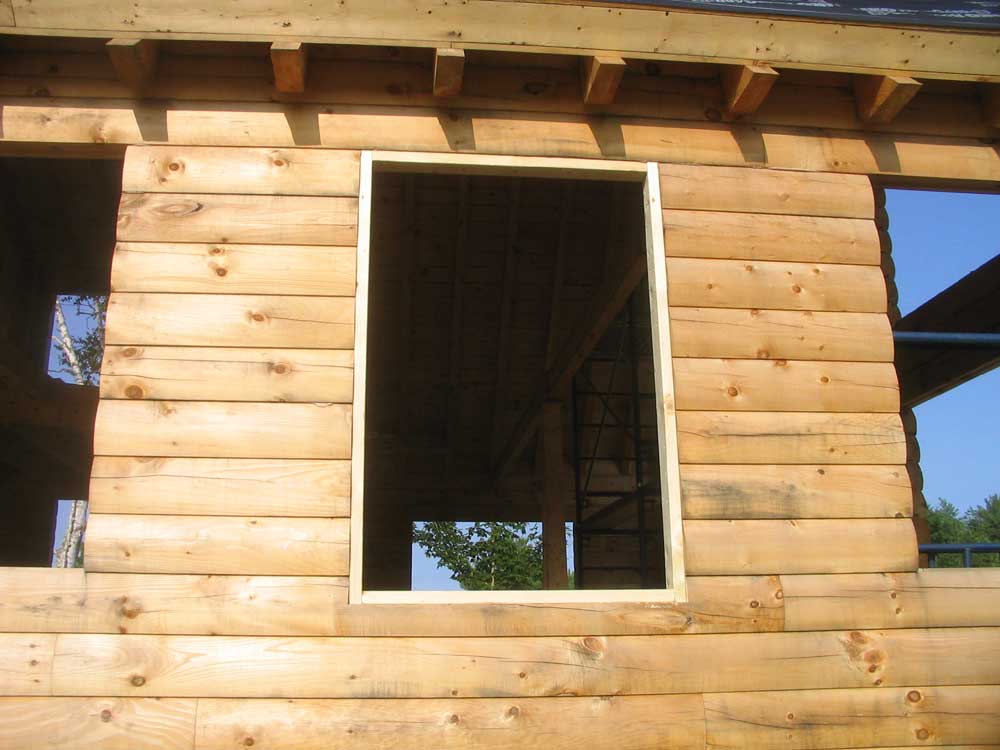
 With
the cut in one window complete, I decided to try installing the
bucks, and cut the 2x4s--freshly delivered and clean and
straight--to size and installed them in the perimeter of the
opening, using 3 heavy beads of Sikaflex to seal them. I
nailed them into each log end with 4 nails as required, and then
installed the top and bottom pieces, again using the Sikaflex to
seal. Because the exterior trim would be notched into the logs
(another chore for the router, methinks), I set the outside edge of
the 2x4 4-9/16" from the inside face of the log, to accommodate the
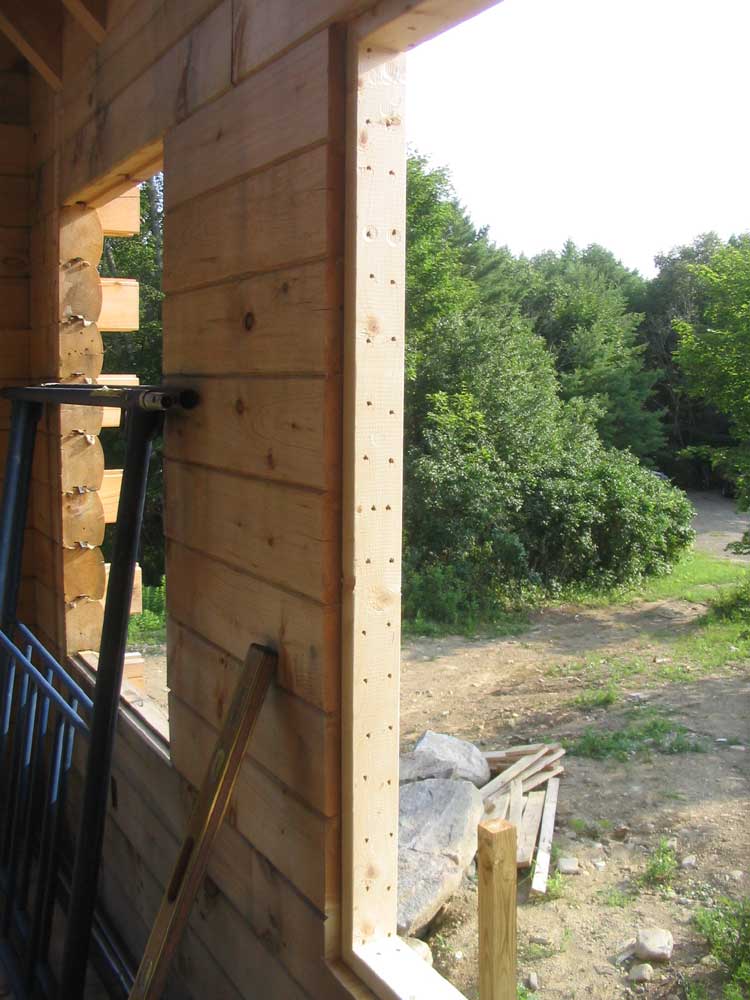
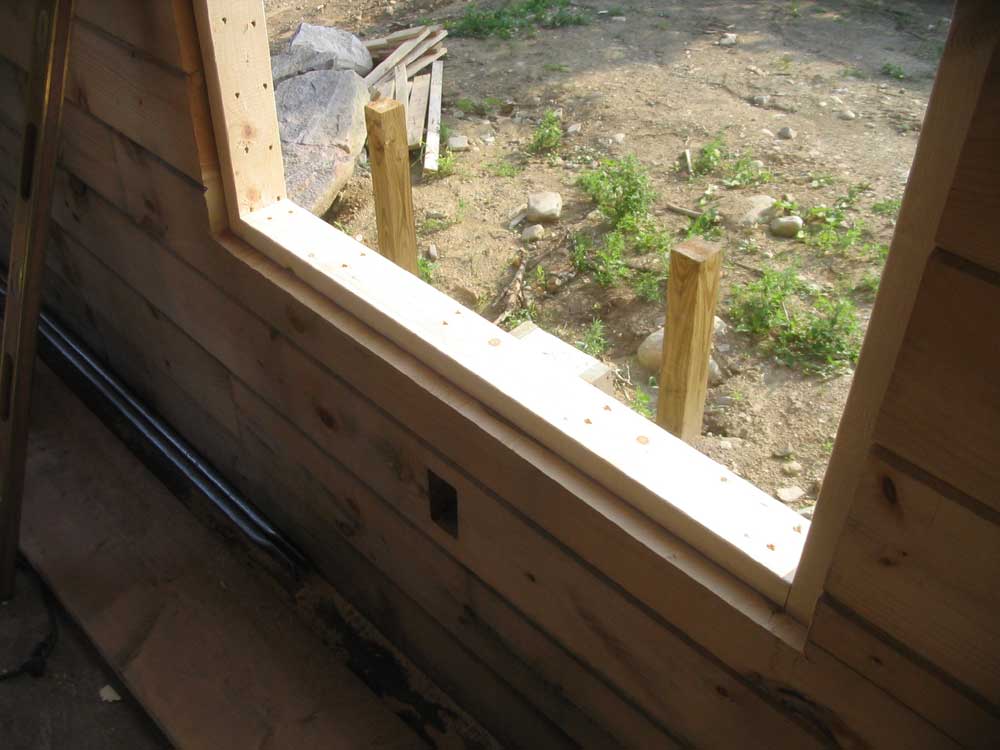
standard window jamb width of the same dimension. With
the cut in one window complete, I decided to try installing the
bucks, and cut the 2x4s--freshly delivered and clean and
straight--to size and installed them in the perimeter of the
opening, using 3 heavy beads of Sikaflex to seal them. I
nailed them into each log end with 4 nails as required, and then
installed the top and bottom pieces, again using the Sikaflex to
seal. Because the exterior trim would be notched into the logs
(another chore for the router, methinks), I set the outside edge of
the 2x4 4-9/16" from the inside face of the log, to accommodate the
standard window jamb width of the same dimension. |
|||
 It
was too late to work on other windows, but, encouraged, I looked
forward to getting right into it in the morning. Once I see
how things go tomorrow, I may be able to schedule window delivery
and also check into Bob's availability to help install them. It
was too late to work on other windows, but, encouraged, I looked
forward to getting right into it in the morning. Once I see
how things go tomorrow, I may be able to schedule window delivery
and also check into Bob's availability to help install them.And yes, there's more sanding ahead in the near future, too! |
|||
|
|
|||
WEDNESDAY, JULY 19, 2006 |
|||
| I got an early start this morning, beginning work around 6. I started at the log gable end, where I applied the polyurethane to a large section of the wall between the windows. | |||
|
Then, while I waited for the first coat to dry, I continued work upstairs on the interior walls, and cut and fit the studs into the wall dividing the bathroom from the closet. I tied this wall into the perpendicular bathroom wall, and prepared to continue with the adjacent walls, but first I returned to the staging and applied the second coat of poly to the wall area I had begun earlier. This brought the completed work down to the first level of staging, below which I had yet to clean or sand. That's coming in the next several days. |
|||
 At
9, I received a materials delivery that I had been waiting for, and
as soon as the truck left, I cleaned up and prepared to leave, for I
had an appointment today--on the water, sailing! I drove down
to Falmouth and went sailing with Nathan on Dasein. The
day was perfect in all ways: perfect wind, perfect
temperature, and just a glorious sail. It was my first time on
the water since I hauled the boat out early last September, so it
was sorely needed. At
9, I received a materials delivery that I had been waiting for, and
as soon as the truck left, I cleaned up and prepared to leave, for I
had an appointment today--on the water, sailing! I drove down
to Falmouth and went sailing with Nathan on Dasein. The
day was perfect in all ways: perfect wind, perfect
temperature, and just a glorious sail. It was my first time on
the water since I hauled the boat out early last September, so it
was sorely needed.(Photo blatantly and unapologetically stolen from Nathan's website.) |
|||
TUESDAY, JULY 18, 2006 |
|||
 Today
was more of the same: ceiling sealing (haha) interspersed with
some interior framing. All of this work is leading up to the
installation of the windows, which I hope to do soon. But
first there are a number of tasks that must be addressed, beginning
with these. Today
was more of the same: ceiling sealing (haha) interspersed with
some interior framing. All of this work is leading up to the
installation of the windows, which I hope to do soon. But
first there are a number of tasks that must be addressed, beginning
with these.By now, you have surely lived through enough description of the ceiling work, so I shall spare you more...except to say that I finally finished the areas I had begun sanding last Thursday, and the ceiling in the great room is now done--except for a few board widths just above wall height (easy to reach later), and also one section above the staircase, as I mentioned before. Soon, I will address these and other areas. The cleaning/sanding/finishing process is far, far from over. But I've slain one mighty dragon nonetheless. |
|||
 In
between coats and sections, I continued work upstairs, and framed up
the wall separating the bedroom from the bathroom. This took a
surprisingly long time, since I first had to transfer the bottom
plate location up to the ceiling and install a top plate
there--easier said then done, but with some measuring and
transferring, eventually I located the plate directly above its
counterpart on the floor. Then, I laid out the bottom plate
and a second top plate, marking the stud location and the door
opening. I made a slight change from the plan--something I had
known all along I would do--and moved the door over a bit, enlarging
the area where the shower would go (it had been drawn with a 3x3
stall--too small, and we're not planning on a prefab shower anyway)
and decreasing the size of a linen closet shown on the plan. In
between coats and sections, I continued work upstairs, and framed up
the wall separating the bedroom from the bathroom. This took a
surprisingly long time, since I first had to transfer the bottom
plate location up to the ceiling and install a top plate
there--easier said then done, but with some measuring and
transferring, eventually I located the plate directly above its
counterpart on the floor. Then, I laid out the bottom plate
and a second top plate, marking the stud location and the door
opening. I made a slight change from the plan--something I had
known all along I would do--and moved the door over a bit, enlarging
the area where the shower would go (it had been drawn with a 3x3
stall--too small, and we're not planning on a prefab shower anyway)
and decreasing the size of a linen closet shown on the plan.Then, it was a matter of cutting the studs to length and installing them one at a time--a pretty slow process alone, but fun to do anyway. |
|||
|
Later, I repeated the top plate process with the other section of wall, the one forming the face of the walk in closet. But I decided that before I framed in this wall, I needed to do the other bathroom wall--the so-called "wet wall", framed with 2x6s to allow room for plumbing stacks and piping. I installed the top plate and, after layout, began installing studs, again each custom-cut to fit in the space between the angled ceiling and floor. It was getting late, and I had no more 2x6 inside; it was raining outside as a front passed through (I love my roof!!!), and most of the 2x6 I had had been used as part of the exterior roof staging, many of which were still nailed together. So I called it quits at this point (6:00). |
|||
MONDAY, JULY 17, 2006 |
|||
|
After a much-needed day of rest,
during which we window-shopped for flooring, chimney material
(stone), and other things for the house, I started the day
back up on the staging, intending to finish the finish on the
ceiling. Beginning where I left off on Saturday, I applied the
first coat to the ridge and peak area, and all seemed to be well.
A little later, I began to apply the second coat to this area, but as I pressed on I noticed, disturbingly, that the new finish was remaining white rather than quickly becoming clear as I had become used to. It was a very humid, foggy morning, and I feared the finish was not drying properly. By the time I noticed, I had virtually completed the second coat on the highest areas, so for better or worse I continued until I had recoated the whole area. Hoping against hope that the finish would eventually dry properly, I stopped at this point to wait and see, rather than continue the finishing work if things were going horribly wrong. |
|||
|
While I waited, I built one of the upstairs wall--the one that defined the stairwell and the bedroom wall. This was a simple wall, complicated only by the need to cut and fit each stud individually. It was fun building the wall, and sure beat sanding and varnishing on the staging! It anything, this hardened my resolve to get the interior finishing over and done with as soon as possible. |
|||
|
|
|||
 While
I built the wall, the sun had come out, and when I checked the
ceiling I noticed that the finish had dried properly and
clear--phew. So I continued with the finishing, and completed
the next-to-last bay between the ceiling ties, and then moved the
staging so I could continue with the final bay, up against the log
gable wall. I managed to get 2 coats on one side of the
highest section before it became too late to consider beginning
more, as each section took an hour or so for the first coat, drying
time, and 30-40 minutes for the second coat. While
I built the wall, the sun had come out, and when I checked the
ceiling I noticed that the finish had dried properly and
clear--phew. So I continued with the finishing, and completed
the next-to-last bay between the ceiling ties, and then moved the
staging so I could continue with the final bay, up against the log
gable wall. I managed to get 2 coats on one side of the
highest section before it became too late to consider beginning
more, as each section took an hour or so for the first coat, drying
time, and 30-40 minutes for the second coat. |
|||
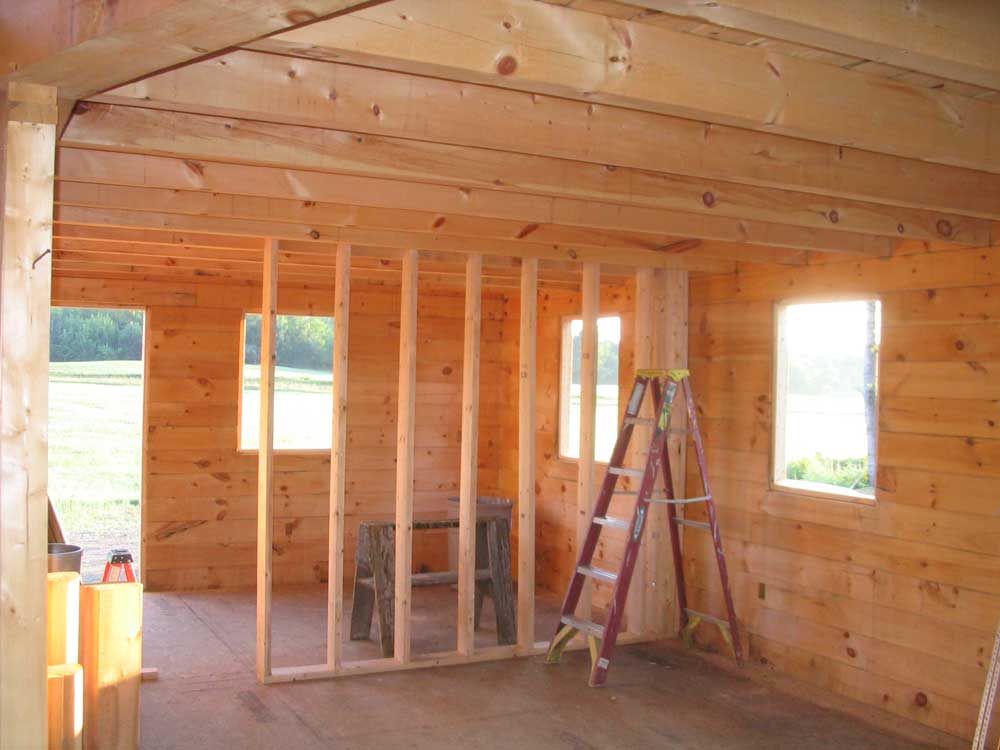
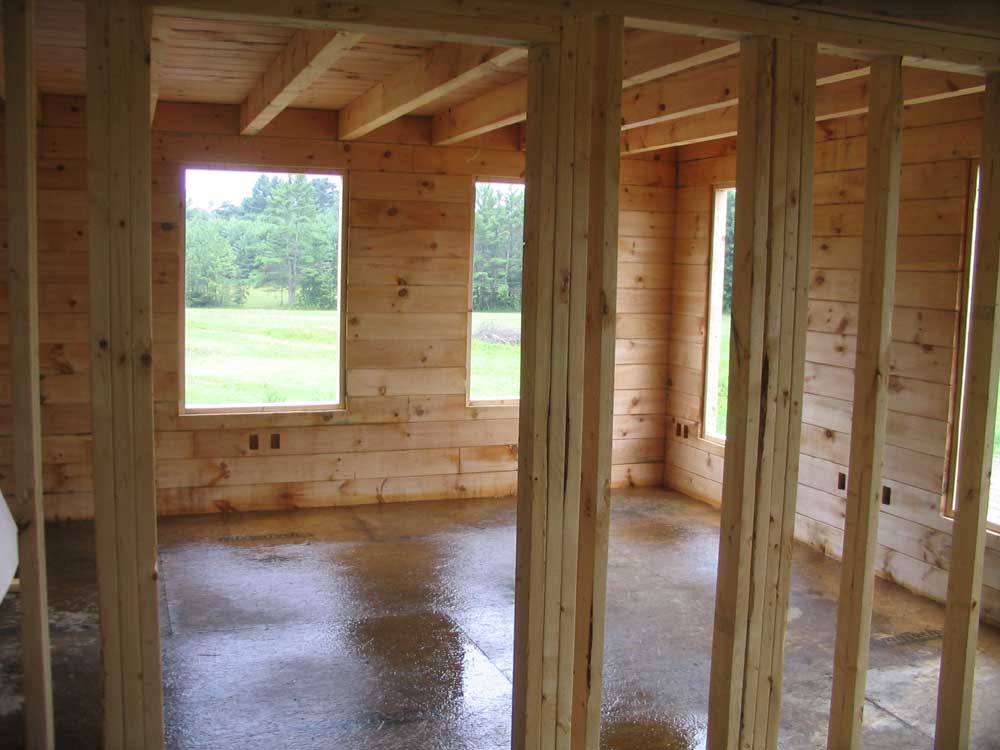
 In
between coats and sections, and then late into the day, I continued
work upstairs. I wanted to lay out and build the remaining
interior walls so that I could properly tie the shed dormer into the
house and remove the last remaining braces and temporary supports.
I worked on the layout, reconciling the actual situation with that
shown on the plans, and shifted things a small amount as needed to
fit in with the reality of the house as built. Then, I managed
to get the bottom plates for the walls installed, working into the
evening. The plates defined for the first time the spaces
upstairs--bathroom on the left, closet center, and the loft beyond
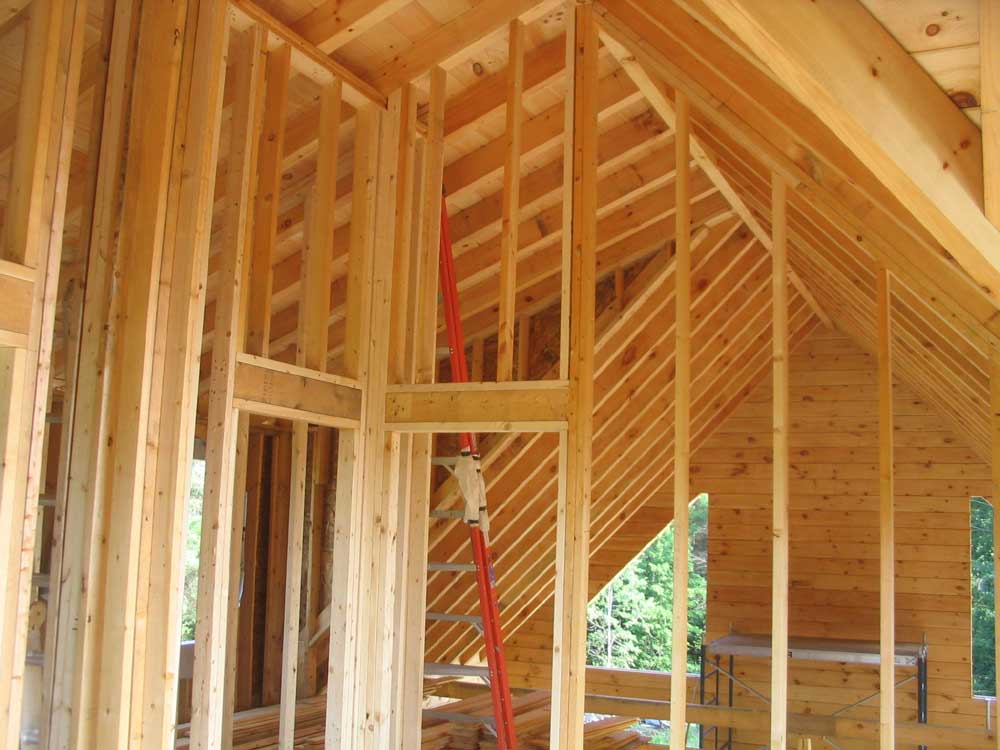
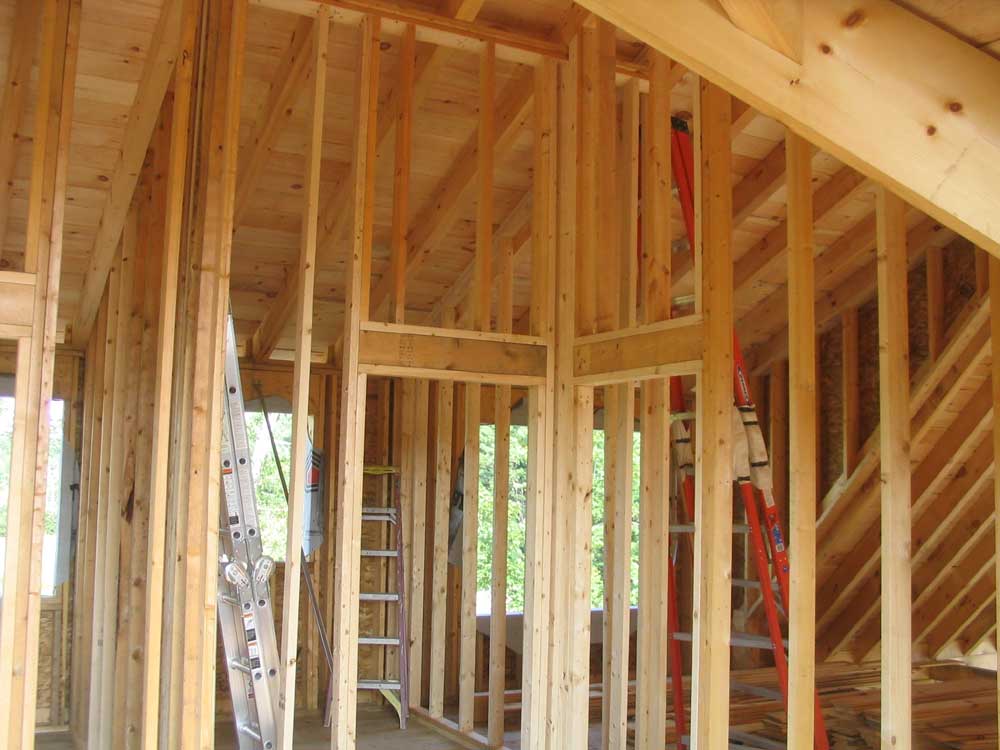
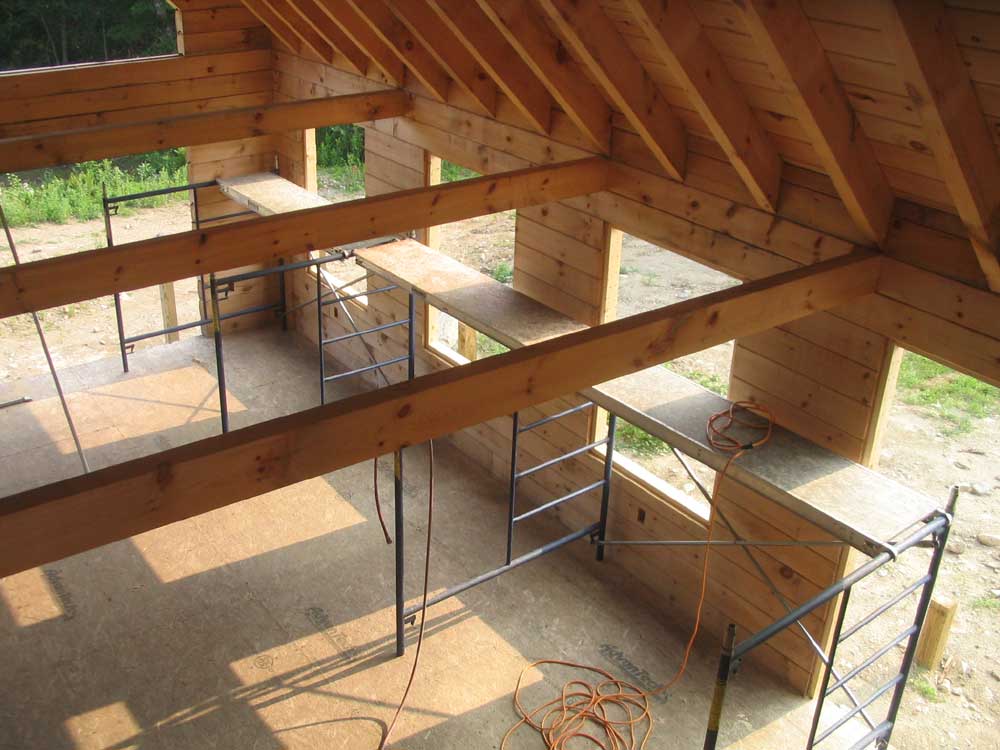
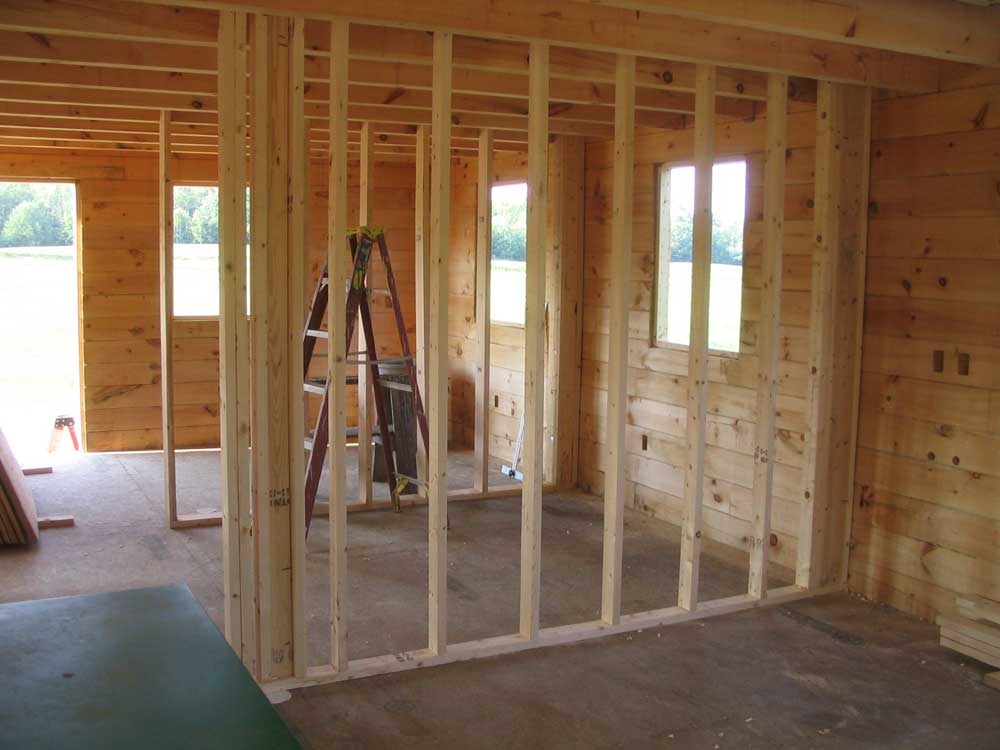
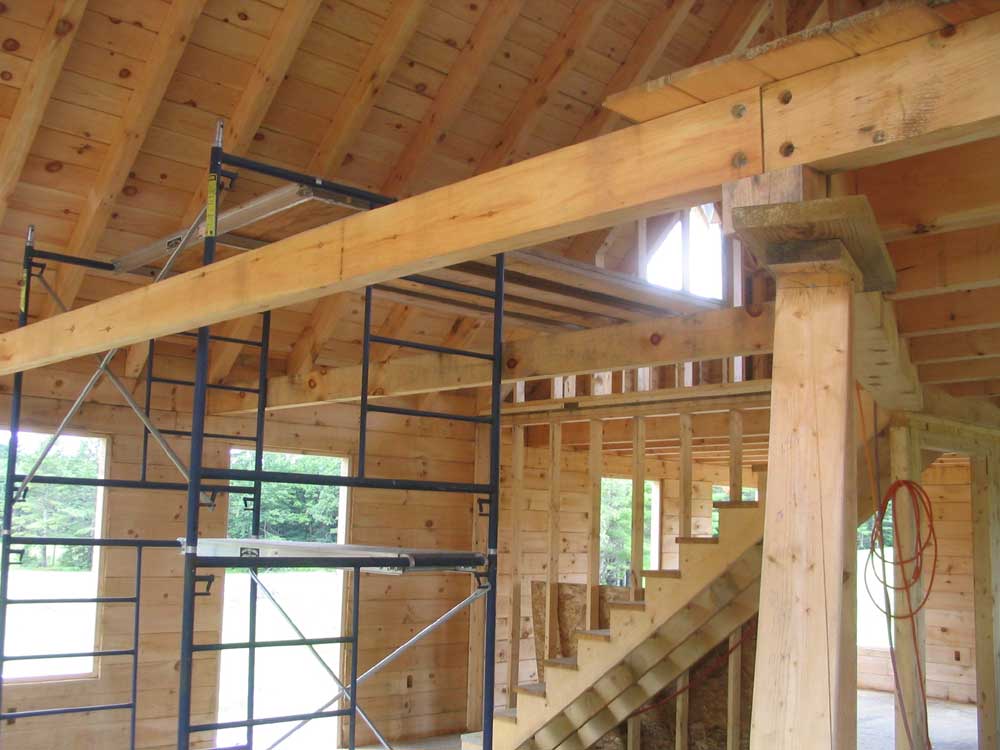
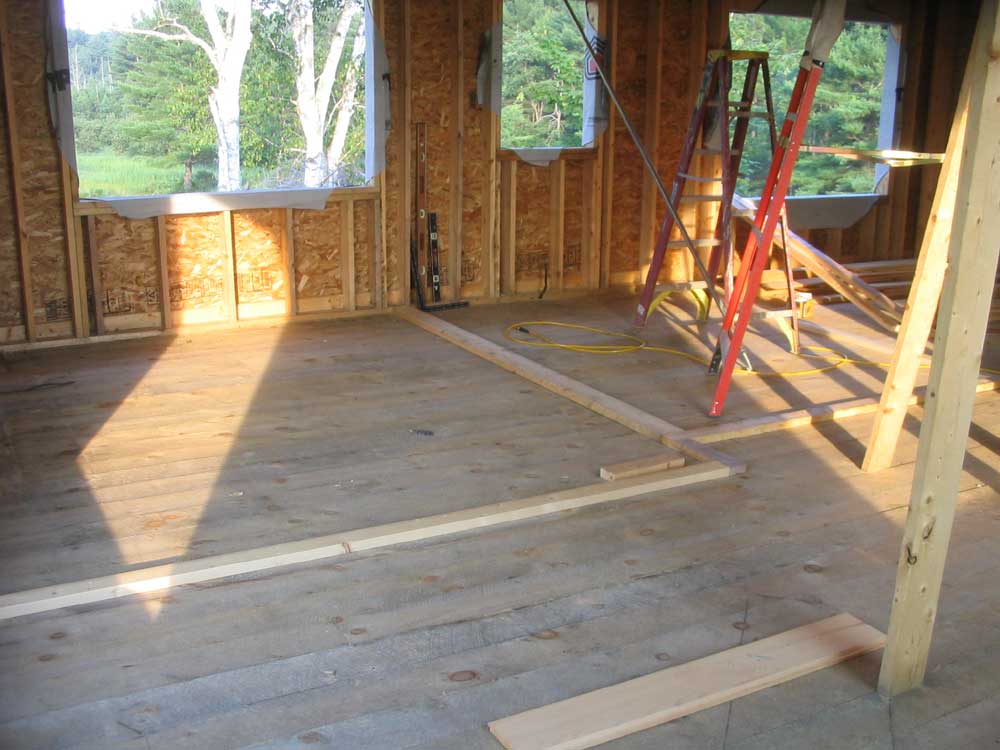
as seen here. In
between coats and sections, and then late into the day, I continued
work upstairs. I wanted to lay out and build the remaining
interior walls so that I could properly tie the shed dormer into the
house and remove the last remaining braces and temporary supports.
I worked on the layout, reconciling the actual situation with that
shown on the plans, and shifted things a small amount as needed to
fit in with the reality of the house as built. Then, I managed
to get the bottom plates for the walls installed, working into the
evening. The plates defined for the first time the spaces
upstairs--bathroom on the left, closet center, and the loft beyond
as seen here. |
|||
 This
view is taken from the opposite vantage point and shows the bedroom
in the background, with the closet and bathroom to the right. This
view is taken from the opposite vantage point and shows the bedroom
in the background, with the closet and bathroom to the right. |
|||
| Click here to read the logs from July 1 to July 15. | |||
|
|||