
|
Equinox Project | Wednesday, March 25, 2009 It was one of those days consumed by myriad small projects, few of which actually managed to be expunged in entirety from the punch list because of the usual extra steps that arose along the way, which steps delayed, at least for a short while, the final completion of the task at hand. Sometimes the simplest things are so complicated. I began by sanding and then varnishing again the mast beam, this time with the satin rubbed-effect varnish that I used elsewhere in the interior. |
 |
|
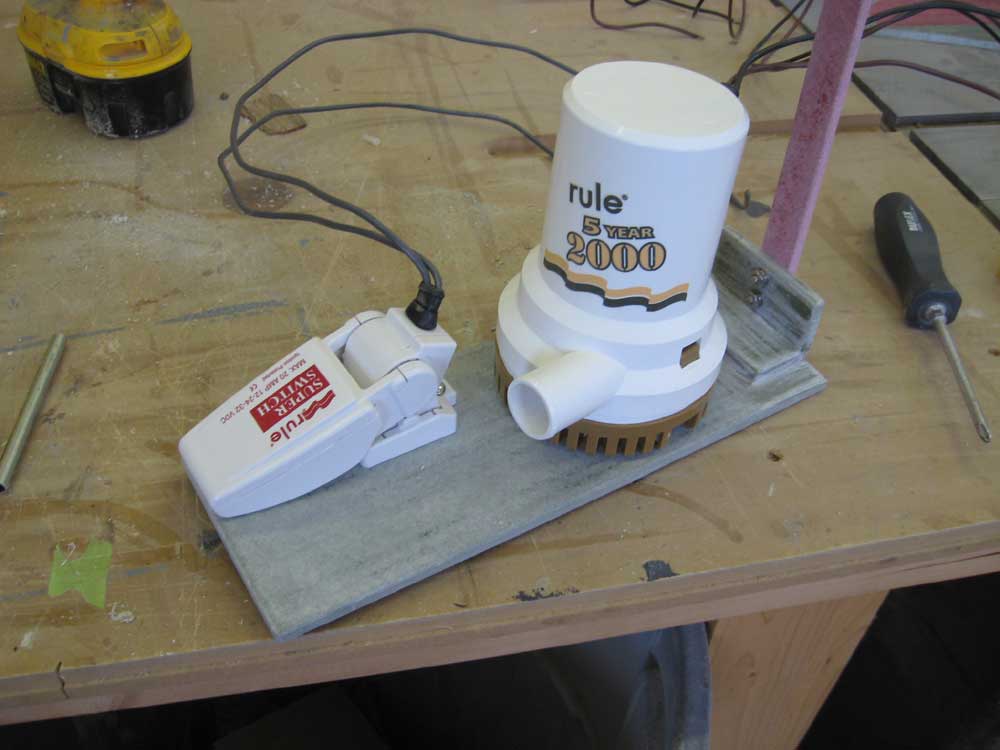
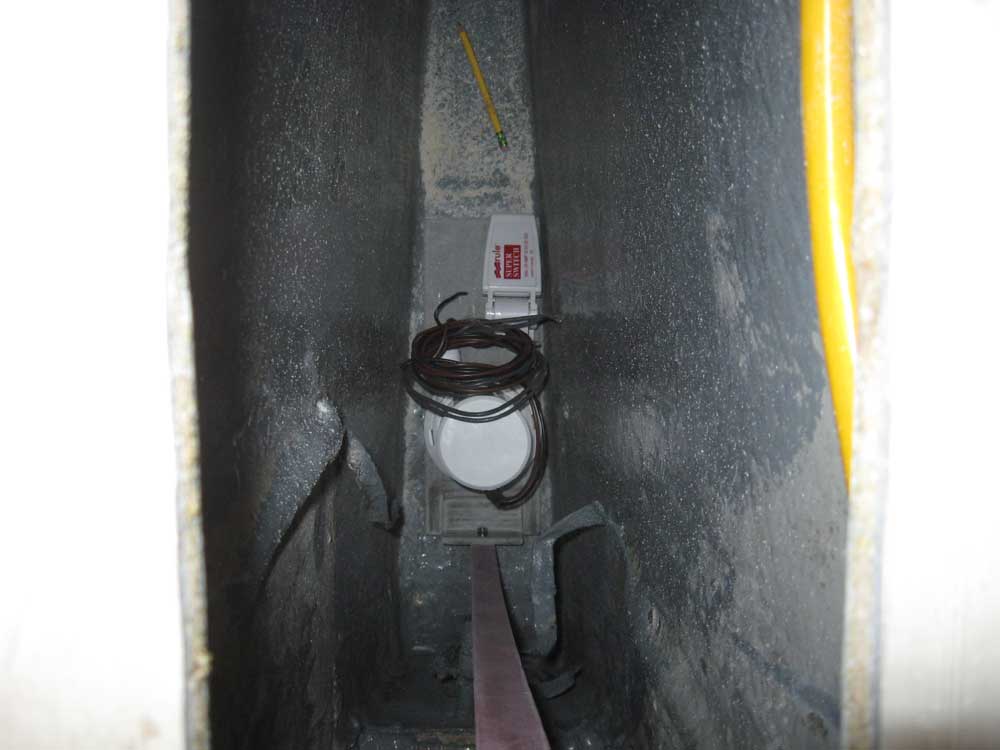
Next, I turned to the bilge pump arrangement. I cleaned up the newly-glued base plate, and then bolted a long, narrow strip of fiberglass to the vertical part of the angle on the aft end, to act as the lifting and securing stick as well as provide a place to secure the pump wiring out of the way. Then, I arranged the pump and float switch on the platform, and temporarily installed them. |
 |
|
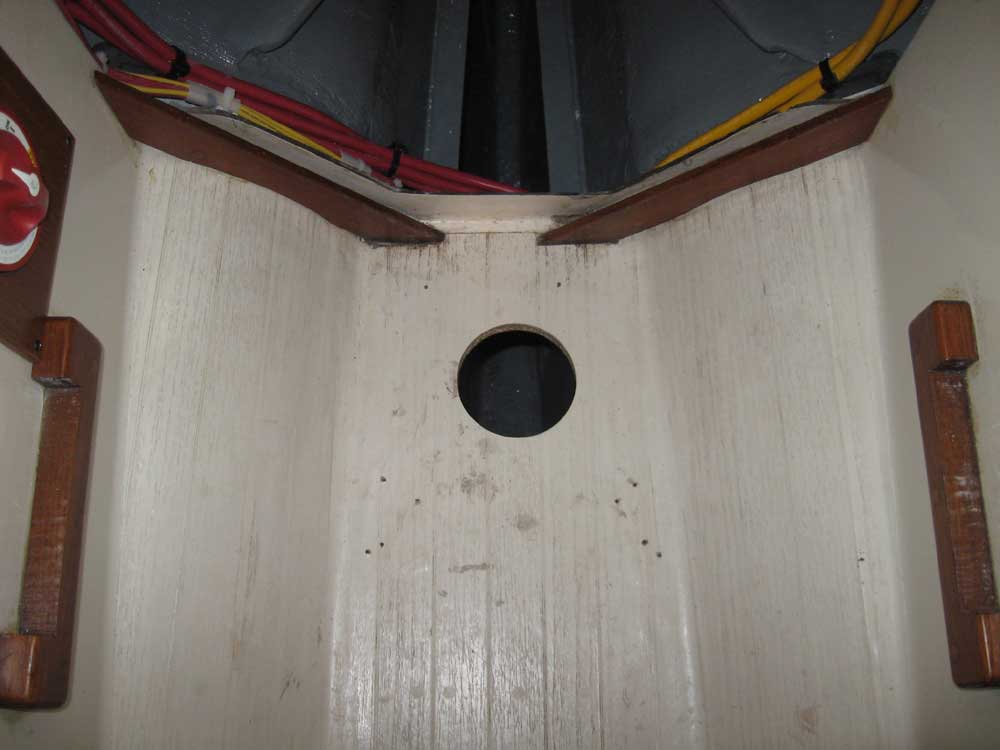
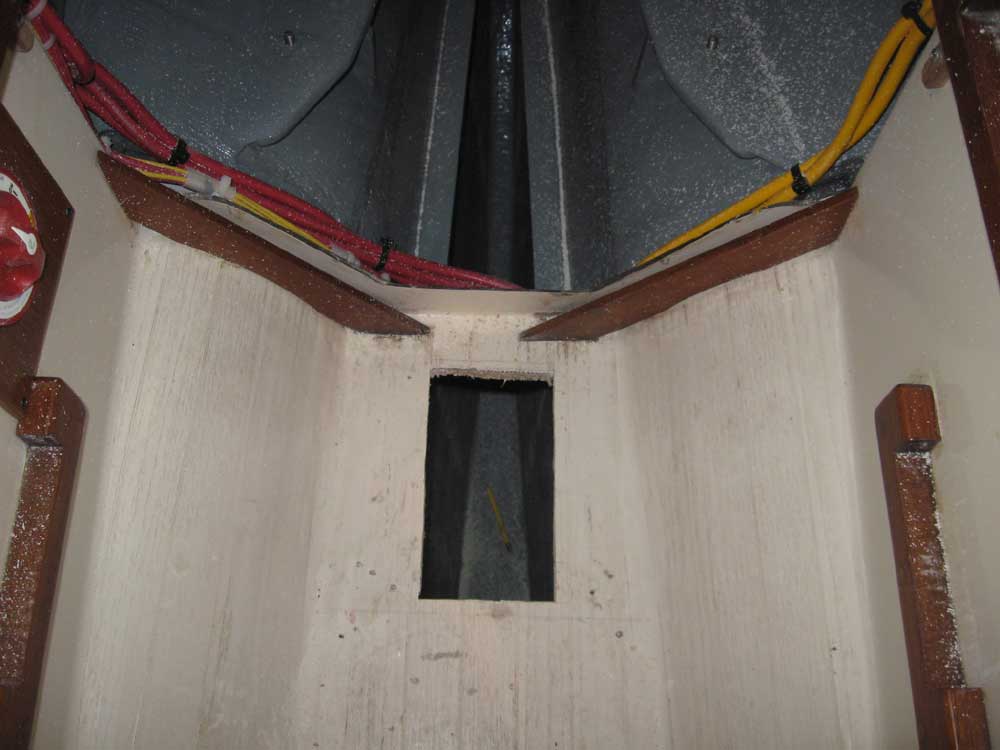
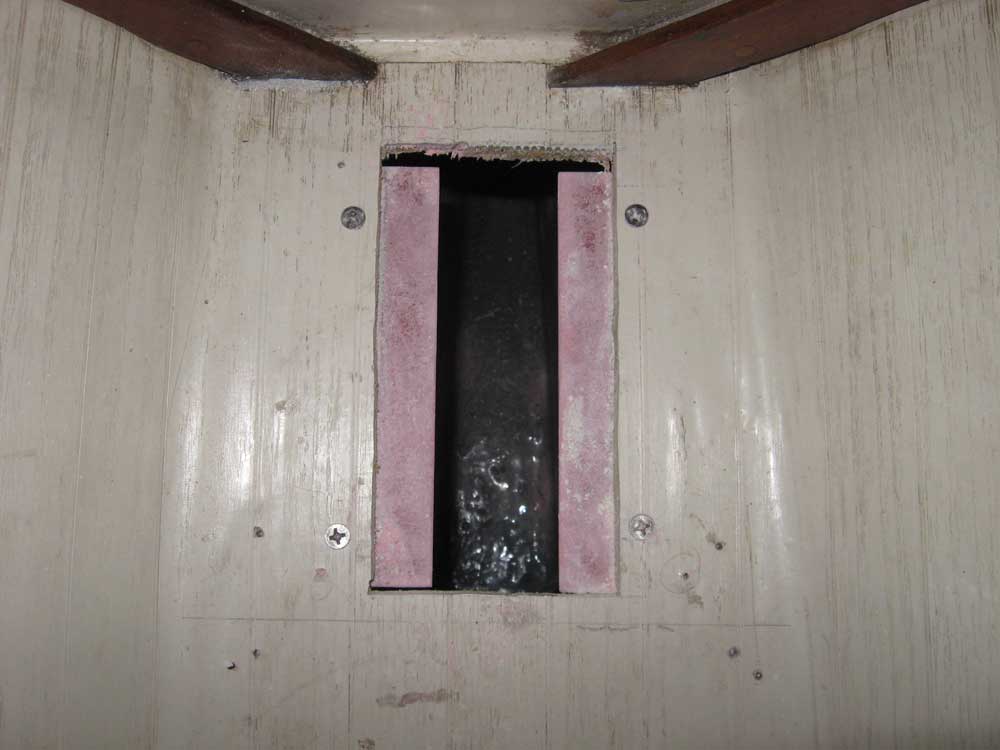
In order to get the pump into and out of the bilge, both now and in the future, I had to make some modifications to the cabin sole. The only way to get this arrangement, which was substantially larger than the small pump that had once been installed here, into the bilge would be to go straight down. There was already a round access hole located beneath the companionway steps, but it wasn't large enough. Since this section of sole happened to have its own small, separate portion of teak veneer covering, I could make a new, larger access hatch with relative ease. Space was limited, between the need to maintain the new opening within the confines of the small section of teak sole, existing wiring in place beneath the sole, and the general shape of the hull immediately beneath. So I marked off the width of the new fiberglass base plate, and determined the length of the opening by making it as long as possible while still keeping it within the bounds of the sole veneer. Then, I cut the opening, being sure that my saw blade missed all the wires beneath. With the new opening, I was pleased to find that it was relatively easy to angle the new pump base, with pump and switch attached, into the slot and down to the base of the bilge. I marked the lifting stick where it met the bottom edge of the opening so I could cut off the excess, and, after doing so and removing the pump and switch, I coated the whole new pump platform with paint and set it aside. |
  |
|
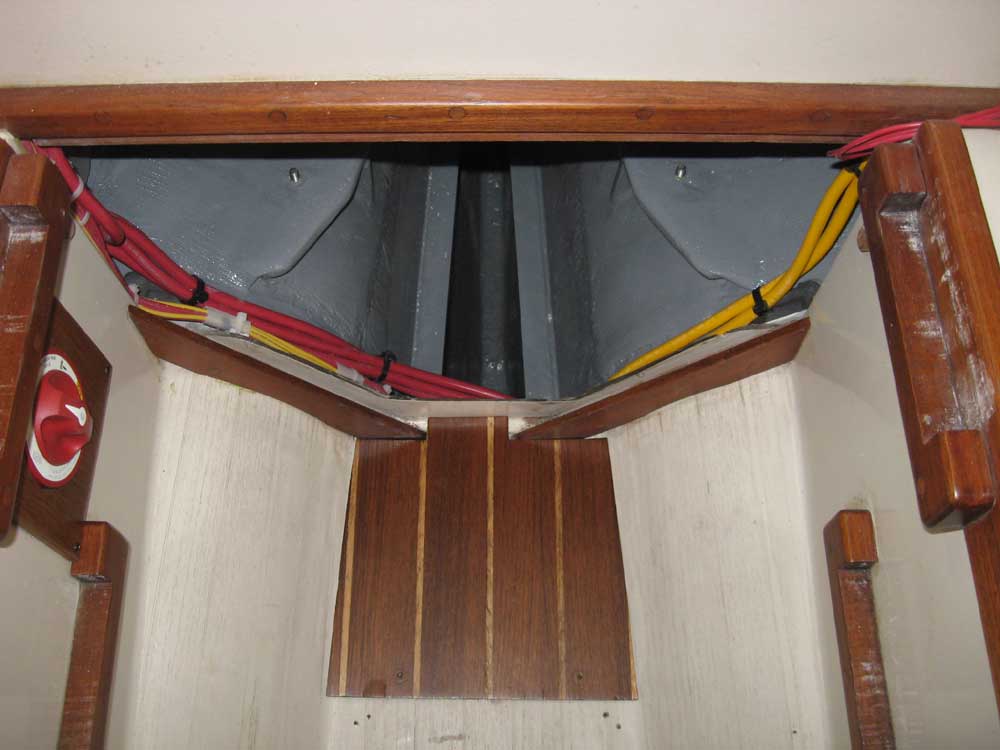
In order to support the thin cabin sole veneer, even though it was located in an area where one wouldn't tend to walk with regularity (beneath the companionway ladder), I planned to glue the cutout piece of the substrate to the bottom of the teak, which in turn I could support with cleats beneath the existing sole. However, because the opening was just wide enough as it was to allow the pump to pass through, I'd have to make the support cleats removable. I cut a pair of 2" wide cleats from 1/4" fiberglass sheet, and then clamped them in place with one inch exposed in the opening (and therefore one inch beneath the sole substrate), and drilled and tapped and countersunk for 1/4" machine screws to secure them from the top. This would make removal and replacement easy whenever it became necessary in the future. I removed the cleats and set them aside for now. Later in the day, I epoxied a short length of fiberglass angle at the aft end of the opening and flush with the edge, to which I could later screw the vertical lifting stick to secure the pump in place. |
 |
|
I optimistically chose a number of jobs from my list that I hoped to wipe clean this day, beginning with the GPS antenna wiring. I laid out a Blue Sea Cable Clam on the deck next to the pulpit, where the wiring would pass through, and began the installation process. Of course, as soon as I started i realized I'd need to overbore some screw holes and fill with epoxy, to isolate the deck core, so after first drilling the large hole in the center for the cable connector, I marked and drilled the four screw locations, masked off, and filled the holes with epoxy. That ended the progress on that job for the day; tomorrow I could continue. |
 |
|
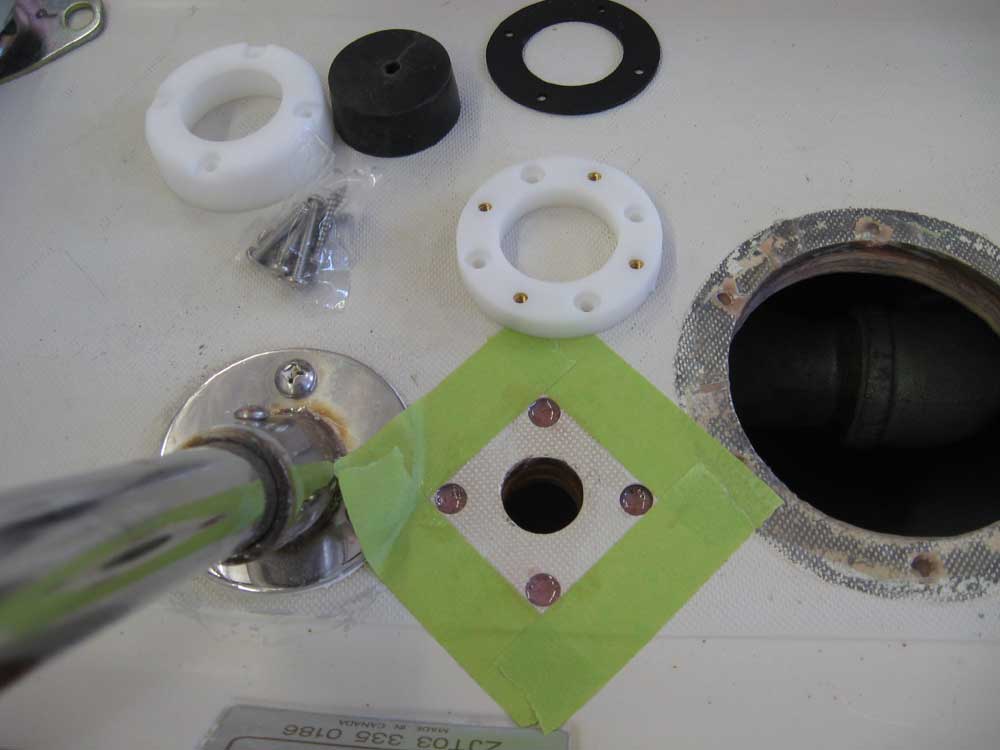
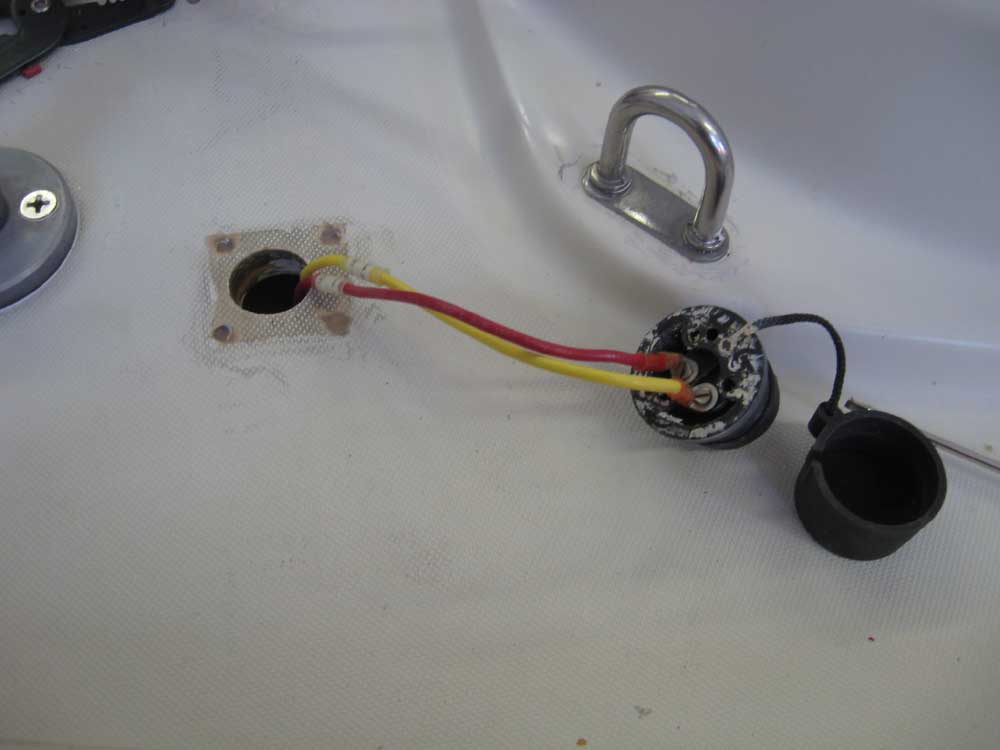
Next, I thought I'd wire and install the plug for the tillerpilot. The original plug that had been installed was long gone and had never been on the boat during my time with her, and I had a new plug assembly on hand that would work, though it would require replacing the end on the tillerpilot cable itself. Fortuitously, however, I discovered that one of the plug fittings that had originally been installed for some of the mast wiring (which I'd be reconfiguring) was a perfect match for the tillerpilot plug, so I decided to use that. I found, however, that the existing hole in the deck was large enough that the screw pattern for securing the new plug wouldn't clear the hole, so in order to install the plug I had to make a small round base plate large enough to cover the existing deck hole. I made the plate from 1/4" fiberglass and painted it white, setting it aside until later. |
 |
|
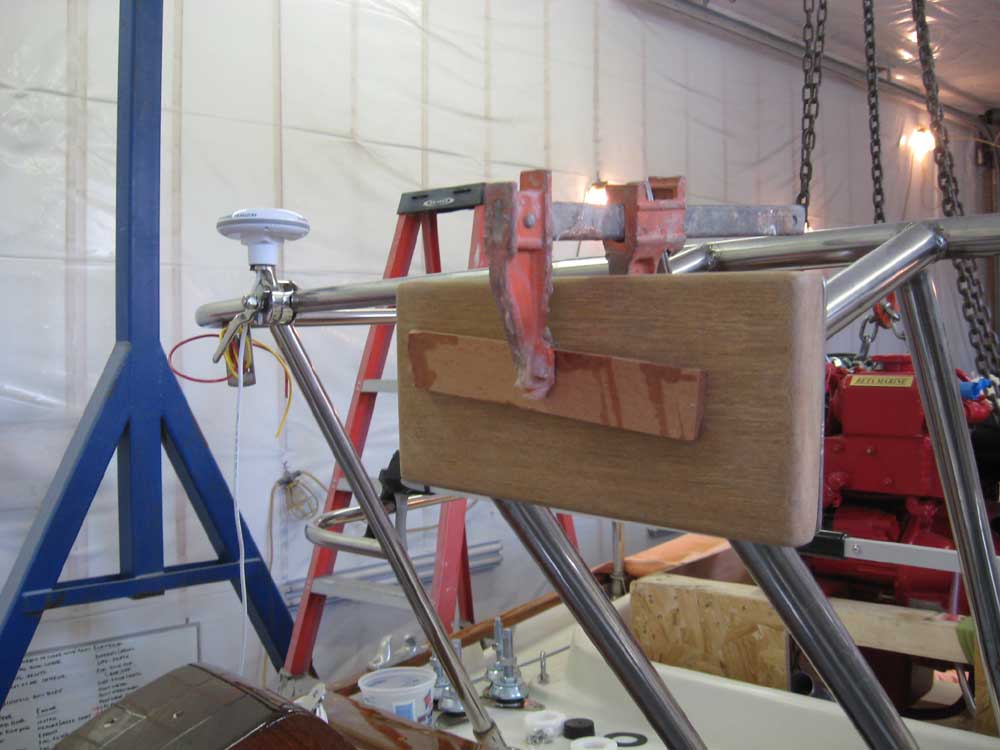
The stern pulpit had previously had an aft-facing support installed that reportedly was used for a now-abandoned windvane, and since this support was permanent, the owner suggested that it could be recycled as a dinghy outboard outboard bracket. To this end, I cut a piece of teak to fit the existing SS plate on the support, marked and drilled for screws in the existing holes on the plate, and applied a first coat of varnish. That job I was able to wipe off the list. |
 |
|
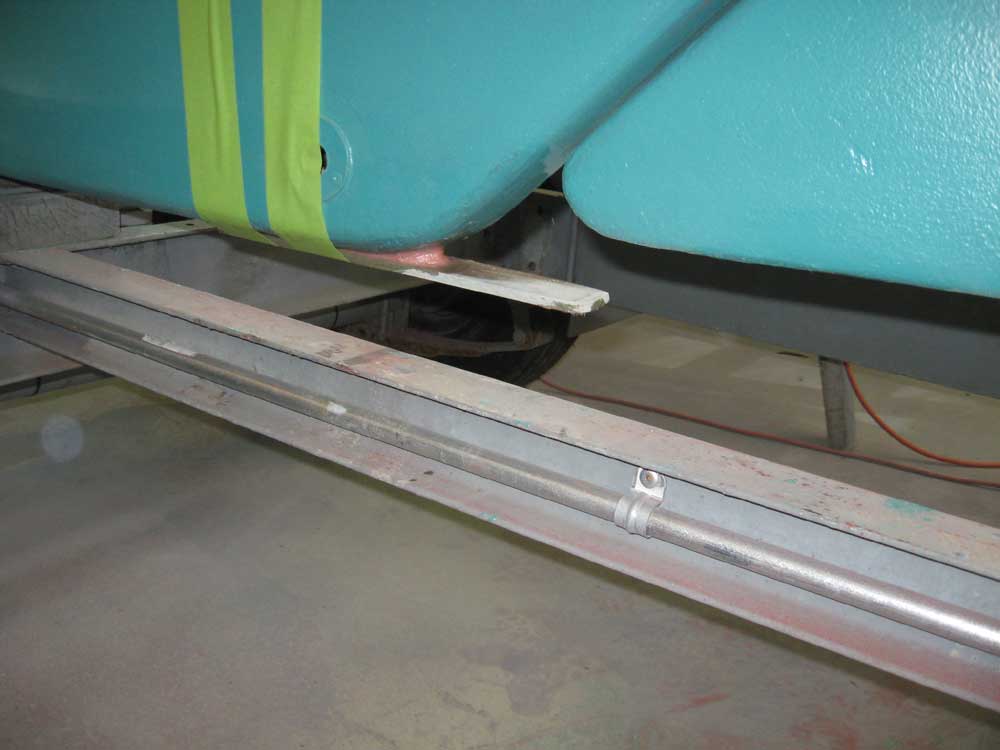
Full keels are generally good designs for use in the lobster pot-infested waters of northern New England, this boat's home waters, but one problem area for line catching remains: the small gap between rudder and deadwood. However, there's a simple fix: install a small batten to the lower edge of the keel that extends far enough aft that any line passing beneath would bypass the gap and pass harmlessly aft of the rudder. I made a batten from more 1/4" fiberglass, shaped it slightly, and epoxied it to the base of the keel after first removing the bottom paint from the bonding surface. I taped the strip in place while the epoxy cured, and later would fillet and fair it in smoothly as needed. I cleaned up the shop, which was a bit messy after a couple weeks' neglect, and which was clearly impacting my work progress, and called it a day, after first working on several more parts orders in an effort to predict and have on hand what I'd be needing in the coming days. |
 |
|
|
|
