
|
Equinox Project | Thursday,
February 12, 2009 |
|
There's also to be a rudimentary AC system, with a battery charger and 110 V receptacle, which is not included in the schematic. |
|
While the schematic is by no means the final word, nor a firm blueprint for how things would go, it did serve to organize my thoughts a bit and helped finalize my ideas on the materials I'd need for the project. I determined a number of suggestions for panels, battery switches, and ancillary equipment that I'd discuss separately and privately with the owner before moving forward. In any event, I'd gotten done what I needed to in order to move the electrical project forward towards its actual inception. |
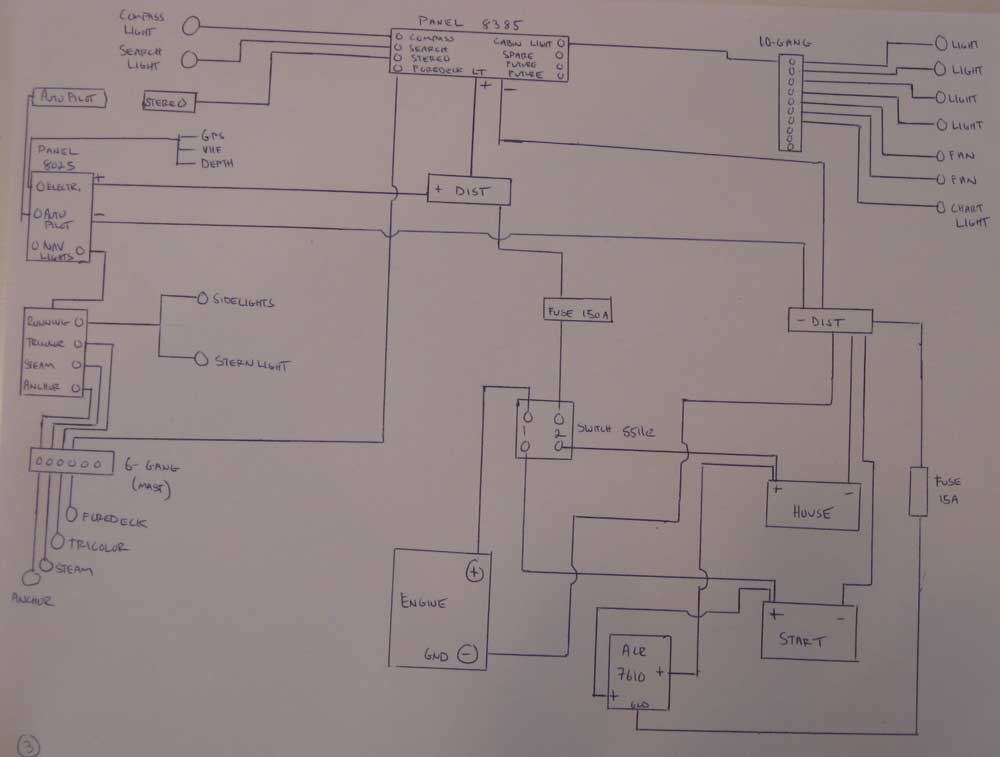 For an extra-large version of this schematic, click this link. |
|
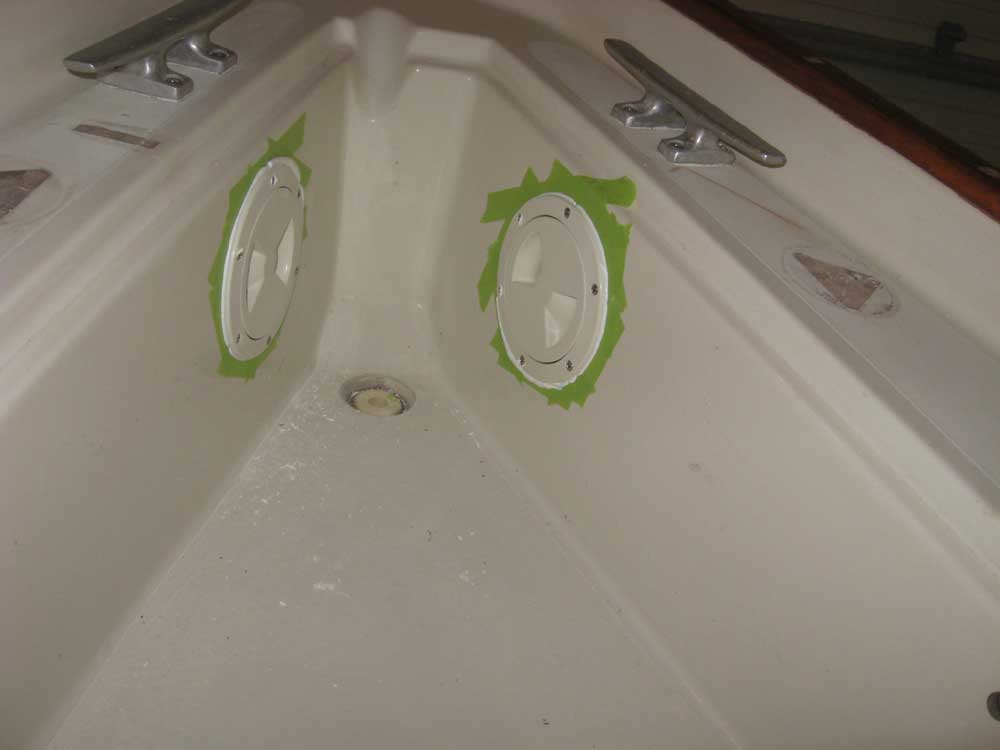
After a full morning in the office, online and buried in catalogs, I'd had enough of that, so after lunch I went out to the shop to do some real work. I began with installing the new screw-in access hatches in the anchor well, to fill the holes I'd drilled earlier so as to gain access to the bow cleats' mounting hardware. I taped around the two small hatches, drilled pilot holes, and installed them using LifeSeal. I refuse to use 100% silicone anywhere on a boat, ever, so this polyurethane/silicone blend (which, frankly, is just as irritating and unpleasant to use as silicone) is my choice when I have to install certain plastics that are not compatible with polysulfide. I left the sealant to fully cure before I made attempts to remove the excess squeezeout from around the edges. |
 |
|
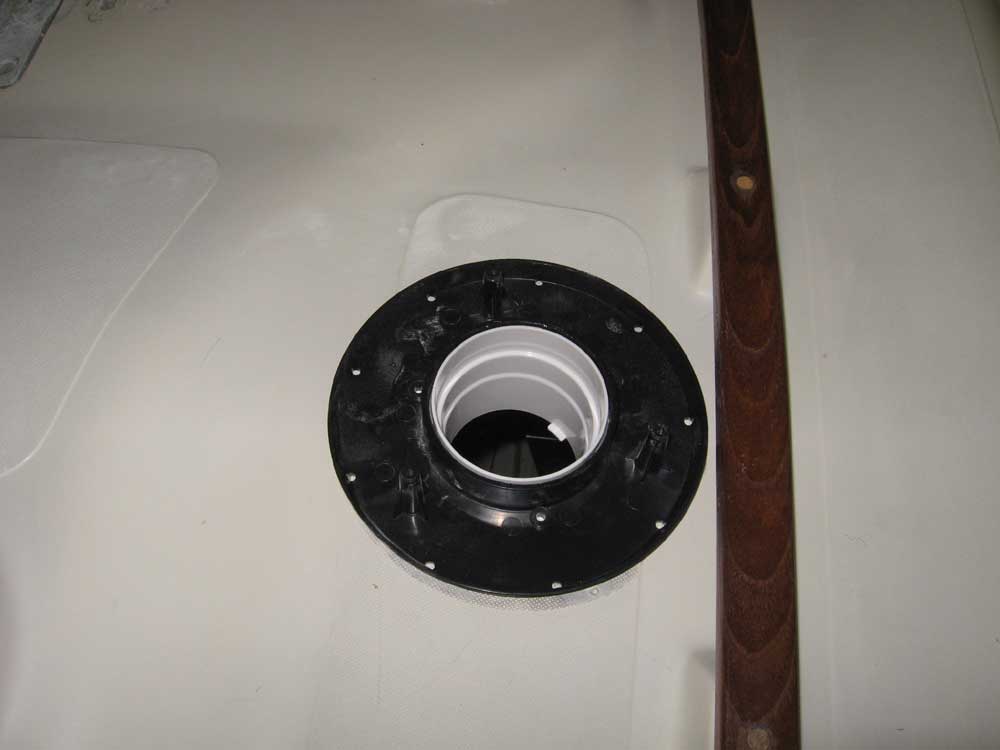
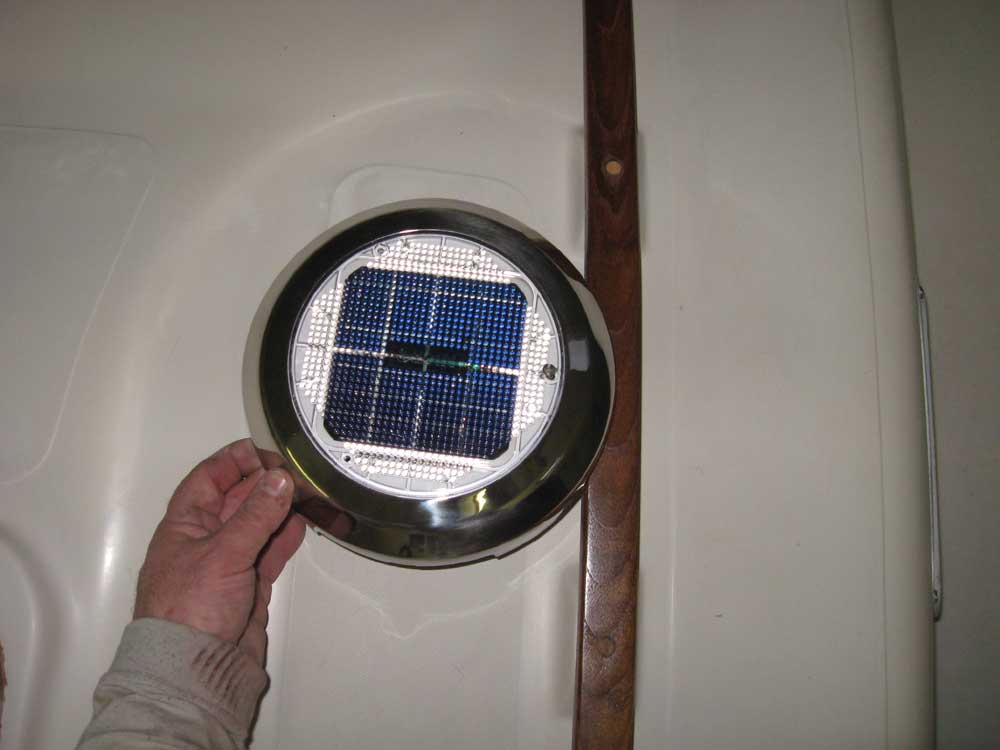
I had hoped to install a new solar vent while I had the LifeSeal open, but I discovered that the cover of the vent--i.e. the main part of the vent--wouldn't clear the handrail. The base plate cleared adequately, and I'd not checked this earlier (in error, obviously) because I made the foolish assumption that since the base plate was a good fit, the top must be also; I hadn't anticipated the top being so much larger than the base (though I ought to have known better). So for the moment, I left this alone for now. Later, after some searching, I found a so-called "mini" solar vent, which used the same through-deck size as this one (3"), but had a smaller overall vent diameter (7" versus 9") that would fit within the space I needed. I made arrangements to return the larger vent, and ordered the small one in its stead. |
 |
|
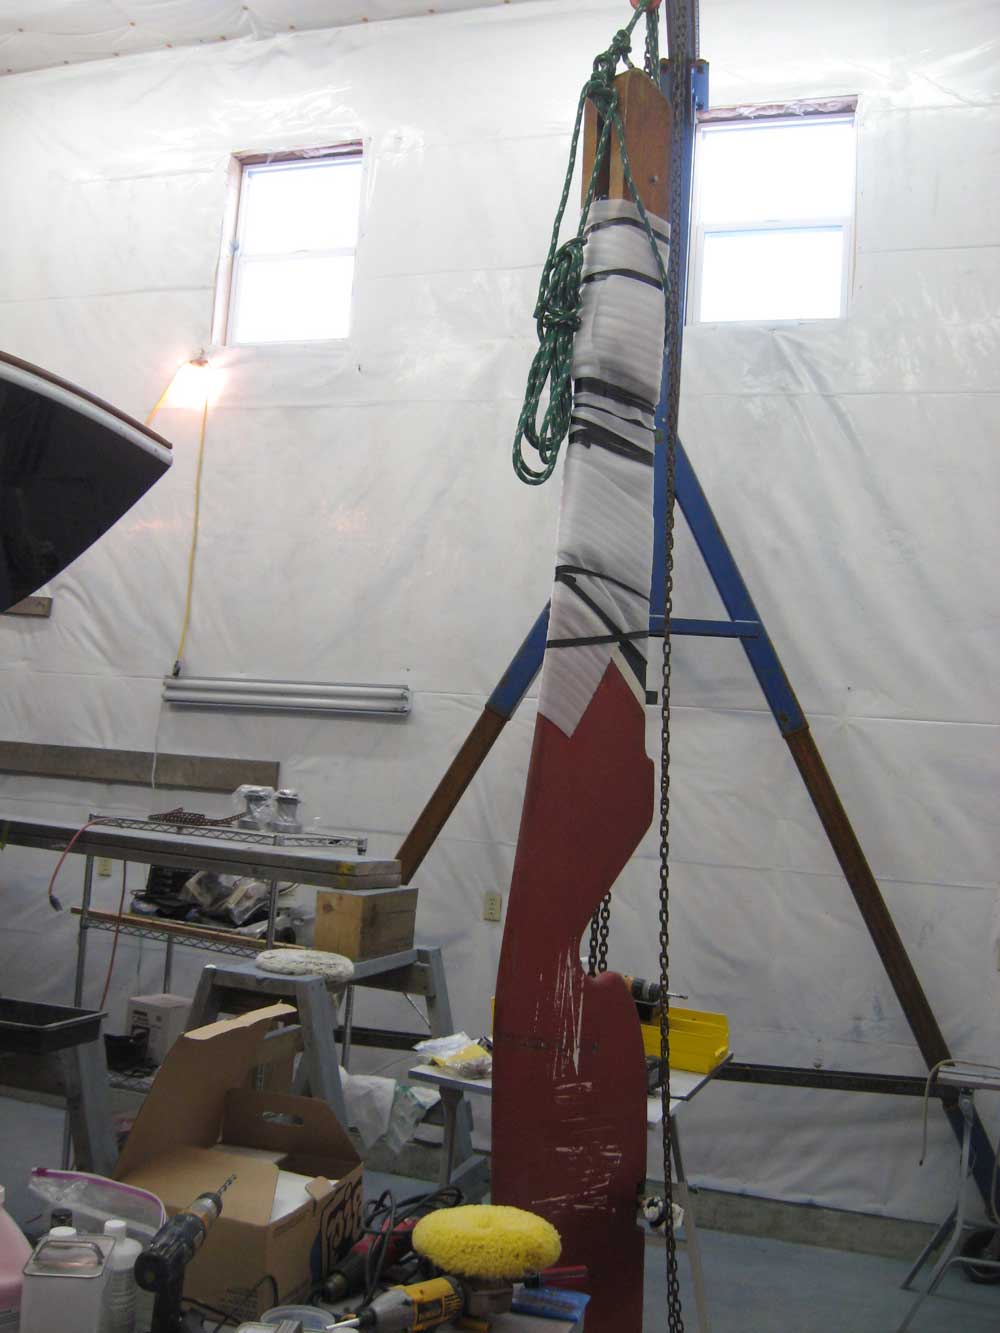
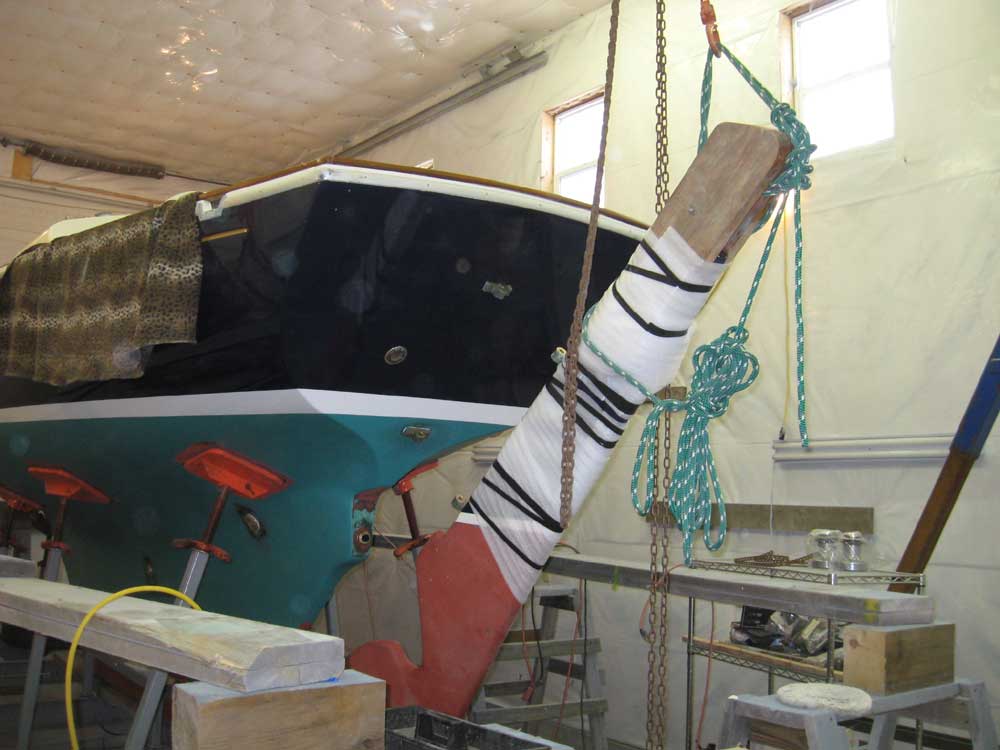
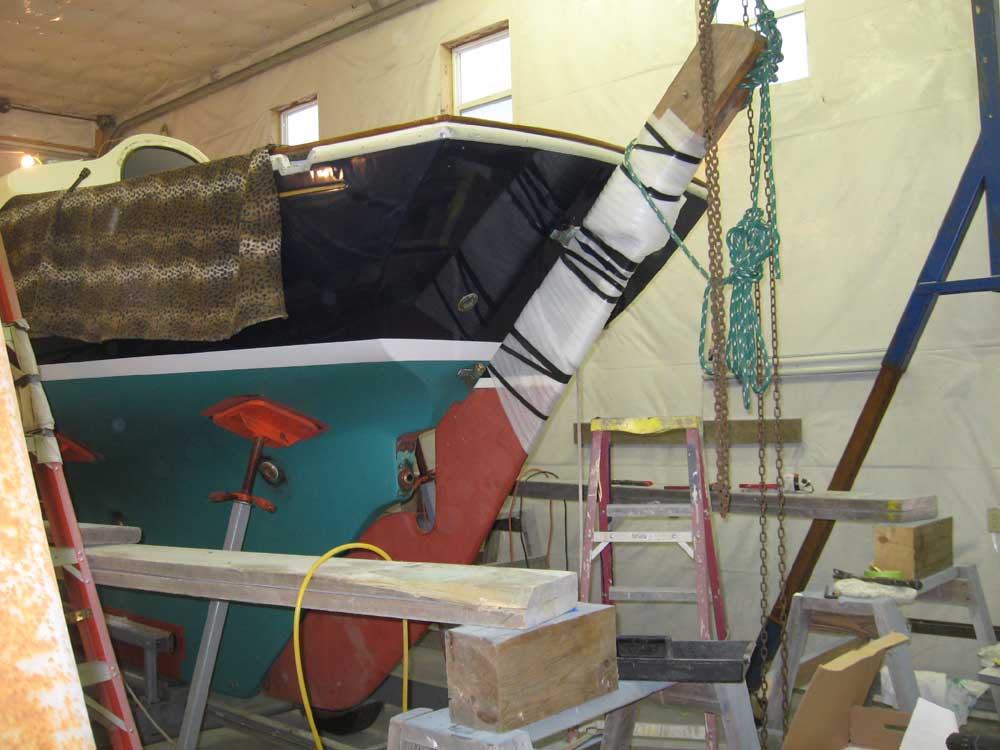
Next, I decided to install the rudder--time to get that out of the way. Using my shop crane, I lifted the rudder vertically, and then angled and lowered it into the appropriate position. I removed the pin from the lower gudgeon/bolt and threaded it through the hole in the deadwood with lots of sealant, then installed a washer and nut on the inside, with lots more sealant beneath the washer. (I used brown-colored sealant because I had an open tube, and the color didn't matter here.) Then, with some effort, I lined up the rudder, beginning with the lower pin, began the threads, and then inserted the pin in the middle gudgeon as well, which I could reach from where I was; I had used a piece of line to temporarily hold the upper gudgeons in relative alignment to make the process easier. For now, I didn't finish threading in the lowermost pin because I couldn't do anymore by hand, didn't have the Allen wrench size required to turn the pin, and there was no other way to turn the smooth pin, which had insufficient clearance around it to allow for any sort of wrench. I ordered the Allen wrench I needed (1/2"), and planned to finish up the installation when that arrived tomorrow. |
  |
|
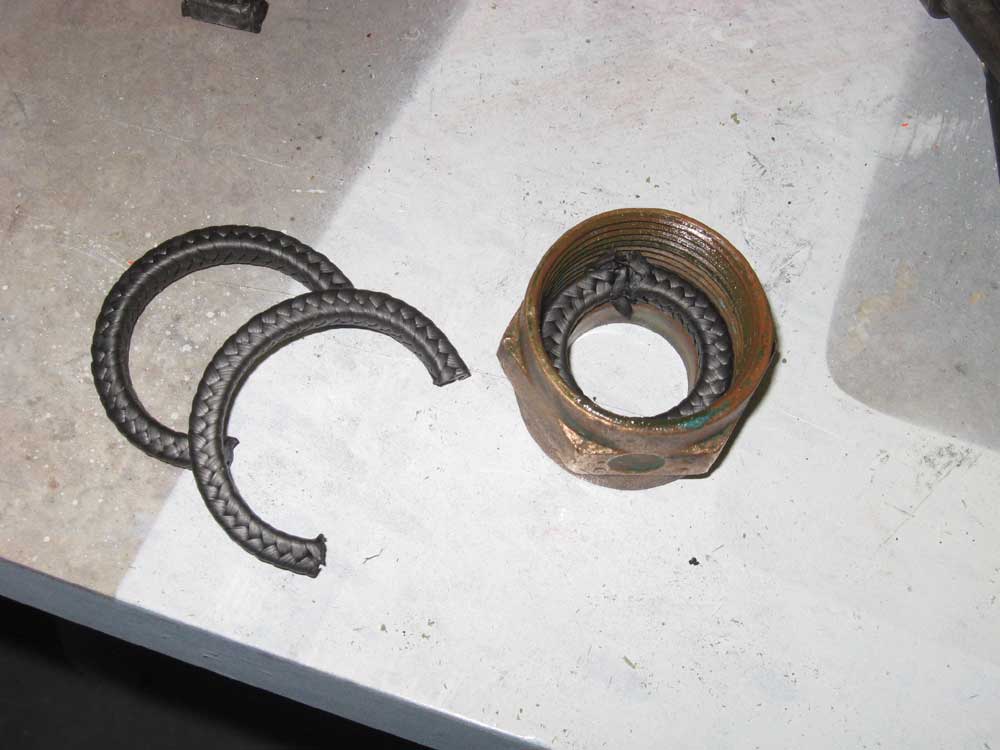
With the rudder now mostly hung, I spent a few minutes assembling the stuffing box (existing, which I'd cleaned up a bit earlier) with its new hose. I had discovered earlier that the stern tube and stuffing box were an odd size, 1-5/8" OD, and while I could have purchased wire-reinforced wet exhaust hose in that size and used that, I preferred the extra-heavy, extra-thick hose made especially for stuffing boxes, which has about twice the wall thickness and multiple plies of fabric reinforcement. Since this hose wasn't available in the correct size, I used 1-3/4" hose and installed some rubber gasket material to make up the size difference and provide a tight, compressible fit. I cut and installed three rings of new graphite packing material; I was prepared to install the stuffing box in the boat and check it off the list, but realized that I didn't want it in place till after I'd done the engine foundation construction and alignment, when I'd need the stern tube open (more on that when the time comes). I completed a few other sundry tasks, and that was that for the day. |
 |
|
|
|
