|
|
~MENU~ |
| Home |
| The Concept |
| The Boat |
| Bringing Her Home |
|
Weekly Progress Log |
|
Daysailor Projects |
| The Boat Barn |
| Resources |
| Other Sites |
| Email Tim |
|
|
|
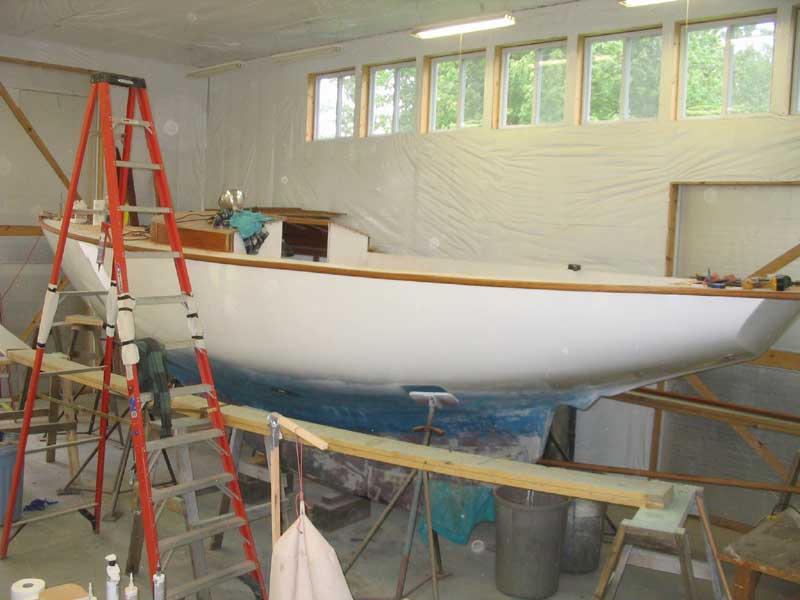
From a Bare Hull: Toerails |
| I planned full length toerails surrounding the boat, but wanted them to be fairly basic, not too high, and with pleasing shapes and proportions. The best way to determine what I wanted was to start with some mockups, so with some scrap 2x4 I began to mill some profiles that I thought might be of interest. My first attempt was not at all what I intended, so I shifted directions a bit and worked with a smooth curved/angled profile on the outside, and eventually milled up a pleasing blank that did the trick. |
|
The toerail would be one piece, and had to overlap the hull/deck joint slightly for best appearance, so I milled a rabbet on the inside to accommodate that. Presently, however, I discovered that my initial design would not work as there was not enough material hanging over the deck itself to accept the required fasteners. Discouraged, I put the test profile aside for some time while working on other projects. |
|
Eventually, I turned my attention to the toerails once more, and determined that I could add some thickness to the profile to allow the rails to overhand the decks the required amount. However, this meant that I would need some thicker mahogany--8/4 (2"), as all I had on hand was 4/4 and 5/4, since I had anticipated making the toerails from the 5/4 stock. |
|
|
|
|
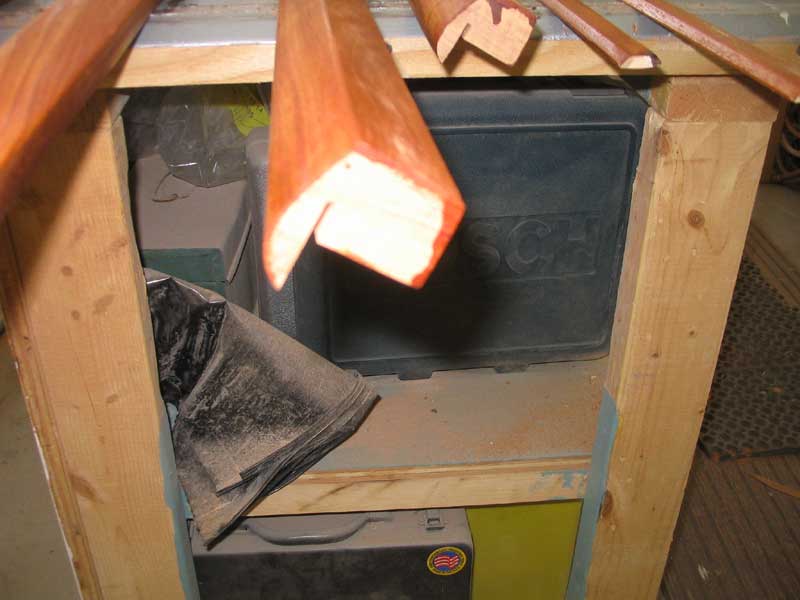 Next,
I cut a 20 degree bevel on the outside, tangent to the 1/2" round at the
bottom, and a 5 degree bevel on the inside for a more pleasing
appearance and to narrow the top of the rails slightly. This
completed the main milling operations, and now I spent several hours
sanding the pieces with 80, 120, and finally 220 grits till they were
smooth and even. Before continuing, I applied one sealer coat of
varnish to the wood, which would not only protect it during later
installation steps, but would also allow me the opportunity to choose
the most compatible pieces of wood for each side, for the most
homogeneous appearance. Next,
I cut a 20 degree bevel on the outside, tangent to the 1/2" round at the
bottom, and a 5 degree bevel on the inside for a more pleasing
appearance and to narrow the top of the rails slightly. This
completed the main milling operations, and now I spent several hours
sanding the pieces with 80, 120, and finally 220 grits till they were
smooth and even. Before continuing, I applied one sealer coat of
varnish to the wood, which would not only protect it during later
installation steps, but would also allow me the opportunity to choose
the most compatible pieces of wood for each side, for the most
homogeneous appearance. |
|
I was unsure how installation would go, quite honestly. When bending wood, one never knows for sure whether the curves involved are appropriate for that particular piece of wood, so some level of apprehension is common. Previous experience bending mahogany around similar curves seemed to indicate that I should have no problem, but still one never knows. Therefore, I chose to proceed with caution, at least till I had a sense of the process. |
|
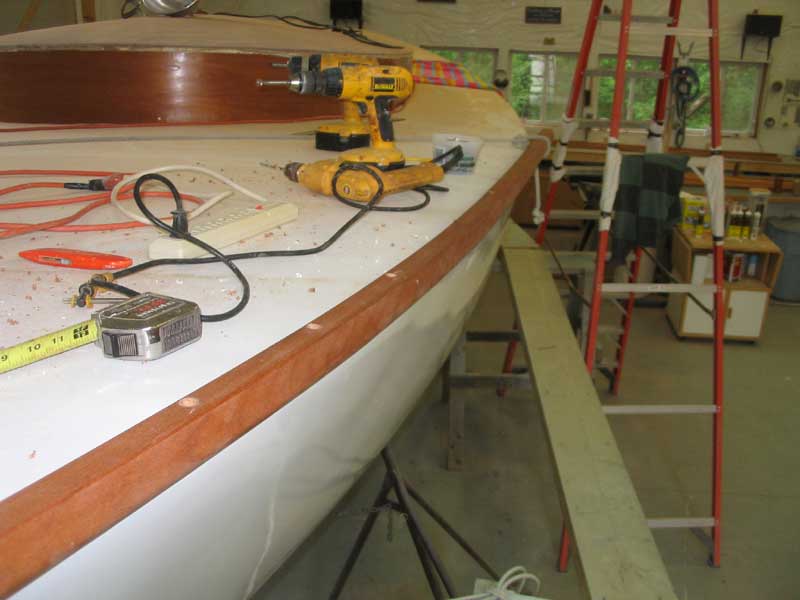
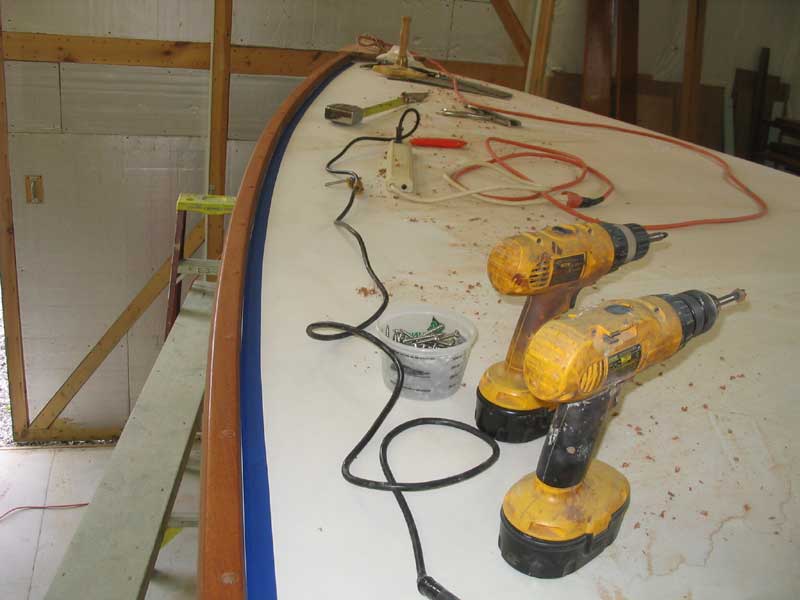
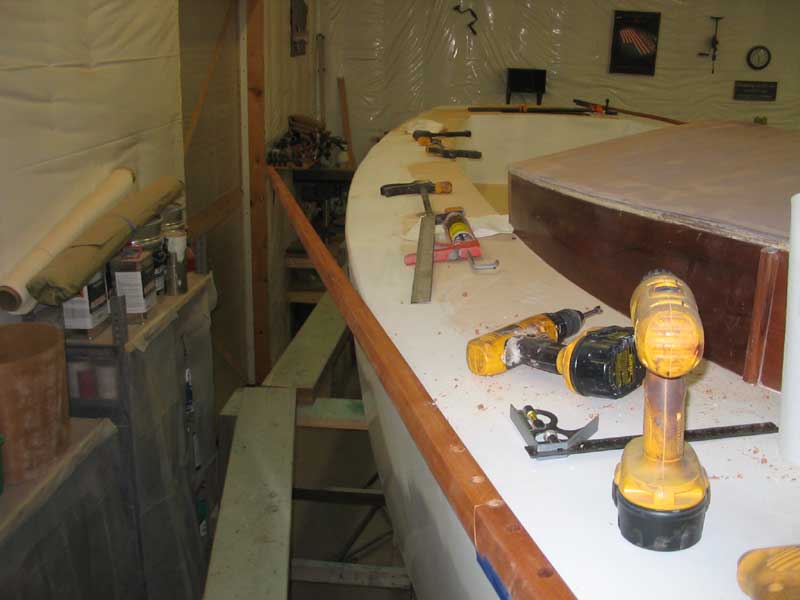
I began by collecting various drills and drill bits required for the counterbores (1/2"), pilot holes, and #3 Phillips driver. This is when having multiple drills pays off, as one bit remains in each tool. I also collected a variety of other tools, including hand saws, pencils, measuring tape, and so forth, which I thought I might need at one point or another. I practiced on some scrap to determine about how deeply I should bore the 1/2" counterbores for the #12 x 2" panhead screws that would secure the toerail; too deep, and there would be insufficient strength, but too shallow and the bungs would not fit correctly. |
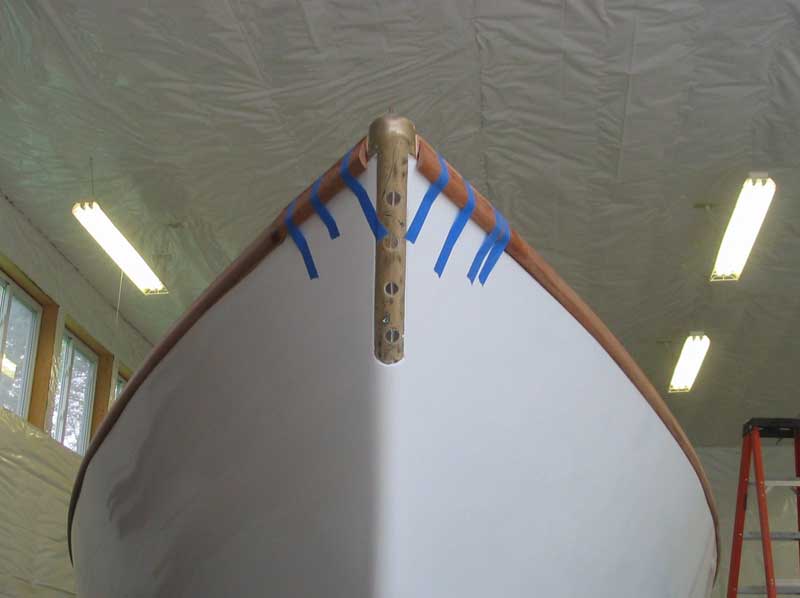
 Beginning at the bow on the port side, I pondered how to mate the
toerail with the pre-existing breasthook. Eventually, I decided to
simply cut an angle on the aft corner of the breasthook that would match
the toerail's angle as naturally determined by the curvature of the
hull. Using a small scrap of toerail as a guide, I marked the
breasthook angle and made the cut with a handsaw. The fit was good
enough, so I proceeded with the installation. Beginning at the bow on the port side, I pondered how to mate the
toerail with the pre-existing breasthook. Eventually, I decided to
simply cut an angle on the aft corner of the breasthook that would match
the toerail's angle as naturally determined by the curvature of the
hull. Using a small scrap of toerail as a guide, I marked the
breasthook angle and made the cut with a handsaw. The fit was good
enough, so I proceeded with the installation. |
|
Starting at the bow meant not only did I have a fixed dead end at which to begin, but also that the most severe curvature would be dealt with first. I marked a location for the first screw hole in one of the toerail sections (after first trimming the end straight and true at the miter saw), 1-1/2" back from the end and 3/8" in from the inner side, and, holding the toerail tightly in place at the forward end (while allowing the after end of the 10' piece to hang wildly off the boat), drilled the first pilot hole, followed by the counterbore. Immediately, I knew I had made a mistake, as without solid material for the point on the 1/2" Forstner bit to bite, the bit was hard to hold steady, and the counterbore was slightly elongated. |
|
Pressing on, I installed the first screw, but I hadn't drilled the pilot hole deeply enough, and the screw came up hard and broke inside the counterbore, leaving a short amount of the screw visible inside. This was not a pleasing start to the project. |
|
Since it was only one screw, I managed to twist the toerail piece off the remaining stud with damage to the end few inches of the toerail (which I later cut off to start anew). I unwound the screw from the deck with vice-grips, and regrouped to make sure I would not have similar problems going forward. |
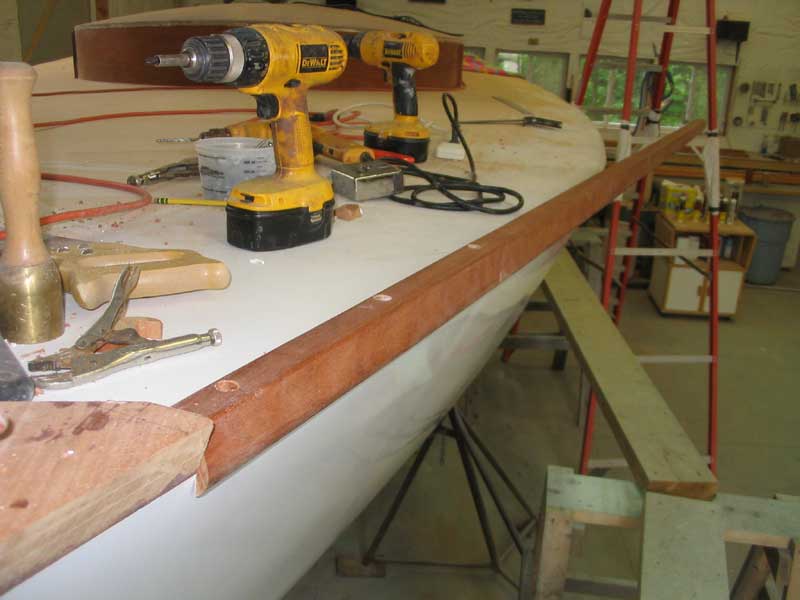 With a fresh toerail end, I marked again for the first hole, this time
2" back so that I could have a fresh hole in the deck. This time,
I began by boring the 1/2" counterbore first, followed by the smaller
pilot hole, and the process went smoothly; with one screw holding
the toerail tightly to the hull and breasthook forward, I marked several
more screw locations on the toerail, 8" on center from the first.
After I had drilled and installed several screws by holding the rail
tightly in place by hand, I found a need to pull the after end of the
rail in further to conform to the curve. A second set of hands
might have been helpful, but I rigged up a line around the boat and
pulled the rail in as need be, drilling and driving screws as I went. With a fresh toerail end, I marked again for the first hole, this time
2" back so that I could have a fresh hole in the deck. This time,
I began by boring the 1/2" counterbore first, followed by the smaller
pilot hole, and the process went smoothly; with one screw holding
the toerail tightly to the hull and breasthook forward, I marked several
more screw locations on the toerail, 8" on center from the first.
After I had drilled and installed several screws by holding the rail
tightly in place by hand, I found a need to pull the after end of the
rail in further to conform to the curve. A second set of hands
might have been helpful, but I rigged up a line around the boat and
pulled the rail in as need be, drilling and driving screws as I went. |
 As I neared the end of the first section, I had to contemplate how I was
to join the various pieces. I thought of various scarf joints, and
ended up selecting a basic bevel cut that would effectively work the
same. Since I had no plans to glue the rail pieces together for
one continuous length (a nearly impossible proposition working alone), I
decided this basic cut, coupled with screws and sealant, would suffice. As I neared the end of the first section, I had to contemplate how I was
to join the various pieces. I thought of various scarf joints, and
ended up selecting a basic bevel cut that would effectively work the
same. Since I had no plans to glue the rail pieces together for
one continuous length (a nearly impossible proposition working alone), I
decided this basic cut, coupled with screws and sealant, would suffice.
|
 With the first section of rail dry-fitted, I now had to remove it so
that I could cut the bevel on the end and prepare for final
installation. First, though, I took the time to run masking tape
along the hull and deck outside of the rail's location, which would help
with sealant cleanup later. Carefully, I removed the section from
the boat, saving the screws, and cut an angle at the proper location at
the after end. Then, I applied tape to the rail as well, for
further sealant protection, and up on the boat bored small countersinks
at each screw location in the deck, so that sealant would collect there
and provide as sound a seal as possible at each fastener location. With the first section of rail dry-fitted, I now had to remove it so
that I could cut the bevel on the end and prepare for final
installation. First, though, I took the time to run masking tape
along the hull and deck outside of the rail's location, which would help
with sealant cleanup later. Carefully, I removed the section from
the boat, saving the screws, and cut an angle at the proper location at
the after end. Then, I applied tape to the rail as well, for
further sealant protection, and up on the boat bored small countersinks
at each screw location in the deck, so that sealant would collect there
and provide as sound a seal as possible at each fastener location. |
 To install the rail permanently, I applied a heavy bead of
mahogany-colored polysulfide caulk to the deck, with extra heavy
applications at the fastener locations. Then, I carefully pressed
the rail into place, taking care not to push sealant all over the place
indiscriminately, and reinstalled the fasteners, one at a time. I
continued till the rail was securely installed, with good sealant
squeezeout along the entire length. Then, I cleaned up the excess
sealant, first with a plastic squeegee, then with rags and solvent.
The tape was a big help, as once I had removed the bulk of the excess, I
could pull the tape off and easily finish the cleanup. I left the
tape on the hull for now, as I planned to run a bead of sealant along
the bottom overlapping edge of the toerail later on to finish off this
seam. To install the rail permanently, I applied a heavy bead of
mahogany-colored polysulfide caulk to the deck, with extra heavy
applications at the fastener locations. Then, I carefully pressed
the rail into place, taking care not to push sealant all over the place
indiscriminately, and reinstalled the fasteners, one at a time. I
continued till the rail was securely installed, with good sealant
squeezeout along the entire length. Then, I cleaned up the excess
sealant, first with a plastic squeegee, then with rags and solvent.
The tape was a big help, as once I had removed the bulk of the excess, I
could pull the tape off and easily finish the cleanup. I left the
tape on the hull for now, as I planned to run a bead of sealant along
the bottom overlapping edge of the toerail later on to finish off this
seam. |
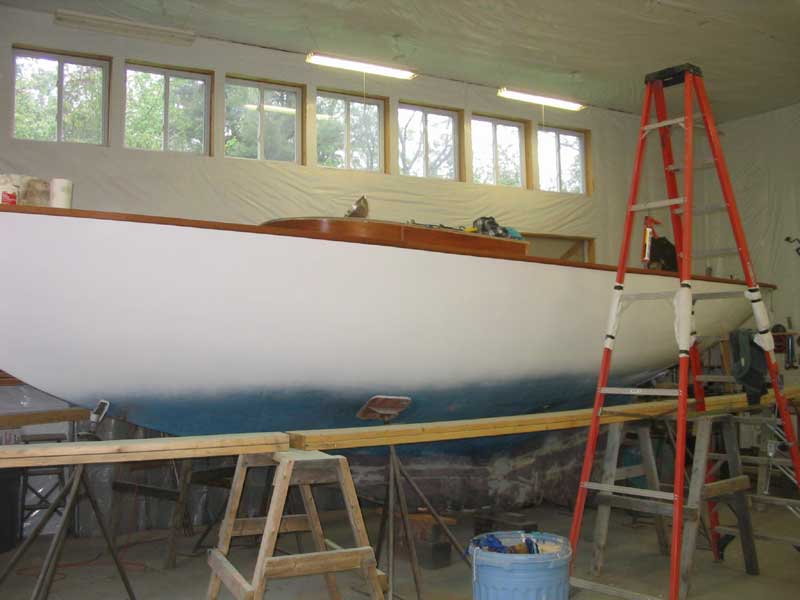
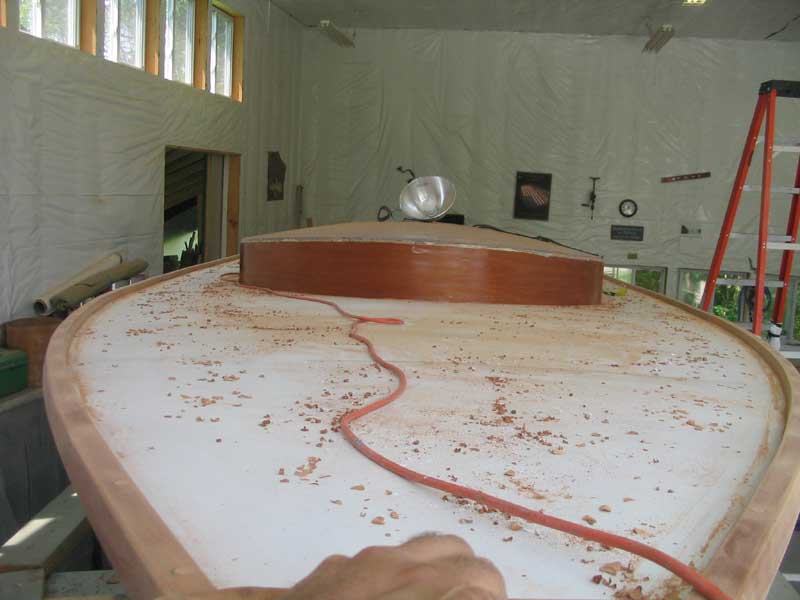
 In this manner I continued along the port side, dry-fitting each section
(three total) and then removing and permanently reinstalling them.
I let the last section run wild over the transom for later trimming.
I finished the last section fairly late in the afternoon, but as there
was some time left in the day before I expected Heidi home from work, I
decided to continue on the starboard side, figuring I'd at least get the
first section installed. In this manner I continued along the port side, dry-fitting each section
(three total) and then removing and permanently reinstalling them.
I let the last section run wild over the transom for later trimming.
I finished the last section fairly late in the afternoon, but as there
was some time left in the day before I expected Heidi home from work, I
decided to continue on the starboard side, figuring I'd at least get the
first section installed. |
 I had clearly gained efficiency during the installation of the first
side, and what had taken much of the day there now went much more
speedily, and to my surprise I managed to complete the entire starboard
side in only a couple hours, so by 1900 the work was essentially
complete. I was thrilled. I had clearly gained efficiency during the installation of the first
side, and what had taken much of the day there now went much more
speedily, and to my surprise I managed to complete the entire starboard
side in only a couple hours, so by 1900 the work was essentially
complete. I was thrilled. |
 The next day, I completed the job my running a bead of the polysulfide
beneath the overlapping edge of the rail along the hull, filling any
small voids left behind by slight unfairness in the hull, deck or
toerail. Then, I cut off the overhanging after ends flush with and
at the same angle as the transom, leaving the taffrail to be dealt with
later (design and execution pending). The next day, I completed the job my running a bead of the polysulfide
beneath the overlapping edge of the rail along the hull, filling any
small voids left behind by slight unfairness in the hull, deck or
toerail. Then, I cut off the overhanging after ends flush with and
at the same angle as the transom, leaving the taffrail to be dealt with
later (design and execution pending). |
 Finally, I cut 100 or more 1/2" bungs from a piece of scrap mahogany at
the drill press, taking an undesired break partway through when one of
the drive pulleys decided to fly off, and then installed the plugs in
the counterbores with resorcinol glue. I left the plugs and glue
to cure for a couple days before I could return and shave them off flush
with the toerail surface. Finally, I cut 100 or more 1/2" bungs from a piece of scrap mahogany at
the drill press, taking an undesired break partway through when one of
the drive pulleys decided to fly off, and then installed the plugs in
the counterbores with resorcinol glue. I left the plugs and glue
to cure for a couple days before I could return and shave them off flush
with the toerail surface. |
 I also sanded and shaped, as needed, the
joints between rail sections so that they lay smoothly together.
Only minor reshaping was required, probably the result of slightly
different profiles on the various pieces, thanks to the warped and curvy
nature of the boards that made accurate and consistent milling difficult
on my junky shop tools. I also sanded and shaped, as needed, the
joints between rail sections so that they lay smoothly together.
Only minor reshaping was required, probably the result of slightly
different profiles on the various pieces, thanks to the warped and curvy
nature of the boards that made accurate and consistent milling difficult
on my junky shop tools. |
|
|
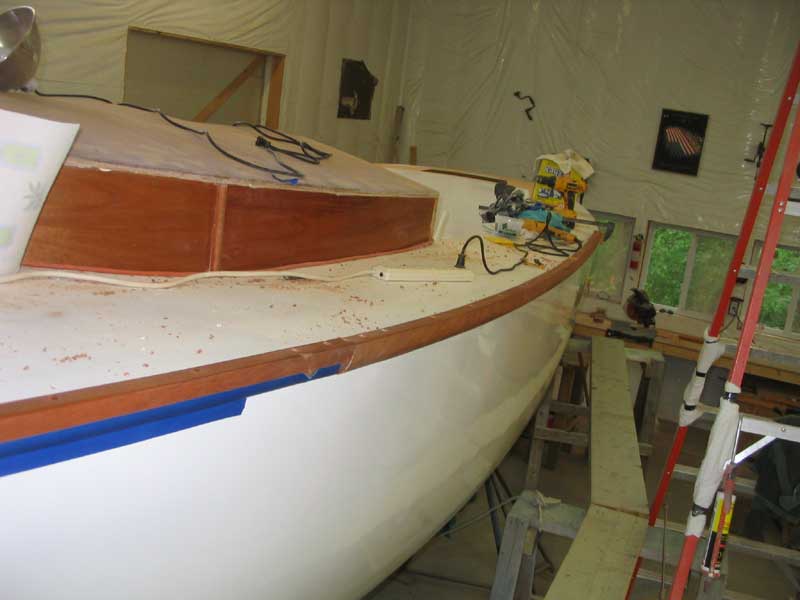
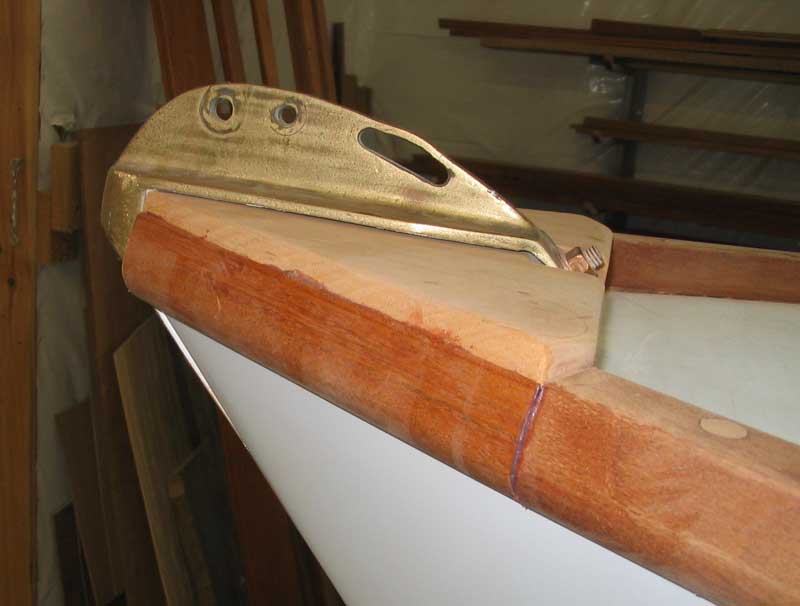
 The breasthook required some final shaping to tie in nicely with the
toerails. I had held off on this until the rails were installed,
so that I could properly integrate the pieces. Now, I used a belt
sander to sand the angled breasthook sides (which I had previously
sanded to match the flare of the hull) so that I could add some external
trim pieces that I sliced off some toerail scrap; I cut off only the
outer profile, containing the roundover and bevel, and these slim pieces
needed a flat surface on which to sit and thereby continue the general
toerail profile all the way to the stem. The breasthook required some final shaping to tie in nicely with the
toerails. I had held off on this until the rails were installed,
so that I could properly integrate the pieces. Now, I used a belt
sander to sand the angled breasthook sides (which I had previously
sanded to match the flare of the hull) so that I could add some external
trim pieces that I sliced off some toerail scrap; I cut off only the
outer profile, containing the roundover and bevel, and these slim pieces
needed a flat surface on which to sit and thereby continue the general
toerail profile all the way to the stem. |
 After
some fine-tuning and additional sanding, I glued the small trim
pieces to the outside of the breasthook with epoxy, and taped the pieces
in place till the epoxy cured. With some final sanding and
cleaning up later on, this completed the toerail construction. After
some fine-tuning and additional sanding, I glued the small trim
pieces to the outside of the breasthook with epoxy, and taped the pieces
in place till the epoxy cured. With some final sanding and
cleaning up later on, this completed the toerail construction.Next: final varnish |
 |
|
Back to the main menu> |