|
|
~MENU~ |
| Home |
| The Concept |
| The Boat |
| Bringing Her Home |
|
Weekly Progress Log |
|
Daysailor Projects |
| The Boat Barn |
| Resources |
| Other Sites |
| Email Tim |
|
|
|
Systems: Rudder Shaping and Installation |
| With the basic rudder construction complete, the next step was to shape the rudder into some semblance of a foil. actually, I didn't attempt to truly make a foil--I just concentrated on creating a taper in the rudder thickness from the leading to the trailing edge, and from top to bottom. With the rudder secured to some horses outside the shop, I used several sanding tools to shape the rudder, beginning with my 7" angle grinder and a soft pad, and moving on to belt sander, DA sander, and finally finish sander. |
|
Once I was pleased with the general shape, and had smoothed the rudder surface sufficiently, I was ready for installation. I already had the new bronze rudder shaft in stock, so the next step was to prepare for the bronze pintles and gudgeons. These required some relief cuts on the leading edge of the rudder, which I made with a jigsaw. Because of the overall design of the pintles, gudgeons, rudder, and keel, I had to loosely pre-install both sections on the rudder before continuing installation. |
 To
install the rudder, I had to first install the rudder shaft by itself,
as I couldn't pre-install it on the rudder as the overall length would
be too great to allow the shaft to be inserted in the rudder tube.
With the boat on concrete, there was no way to dig a hole beneath the
rudder, which would have worked outside. I
hoped--desperately--that I would be able to install the four bronze
screws that secured the rudder shaft to the rudder once the shaft was
partially installed. I did do a dry fit on the bench, and drilled
the holes for the #20 bronze flathead screws; I also installed all four
screws completely with the rudder on the bench, as cutting the threads
first would make installation on the fly easier. To
install the rudder, I had to first install the rudder shaft by itself,
as I couldn't pre-install it on the rudder as the overall length would
be too great to allow the shaft to be inserted in the rudder tube.
With the boat on concrete, there was no way to dig a hole beneath the
rudder, which would have worked outside. I
hoped--desperately--that I would be able to install the four bronze
screws that secured the rudder shaft to the rudder once the shaft was
partially installed. I did do a dry fit on the bench, and drilled
the holes for the #20 bronze flathead screws; I also installed all four
screws completely with the rudder on the bench, as cutting the threads
first would make installation on the fly easier. |
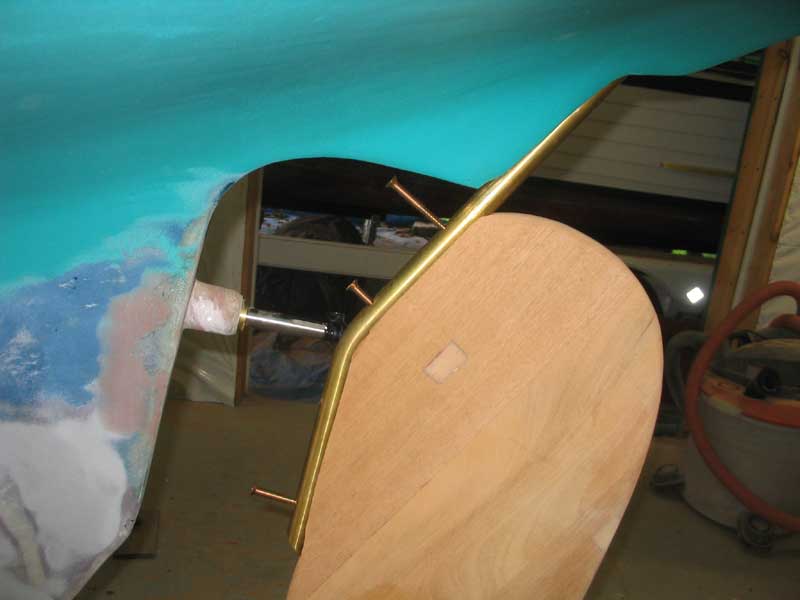 With
the shaft installed partially in the tube, and held in place with
friction against the propeller shaft, I hoisted the rudder into position
and threaded in a couple of the screws. To my relief, I could
easily (using the term relatively) access all four screws, and after
some grunting I managed to drive them all home. With
the shaft installed partially in the tube, and held in place with
friction against the propeller shaft, I hoisted the rudder into position
and threaded in a couple of the screws. To my relief, I could
easily (using the term relatively) access all four screws, and after
some grunting I managed to drive them all home. |
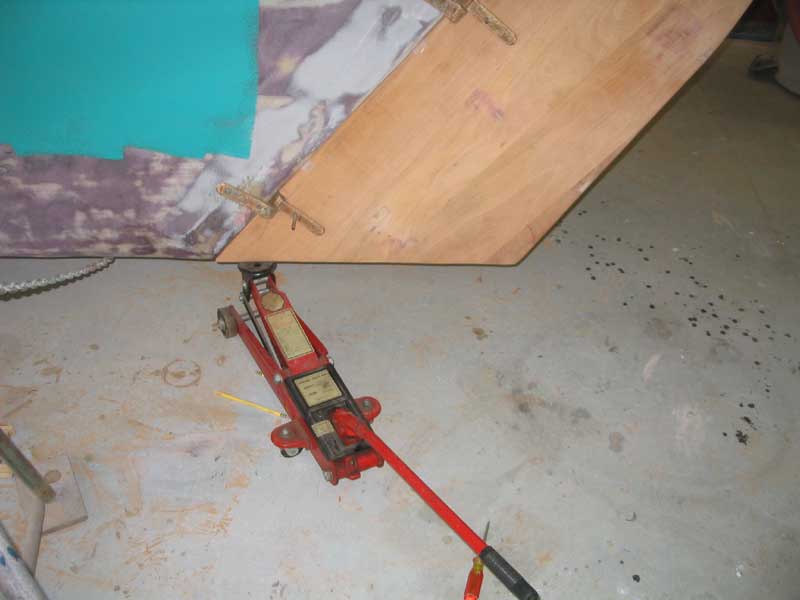
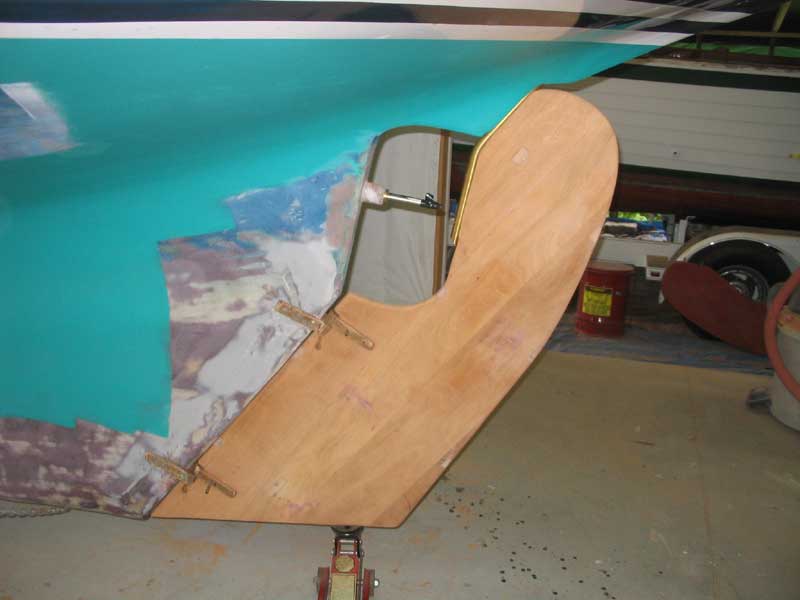 Next,
I aligned the gudgeons with the trailing edge of the keel, and then
began to lift the rudder into position. I used a floor jack to
assist, mainly to hold the rudder in position. I found that the
gudgeons needed to be widened to pass along the aft end of the keel, to
which I had added some fiberglass during the keel fairing process. Next,
I aligned the gudgeons with the trailing edge of the keel, and then
began to lift the rudder into position. I used a floor jack to
assist, mainly to hold the rudder in position. I found that the
gudgeons needed to be widened to pass along the aft end of the keel, to
which I had added some fiberglass during the keel fairing process.
|
|
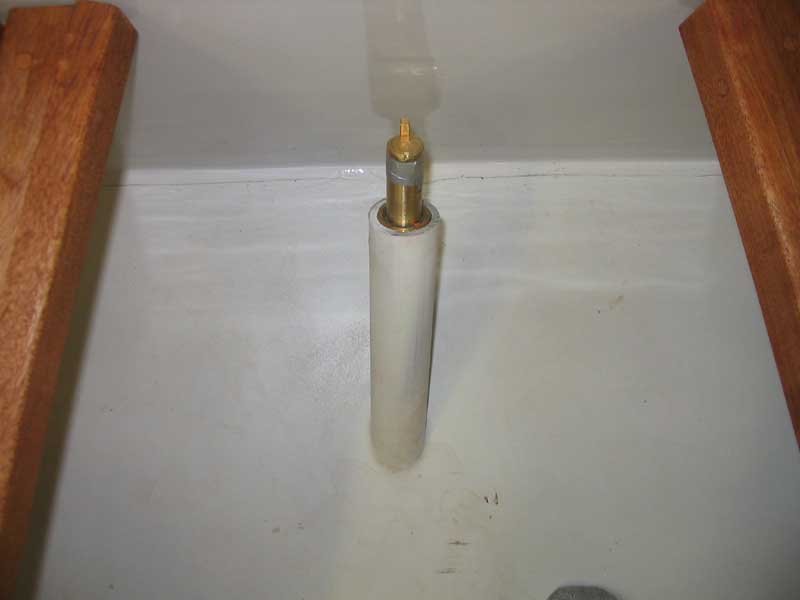
Eventually, I managed to get the rudder into its final position, and I went on deck to check out the shaft clearance and to add a bearing inside the rudder tube. I chose a shaft bearing (Cutless bearing) for this job, but unfortunately I discovered that with the shaft completely installed, I could not install the bearing over the top, as there was a clearance issue with the after bulkhead. Getting the bearing inside the tube required me to lower the rudder slightly, and to then raise it again. |
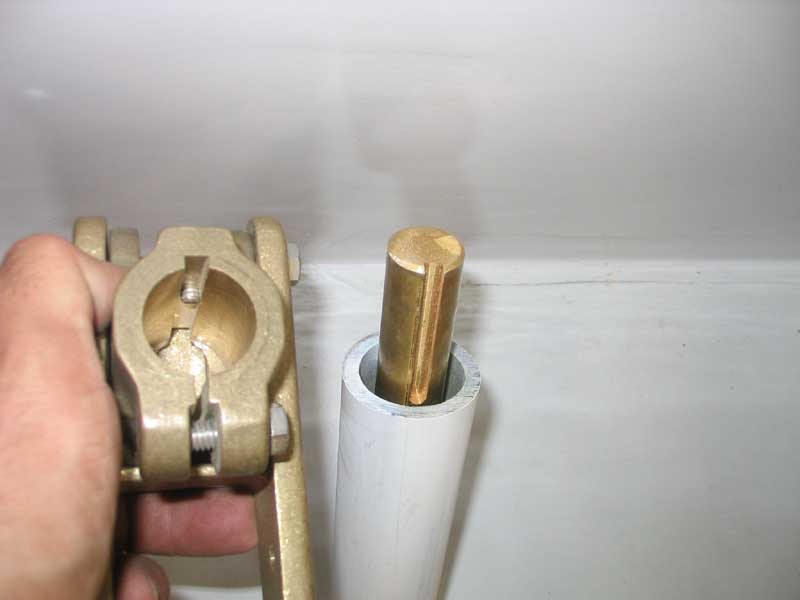 With
everything in place once more, I prepared to test fit the Spartan tiller
head. At this point, I noticed a more serious problem: the
keyway on the shaft, milled to match that in the tiller head, was on the
wrong side of the shaft! It should have been on the aft side, but
instead it was on the forward side. What an annoyance. With
everything in place once more, I prepared to test fit the Spartan tiller
head. At this point, I noticed a more serious problem: the
keyway on the shaft, milled to match that in the tiller head, was on the
wrong side of the shaft! It should have been on the aft side, but
instead it was on the forward side. What an annoyance.I immediately got on the phone to H&H Propeller shop, who had made the shaft, and spoke with the engineer, Tom. He was concerned and told me he could have someone pick up the shaft, and that he would get back to me in 5 minutes. I removed the rudder and unscrewed the shaft (just what I wanted to do), and then waited anxiously for the phone to ring, and could not concentrate on other projects in the meantime with this major unresolved issue. 5, 10, 30, 45 minutes passed with no return call, and I began to fret. I was moments away from calling back (I like to give people every opportunity to come through on their own first) when my dogs went crazy outside, and I went out to find Tom walking through my backyard; he had obviously left immediately after our first call and driven down himself. I was impressed and pleased with this service, and he promised my shaft back the next day. True to his word, the shaft was ready the next day, and someone from the shop dropped it off for me on their way home, arriving around 5 PM. This time, the keyway was correct. |
|
I immediately reinstalled the rudder and shaft, as before, and held it in place with the jack temporarily. I had ordered bronze bolts with which to secure the pintles and gudgeons; these were due the next afternoon.
|
 When
my bolts arrived, I permanently installed the pintles and gudgeons,
using polysulfide sealant where appropriate on the keel. This
completed the rudder installation, and I immediately finished up the
bottom painting. When
my bolts arrived, I permanently installed the pintles and gudgeons,
using polysulfide sealant where appropriate on the keel. This
completed the rudder installation, and I immediately finished up the
bottom painting.Next: tiller head and tiller. |
| Back to Main Menu> |