|
|
~MENU~ |
| Home |
| The Concept |
| The Boat |
| Bringing Her Home |
|
Weekly Progress Log |
|
Daysailor Projects |
| The Boat Barn |
| Resources |
| Other Sites |
| Email Tim |
|
|
|
From a Bare Hull: Interior: Final Trim and Details (Page 9) |
|
Cabin Sole The plywood "subfloor", or working sole, was never intended to be the final surface, of course. Over the course of the year and some months that the sole was in place, it gradually became more and more decrepit, covered with paint splatters and other damage. I couldn't wait to cover it. |
 Until I actually became ready to attack the issue of the finish sole, I
didn't really know how I was going to proceed, and with what I would cover
the sole. In the days leading up to the actual construction, however,
a plan began to hatch. I had been dreading the tedium that would be
required if I were to lay a solid plank sole, with the confined space and
many cuts required. It occurred to me that it would make the most
sense to create a second plywood substrate that fit the space properly, and
then build the new sole on top of that--out on the shop bench. Until I actually became ready to attack the issue of the finish sole, I
didn't really know how I was going to proceed, and with what I would cover
the sole. In the days leading up to the actual construction, however,
a plan began to hatch. I had been dreading the tedium that would be
required if I were to lay a solid plank sole, with the confined space and
many cuts required. It occurred to me that it would make the most
sense to create a second plywood substrate that fit the space properly, and
then build the new sole on top of that--out on the shop bench. |
 To begin, I created a paper pattern of the existing area. I use a
technique favored by vinyl floor installers where the pattern is held shy of
the edges of the space by an inch or so, and the shape of the space is
transferred to the pattern using a ruler of known width--2" in my case.
Marking the opposite side of the ruler, with one edge held tightly against
the surrounding bulkhead, makes it much easier to create accurate patterns.
Since I had no decent pattern material around, I was forced to use
newspaper--not the best for the job, but it worked. To begin, I created a paper pattern of the existing area. I use a
technique favored by vinyl floor installers where the pattern is held shy of
the edges of the space by an inch or so, and the shape of the space is
transferred to the pattern using a ruler of known width--2" in my case.
Marking the opposite side of the ruler, with one edge held tightly against
the surrounding bulkhead, makes it much easier to create accurate patterns.
Since I had no decent pattern material around, I was forced to use
newspaper--not the best for the job, but it worked. |
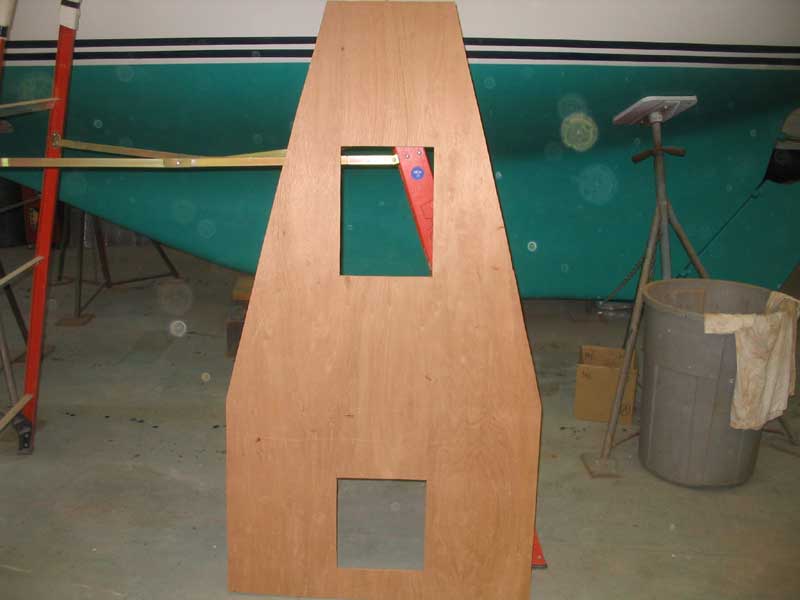 Next, I transferred the shape to a piece of 11mm Meranti plywood and cut it
out. After one or two test fits and fine-tuning, the new plywood fit
snugly in the existing space, and I was ready to begin laying the finish
material on top. Next, I transferred the shape to a piece of 11mm Meranti plywood and cut it
out. After one or two test fits and fine-tuning, the new plywood fit
snugly in the existing space, and I was ready to begin laying the finish
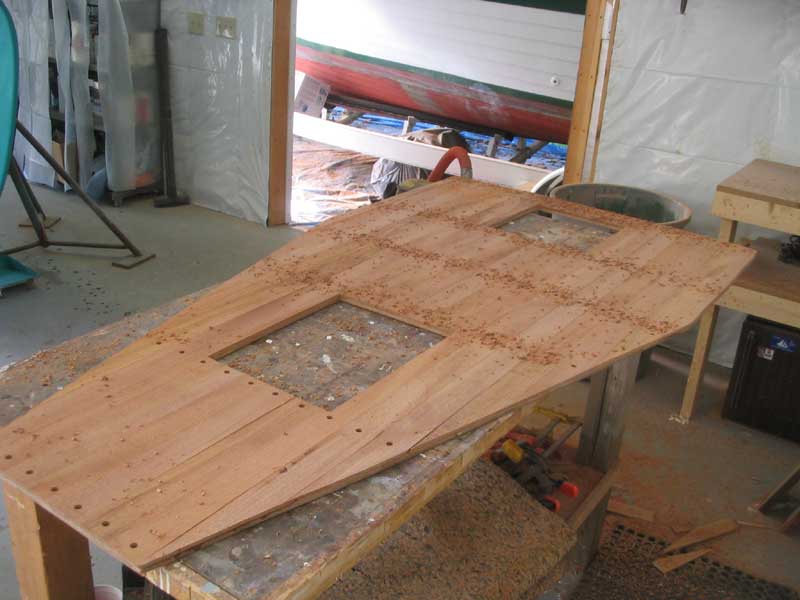
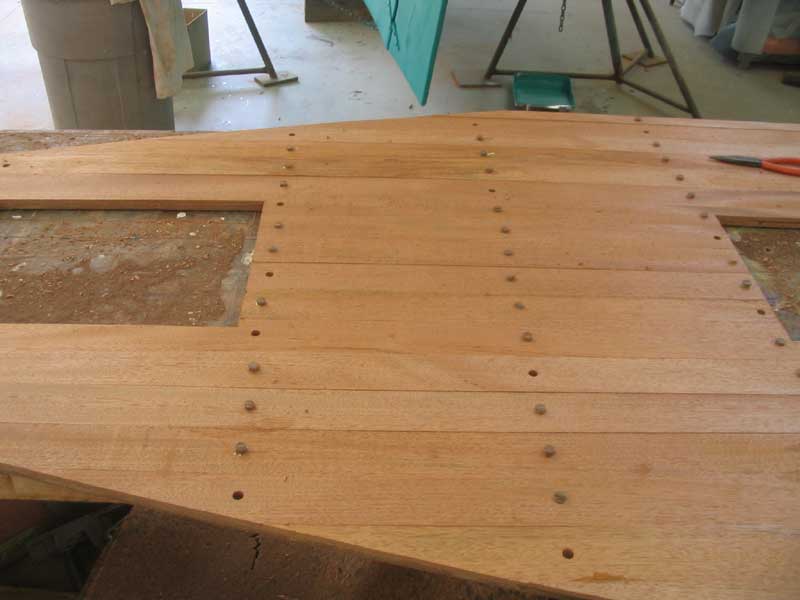
material on top.I chose solid mahogany strips to match the remainder of the interior--and because it looks darn nice. From some larger stock, I milled a number of 1/4" thick by 2" wide strips with which to cover the plywood. Then, I glued them in place directly on the plywood, using more temporary drywall screws to hold them while the glue cured. I simply butted each plank right next to the one before, starting at the centerline with a seam and working out to each side. I let the boards run wild over the edges. |
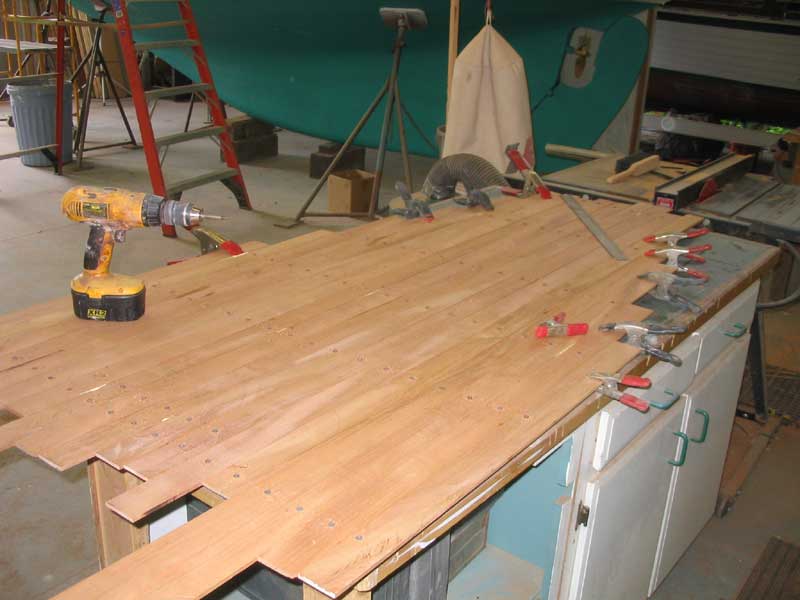 When the glue cured, I removed the temporary screws and trimmed the excess
overhanging boards with a router and a pattern bit, taking pains to avoid
any tearout, which can happen in these situations. Then, I bored out
all the screwholes with a 3/8" bit and installed walnut bungs in their
stead. I chose walnut as a contrast for the bungs on a whim, just to
add another interesting touch to the cabin. I left a few of the bungs
out for the time being, as I planned to screw the new sole in place through
those holes, and would then plug them afterwards. When the glue cured, I removed the temporary screws and trimmed the excess
overhanging boards with a router and a pattern bit, taking pains to avoid
any tearout, which can happen in these situations. Then, I bored out
all the screwholes with a 3/8" bit and installed walnut bungs in their
stead. I chose walnut as a contrast for the bungs on a whim, just to
add another interesting touch to the cabin. I left a few of the bungs
out for the time being, as I planned to screw the new sole in place through
those holes, and would then plug them afterwards. |
|
|
 When the glue on the bungs cured, I sanded the sole smooth, evening out the
slight differences in some of the plank thicknesses, and then sanded it to a
220 finish in preparation for a number of coats of gloss varnish, followed
by a coat of the same rubbed effect satin varnish used elsewhere in the
cabin. When the glue on the bungs cured, I sanded the sole smooth, evening out the
slight differences in some of the plank thicknesses, and then sanded it to a
220 finish in preparation for a number of coats of gloss varnish, followed
by a coat of the same rubbed effect satin varnish used elsewhere in the
cabin.
|
|
Installation
|
|
Work remaining: finish up the two small bilge access hatches. Coming soon.
|
|
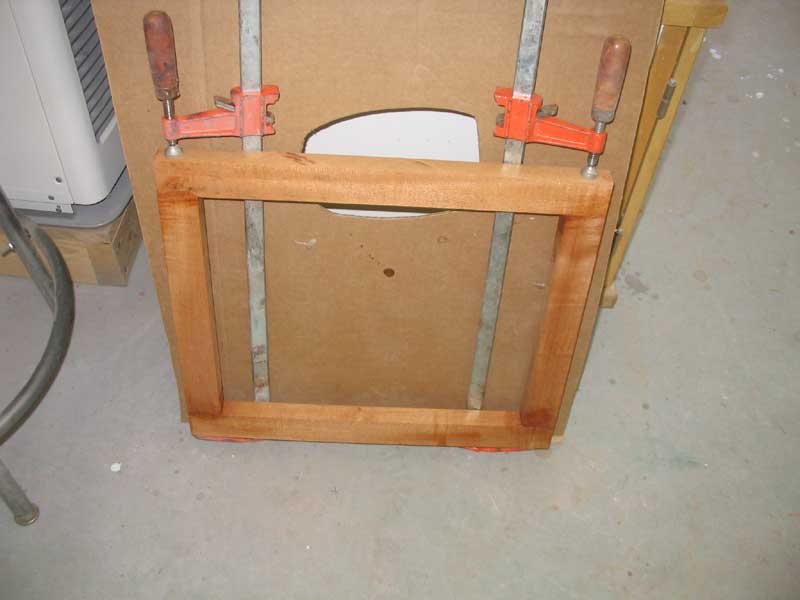
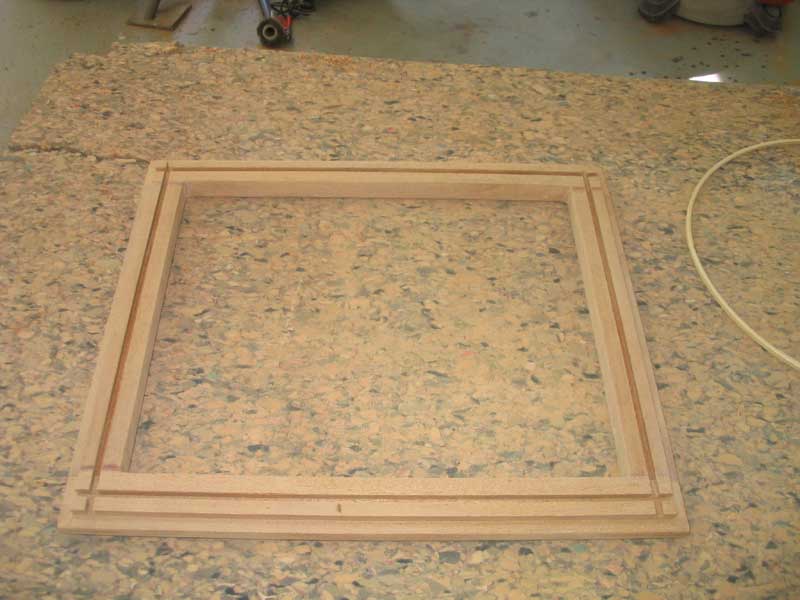
I measured the opening, and then calculated for a 3/8" overlay all the way around. Then, I milled the four pieces required to a 1-1/2" width, cut them to length, and glued up the frame, checking for square. |
|
|
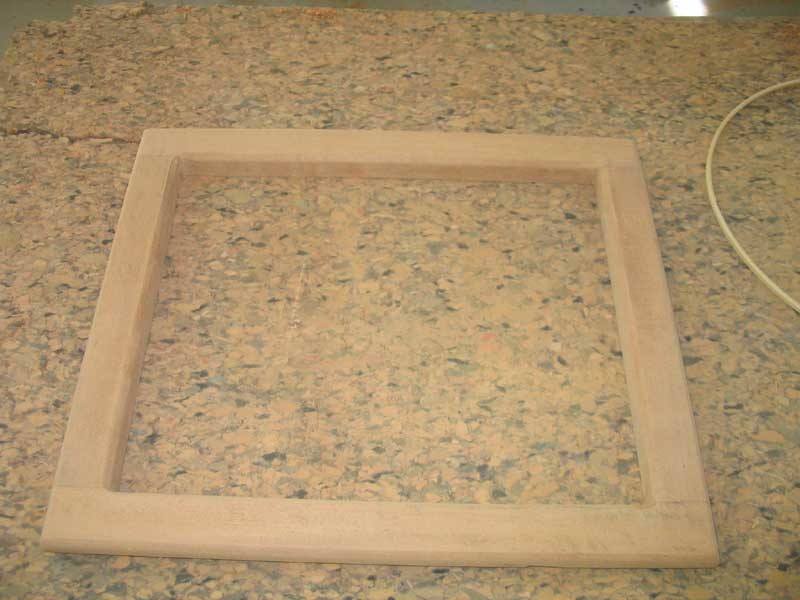
 When the frame cured, I removed the clamps and performed a few milling
operations, including cutting a 3/8" rabbet on the back side for the
overlay, and chamfers on the front side for looks, both on the inside and
outside of the frame. Finally, I milled a groove on the back side of
the frame, on all four sides, to later accept the caning and spine material.
Then, I sanded everything smooth, and , over several days, applied three
coats of gloss varnish, followed by a coat of satin to match the interior. When the frame cured, I removed the clamps and performed a few milling
operations, including cutting a 3/8" rabbet on the back side for the
overlay, and chamfers on the front side for looks, both on the inside and
outside of the frame. Finally, I milled a groove on the back side of
the frame, on all four sides, to later accept the caning and spine material.
Then, I sanded everything smooth, and , over several days, applied three
coats of gloss varnish, followed by a coat of satin to match the interior. |
|
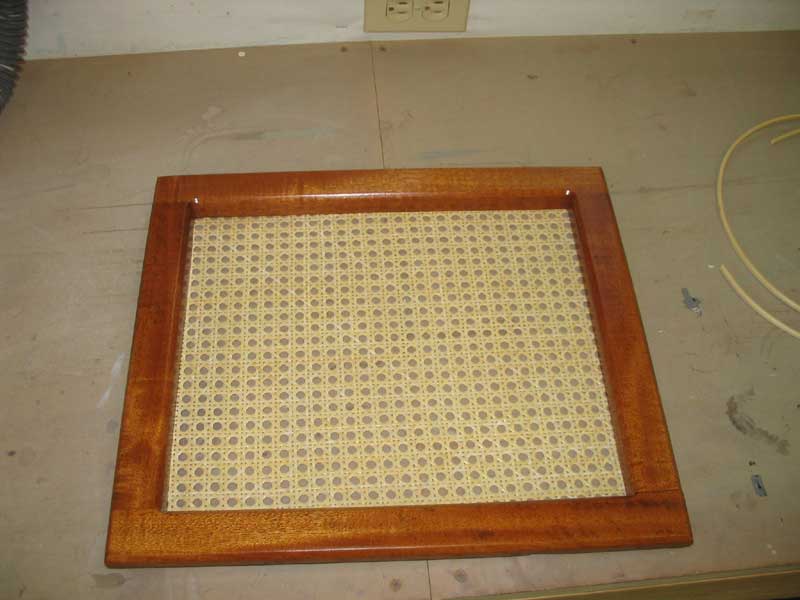
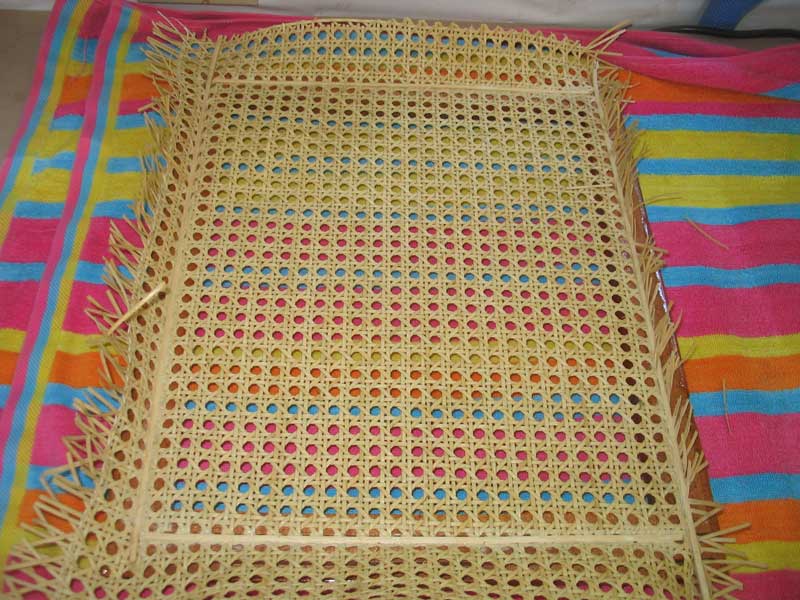
With the varnish complete, I moved on to the caning. I had the materials on hand, so I cut a piece of the prewoven cane material somewhat larger than the door opening, and soaked it in a bucket of water for a time to swell it up. I did this so that it would be wet and swollen during installation, and would then dry and tighten itself naturally once complete.
|
 I installed the 3/8" overlay hinges, along with
a brass knob, and hung the door in the opening. The installation
required a door latch in order to be considered complete, but otherwise the
new door really finished off the opening, and brought the interior one step
closer to ultimate completion. I installed the 3/8" overlay hinges, along with
a brass knob, and hung the door in the opening. The installation
required a door latch in order to be considered complete, but otherwise the
new door really finished off the opening, and brought the interior one step
closer to ultimate completion.
|