|
|
~MENU~ |
| Home |
| The Concept |
| The Boat |
| Bringing Her Home |
|
Weekly Progress Log |
|
Daysailor Projects |
| The Boat Barn |
| Resources |
| Other Sites |
| Email Tim |
|
|
|
From a Bare Hull: The Deck: Details (Page 2) |
Lazarette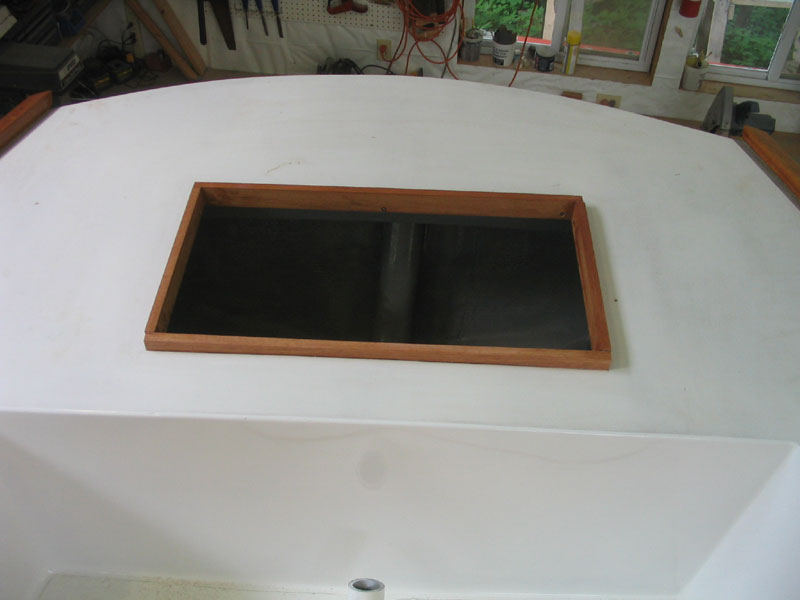 Earlier,
I had cut an access hole in the poop deck, and now it was time to finish
off the opening and create a hatch with which to cover it. I began
by squaring off the radiused corners of the opening, as my plans did not
allow those to remain. Earlier,
I had cut an access hole in the poop deck, and now it was time to finish
off the opening and create a hatch with which to cover it. I began
by squaring off the radiused corners of the opening, as my plans did not
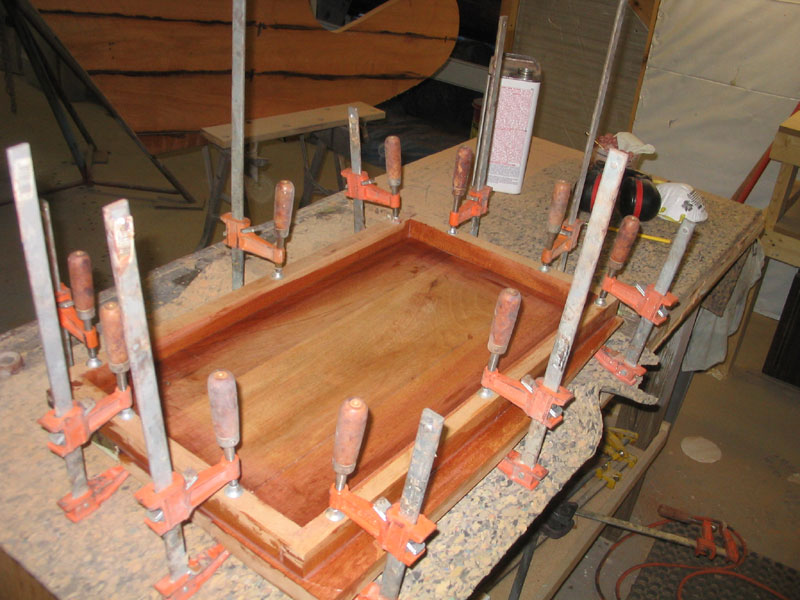
allow those to remain.Next, I cut four pieces of mahogany to fit tightly inside the opening. Each piece extended above deck level by an inch or so, and extended the thickness of the deck into the opening. When I was satisfied with the fit, I permanently installed the pieces using epoxy adhesive and bronze screws, creating a raised coaming around the opening. |
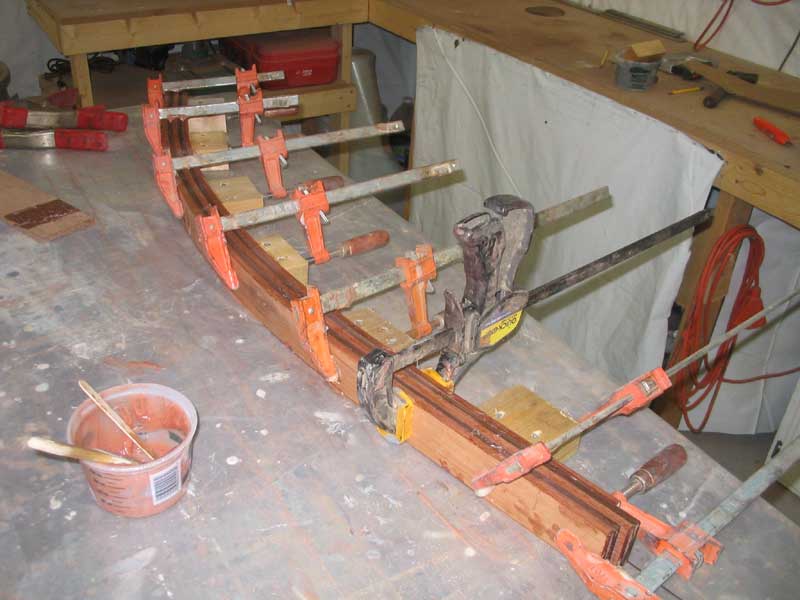
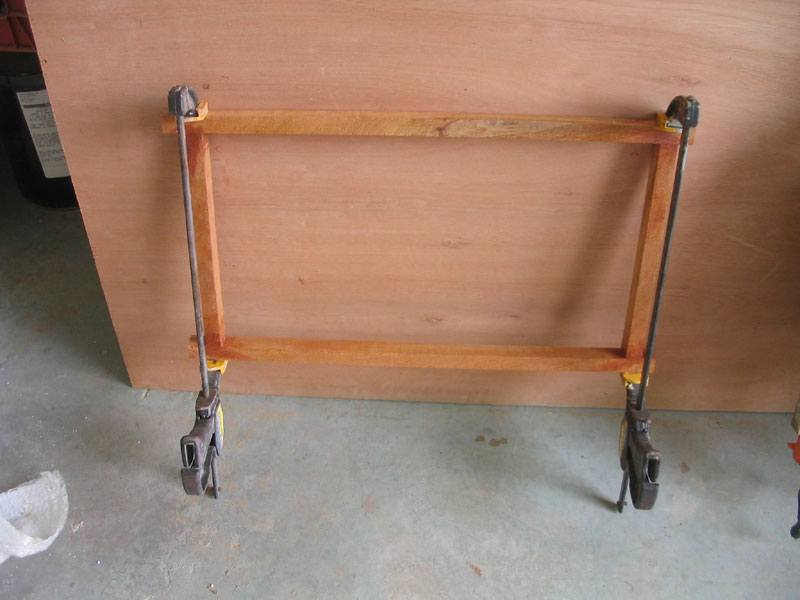 With
the coaming in place, I began work on the hatch to cover it. Using
the coaming as a guide, I cut four pieces of stock, each taller than the
coaming, to fit around it tightly, but with enough room to allow for
ease of operation. I left the two longer (transverse) rails
overlong to allow for trimming to exact shape later. T hen, I
glued up the frame with epoxy, doing the glueup right in place on the
boat to ensure that the basis for the hatch fit perfectly around the
existing coamings. Once it was tightly clamped, I removed it to
the shop floor for curing. With
the coaming in place, I began work on the hatch to cover it. Using
the coaming as a guide, I cut four pieces of stock, each taller than the
coaming, to fit around it tightly, but with enough room to allow for
ease of operation. I left the two longer (transverse) rails
overlong to allow for trimming to exact shape later. T hen, I
glued up the frame with epoxy, doing the glueup right in place on the
boat to ensure that the basis for the hatch fit perfectly around the
existing coamings. Once it was tightly clamped, I removed it to
the shop floor for curing. |
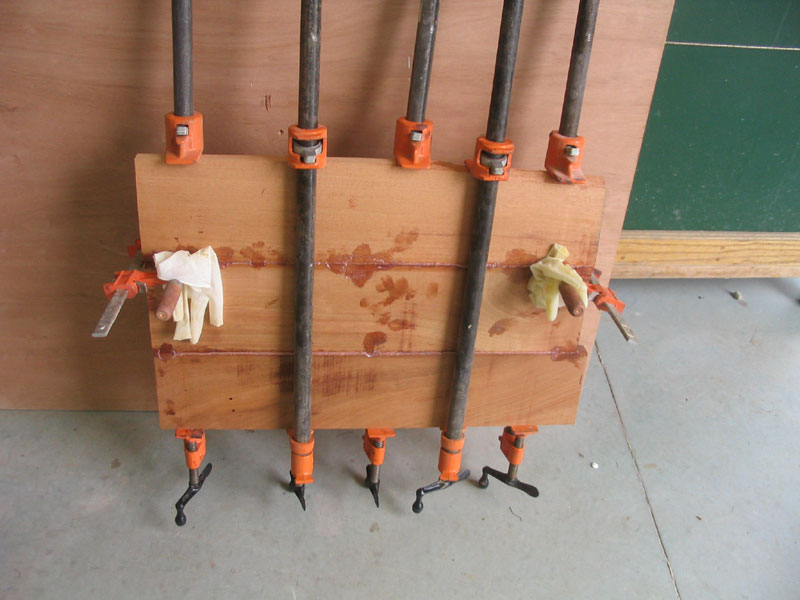 I
also glued up a panel of solid mahogany for the top of the hatch, using
three scrap lengths left over from the rudder blank glueup. I set
these pieces aside to cure. To keep the small clamps, which I used
to hold the boards flat during curing, from sticking, I grabbed whatever
was close at hand--in this case, a used pair of latex gloves. Mmm. I
also glued up a panel of solid mahogany for the top of the hatch, using
three scrap lengths left over from the rudder blank glueup. I set
these pieces aside to cure. To keep the small clamps, which I used
to hold the boards flat during curing, from sticking, I grabbed whatever
was close at hand--in this case, a used pair of latex gloves. Mmm. |
 When
all the glued subassemblies were cured, I sanded away any imperfections
and cured epoxy, and then epoxied the solid mahogany hatch to the rail
assembly, leaving an overhang on all sides for later trimming.
Once the glue cured, I removed most of the overhanging excess on the
table saw, and then trimmed the top flush with the rails with a router
and a straight-cutting pattern bit. When
all the glued subassemblies were cured, I sanded away any imperfections
and cured epoxy, and then epoxied the solid mahogany hatch to the rail
assembly, leaving an overhang on all sides for later trimming.
Once the glue cured, I removed most of the overhanging excess on the
table saw, and then trimmed the top flush with the rails with a router
and a straight-cutting pattern bit. |
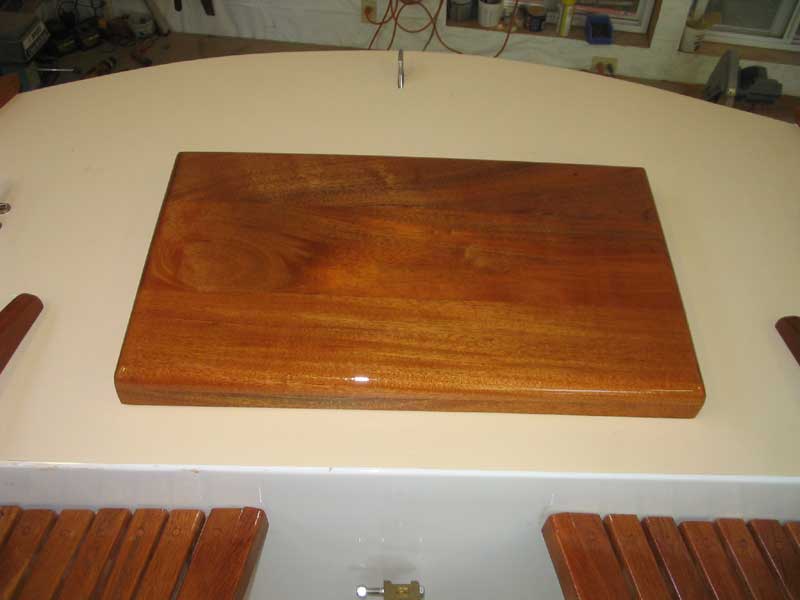 Next,
I milled a pleasing 3/4" roundover on the top edges of the top,
providing a smooth, rounded appearance, and then sanded the hatch
smooth. All that remained was final varnishing, which would take
place over the coming days. Finally, I placed the hatch in place
on the poop deck and scribed the camber of the deck onto the edges of
the hatch. Down on the bench, I sanded away the excess, up to my
line, which allowed the hatch to fit cleanly against the deck. Next,
I milled a pleasing 3/4" roundover on the top edges of the top,
providing a smooth, rounded appearance, and then sanded the hatch
smooth. All that remained was final varnishing, which would take
place over the coming days. Finally, I placed the hatch in place
on the poop deck and scribed the camber of the deck onto the edges of
the hatch. Down on the bench, I sanded away the excess, up to my
line, which allowed the hatch to fit cleanly against the deck.Finally, I applied a number of coats of varnish until I had sufficient buildup and the piece began to look good. |
Tiller
To begin, I milled a series of strips, 2" wide and 1/4" thick, of the two woods. Then, using some cardboard, I created a rough template of the tiller curvature up in the cockpit, using the tiller strap to determine the exit angle (the most important aspect of the design) and creating what I hoped would be a pleasing and functional curve by eye. After cutting out the shape and making some minor modifications, I was happy and decided to go ahead and laminate the tiller. |
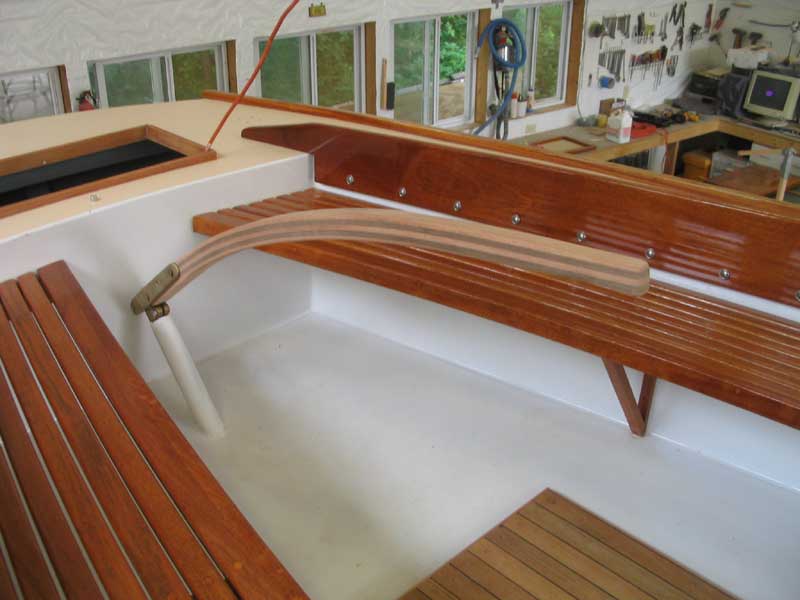 I
ran the cured blank through my planer till it fit perfectly inside the
bronze tiller strap and smoothed both edges. Then, with a variety
of sanding tools and router bits, I shaped the raw blank into a pleasing
shape, after determining the proper length of the tiller by mocking it
up on deck. I was striving for a very smooth, rounded end where
one would hold the tiller, but with less dramatic roundness elsewhere. I
ran the cured blank through my planer till it fit perfectly inside the
bronze tiller strap and smoothed both edges. Then, with a variety
of sanding tools and router bits, I shaped the raw blank into a pleasing
shape, after determining the proper length of the tiller by mocking it
up on deck. I was striving for a very smooth, rounded end where
one would hold the tiller, but with less dramatic roundness elsewhere. |
 Once
I was pleased with the shape, I sanded the tiller smooth and began the
process of varnishing the tiller. This photo shows the tiller
after 3-4 coats had been applied; more to come. Once
I was pleased with the shape, I sanded the tiller smooth and began the
process of varnishing the tiller. This photo shows the tiller
after 3-4 coats had been applied; more to come. |