|
|
~MENU~ |
| Home |
| The Concept |
| The Boat |
| Bringing Her Home |
|
Weekly Progress Log |
|
Daysailor Projects |
| The Boat Barn |
| Resources |
| Other Sites |
| Email Tim |
|
|
|
From a Bare Hull: The Cockpit (Page 2) |
|
Cockpit
Understructure: Edge Beams |
|
|
|
|
|
|
|
|
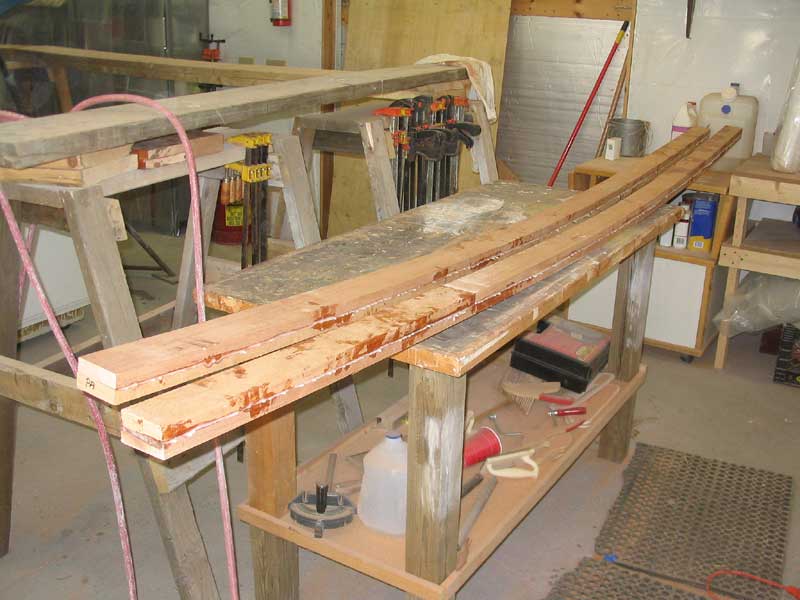
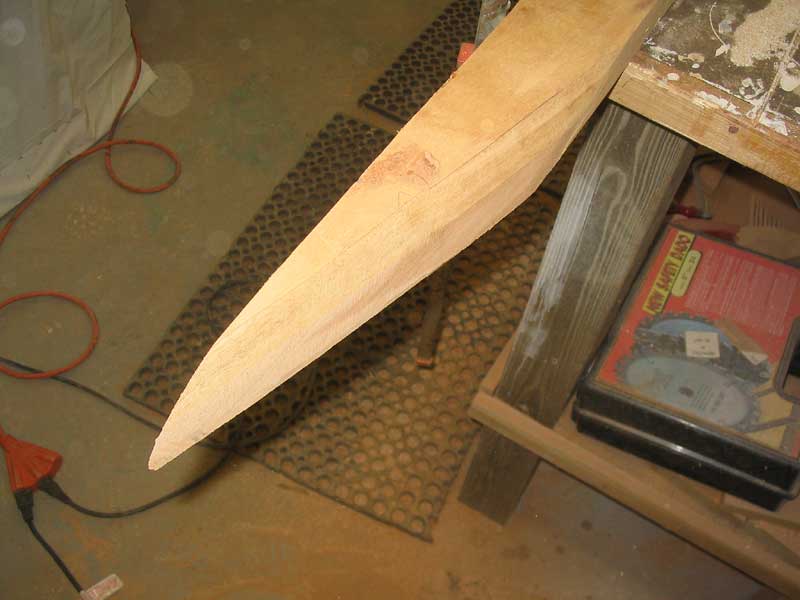
 As
it happened, the beams were just the right length with no cutting
required; for practical reasons, the rough assemblies could be no longer
than the space defined by the deck carlins and midships bulkhead, so the
fact that they were not overlong was no real surprise. Since the
beam was sitting exactly 3" higher than it would in its final location
(since I had not yet cut the notch required in the after bulkhead),
scribing the aft end of the beams to match the curvature of the hull was a
simple matter of setting the dividers to 3" and marking a line on each
side of the beam, with the aft end (which tended to spring back out of
position because of its curvature) held tightly in place by hand. As
it happened, the beams were just the right length with no cutting
required; for practical reasons, the rough assemblies could be no longer
than the space defined by the deck carlins and midships bulkhead, so the
fact that they were not overlong was no real surprise. Since the
beam was sitting exactly 3" higher than it would in its final location
(since I had not yet cut the notch required in the after bulkhead),
scribing the aft end of the beams to match the curvature of the hull was a
simple matter of setting the dividers to 3" and marking a line on each
side of the beam, with the aft end (which tended to spring back out of
position because of its curvature) held tightly in place by hand. |
 With
the rough measurements made, I returned to the bench and cut the after
ends at the appropriate angle, using a circular saw set at an angle to
match that of the hull, as indicated by the scribe marks. I finished
up with some sanding to fine-tune the end cut. With
the rough measurements made, I returned to the bench and cut the after
ends at the appropriate angle, using a circular saw set at an angle to
match that of the hull, as indicated by the scribe marks. I finished
up with some sanding to fine-tune the end cut. |
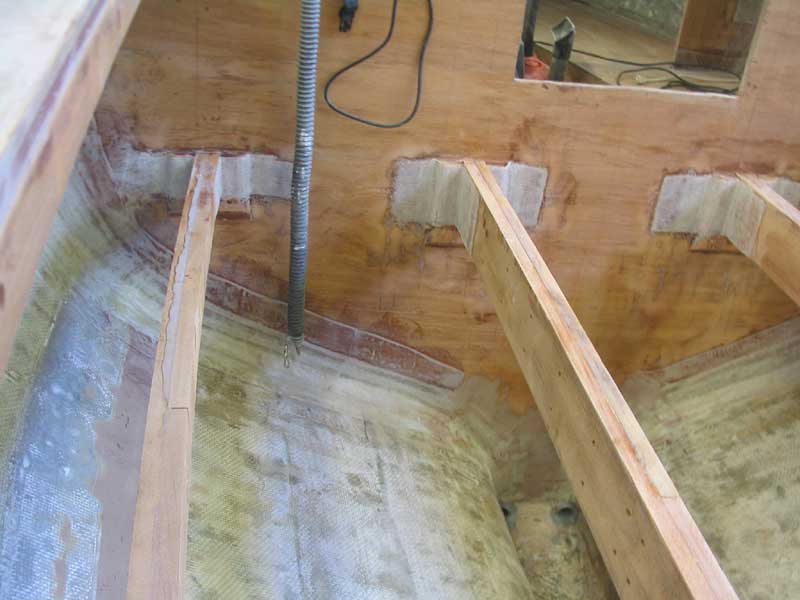
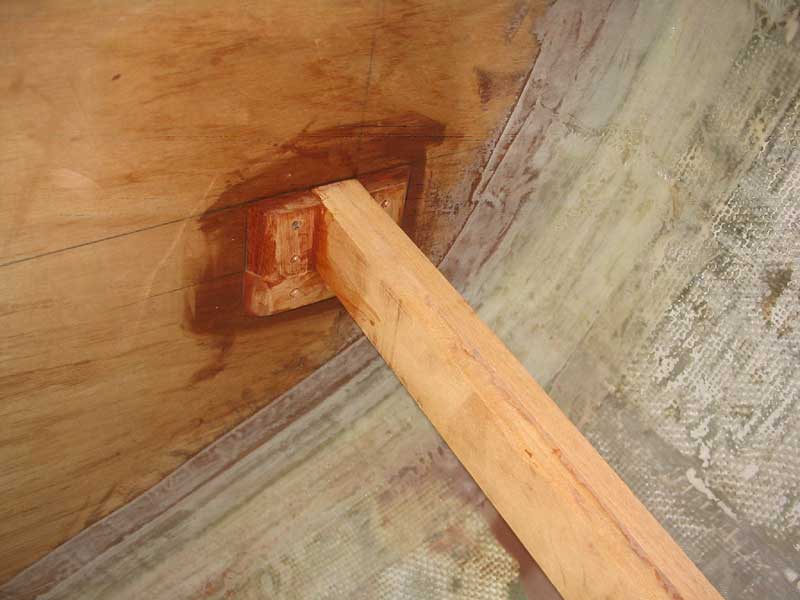 Next,
it was time for a fitting in the beams' actual location. First, I
had to cut 3" notches out of the after bulkhead, to allow the beams to sit
down in the proper place. Then, I cut and installed mahogany cleats
at the forward end, identical to the ones I used for the centerline beams a
day before, only shorter to match the reduced profile of the edge beams. Next,
it was time for a fitting in the beams' actual location. First, I
had to cut 3" notches out of the after bulkhead, to allow the beams to sit
down in the proper place. Then, I cut and installed mahogany cleats
at the forward end, identical to the ones I used for the centerline beams a
day before, only shorter to match the reduced profile of the edge beams.
|
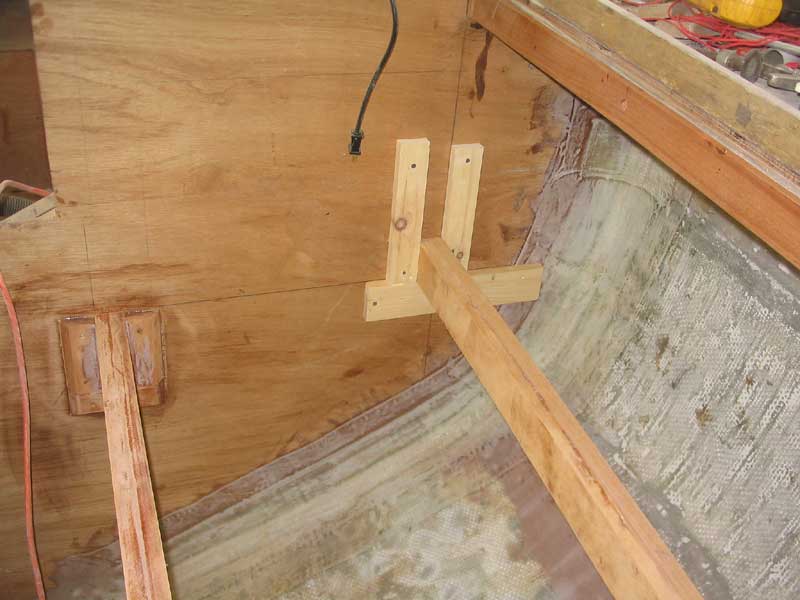
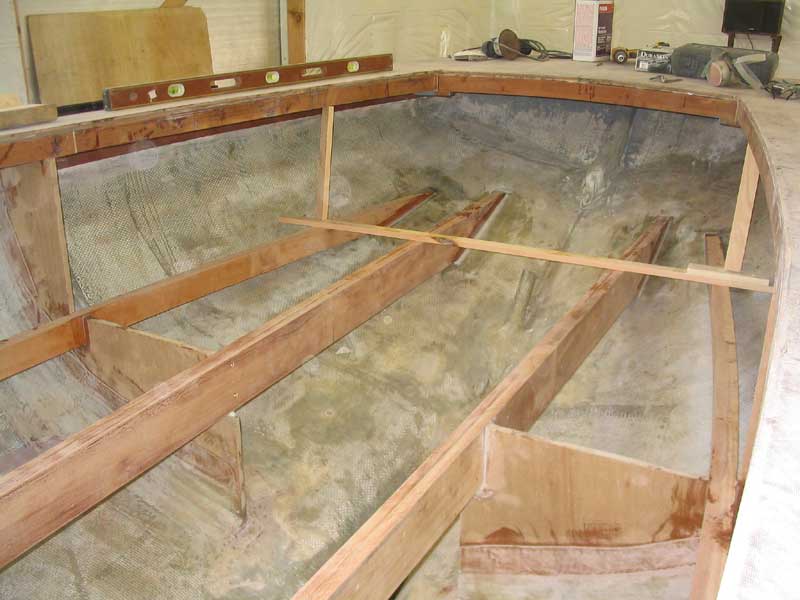
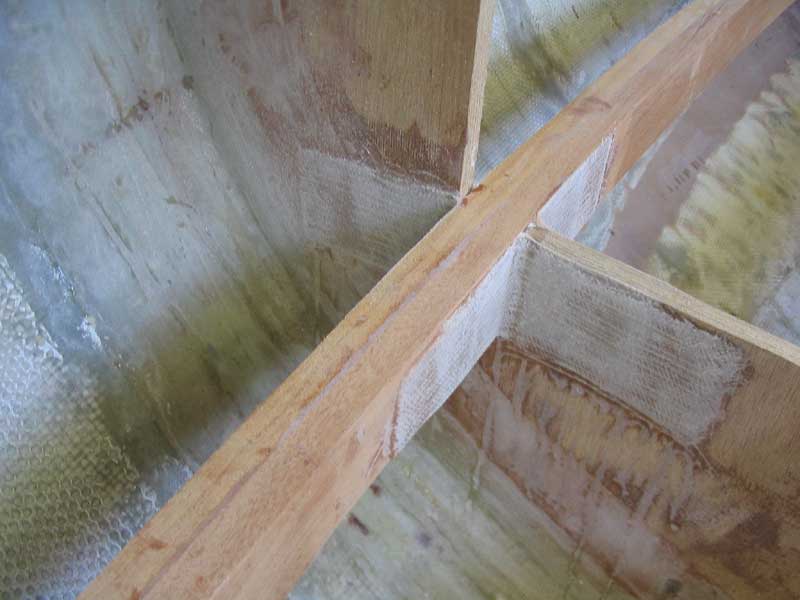
 After
I slipped the beam into position, I carefully pulled the after end into
the appropriate position, which I determined by using a level off the two
installed centerline beams; I adjusted the position of the edge beam by
pulling it in or out as needed until the level was perfect. Then, I
marked the position on the hull with a marker. This photo shows the
black marks where the beam ends belong, and their tendency to spring
outboard when not held tightly in place. After
I slipped the beam into position, I carefully pulled the after end into
the appropriate position, which I determined by using a level off the two
installed centerline beams; I adjusted the position of the edge beam by
pulling it in or out as needed until the level was perfect. Then, I
marked the position on the hull with a marker. This photo shows the
black marks where the beam ends belong, and their tendency to spring
outboard when not held tightly in place. |
 Finally,
I installed the beams permanently with thickened epoxy adhesive at all
mating locations. To help hold the after ends in the proper position
side-to-side, and pushed down tightly against the hull and into the
adhesive, I arranged some scrap pine to hold things properly in position,
and braced off the deck above to push them down into the epoxy. I
left this to cure overnight. Finally,
I installed the beams permanently with thickened epoxy adhesive at all
mating locations. To help hold the after ends in the proper position
side-to-side, and pushed down tightly against the hull and into the
adhesive, I arranged some scrap pine to hold things properly in position,
and braced off the deck above to push them down into the epoxy. I
left this to cure overnight. |
|
|
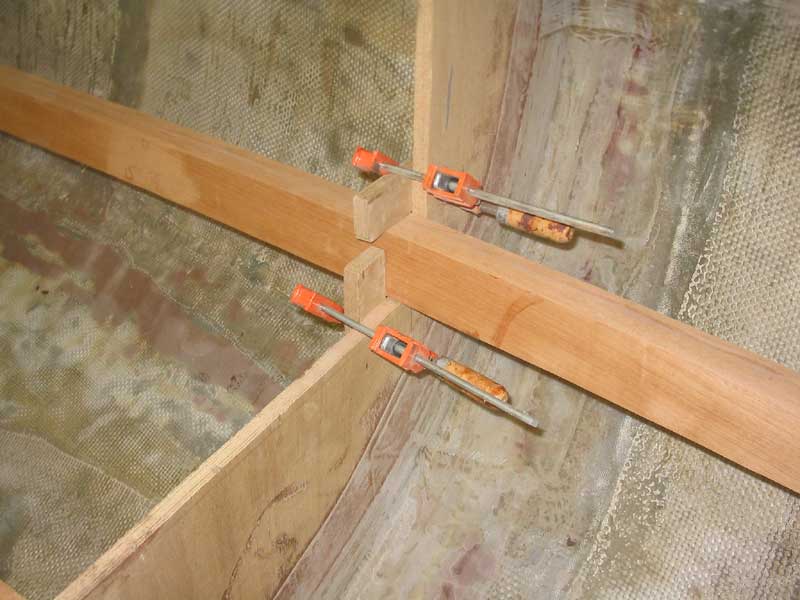
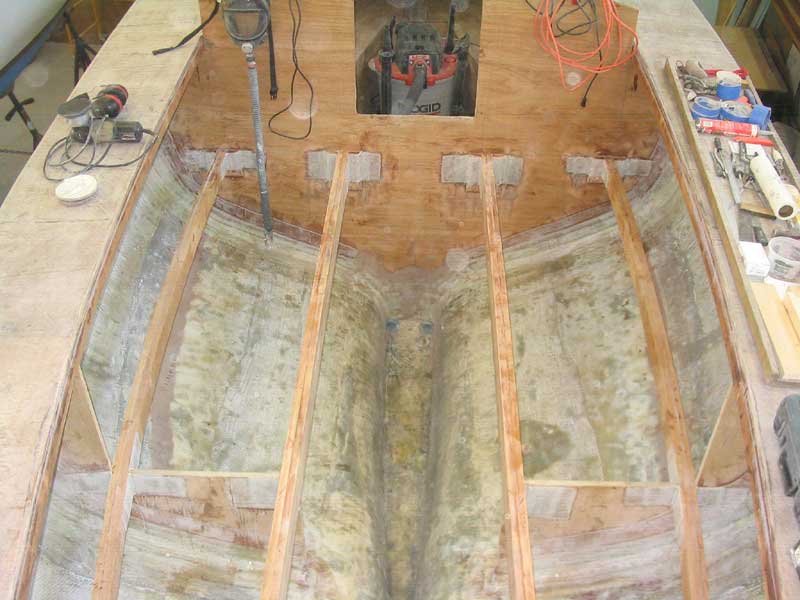 The next day, I returned. I had limited time available, but wanted
to install the fiberglass tabbing at all of the beam mating locations to
reinforce the joints and the structure as a whole. I decided to
leave the temporary wooden clamps and braces in place until the tabbing
was installed and cured. The next day, I returned. I had limited time available, but wanted
to install the fiberglass tabbing at all of the beam mating locations to
reinforce the joints and the structure as a whole. I decided to
leave the temporary wooden clamps and braces in place until the tabbing
was installed and cured. |
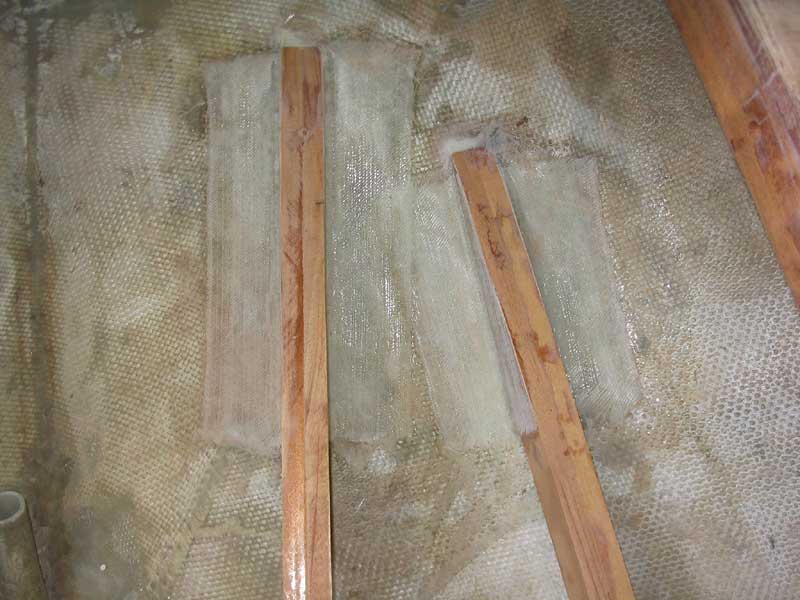
 Over a couple hours, I installed tabbing at the ends of the four beams
where they disappeared into the hull, and at all the areas where the beams
met the bulkheads. In each location, I used two layers of
overlapping 22 oz. biaxial tape. Over a couple hours, I installed tabbing at the ends of the four beams
where they disappeared into the hull, and at all the areas where the beams
met the bulkheads. In each location, I used two layers of
overlapping 22 oz. biaxial tape. |
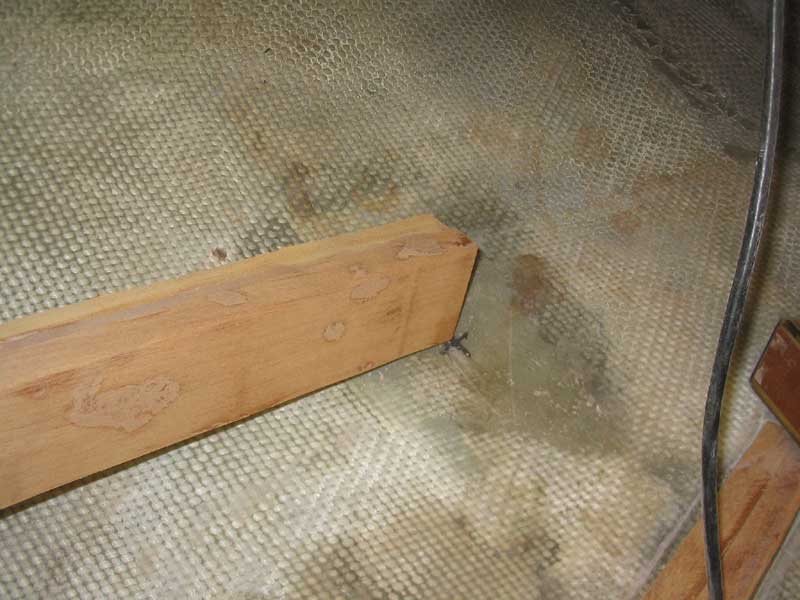
 The next morning, the fiberglass had cured, and I spent some time cutting
away some extra material that extended beyond the beams in a few places,
and grinding the new fiberglass to remove rough edges and clean it up for
future steps. This completed the basic cockpit understructure. The next morning, the fiberglass had cured, and I spent some time cutting
away some extra material that extended beyond the beams in a few places,
and grinding the new fiberglass to remove rough edges and clean it up for
future steps. This completed the basic cockpit understructure. |
 |