|
| |
|
From a Bare
Hull: The Bottom
|
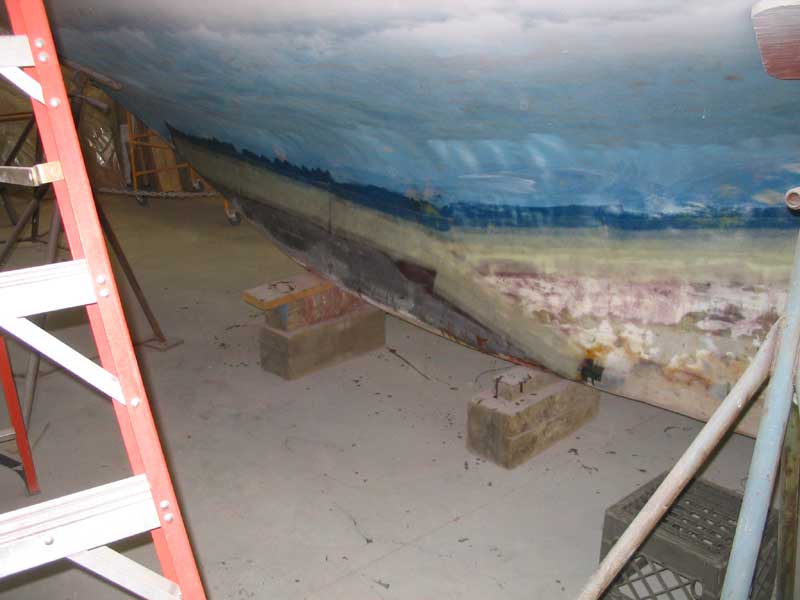
 The
bottom, and in particular the keel, required some attention, attention
that I had long postponed. However, with the ultimate completion of
the boat looming in the not-so-distant future, I decided to tackle the
chores required to complete the bottom work and prepare the bottom for
painting. The
bottom, and in particular the keel, required some attention, attention
that I had long postponed. However, with the ultimate completion of
the boat looming in the not-so-distant future, I decided to tackle the
chores required to complete the bottom work and prepare the bottom for
painting. |
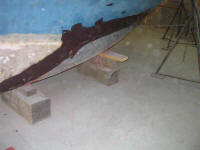
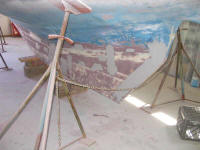
 The
keel, with its external ballast pig and foam-filled deadwood, required the
most work. The seams between these various components had opened up
years before, and several previous attempts at repair and filling were
failing. To begin, I ground away any loose material, old paint, and
other foreign substances with 40 grit discs, working my way around the
entire keel, including the bottom area normally invisible to bystanders.
I ground the entire ballast pig to expose fresh, clean, unutilized
material so that any epoxy used would bond as well as possible. The
keel, with its external ballast pig and foam-filled deadwood, required the
most work. The seams between these various components had opened up
years before, and several previous attempts at repair and filling were
failing. To begin, I ground away any loose material, old paint, and
other foreign substances with 40 grit discs, working my way around the
entire keel, including the bottom area normally invisible to bystanders.
I ground the entire ballast pig to expose fresh, clean, unutilized
material so that any epoxy used would bond as well as possible. |
 Next,
I mixed a batch of epoxy filler and troweled it onto the seams between the
ballast and the hull, and between the deadwood and main hull molding.
My goal in this step was to provide a decent base for a future application
of fiberglass reinforcement, and to smooth out some abrupt transitions to
allow the glass to lay down more effectively. I left the epoxy to
cure overnight, and then sanded it smooth the next morning. Next,
I mixed a batch of epoxy filler and troweled it onto the seams between the
ballast and the hull, and between the deadwood and main hull molding.
My goal in this step was to provide a decent base for a future application
of fiberglass reinforcement, and to smooth out some abrupt transitions to
allow the glass to lay down more effectively. I left the epoxy to
cure overnight, and then sanded it smooth the next morning. |
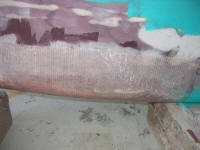
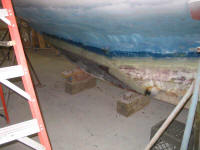 The
next step was to install some fiberglass over these joints, to seal them
and reinforce the area; in particular, the keel deadwood was thin and
weak, and required additional material. I applied three layers of
material to all areas: 4" and 6" biaxial tape, followed by a layer
of 10 oz. fiberglass tape in an 8" width, which helped smooth out the
previous layers and worked to absorb some excess resin for a smoother
overall surface. The
next step was to install some fiberglass over these joints, to seal them
and reinforce the area; in particular, the keel deadwood was thin and
weak, and required additional material. I applied three layers of
material to all areas: 4" and 6" biaxial tape, followed by a layer
of 10 oz. fiberglass tape in an 8" width, which helped smooth out the
previous layers and worked to absorb some excess resin for a smoother
overall surface. |
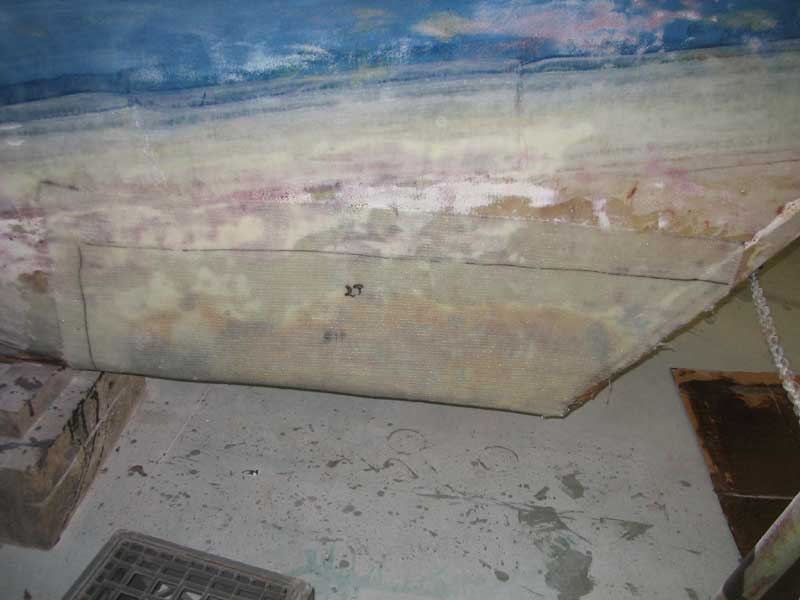
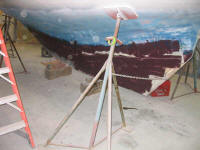
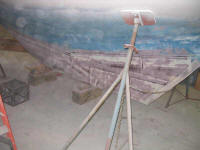
 The
next day, I sanded the new tabbing, and then prepared to apply some large
pieces of fiberglass to the bottom portion of the keel deadwood, aft of
the ballast, that would wrap directly beneath the keel and around to
the other side, repairing some damage in the area and significantly
reinforcing the whole thing. I made a plastic pattern of the area
with some scrap plastic sheeting, then transferred the shape to some 15
ox. biaxial fabric and cut it out. Then, I cut another piece, this
time 3" larger in all dimensions so that it would overlap the first piece. The
next day, I sanded the new tabbing, and then prepared to apply some large
pieces of fiberglass to the bottom portion of the keel deadwood, aft of
the ballast, that would wrap directly beneath the keel and around to
the other side, repairing some damage in the area and significantly
reinforcing the whole thing. I made a plastic pattern of the area
with some scrap plastic sheeting, then transferred the shape to some 15
ox. biaxial fabric and cut it out. Then, I cut another piece, this
time 3" larger in all dimensions so that it would overlap the first piece. |
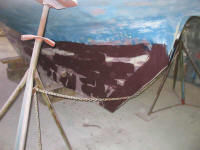
 With
the area cleaned and prepared, and a few reference marks made on the
surface, I wet out with epoxy resin the first (smaller) piece of glass on
some cardboard. Then, bringing the cardboard over to the boat, I
picked up one side and pressed it onto the keel, sticking it with my hands
(glove-covered). Moving around to the other side of the boat, I
repeated the process with the other half of the fabric. Once it was
stuck on both sides, I continued by smoothing it out and rolling it into
place with an air roller, ensuring that I removed all air pockets and
ridges. In particular, I paid attention to the bottom of the keel,
where the fabric wrapped beneath the keel. With
the area cleaned and prepared, and a few reference marks made on the
surface, I wet out with epoxy resin the first (smaller) piece of glass on
some cardboard. Then, bringing the cardboard over to the boat, I
picked up one side and pressed it onto the keel, sticking it with my hands
(glove-covered). Moving around to the other side of the boat, I
repeated the process with the other half of the fabric. Once it was
stuck on both sides, I continued by smoothing it out and rolling it into
place with an air roller, ensuring that I removed all air pockets and
ridges. In particular, I paid attention to the bottom of the keel,
where the fabric wrapped beneath the keel. |
 Once
the first piece was rolled out, I repeated the process with the second,
larger piece, The whole job was surprisingly easy, despite the large and
inconvenient sizes of the sheets of fiberglass. I used about 72 oz.
of mixed resin for the job. Once
the first piece was rolled out, I repeated the process with the second,
larger piece, The whole job was surprisingly easy, despite the large and
inconvenient sizes of the sheets of fiberglass. I used about 72 oz.
of mixed resin for the job.
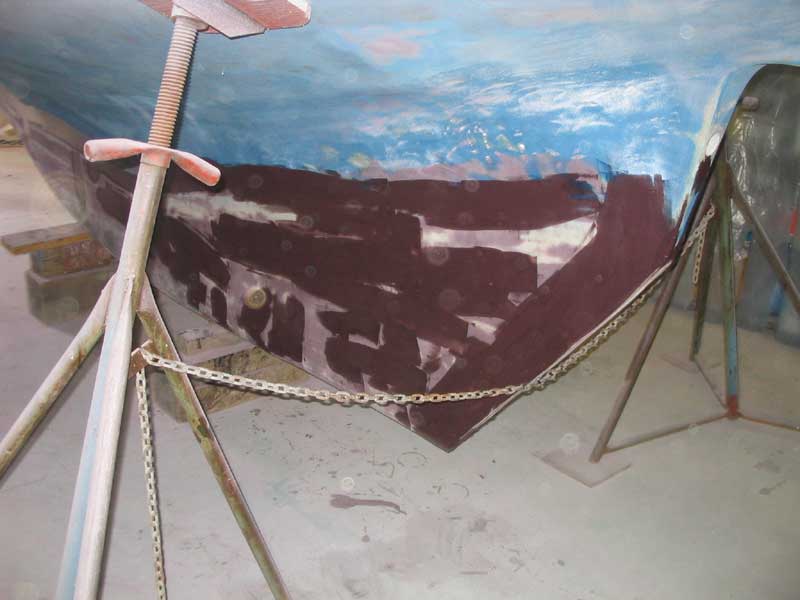
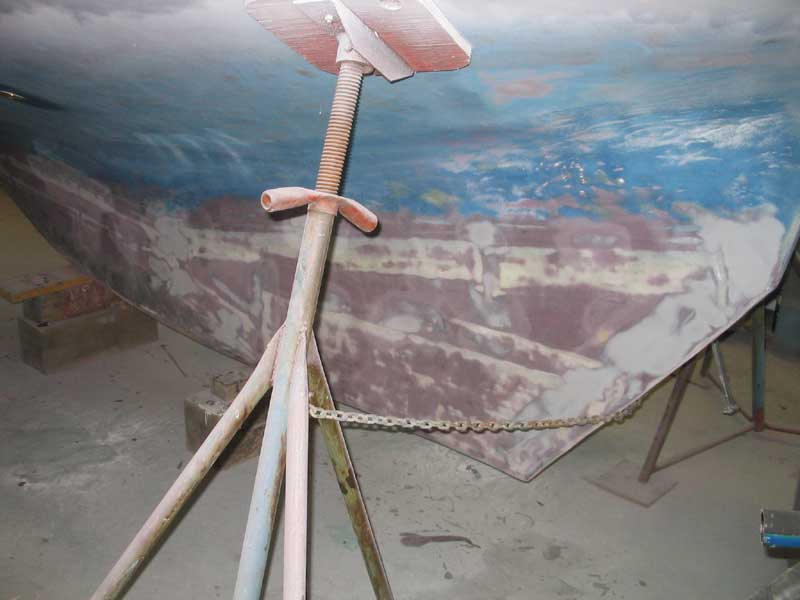
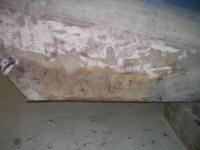
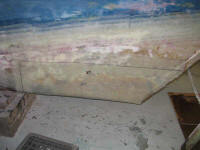
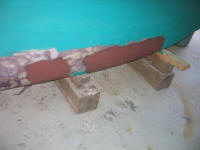
When the
fiberglass was cured, I cleaned and sanded it to remove rough edges, and
then began the first application of final fairing filler to the keel
areas, applying the thickened epoxy filler to all areas where I had
installed fiberglass to provide a smooth and fair transition between the
glass and the remaining keel and hull, and also to begin to fill any rough
weave of the biaxial cloth. I continued this process through three
rounds of fairing, each time filling only the low spots and working to
achieve a relatively fair and smooth surface.
|
Round 1 Fill Application
|
 Round
1 Sanding Round
1 Sanding |
 Round
2 Fill Application Round
2 Fill Application |
 Final
Fill Application Final
Fill Application |
|

Final Sanding
|
 Several
weeks later, after test-launching the boat to determine the waterline, I
had the boat reblocked so as to expose the two areas that had been
inaccessible beneath the blocking earlier. Both areas required
minor filling and fairing, after removing some old polyester fairing
material that had been applied some time in the distant past. Several
weeks later, after test-launching the boat to determine the waterline, I
had the boat reblocked so as to expose the two areas that had been
inaccessible beneath the blocking earlier. Both areas required
minor filling and fairing, after removing some old polyester fairing
material that had been applied some time in the distant past. |
 With
that complete, I applied a layer of fiberglass over each area to
encapsulate the repairs and clean things up. When the glass cured,
I applied fairing compound, which I sanded smooth the next day. With
that complete, I applied a layer of fiberglass over each area to
encapsulate the repairs and clean things up. When the glass cured,
I applied fairing compound, which I sanded smooth the next day.
Return to Main Menu>
|
|