~MENU~

Home
The Concept
The Boat
Bringing Her Home
Weekly
Progress Log
Daysailor
Projects
     
The Boat Barn
Resources
Other Sites
Email Tim


Boat Barn:  Insulation, Windows, and Doors 

Along with the electrical installation and wiring, I chose to do all the work on the windows, doors, and insulation in the barn.
Framing          
Raising the Walls           
Roof and Trim
Electrical
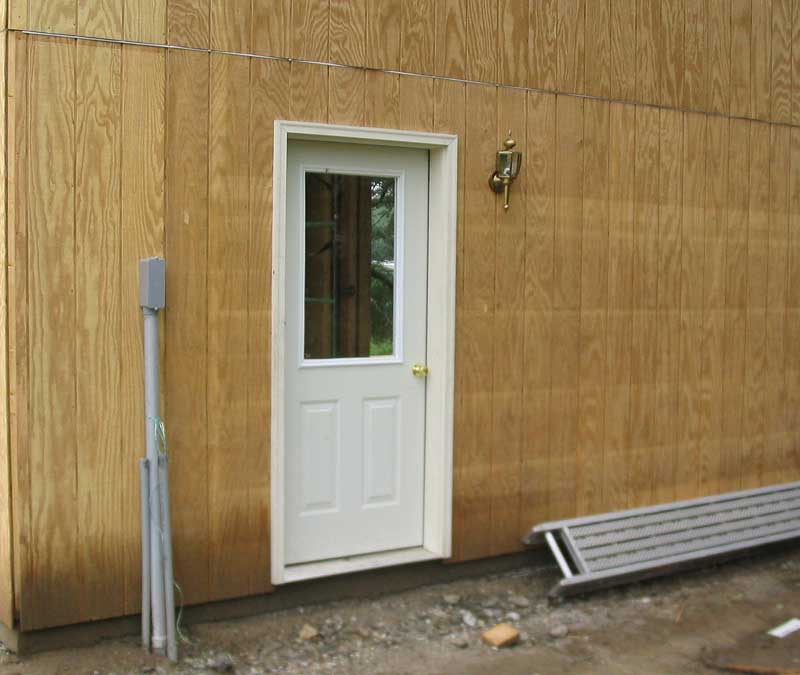
  Insulation/Windows/Doors 
     
Clerestory Windows
       
Back Windows
        Man Door
       
Insulation
        Vapor Barrier Plastic
       
Rolling Barn Doors
 
Barn Home Page

Clerestory Windows

barnright-o.jpg (13096 bytes)The original design for the barn called for seven clerestory windows along the upper edge of one of the walls.  Because of the way the barn ended up situated on my property, I essentially "flipped" the walls; that is, the right wall from the plan (image to the right) became the left wall in reality.

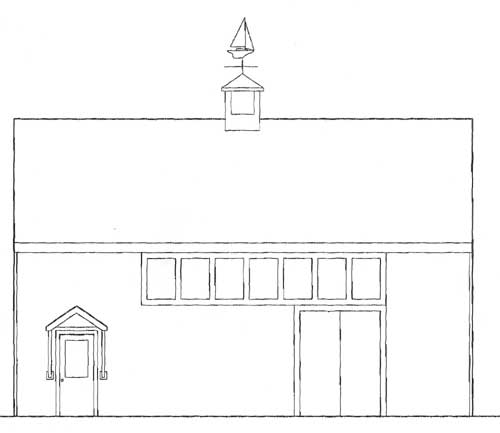
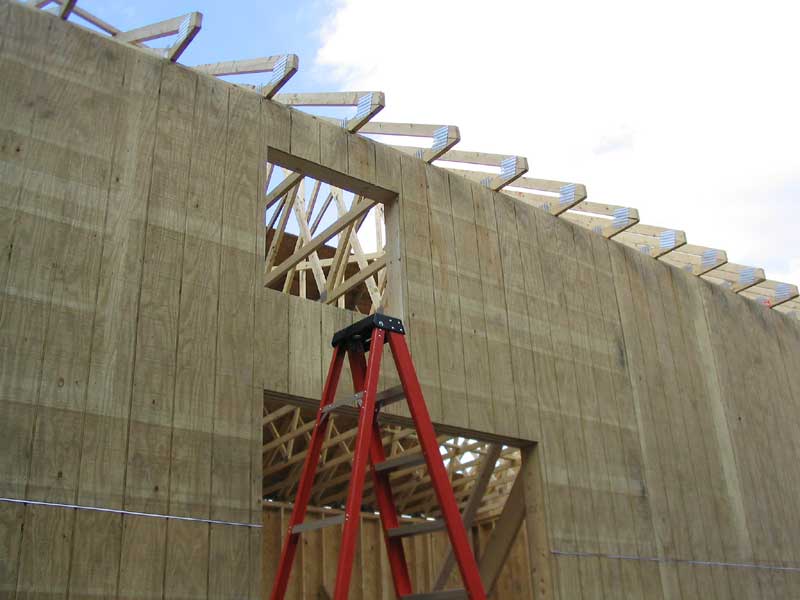
For a time, I debated how many--or if indeed any--windows I would install in the barn at this time.  Duh.  Of course, I ended up deciding that I needed to install all seven clerestory windows, in part because the two end openings had been partially cut open while the walls were raised with the crane.  Because I wanted to retain the consistent look of the full row of windows, this more or less forced my hand into installing all seven; I had been considering doing five.

No worry, though, as the windows I had chosen previously (so that the rough openings could be properly framed) were inexpensive enough that I could splurge on a large number of them.  And in the end, the windows will make the barn, both from an appearance standpoint outside, as well as from a functionality standpoint inside.


Itching to do something on the barn myself, after weeks of anticipation and waiting through site work, slab, framing, and other details, I decided to cut the openings out one Sunday shortly after the walls were raised.  That way, I would be ready to install the actual windows as soon as the roof was complete, with minimal work at that moment.  To assist in the myriad tasks that I intended to complete on the barn myself, I had earlier purchased a nice 12' commercial fiberglass stepladder; which is the perfect height for doing work inside the barn (with 16' ceilings).  This ladder worked well for cutting the window openings, which were located near the top of the sidewall as shown.

1csopening.jpg (41932 bytes)First, however, I needed to mark the openings so I'd know where to cut.  From the inside, I drilled a small hole at each corner of the seven windows, keeping the long bit tightly into the corner of the rough opening framing.  Thusly marked, it was easy to climb the ladder outside and, using a straightedge, connect the four points with a Sharpie marker.

With each window marked, I cut out the plywood sheathing/siding with my small circular saw, with the blade set to just over 3/4" in depth. (The siding is 3/4".)  Then, I plunged the blade into the siding and cut out the openings, one at a time, until all seven were complete.  My blade, the only one I had on hand, was dull to begin with, but was really dull by the time I reached the last opening.  Needless to say, I was glad to be done with it!  


csinside.jpg (80723 bytes)The new openings instantly transformed the space, as well as the outside appearance of the south wall.  The 63 ft2 of window space located at the top of the wall would provide great and useful light, as well as some ventilation (since the windows to be installed were sliders).


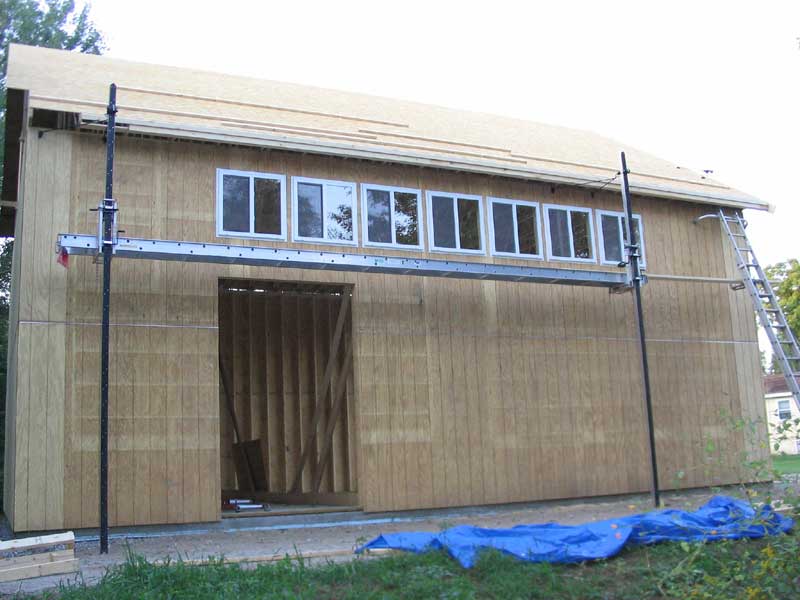
I installed the windows several days later.  Bob had his aluminum jack staging set up on the south wall, and I couldn't pass up such a convenient opportunity.  The windows I chose are simple sliding vinyl windows, 3' x 3', with a nailing flange that makes installation a breeze.

windowsoutside-o.jpg (52382 bytes)Installation was quite simple.  First, I checked each opening for level--they were, so that meant that I didn't have to bother leveling each window as long as I ensured that the sill was properly resting on the bottom of the rough opening.  Then, for each window, I caulked the bottom of the rough opening, placed the window in, and nailed in place all around the nailing flange with 2" roofing nails.  I had to trim a couple of the rough openings just a touch in order to get the windows to fit, but the installation went smoothly.  Later, I'll trim out the windows with some flat pine trim to match the rest of the building, which should finish off the look quite nicely.

windowsinside-o.jpg (60759 bytes)


West Wall Windows (Back Wall)

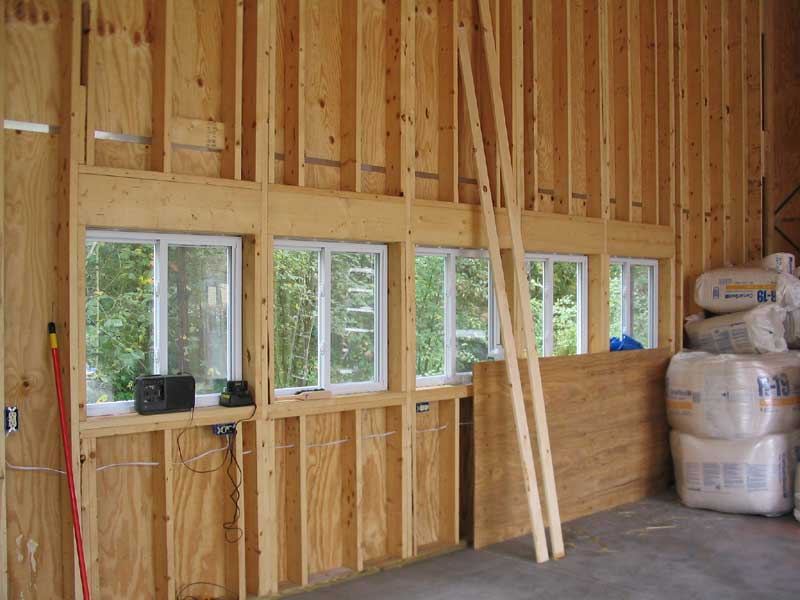
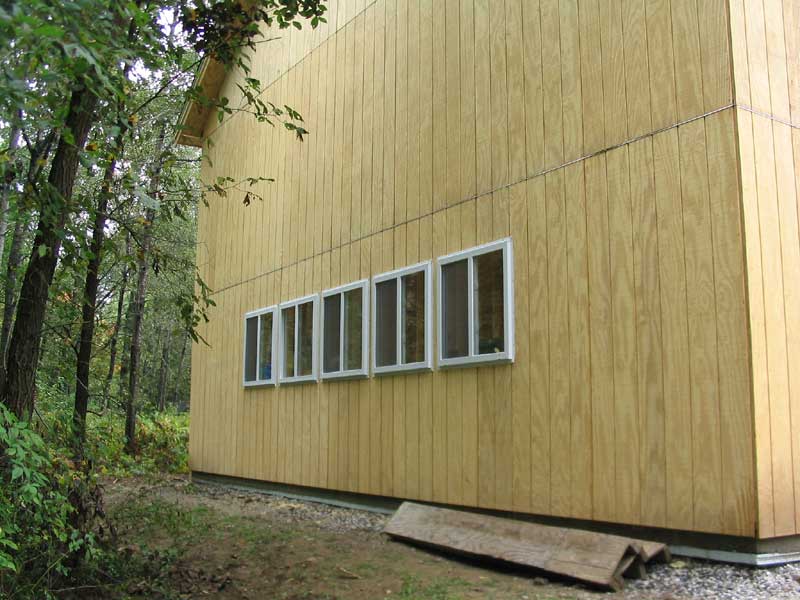
I couldn't resist installing all five of the planned windows in the back wall.  I had entertained the idea of adding a couple, or waiting altogether until another time.  However, after seeing the difference the clerestory windows made, I threw the budget out the window and bought five more of the same windows for the back wall.  Easy come, easy go.

I followed the same installation procedure as detailed above, although it was significantly easier this time because the windows were much closer to the ground--and I used a different saw with a good blade, powered with a short cord from the barn outlets. 

Oh, how nice the windows were.  I was instantly glad I installed them.  The barn is located in the corner of the property nearest our back neighbor, which happens to be an attractive cape style with a pond right on the property line.  Interestingly enough, the barn now commands the best views on our property, with pleasing glances of the pond and stream through the new back windows.

backwindowsin.jpg (53156 bytes)     backwindowsout.jpg (68663 bytes)


Entry Door (North Wall)

entrydoor.jpg (45422 bytes)Along with a large delivery of insulation, lumber, and sliding door tracks, the standard entry door finally arrived, and I installed it the same day.  With a newly-framed rough opening that was basically plumb and level, installation was quite simple and trouble-free.  In short order, I had the door installed, shimmed, and securely nailed and screwed in place as called for.  I installed the supplied door hardware, and the job was complete.


Continue>


All photos and text on this site ©2002-2009 by Timothy C. Lackey and Lackey Sailing, LLC
All rights reserved.