
|
|
~MENU~ |
| Home |
| The Concept |
| The Boat |
| Bringing Her Home |
|
Weekly Progress Log |
|
Daysailor Projects |
| The Boat Barn |
| Resources |
| Other Sites |
| Email Tim |
|
|
| Boat Barn: Framing Detail |
| Barn
Home Page
Boat Barn Framing Detail I watched the framing process (well, really the whole barn construction process) with keen interest. I decided to hire out the bulk framing and roofing for this job for a few reasons, even though I knew I was capable of pulling it off myself if need be. Still, the job was a little bigger than I wanted to tackle alone, and while I've framed a number of interior rooms and such, I didn't feel I was quite up to snuff on all the ins and outs that a substantial framing job like this one entails. Had the walls been somewhat smaller--perhaps the size of a typical garage--I would have attacked the job with little hesitation. That doesn't mean, however, that I have no interest in doing this sort of job myself in the future. I despite having to hire people to do work of which I am capable, so I try to learn as much as possible at all stages of the game; this is why I have made myself available around the site as much as possible during the whole process. In any event, I thought it would be useful to me--and perhaps to others--if I cataloged some of the framing and construction details of this boat barn. If nothing else, then for general interest. Please click on any of the
photos for a full-size version. |
 |
1
The standard man door at the east corner of the north wall features header built up of 3 2x10s, with two layers of 1/2" plywood sandwiched between to make up the thickness so the header is the same thickness as the 2x6 framing (5-1/2").
|
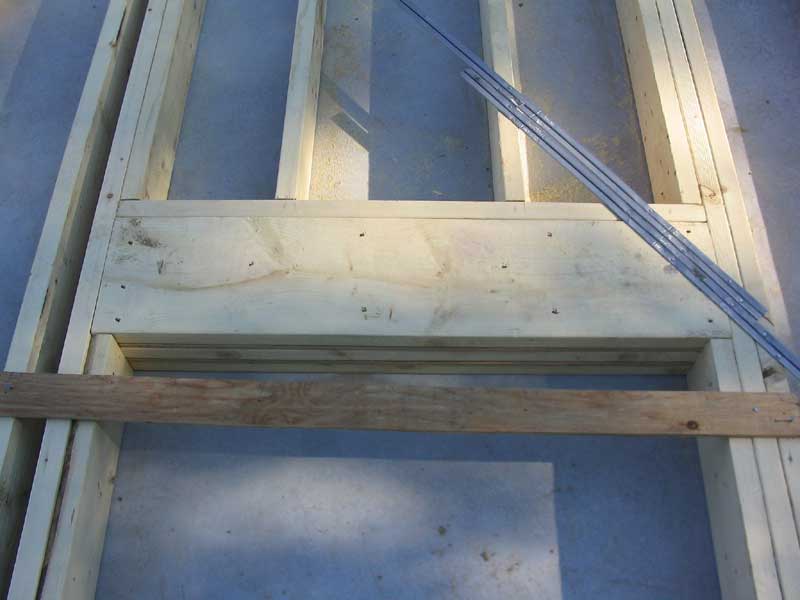 |
2
As is typical, the header is supported by jack studs on the inside of the full-height main studs on either side. The additional studs on either side--particularly on the right side in these photos--are installed as necessary to maintain the standard 16" OC frame spacing. |
 |
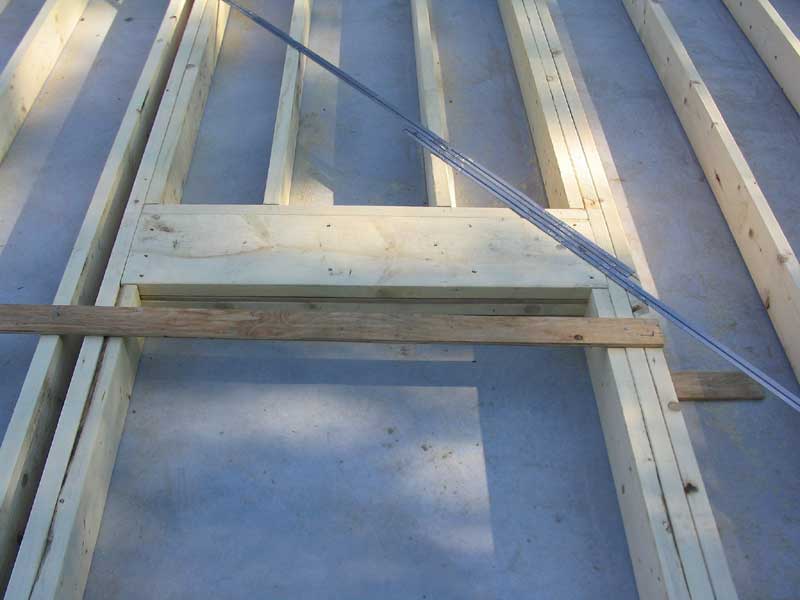
3
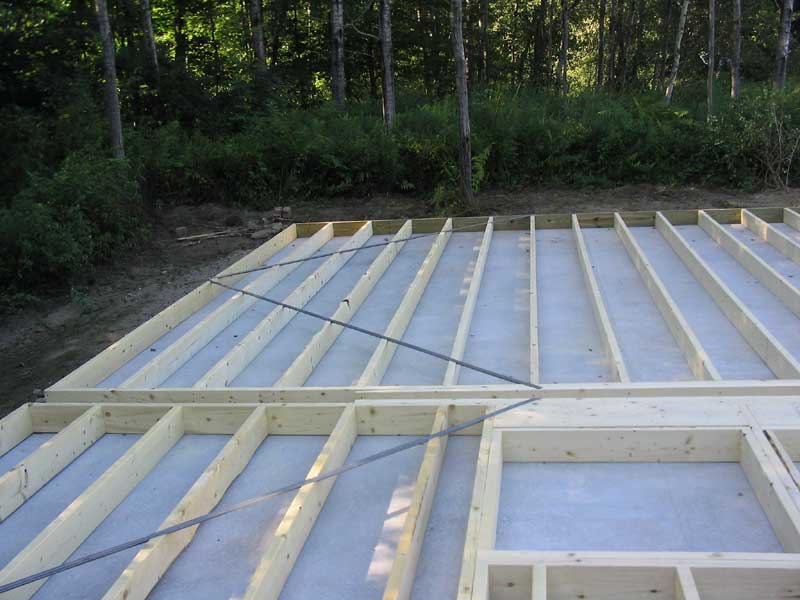
There are also a complementary set of studs--I hesitate to call them jack studs in this application--above the header and in line with the jack studs beneath. Note also the diagonal metal bracing, which is installed on each wall in a similar manner. The bracing fits into a slot sawn into the framing, and is nailed in place. |
 |
4
The rough opening for this door, as seen here, is 38-1/2" wide by 81" high, to fit a standard 3' by 6'-8" door (3068). |
 |
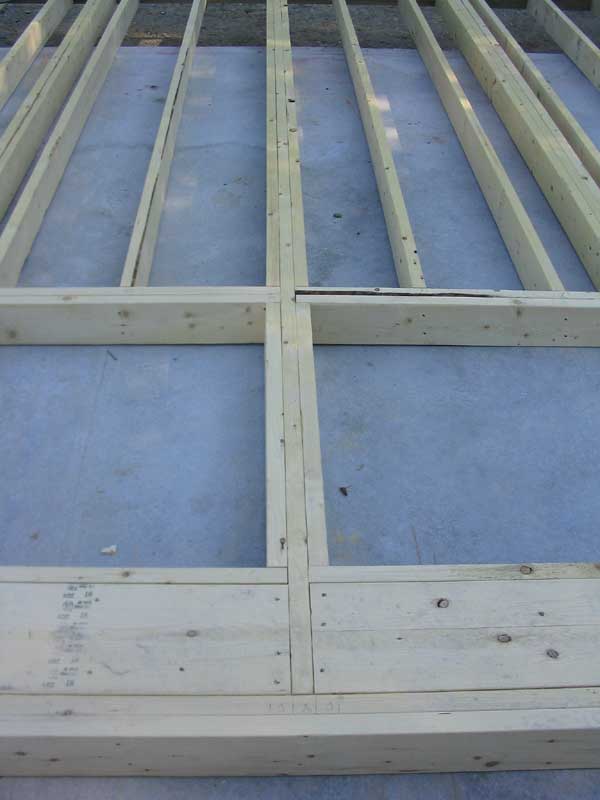
5
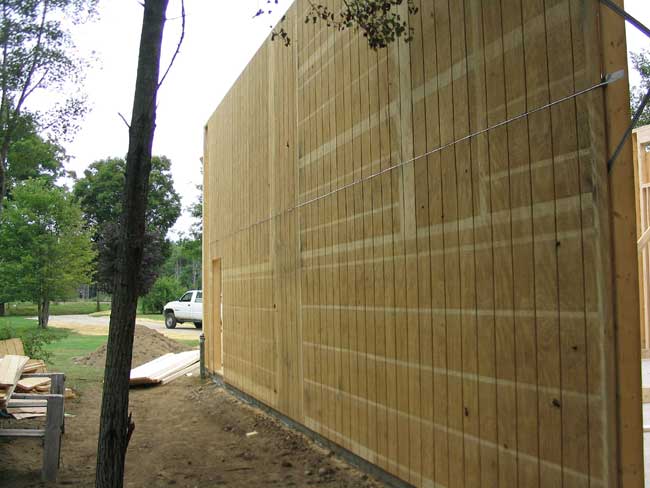
The north wall (looking towards the back of the barn in this photo) is quite simple and features typical 2x6 studs on 16" centers. The only feature breaking up this wall is the man door opening described above, which is located towards the front of the building. |
 |
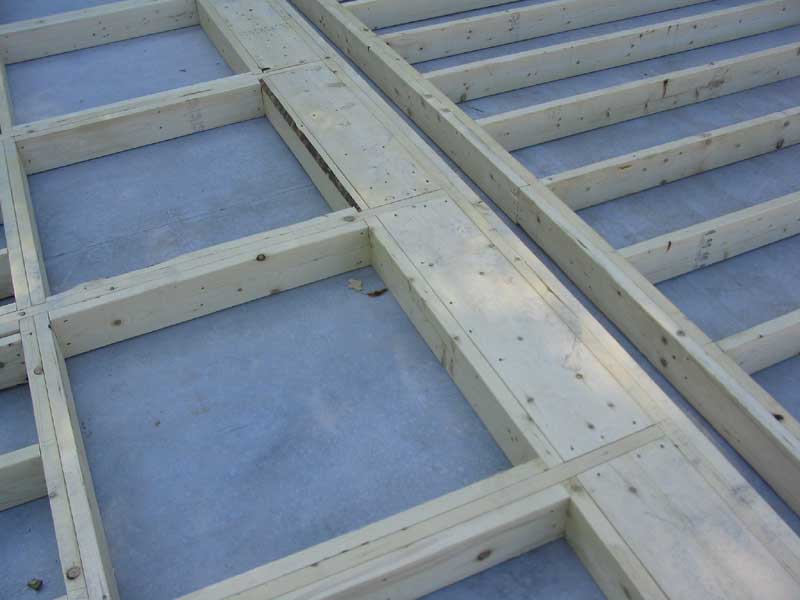
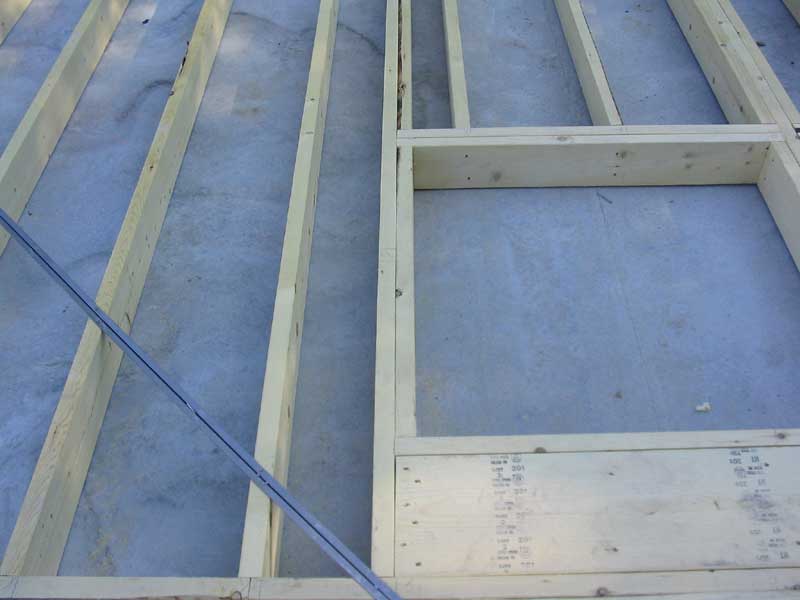
6
Here's another view of the back part of the north wall, and also part of the south wall, with the framed window opening. Note the metal bracing and its position. |
 |
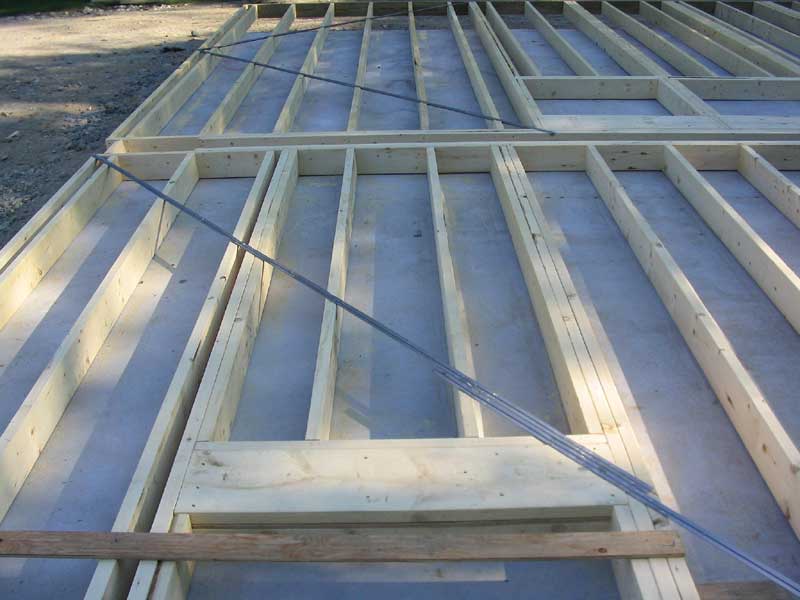
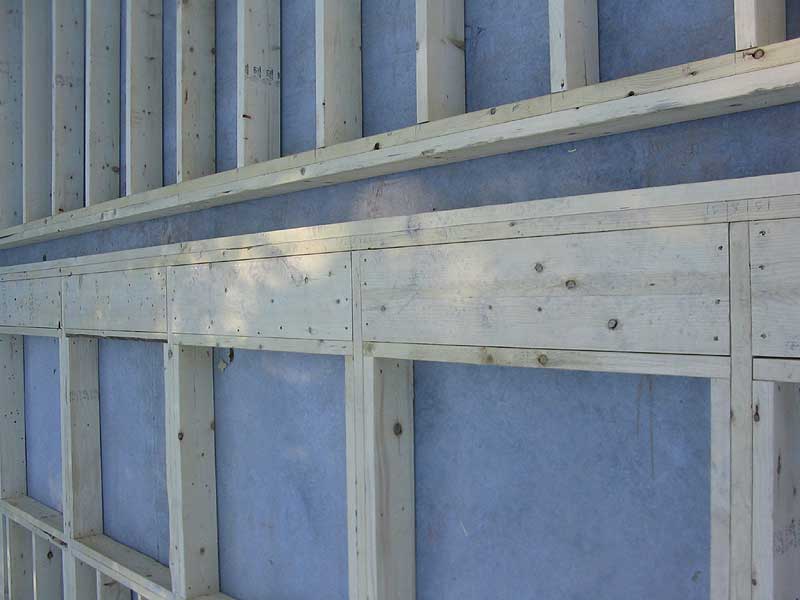
7
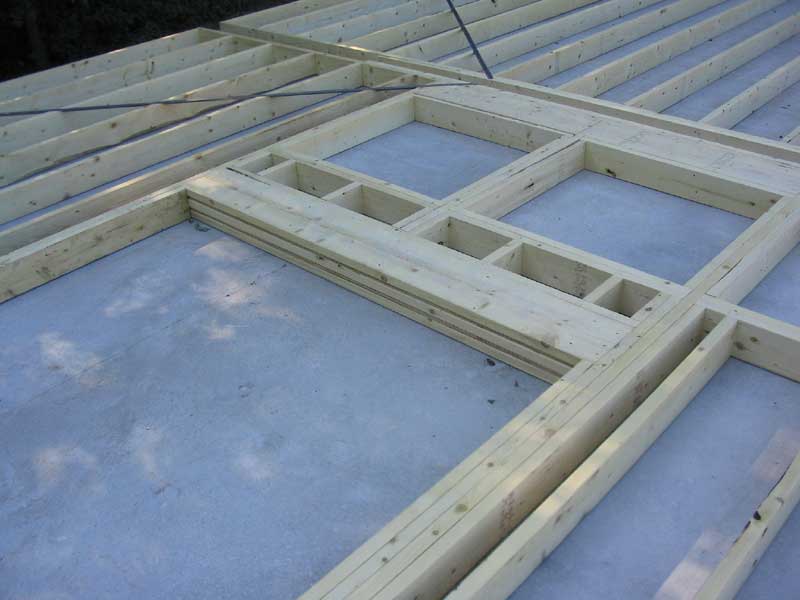
This is the rough opening for the side door located 8' forward of the back (west side) of the barn on the south wall. The rough opening is 6'4" wide and 10' high. Note that the window openings (2 of 7 total shown) are in line with the door opening beneath for visual effect. |
 |
8
Here's a more detailed view of the header. Like the man door on the opposite side, this header is 3 lengths of 2x10 with 2 layers of 1/2" plywood between, making a total thickness of 5-1/2" and therefore flush with both sides of the framing. Note also the triple studs between each window opening. |
 |
9
Here's a detail view of the window framing, looking towards the "bottom" of the wall (top of the photo). Details to notice:
|
 |
10
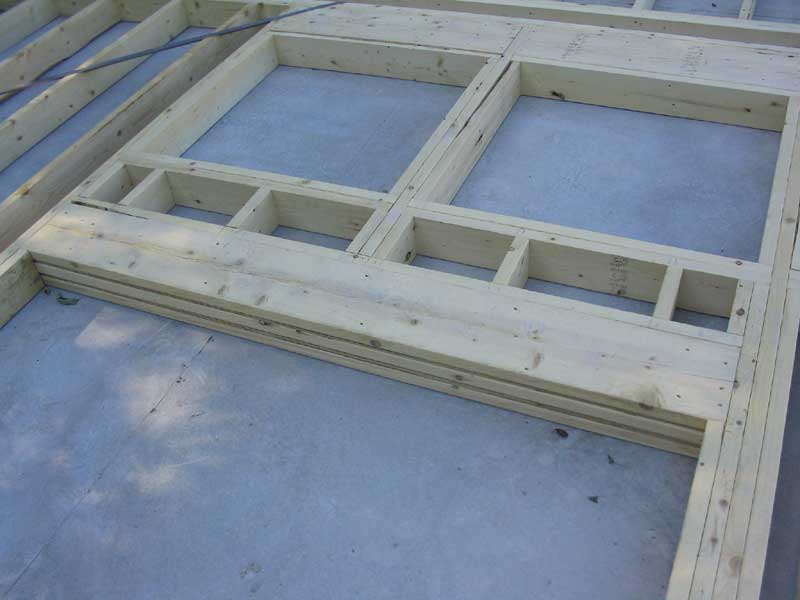
Here's a view of several of the window headers and associated framing. The rough opening is 36-1/2" wide by 35-1/2" tall, for a window of nominal size 3' x 3' (3030). |
 |
11
More of the same from a slightly different angle. |
 |
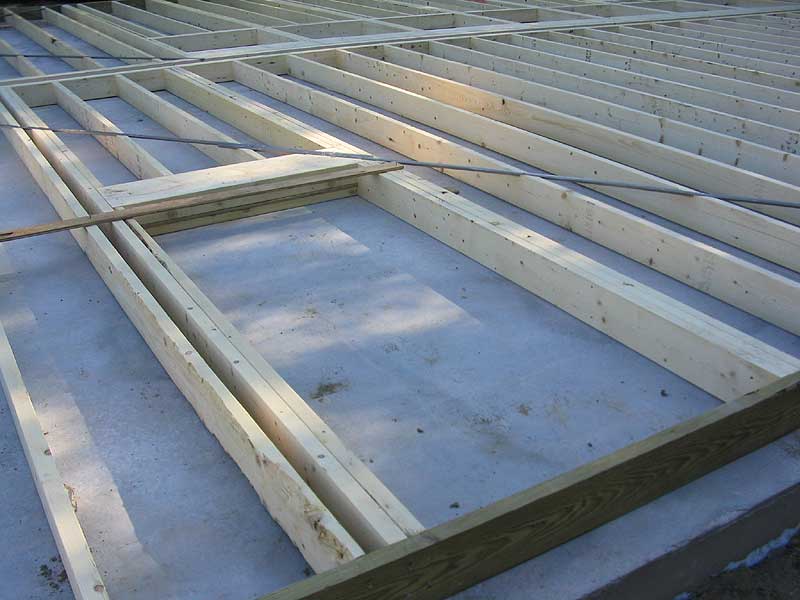
12
Here's a more detailed shot of the end window framing, with full-length stud outside the jamb, doubled bottom plate, and other details. |
 |
13
Here's an overall shot of the south well, showing the line of clerestory windows and their general relationship to the doorway and other features of the wall. |
 |
14
This shows the window framing from a different angle. Note the triple studs beneath each set of tripled jambs--but separate from the jamb liners and bottom plates, though the center stud in each case extends all the way to the top plate. The headers span the distance between these full-length studs, and the jambs inside support the headers. Refer to photo 9 for a more detailed view. |
Continue>