|
|
~MENU~ |
| Home |
| The Concept |
| The Boat |
| Bringing Her Home |
|
Weekly Progress Log |
|
Daysailor Projects |
| The Boat Barn |
| Resources |
| Other Sites |
| Email Tim |
|
|
| Progress Report: 2005 Archives |
|
January February March April May June July August September October November December |
|
Reports from August 2005 8/7/05 8/14/05 8/21/05 8/28/05 |
|
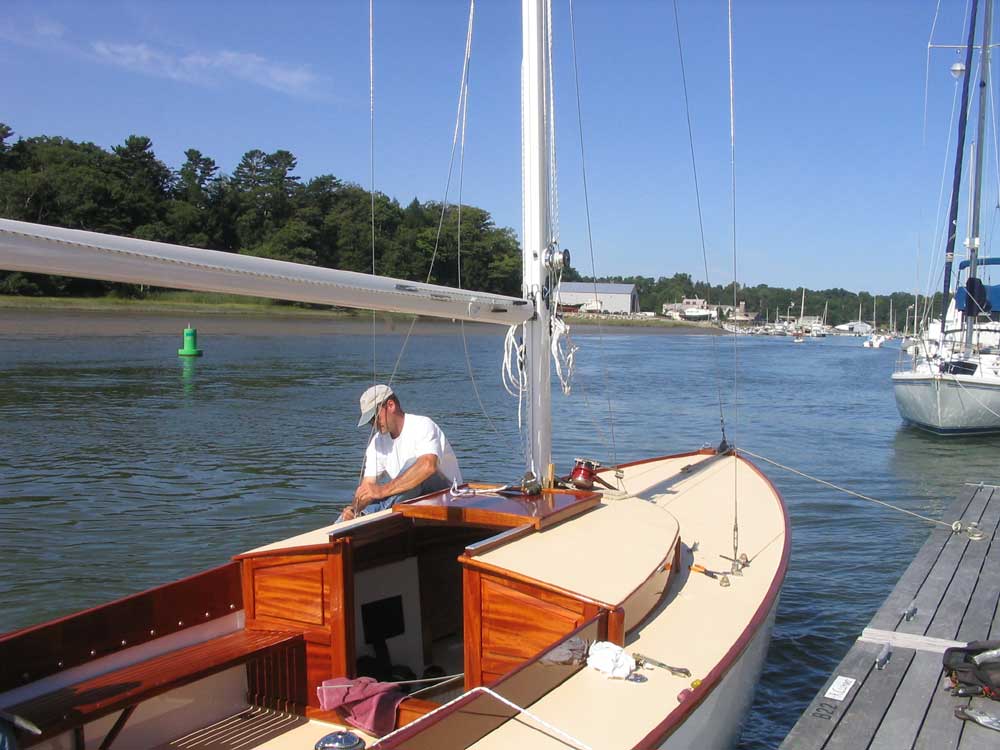
Log for the Week Ending August 7, 2005 There is no progress to report this week; I was away cruising. |
|
Log for the Week Ending August 14, 2005 There is no progress to report this week; I was away cruising. |
|
Log for the Week Ending August 21, 2005 We returned from cruising this week, but I remained on vacation through the weekend. With launching and rigging scheduled for next Friday, I knew I'd have a busy final week preparing things, and looked forward to returning to work Monday. The only thing I did over the weekend was install the new tiller. |
|
Log for the Week Ending August 28, 2005 Monday morning, I jumped back into the swing of things bright and early, eager to knock off as many punch list items as I could before launching on Friday. Most of the major work was already done, but myriad details remained.
|
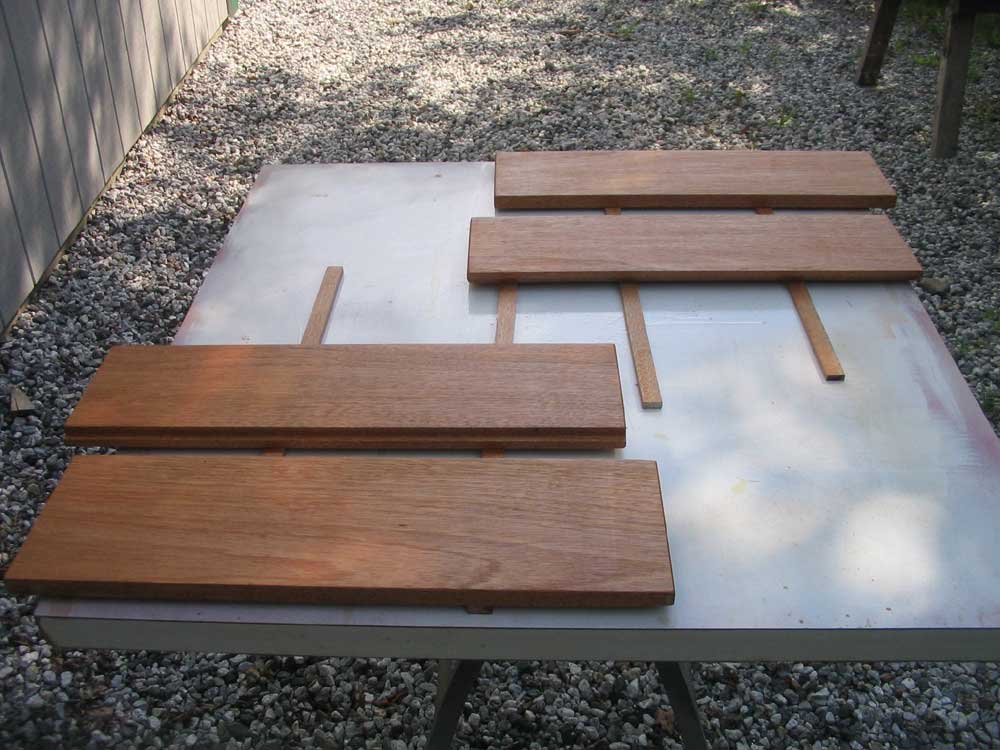
 The cabin sole required some trim pieces around the edges, to hide the seam
there. I milled some 1/2" quarter round molding with a router and the
table saw, and set it aside for finishing before installation. I also
installed mahogany planks on the two bilge access hatches in the cabin sole,
which I had refrained from doing earlier. I followed the same basic
process used for the main sole. The cabin sole required some trim pieces around the edges, to hide the seam
there. I milled some 1/2" quarter round molding with a router and the
table saw, and set it aside for finishing before installation. I also
installed mahogany planks on the two bilge access hatches in the cabin sole,
which I had refrained from doing earlier. I followed the same basic
process used for the main sole. |
|
While I awaited the delivery of my rigging wires, I took some time to run the Dacron halyards on the mast. The mast came complete with messenger lines for the internal halyards, so it was relatively simple to run the lines through. I ran a main halyard, jib halyard, and topping lift--even though the topping lift would be unnecessary once my new rigid boom vang arrived from Garhauer. Because I didn't anticipate that the vang (or the traveler, for that matter) would be here in time for launching, I ran the topping lift; later, I'll just remove it. I bought a full reel of 3/8" double braid from Samson for the halyards, sheets, and other control lines. |
|
I filled the last holes in the cabin sole with walnut bungs, covering the screws that I used to secure the cabin sole, leaving them for later trimming once the glue dried. I wanted to install the bronze lower chainplates, but I needed a tap that I didn't have in stock (3/8-16), and since I had errands to run the next morning anyway, I held off on running out quickly to pick up this item. The chainplates remained undone for yet another day. |
|
Oh, what else did I do? I painted out the bottom sides of the v-berth hatch covers with white paint, and also painted the supporting cleats. Later, I compiled a list of fasteners that I needed (I always seem to need some for something) and placed the order online, along with an order for a variety of last-minute items that I needed for the boat. With luck, this would be the last major order (as if...). |
|
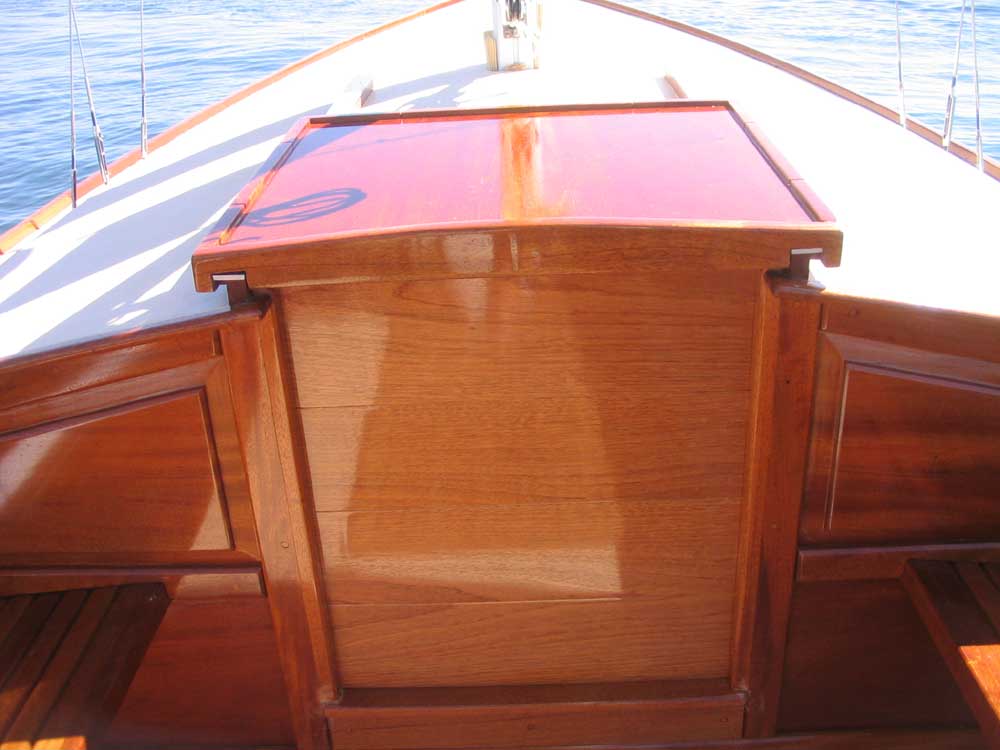
When the glue securing the planks to the bilge access hatches dried, I trimmed the excess overhang with a router, and then prepared to install a bronze drop ring in the after hatch. Installation required a rectangular hole for the base and a chiseled-out area for the top portion. The forward hatch would later be cut to fit around the mast, once the mast was stepped, so I didn't install a drop ring there. I cut the hatch in to two pieces, with the cut centered over the mast step, and would leave it for further scribing and trimming later in the week. I finished up the day's work with some more varnish on the hatch boards, and a first coat on the bilge hatches. |
|
Tuesday, after running errands that took most of the morning, I got back to work. A large order of last-minute gear arrived--stuff like docking lines and fenders, life jackets, flares, fire extinguisher, and ground tackle, and assorted other items like a masthead Windex, small halyard winch, and assorted other goodies. Unfortunately, because of an online ordering snafu at my vendor, I received two complete orders of the same stuff...partly my fault, since after I hadn't received any confirmation for my order when I placed it late last week, I simply reordered everything on Monday. No harm done. |
 Next, I attacked the bronze chainplates and remaining deck hardware, permanently
installing the remaining pieces. The bronze chainplates required 3/8"
fasteners for a nice strong installation. Below, I installed large backing
plates beneath these locations. I also installed the large forward mooring
cleat. Next, I attacked the bronze chainplates and remaining deck hardware, permanently
installing the remaining pieces. The bronze chainplates required 3/8"
fasteners for a nice strong installation. Below, I installed large backing
plates beneath these locations. I also installed the large forward mooring
cleat. |
|
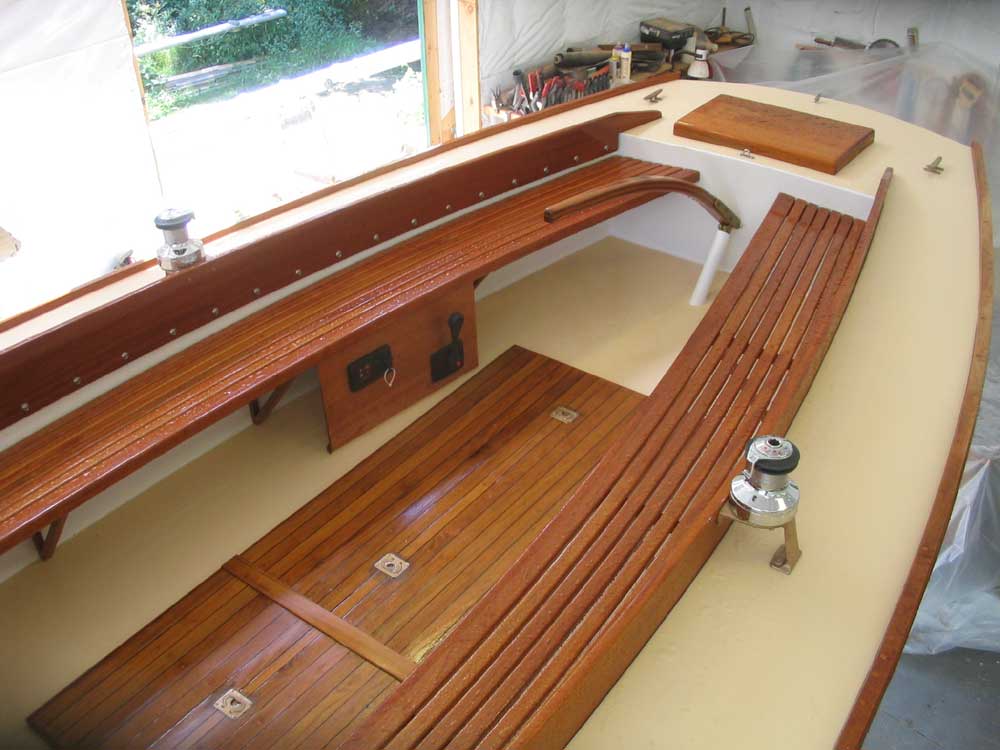
Finally, I got to work locating the bronze winch bases. Because of the construction of the boat, the after 4' or so of the cockpit walls and side decks were inaccessible from outside, as these areas were located aft of the sternmost bulkhead, and the clearance beneath the cockpit deck was tight enough to prohibit getting in from beneath. I had previously determined this lack of access would not ever create a problem, since it seemed that the winch bases (which were the only hardware item that might have had the potential to be located that far aft) would be better off further forward anyway. |
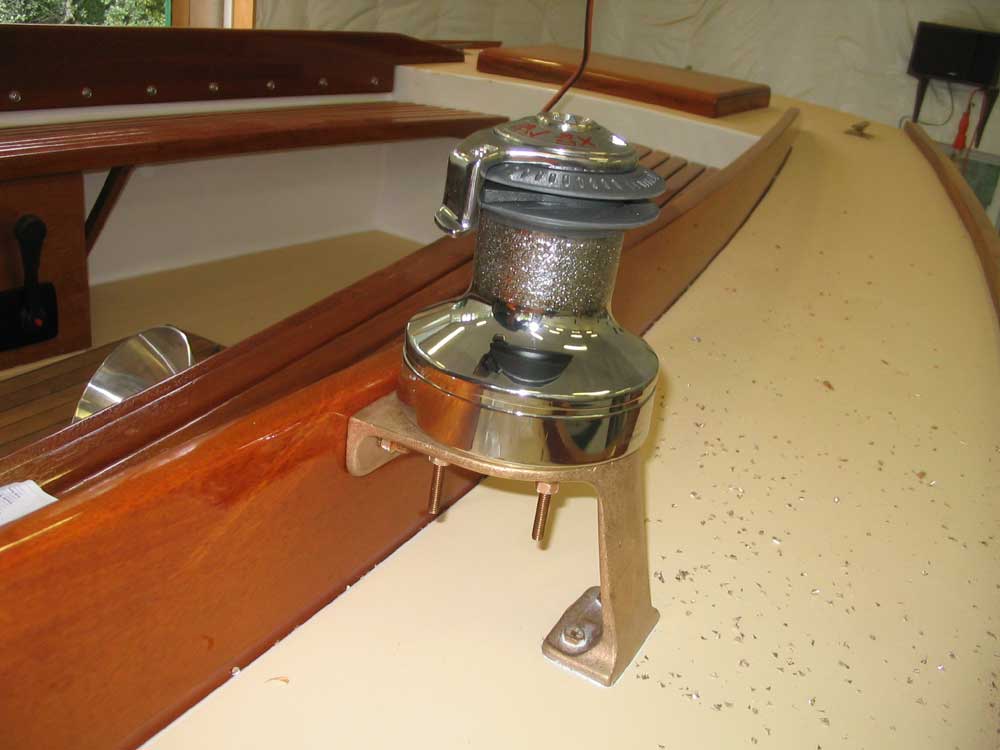 I wanted the winches to be located about as far aft as practicable, to allow for
easy access for the helmsman at the aft end of the cockpit, and to keep the
forward end of the cockpit clear for sailing guests. To locate the bases,
I first crawled beneath the cockpit and into the space outboard of the well,
beneath the sidedeck, and measured from the midships bulkhead aft to determine
the locations of deck beams that might interfere with the installation.
With these measurements in hand for both sides (yes, they were the same, but you
just never know!), I transferred the marks to the deck, and then determined by
final location. As luck would have it, the bases ended up so located as to
keep the top surface nearly level with (just a bit lower than) the top of the
coamings; any farther aft, by more than a few inches, and the bases would have
been too tall anyway. I wanted the winches to be located about as far aft as practicable, to allow for
easy access for the helmsman at the aft end of the cockpit, and to keep the
forward end of the cockpit clear for sailing guests. To locate the bases,
I first crawled beneath the cockpit and into the space outboard of the well,
beneath the sidedeck, and measured from the midships bulkhead aft to determine
the locations of deck beams that might interfere with the installation.
With these measurements in hand for both sides (yes, they were the same, but you
just never know!), I transferred the marks to the deck, and then determined by
final location. As luck would have it, the bases ended up so located as to
keep the top surface nearly level with (just a bit lower than) the top of the
coamings; any farther aft, by more than a few inches, and the bases would have
been too tall anyway. |
|
I began installation with a small test hole drilled from above, once I had marked the bolt locations on deck in the bases' final locations. From beneath, I confirmed that the test hole was clear of any obstructions, and then drilled the final holes through the deck. At this point, it had become late in the day, so I called it quits. The next day, Wednesday, I completed the installation, after a meeting and some errands that again took most of the morning. As with most hardware installations, I chose to tap the holes for the threads of the bolts, which is strong and also means that bolts can be easily installed by one person. In this case, however, this job was a real chore, since the design of the winch bases was such that I couldn't get a socket and ratchet on the bolt heads, as there was insufficient clearance around the outer leg of the bases. I was forced to use an open end wrench to turn the bolts down through about half their length, after which I could finally get a ratcheting box end wrench onto the heads for the final threads. I bedded the bases in plenty of polysulfide. |
|
The winch bases also required two bolts through the coamings to secure the upper ends, which I drilled for during the initial layout (taking great care to avoid splintering the exposed face of the coaming) and installed loosely once I had the outer bolts partially engaged. With the outer bolts fully driven home, I tightened the top bolts securely, and then crawled below to apply nuts and washers to the threaded bolts. Installation complete. |
|
Next, I installed the new winches--Lewmar #30 two-speed self tailers. These winches were almost too large for the bases I chose, but the larger bases would have been too large for the low, sleek coamings on this boat. I installed the winches to the bases with bronze bolts, which for some reason I had ordered way too long, so I had to cut off the excess afterwards. |
 I installed a Lewmar #7 halyard winch on the mast
for the main and/or jib halyard, driving machine screws into tapped holes.
To complete work on the mast, other than hanging the new rigging (which arrived
late Wednesday), I also installed a base mount for the Windex at the masthead.
I used some polysulfide sealant on all the boltholes as an isolation material
between the stainless steel screws and aluminum mast. I installed a Lewmar #7 halyard winch on the mast
for the main and/or jib halyard, driving machine screws into tapped holes.
To complete work on the mast, other than hanging the new rigging (which arrived
late Wednesday), I also installed a base mount for the Windex at the masthead.
I used some polysulfide sealant on all the boltholes as an isolation material
between the stainless steel screws and aluminum mast. |
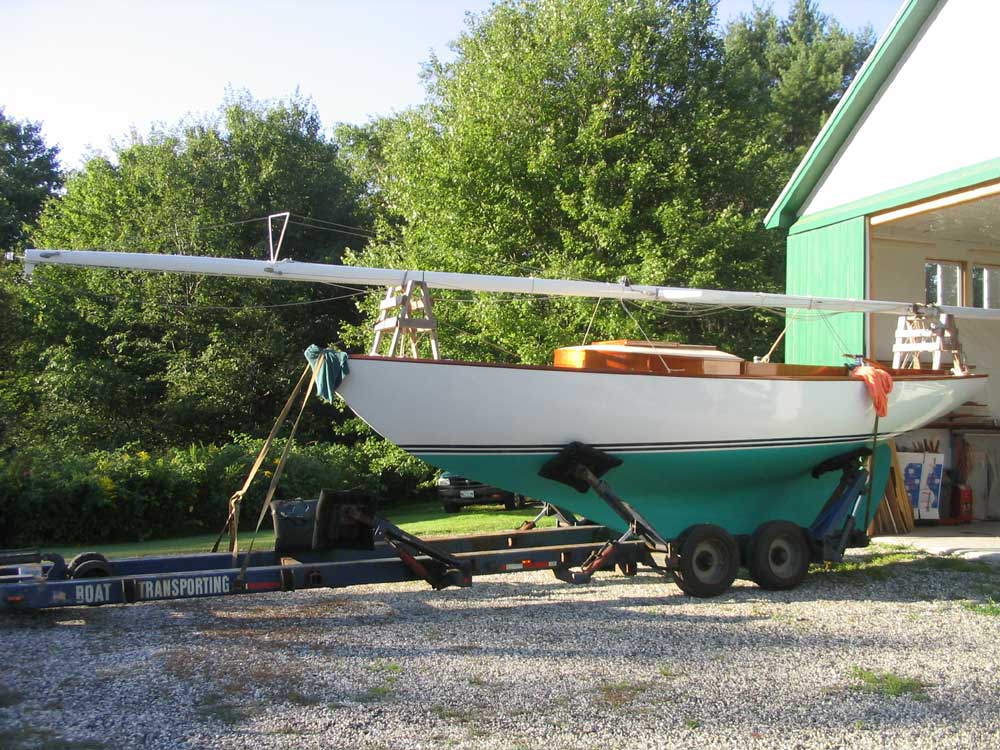
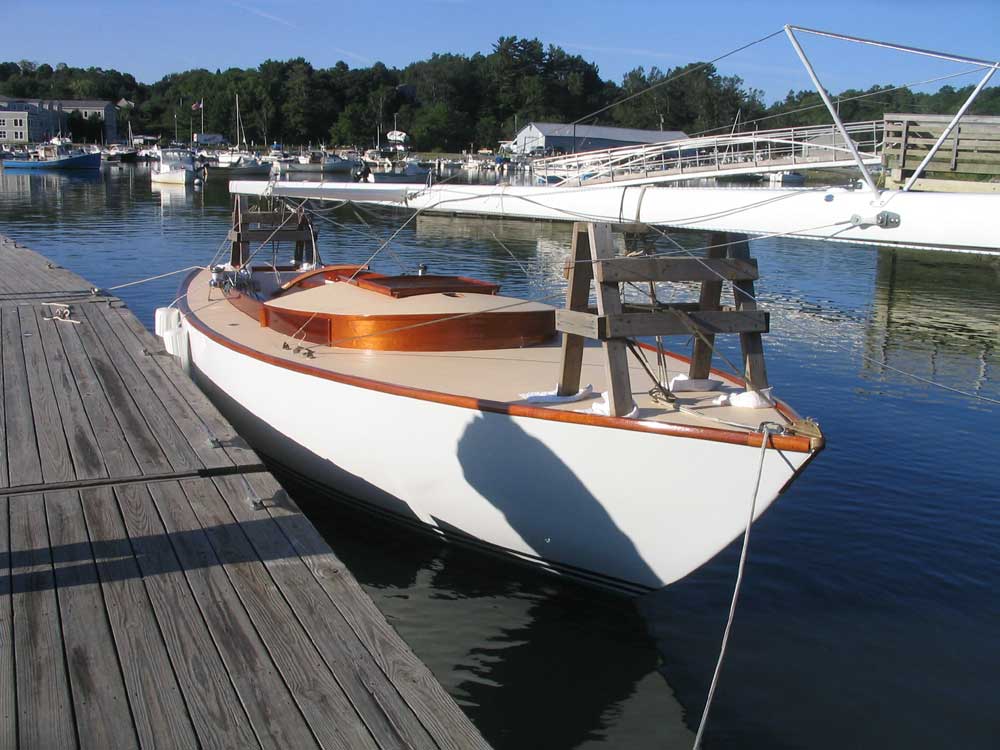
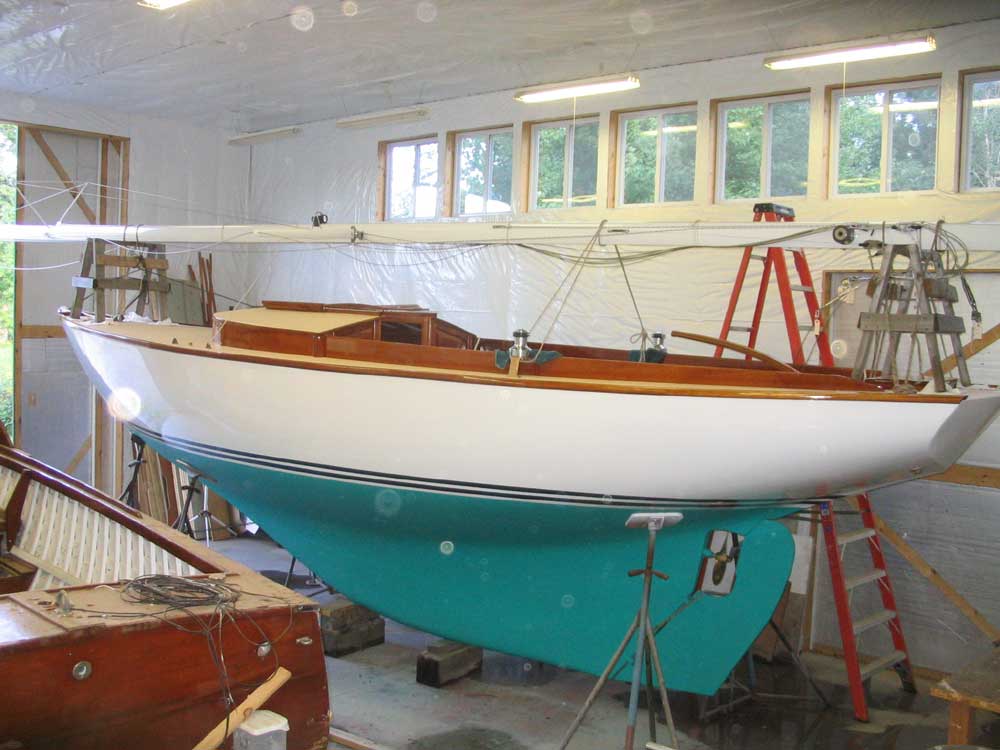
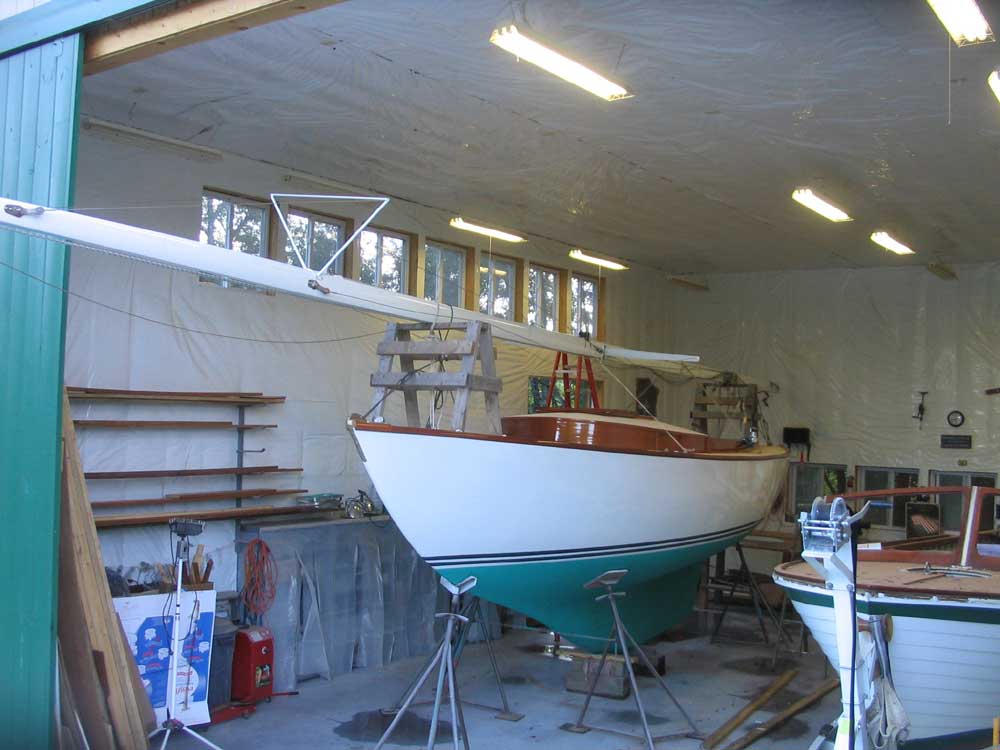 Thursday
was filled with last-minute details, and preparing the boat for
launching--including cleaning out remaining tools and gear, cleaning and
vacuuming the interior, decks, and hull, and loading on gear like fenders,
lines, and life jackets. I made sure the mast was ready to go, and then in
the afternoon, with Nathan's help, we managed to hoist the mast up on deck,
where I secured the mast to some wooden sawhorses bow and stern. With the
mast on deck and the rigging hung, the boat suddenly looked ready to go and
complete, rather than simply an ongoing project. Thursday
was filled with last-minute details, and preparing the boat for
launching--including cleaning out remaining tools and gear, cleaning and
vacuuming the interior, decks, and hull, and loading on gear like fenders,
lines, and life jackets. I made sure the mast was ready to go, and then in
the afternoon, with Nathan's help, we managed to hoist the mast up on deck,
where I secured the mast to some wooden sawhorses bow and stern. With the
mast on deck and the rigging hung, the boat suddenly looked ready to go and
complete, rather than simply an ongoing project. |
 |
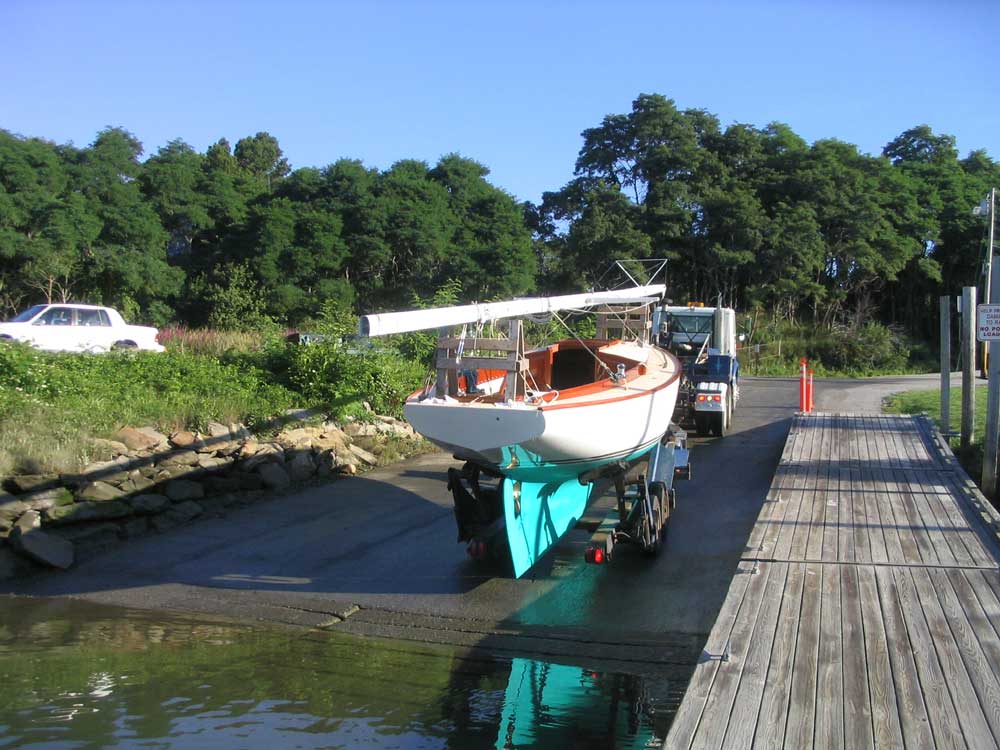
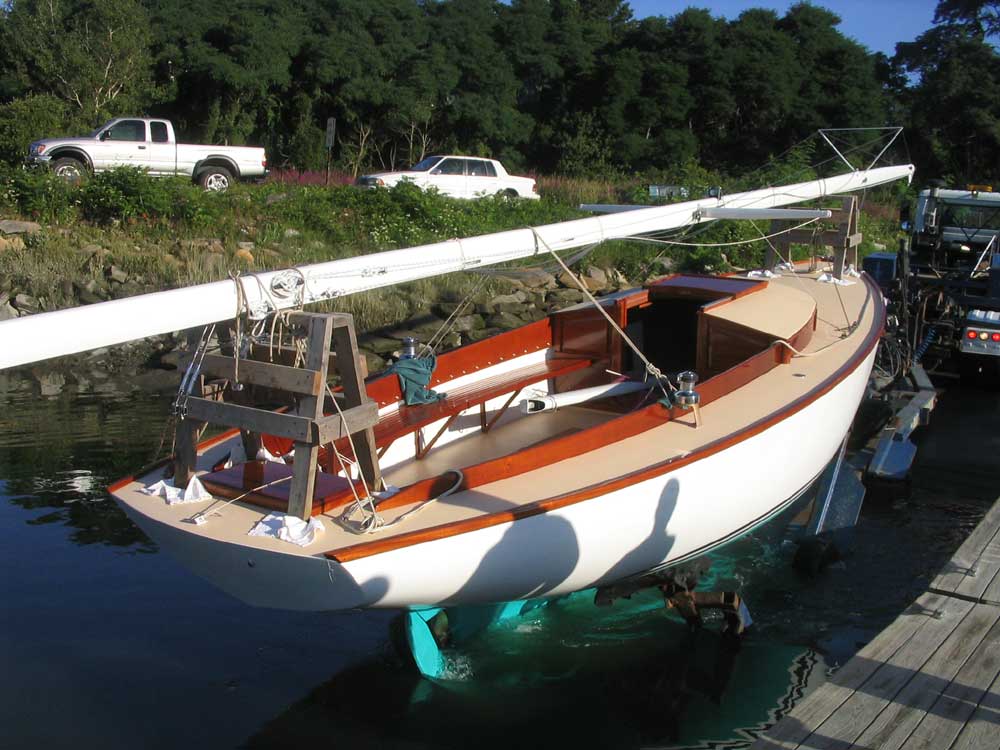
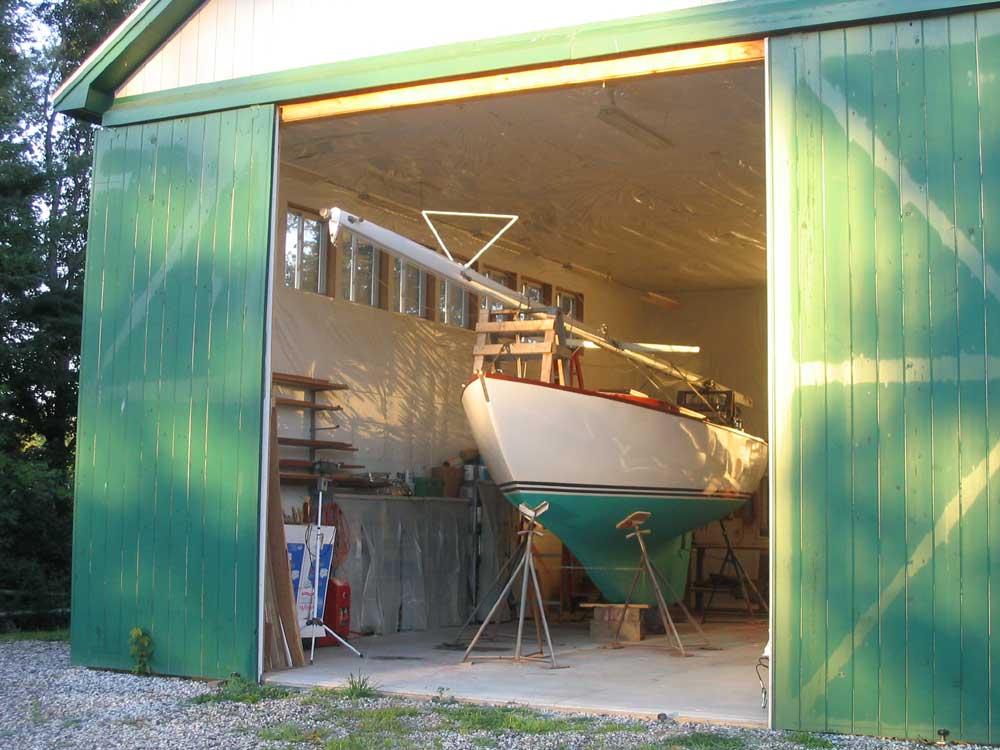 Friday
morning, Steve Morse picked the boat up around 0730, and shortly after 0800 she
was afloat at the town landing. It was a beautiful, perfect day. The
engine fired right up, and after installing the Windex at the masthead we
departed the town landing and motored down the river to Royal River Boat Yard
for the mast work. Heidi and Nathan were along for the ride, and my
brother Dave showed up at the launching ramp to watch the process. Friday
morning, Steve Morse picked the boat up around 0730, and shortly after 0800 she
was afloat at the town landing. It was a beautiful, perfect day. The
engine fired right up, and after installing the Windex at the masthead we
departed the town landing and motored down the river to Royal River Boat Yard
for the mast work. Heidi and Nathan were along for the ride, and my
brother Dave showed up at the launching ramp to watch the process. |
|
|
 Stepping
the mast went well, and afterwards my rigger, Jay Maloney, arrived to finish up
the head- and backstays, which he had left overlong since there was no accurate
way of knowing exactly what their lengths should be, depending on the
orientation of the mast. He also shortened the four lower shrouds, which
were just slightly overlong, as it turned out. In the river, I received
the first looks and comments from passers-by, which were all positive. Stepping
the mast went well, and afterwards my rigger, Jay Maloney, arrived to finish up
the head- and backstays, which he had left overlong since there was no accurate
way of knowing exactly what their lengths should be, depending on the
orientation of the mast. He also shortened the four lower shrouds, which
were just slightly overlong, as it turned out. In the river, I received
the first looks and comments from passers-by, which were all positive. |
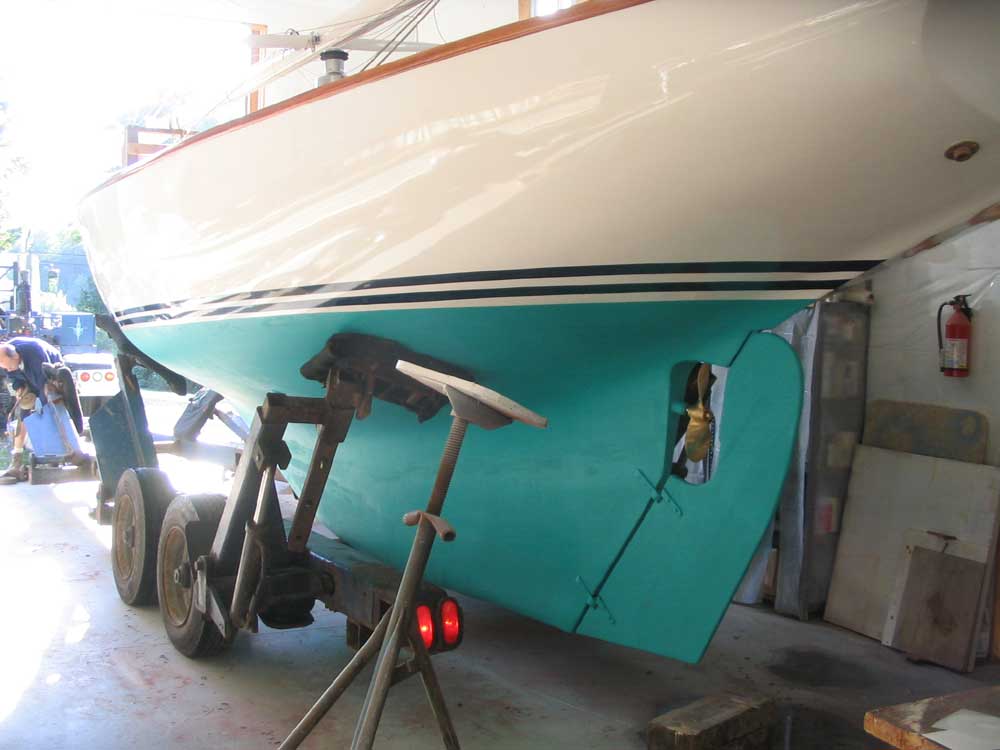
 With
that, we were ready to depart for the trip around to the mooring in Falmouth.
The tide was low, so I took it slowly down the shallow river. The engine
ran beautifully, and the boat seemed to maneuver very well in close quarters
with the large propeller and newly-designed rudder. Once we got outside
the river and throttled up, cruising speed seemed to be around 5.5 knots or so.
Future sea trials will better determine the engine's sweet spot. Partway
along on the journey, I lifted the engine hatches to check out the stuffing box,
which was leaking a little more rapidly than ideal, so I made a note to tighten
the packing when we arrived. With
that, we were ready to depart for the trip around to the mooring in Falmouth.
The tide was low, so I took it slowly down the shallow river. The engine
ran beautifully, and the boat seemed to maneuver very well in close quarters
with the large propeller and newly-designed rudder. Once we got outside
the river and throttled up, cruising speed seemed to be around 5.5 knots or so.
Future sea trials will better determine the engine's sweet spot. Partway
along on the journey, I lifted the engine hatches to check out the stuffing box,
which was leaking a little more rapidly than ideal, so I made a note to tighten
the packing when we arrived. |
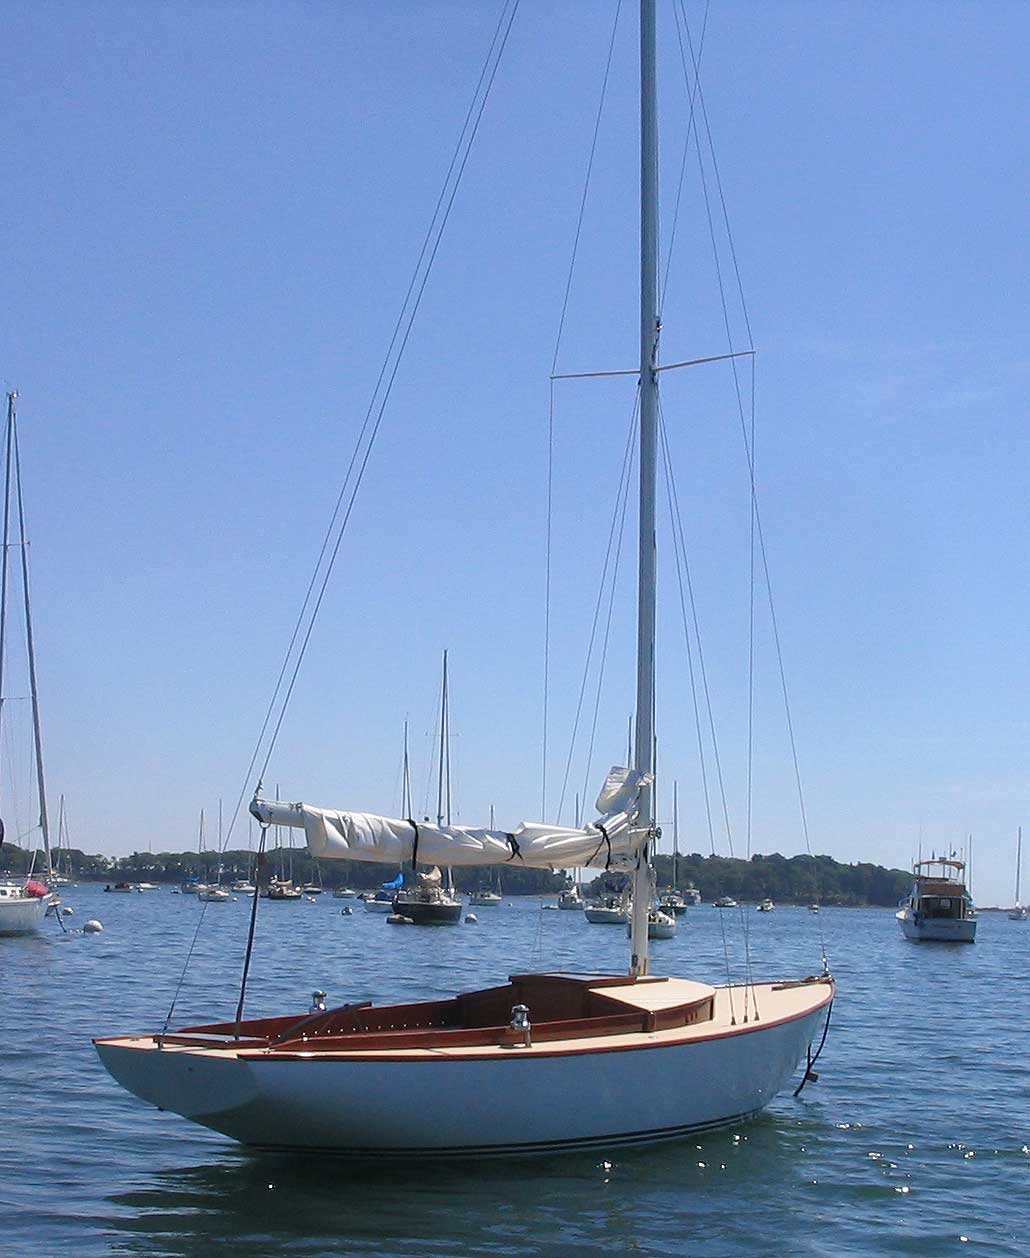
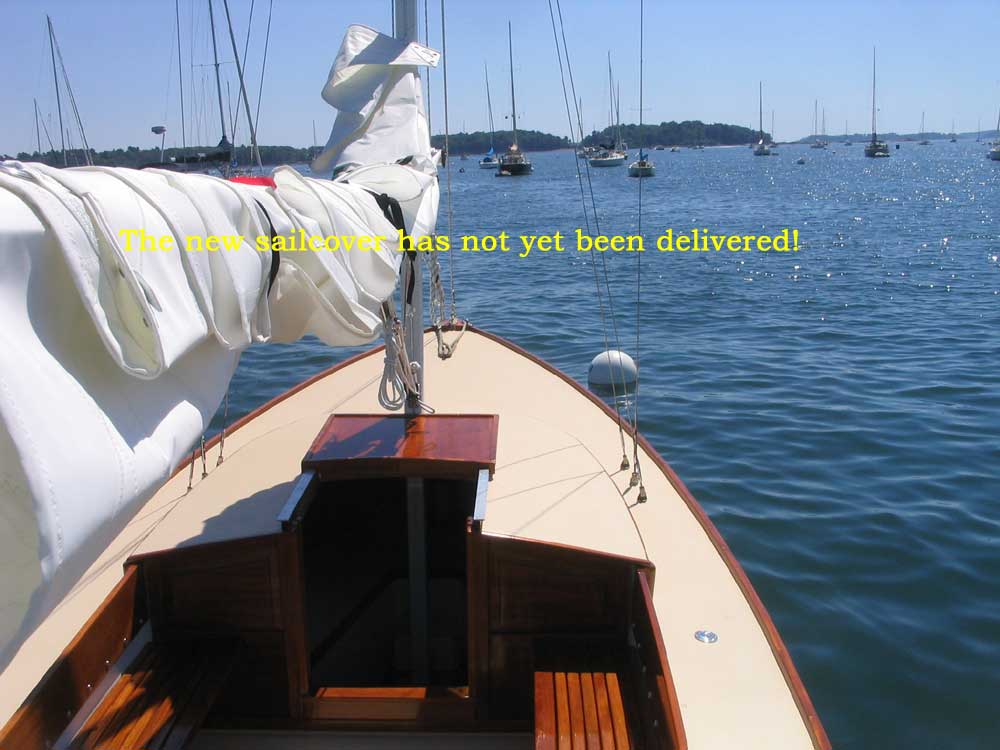
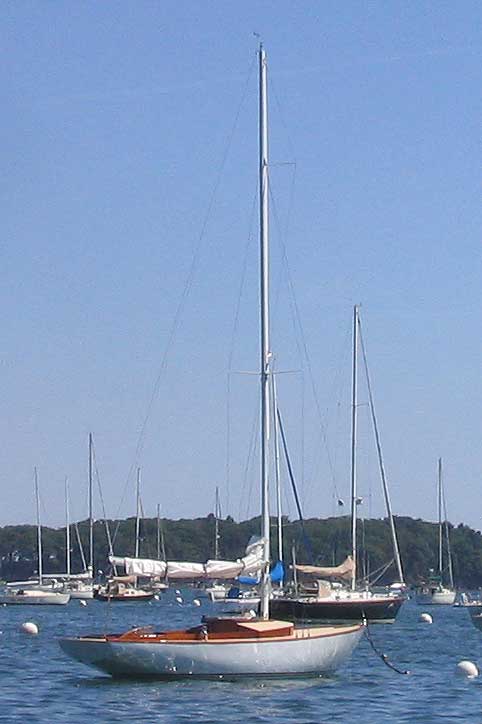
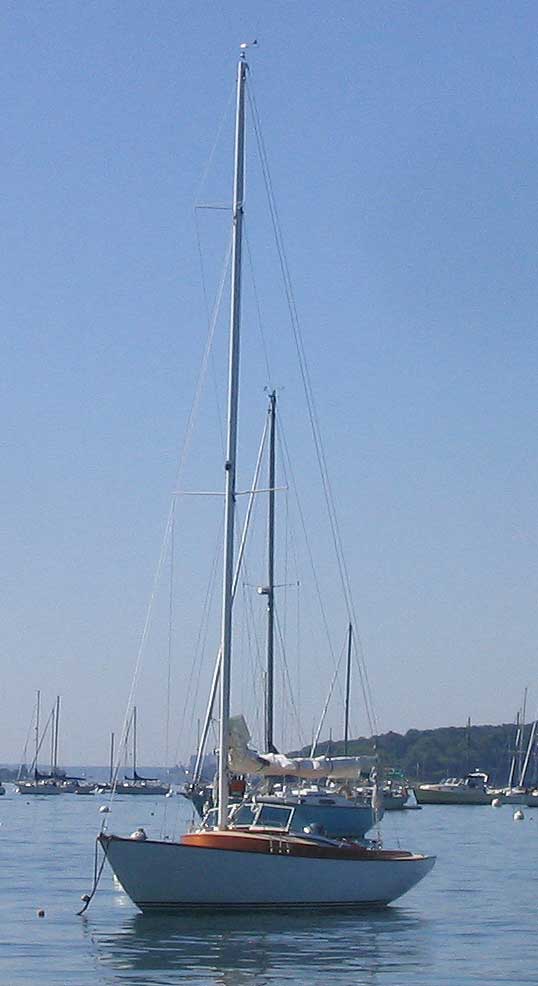
 At
the mooring, we bent on the new tri-radial mainsail from Hallett Sails, which
looked beautiful, though there was no wind to fill it. Among the
incomplete aspects of the boat at this time was the mainsheet and traveler
system; the traveler was on order, but had not yet arrived. Also missing
at this time was the genoa and roller furler, which were scheduled to be
completed early next week, and the sailcover, for which the sail loft wanted the
boat rigged and the sail in place before completing to ensure accuracy. At
the mooring, we bent on the new tri-radial mainsail from Hallett Sails, which
looked beautiful, though there was no wind to fill it. Among the
incomplete aspects of the boat at this time was the mainsheet and traveler
system; the traveler was on order, but had not yet arrived. Also missing
at this time was the genoa and roller furler, which were scheduled to be
completed early next week, and the sailcover, for which the sail loft wanted the
boat rigged and the sail in place before completing to ensure accuracy. |
 Later
in the afternoon, I returned to the boat to complete a few small chores, such as
installing the new Garhauer rigid boom vang, reefing a mainsheet tackle, and
some minor rig tuning. It seemed that people's eyes were on the
boat, as I received more questions and compliments about the boat, mostly
beginning with a question along the lines of, "Hey, what kind of boat is that?". Later
in the afternoon, I returned to the boat to complete a few small chores, such as
installing the new Garhauer rigid boom vang, reefing a mainsheet tackle, and
some minor rig tuning. It seemed that people's eyes were on the
boat, as I received more questions and compliments about the boat, mostly
beginning with a question along the lines of, "Hey, what kind of boat is that?". |
|
|
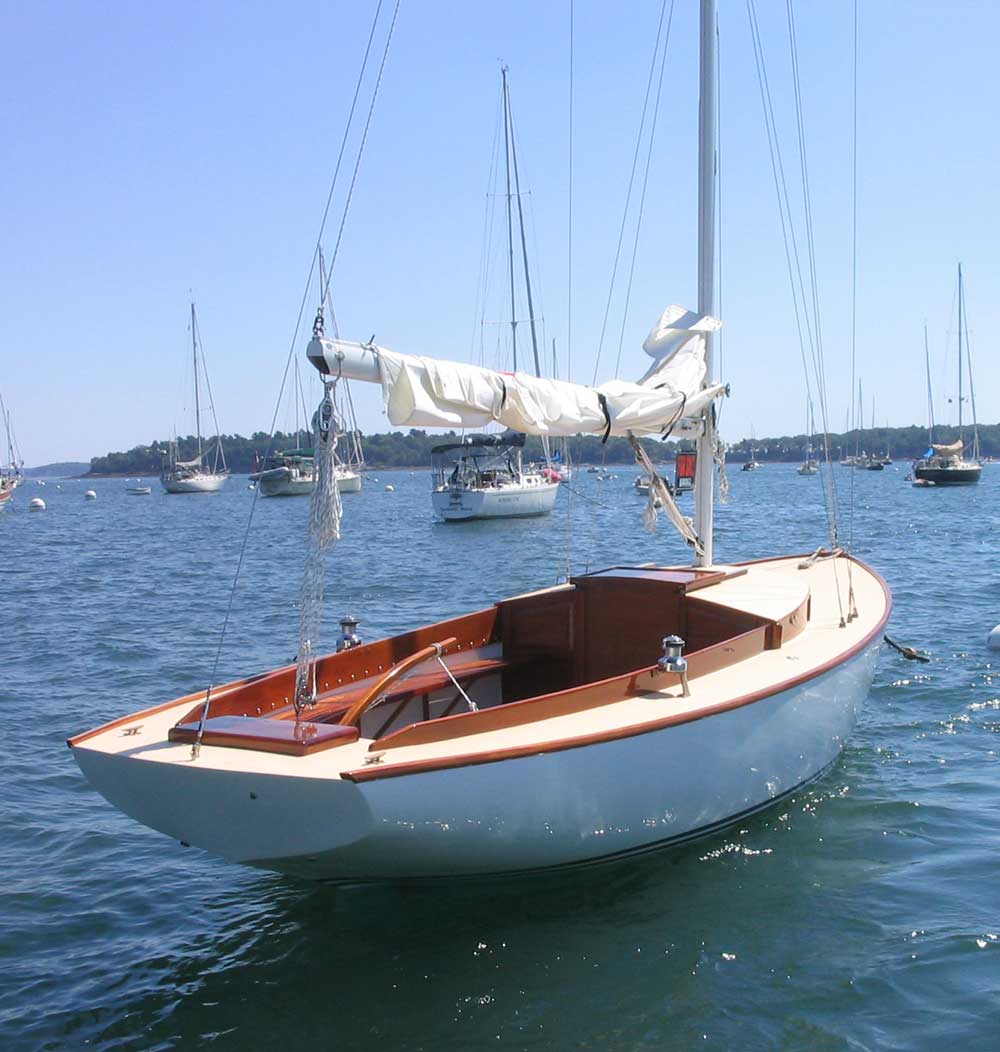
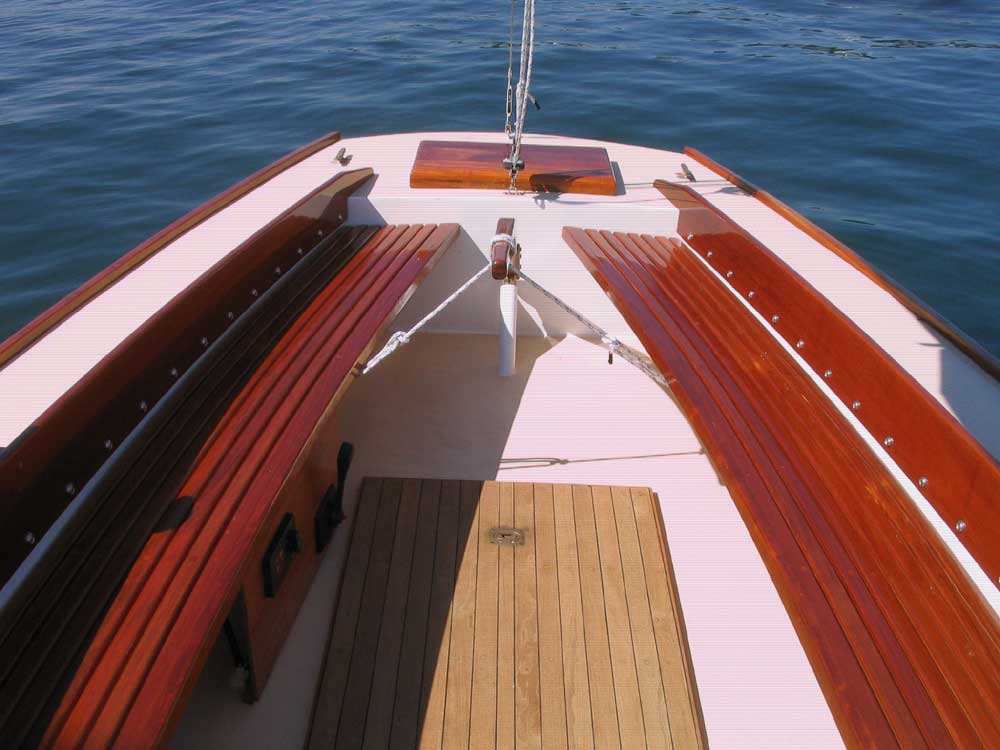
 Saturday,
I went out to the boat to take several measurements for items that remained to
be built, such as the settee back cushions (and locker doors), mast partner
wedges and collar, and marked for the cutout in the forward cabin sole bilge
access hatch so that the hatch pieces would fit around the mast when stepped.
It would have been a great day for an inaugural sail, but with no headsail, no
genoa tracks, and no traveler (or appropriate attachment point for the
mainsail), I would just have to wait. Saturday,
I went out to the boat to take several measurements for items that remained to
be built, such as the settee back cushions (and locker doors), mast partner
wedges and collar, and marked for the cutout in the forward cabin sole bilge
access hatch so that the hatch pieces would fit around the mast when stepped.
It would have been a great day for an inaugural sail, but with no headsail, no
genoa tracks, and no traveler (or appropriate attachment point for the
mainsail), I would just have to wait. |
|
|