|
|
~MENU~ |
| Home |
| The Concept |
| The Boat |
| Bringing Her Home |
|
Weekly Progress Log |
|
Daysailor Projects |
| The Boat Barn |
| Resources |
| Other Sites |
| Email Tim |
|
|
| Progress Report: 2005 Archives |
|
January February March April May June July August September October November December |
|
Reports from April 2005 4/3/05 4/10/05 4/17/05 4/24/05 |
|
Log for the Week Ending April 3, 2005 Monday was all about cleaning. It was time to prepare for spraying the finish primer, the last step before actually spraying the final coats of paint. I planned to spray the boat on Tuesday, and to spray the Sanborn's boat on Wednesday, so it was paramount to clean the shop and rid it of the accumulated dust from the past several weeks of woodwork and other work that we had done since the high build primer application. |
|
I began by clearing out as much extraneous stuff as I could--various jigs, pieces of equipment, boat parts, etc. Extra stuff only collects and attracts dust, so out it went, mostly into the temporary lean-to outside the barn where it would stay till the painting was complete and the shop no longer needed to be a perfectly clean environment. Next, I did a little sanding on the deck, as I had spilled some varnish and resin here and there during the past weeks' work. With the sanding complete, I moved on to the first of several shop cleanings. I swept the floor and counters, then prepared my shop vac blower and spent quite a bit of time with the big shop doors open, blowing out as much as I could, including the walls, light fixtures, and the tight areas beneath shelves and the like where brooms cannot reach. When I had done the walls and floor, I moved up to the two boats and blew them down too, then back to the floor for a final blowdown. |
|
The blowout was crucial, but was hardly the last step. Once I had done all I could, I let the dust settle for a while with the doors open, then moved on to begin vacuuming the entire shop and all surfaces to pick up the settled dust, including benches, shelves, the boats, and everything else. |
 Next,
I set up the staging around the boat. I planned to shoot the cockpit
area first, then the decks, and finally the hull, so I began with the staging up
at its highest level. Then, I covered the cabin trunk, engine room hatch,
and lazarette with plastic, and taped off the stem fitting and breasthook as
needed to protect these areas from spray. Finally, I vacuumed the boat
again, and solvent washed the hull and deck with the appropriate Alexseal
surface cleaner. Next,
I set up the staging around the boat. I planned to shoot the cockpit
area first, then the decks, and finally the hull, so I began with the staging up
at its highest level. Then, I covered the cabin trunk, engine room hatch,
and lazarette with plastic, and taped off the stem fitting and breasthook as
needed to protect these areas from spray. Finally, I vacuumed the boat
again, and solvent washed the hull and deck with the appropriate Alexseal
surface cleaner. |
|
It had been an exhausting 8 hours, but before I left I organized and set up the paint equipment for the next day, as I planned to start early in order to get the entire boat done in the three separate spraying operations of three coats each. |
|
Tuesday, I started at 0600 by tacking off the hull and deck one final time. Then, I prepared to mix the primer and get ready to spray. Immediately, though, I ran into a problem: the primer had settled badly and was near solid on the bottom. I had even left the containers upside down overnight in the hopes that the settled material would drop free, but it did not. Therefore, I had to fight with an anemic drill mixer to break up the solids, and to incorporate them mostly back into the primer--a tough job, and I still ended up with chunks that I could not incorporate. I determined to discuss this with my supplier to find out the root of the problem. (See below) |
|
Moving on, with the primer finally mixed, I prepared to shoot the first coat in the cockpit area--the first of three separate stages in the painting operation (cockpit, 3 coats; decks, 3 coats; hull, 3 coats). But apparently I had done an inadequate job of cleaning the gun the last time I had used it a few weeks before, and there was hardened paint on the nozzle and inside. It took me some time to get things going again, an annoying delay. Even so, some internal passage was apparently partly clogged, as I never this day got the volume out of the gun that I should have. |
 With these issues behind me, I began what turned into a marathon of mixing,
stirring, spraying, and repeating the process all over again. By just
after 1500, I had completed the job. Priming multiple coats meant that I
had lots of down time between coats--usually each application took about 30
minutes, after which I would have about 45 minutes to an hour before I could
spray again. With these issues behind me, I began what turned into a marathon of mixing,
stirring, spraying, and repeating the process all over again. By just
after 1500, I had completed the job. Priming multiple coats meant that I
had lots of down time between coats--usually each application took about 30
minutes, after which I would have about 45 minutes to an hour before I could
spray again.Click here for more about the finish primer and application. |
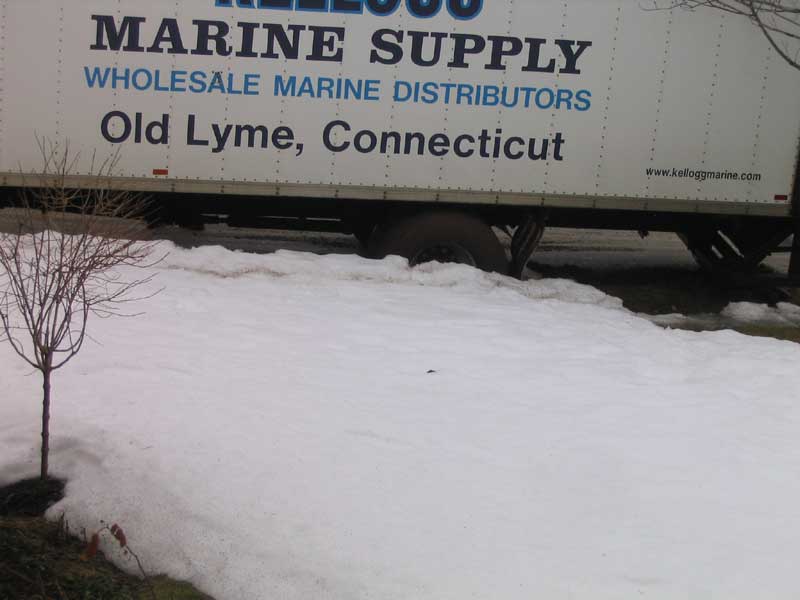
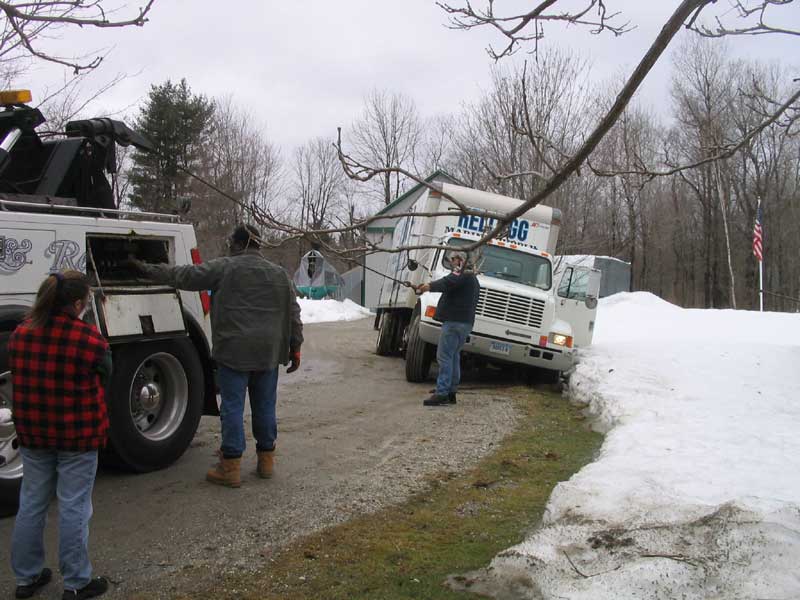
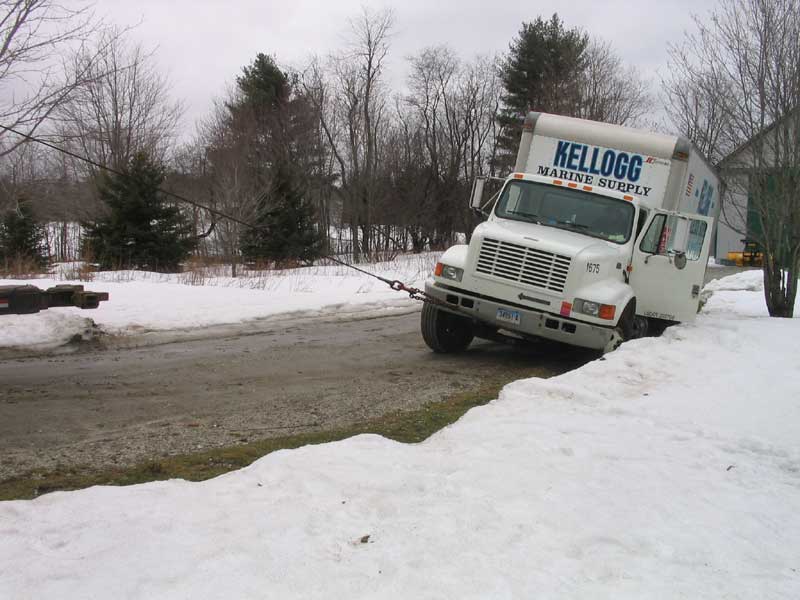
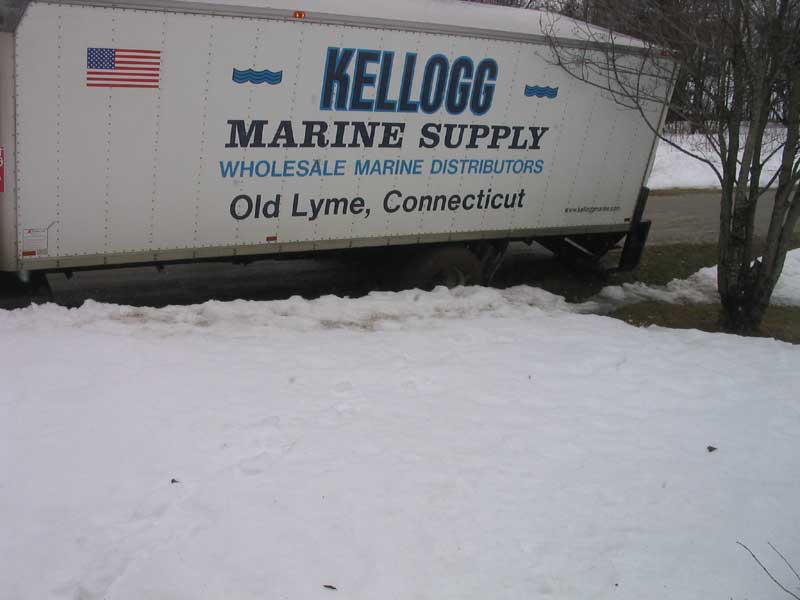 The morning was punctuated by the Kellogg Marine delivery truck, which managed
to miss my driveway and back off into the very soft grass next to the
drive--dirt softened by lots of recent snowmelt, plus 2" of rain the day before.
I happened to be on a break from spraying when he arrived, and watched out my
office window as he sank deeper and deeper, till the big truck was sunk up to
its axles on one side, resulting in about 20 degrees of heel; he had to call a
wrecker to pull him out. The wrecker was the largest I had ever seen and
made quick work of the stuck delivery truck, but trashed another area of the
grass near the end of the driveway in the process. It was a bad day for
turf at the shop. The morning was punctuated by the Kellogg Marine delivery truck, which managed
to miss my driveway and back off into the very soft grass next to the
drive--dirt softened by lots of recent snowmelt, plus 2" of rain the day before.
I happened to be on a break from spraying when he arrived, and watched out my
office window as he sank deeper and deeper, till the big truck was sunk up to
its axles on one side, resulting in about 20 degrees of heel; he had to call a
wrecker to pull him out. The wrecker was the largest I had ever seen and
made quick work of the stuck delivery truck, but trashed another area of the
grass near the end of the driveway in the process. It was a bad day for
turf at the shop. |
|
|
|
|
|
Wednesday was spent spraying finish primer on Dasein (aka Gud 'Nuf) on decks, cockpit and hull, in much the same way as the Daysailor. This was another 8-hour spraying session (elapsed time), interrupted a few times early on by more spray equipment problems caused by my insufficient cleaning weeks before. I was angry at myself for allowing such a stupid mistake, but managed nonetheless to get the gun going again, after a few teardowns. Late in the day, when the spraying was complete, I tore the gun down for a thorough soaking in solvent, and ordered a number of replacement and spare parts to have on hand for the future. |
|
I also received a thorough message from Michael Laurence at Lewis Marine, the supplier of the Alexseal (and other marine products that I use), indicating that the manufacturer was aware of the problem and making a few packaging and other changes to help suppliers better handle the product and allow it to be shaken pre-delivery, but also that the high-solids product was prone to settling (which I understood). As usual, I was pleased with the excellent follow-through from Lewis Marine. |
 Thursday, I sanded the hull primer. I hand-sanded the hull using a small
3M foam sanding block and 220 grit sandpaper for the initial sanding, followed
by a full sanding with 320 paper on the block. This left a very smooth
surface suitable for accepting the high-gloss topcoats a few days hence. Thursday, I sanded the hull primer. I hand-sanded the hull using a small
3M foam sanding block and 220 grit sandpaper for the initial sanding, followed
by a full sanding with 320 paper on the block. This left a very smooth
surface suitable for accepting the high-gloss topcoats a few days hence. |
 Friday,
I began by finishing up the hull sanding, getting the areas beneath the counter
and the transom. Then, I sanded the decks and cockpit. Since most of
the deck areas would be covered with nonskid paint, the prepwork didn't need to
be quite as fine as that on the hull, but I still sanded all areas with both 220
and 320 on my little hand-sanding block. This, and a few small,
nondescript projects, completed the day. Friday,
I began by finishing up the hull sanding, getting the areas beneath the counter
and the transom. Then, I sanded the decks and cockpit. Since most of
the deck areas would be covered with nonskid paint, the prepwork didn't need to
be quite as fine as that on the hull, but I still sanded all areas with both 220
and 320 on my little hand-sanding block. This, and a few small,
nondescript projects, completed the day. |
 Saturday,
I treaded water, with little to do except wait for painting next week; with a
second boat in the shop also preparing for paint, I couldn't choose to paint any
sooner, as I needed to thoroughly clean the shop once more and it only made
sense to deal with both boats' paint jobs--and the shop cleaning--all at once.
I did install the wooden cabin trunk knees I built last week, and applied the
heat lamps to accelerate the epoxy curing. Saturday,
I treaded water, with little to do except wait for painting next week; with a
second boat in the shop also preparing for paint, I couldn't choose to paint any
sooner, as I needed to thoroughly clean the shop once more and it only made
sense to deal with both boats' paint jobs--and the shop cleaning--all at once.
I did install the wooden cabin trunk knees I built last week, and applied the
heat lamps to accelerate the epoxy curing.
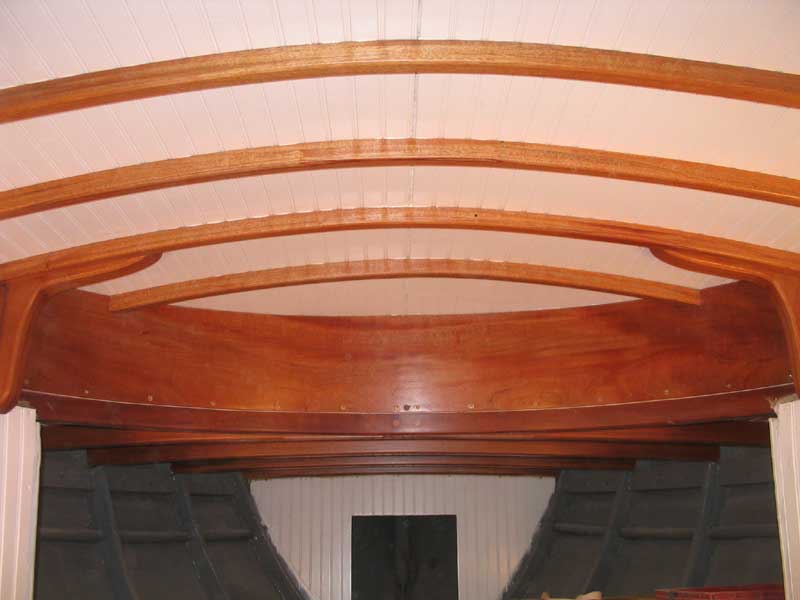
I fiddled with this or that, briefly worked on the engine room hatches, for which I planned teak tops, but after some frustrations put those aside and instead turned my attention to the cabin, cleaning the interior varnish and applying one (hopefully) final coat of satin varnish to the overhead beams and cabin trunk sides and knees. Things ought to look very different next week. |
|
Log for the Week Ending April 10, 2005
|
 The
rest of Sunday, and most of Monday morning, were spent preparing the shop and
the boat for final topcoats Monday afternoon. Once more, I cleaned the
shop from head to toe to remove the surprising amount of dust that had arrived
thanks to the primer sanding of the previous week. The
rest of Sunday, and most of Monday morning, were spent preparing the shop and
the boat for final topcoats Monday afternoon. Once more, I cleaned the
shop from head to toe to remove the surprising amount of dust that had arrived
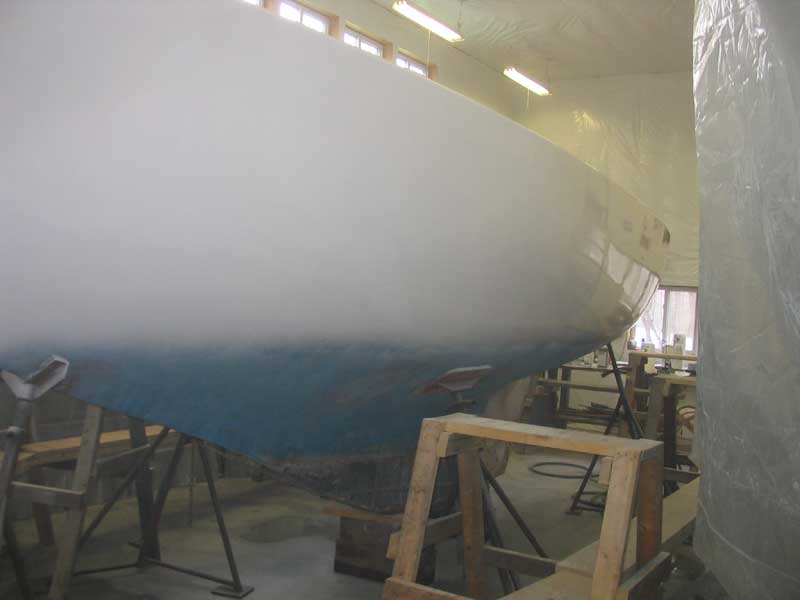
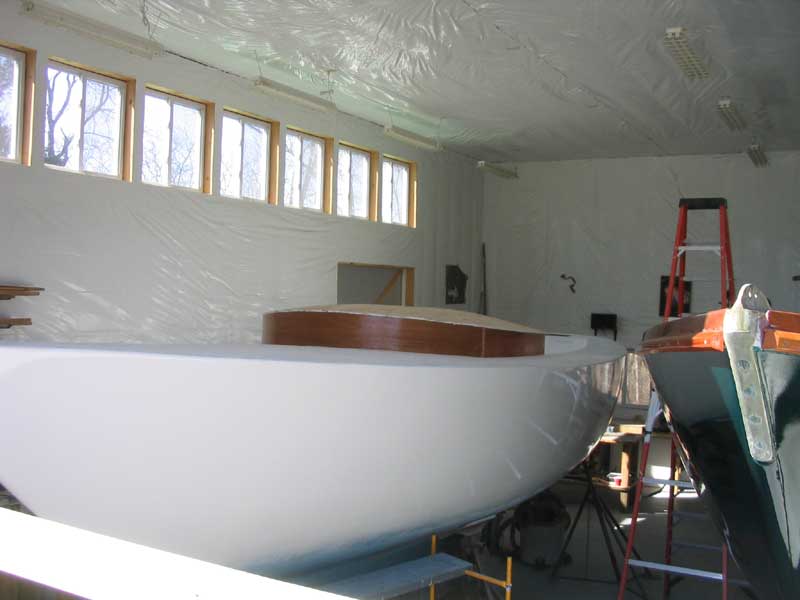
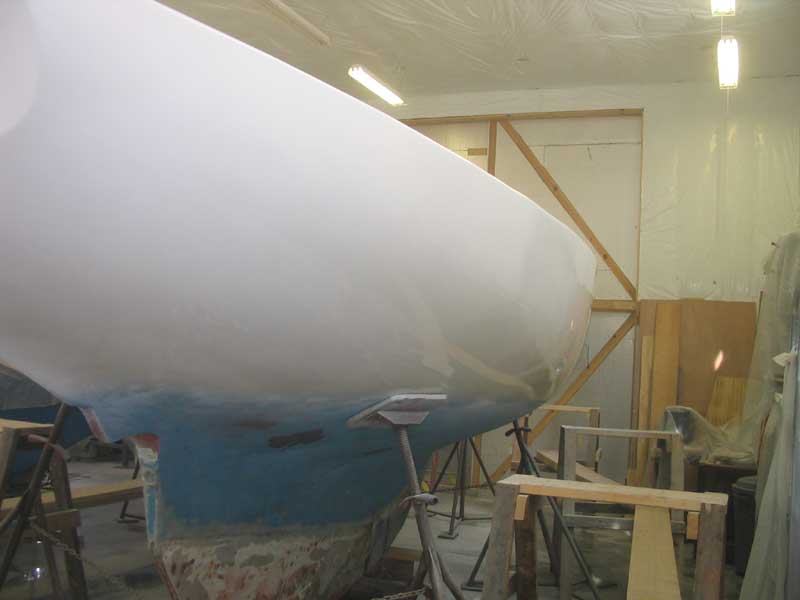
thanks to the primer sanding of the previous week.When the shop was clean once more, I taped off and covered the deck to prevent overspray, and moved on to make final preparations to the hull for the snow white Alexseal paint. Click here to learn more about the topcoats.
|
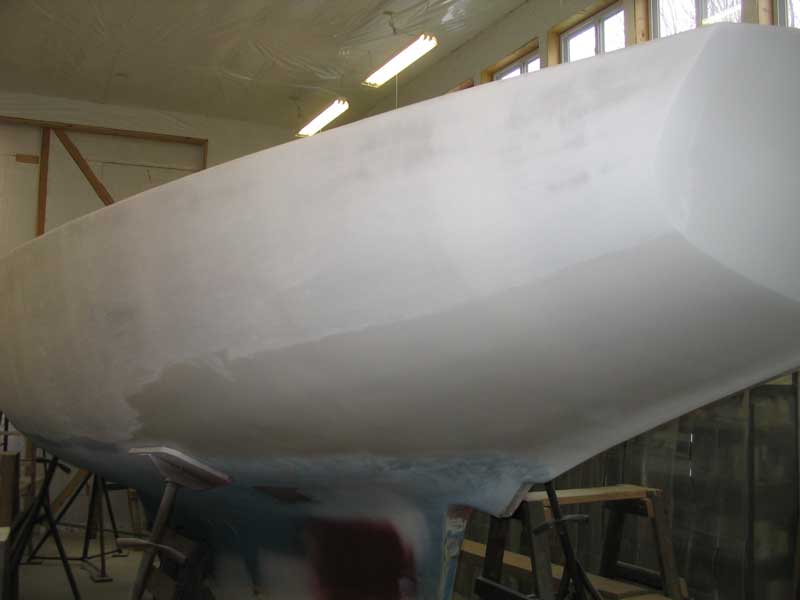
 With the topcoats done, I spent Tuesday taking care of other business away from
the shop. Then, the rest of the workweek was spent in the shop working on
Dasein, making final preparations for her own painting--both hull and deck.
On Wednesday, after covering the Daysailor with plastic for protection, I sprayed
Dasein's cabin trunk, deck areas, and cockpit, but
thanks to a mistake on my part I had to respray the cabin trunk Thursday to
correct some runs. Finally, on Friday, I applied three deep, glossy coats
of dark green to Dasein's hull, completing the painting phase in the shop. With the topcoats done, I spent Tuesday taking care of other business away from
the shop. Then, the rest of the workweek was spent in the shop working on
Dasein, making final preparations for her own painting--both hull and deck.
On Wednesday, after covering the Daysailor with plastic for protection, I sprayed
Dasein's cabin trunk, deck areas, and cockpit, but
thanks to a mistake on my part I had to respray the cabin trunk Thursday to
correct some runs. Finally, on Friday, I applied three deep, glossy coats
of dark green to Dasein's hull, completing the painting phase in the shop.
Click here for more about Dasein's paint. (Outside link) |
 After an exhausting two weeks of primer, sanding, and topcoats, each with their
share of frustrations and difficulties, I vowed to enjoy a weekend off, but
looked forward to getting back into some more serious construction next week. After an exhausting two weeks of primer, sanding, and topcoats, each with their
share of frustrations and difficulties, I vowed to enjoy a weekend off, but
looked forward to getting back into some more serious construction next week. |
|
Log for the Week Ending April 17, 2005
Therefore, I managed to accomplish little of note. I did cut and install the second layer of plywood to the cabin trunk overhead, using 7mm Meranti for the job, which I laminated to the first layer with epoxy and screws. |
|
Early in the week, I ordered the new spars for the boat from Metalmast Marine in Putnam, CT. Using an existing Triton spar as a guideline, I produced a series of measurements and specifications for the new mast, modifying things as required to fit the specifics of the Daysailor. The most notable change was the addition of about five feet of spar length to accommodate the new keel step, versus deck step. I also began the lengthy task of spec'ing out the various products required in order to complete the systems on board: fuel, electrical, deck hardware, rigging, and so forth. With a stunning variety of choices in many cases, this process took much time, and was a good way to spend part of an otherwise unproductive shop week. While significant work remains to complete the boat, there is no question that I have entered the final stretch towards completion, and that I had little choice but to start ordering materials required to finish the job. I hope next week brings much more significant progress! |
|
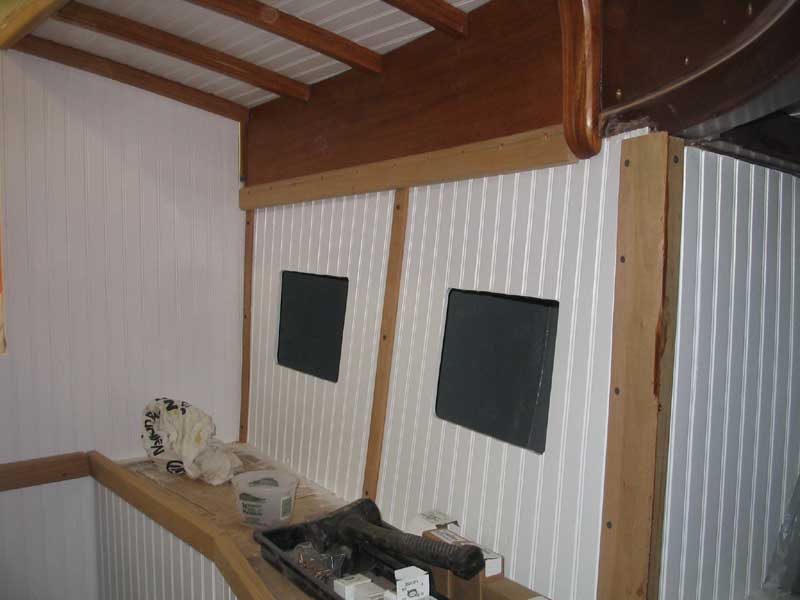
Log for the Week Ending April 24, 2005 This week seemed to be all about the cabin and cabin trunk. Visual progress seems slow, but each aspect of the various jobs took substantial amounts of time.
|
|
I also began to mock up a profile for the toerail. I hoped to make a single piece that would overlap the hull-deck joint and provide a pleasing profile, but ran into a snag when I discovered that it would be difficult to screw my chosen profile into the boat; I put the mockup aside while I considered other options, including making a 2-piece toerail/rubrail. I'll post more detail about the whole process once I get a little further in the process. |
|
Tuesday, I was away from the shop all morning and into the afternoon. With limited time available, and no inclination to get involved in a more lengthy job, I sat down and finalized my purchase lists for the various systems on board, which I had started last week. Then, I ordered all the various parts online from three different suppliers, a process that took several hours in its own right. |
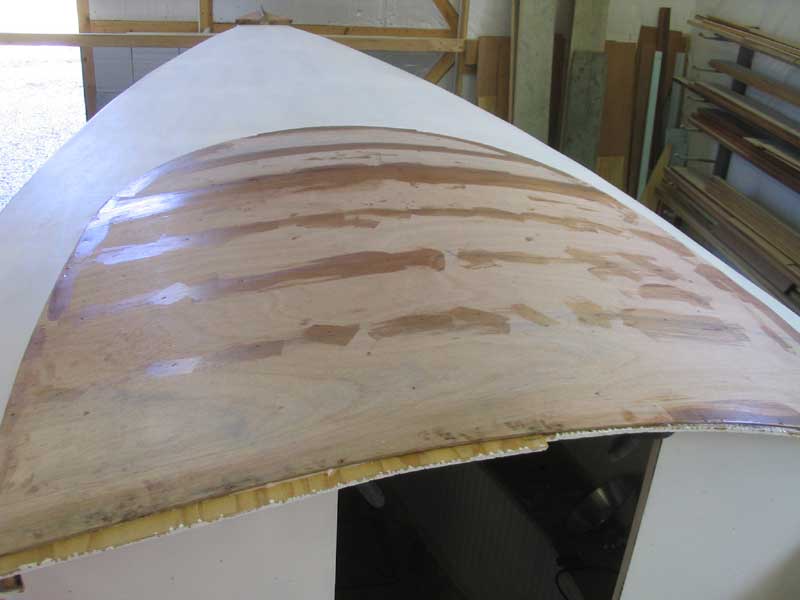
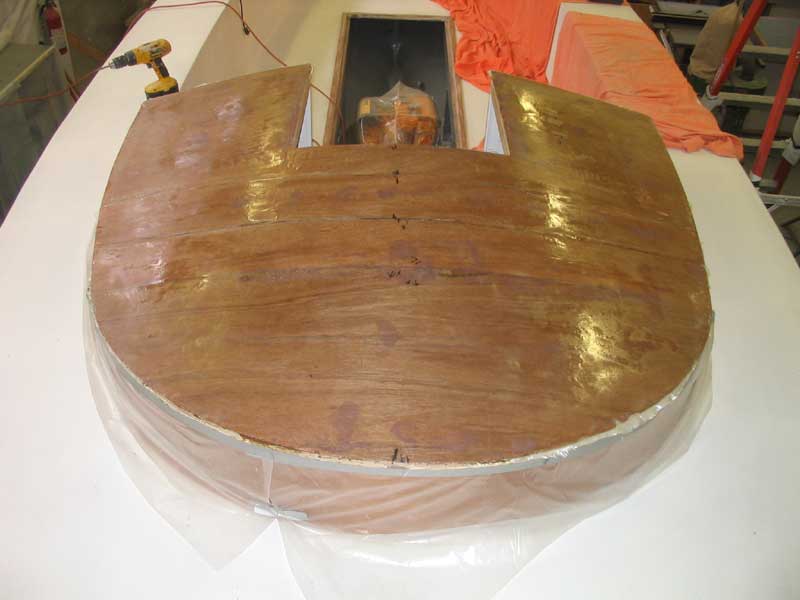 Wednesday,
I prepared to fiberglass over the new coachroof. I laid out two
overlapping layers of 10 oz. cloth, and then installed them in epoxy resin.
It was an extremely warm day--in the 80s--so the resin cured very quickly; I had
to work fast. This process took most of the morning; in the afternoon, I
began work on the myriad interior trim pieces required to finish off the
interior. Wednesday,
I prepared to fiberglass over the new coachroof. I laid out two
overlapping layers of 10 oz. cloth, and then installed them in epoxy resin.
It was an extremely warm day--in the 80s--so the resin cured very quickly; I had
to work fast. This process took most of the morning; in the afternoon, I
began work on the myriad interior trim pieces required to finish off the
interior. |
|
Thursday and Friday, I divided my time between work in the shop on the interior trim, adding additional fiberglass to the coachroof, and working outside on several other boat-related projects, attempting to take advantage of nice weather that was not forecast to last. I continued work on the trim, which seemed to be going at a snail's pace, and managed to get the worst of the layout and head scratching on the v-berth trim pieces out of the way. |
 Late
in the morning, the delivery trucks from two of my vendors arrived bearing
numerous boxes filled with all sorts of boat parts, from electrical connectors
to exhaust systems to fuel components. The small items filled several
large boxes, in addition to the individual boxes containing pumps, panels, and
other parts. All this made an impressive pile on my bench; more
parts--including the aluminum diesel tank--were on the way from a third vendor. Late
in the morning, the delivery trucks from two of my vendors arrived bearing
numerous boxes filled with all sorts of boat parts, from electrical connectors
to exhaust systems to fuel components. The small items filled several
large boxes, in addition to the individual boxes containing pumps, panels, and
other parts. All this made an impressive pile on my bench; more
parts--including the aluminum diesel tank--were on the way from a third vendor. |
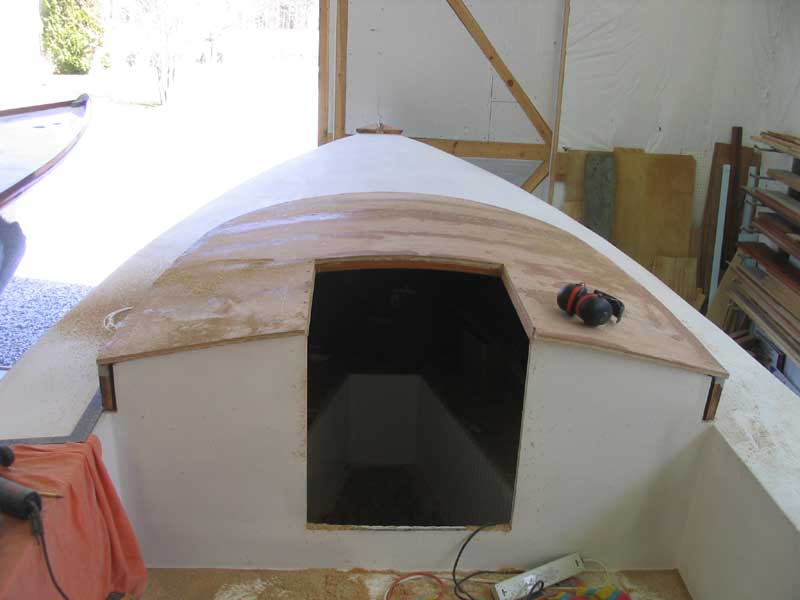
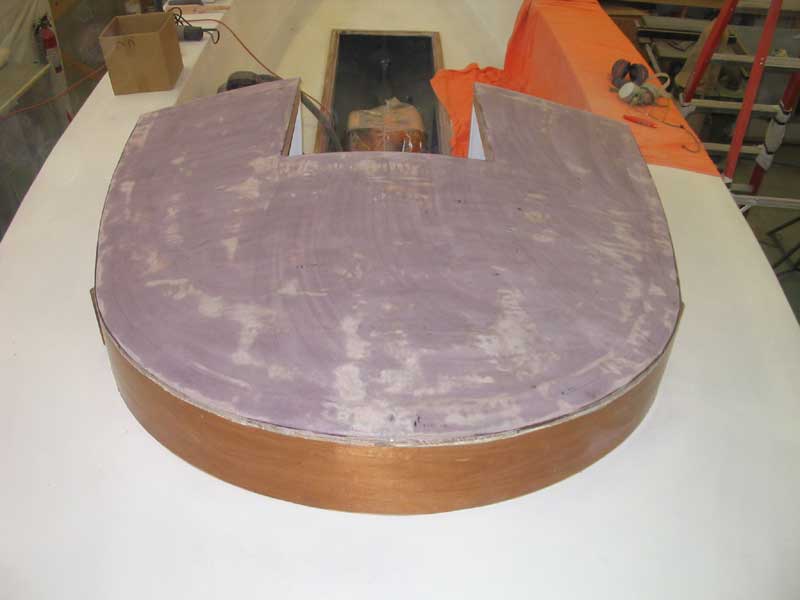 Friday,
I continued work on the interior trim, and, after sanding the fiberglass on the
cabin trunk, applied the first coat of fairing filler to the cloth, to fill the
weave and take up any low spots there might be. With one more decent day
on hand, I continued some of my outside work as well, as the weekend was
forecast to be rainy. Later, when the filler cured, I sanded it to prepare
for a final application to fill in the few low spots. Friday,
I continued work on the interior trim, and, after sanding the fiberglass on the
cabin trunk, applied the first coat of fairing filler to the cloth, to fill the
weave and take up any low spots there might be. With one more decent day
on hand, I continued some of my outside work as well, as the weekend was
forecast to be rainy. Later, when the filler cured, I sanded it to prepare
for a final application to fill in the few low spots. |
 Saturday,
in the rain, I worked again on the interior trim, and despite all the time so
far, I was still far from done. Each piece needed to be conceived,
measured, the raw stock cut to the appropriate rough dimensions, each piece test
fit and recut as needed, and then final milling and sanding operations could
occur--all this before the pieces could even be fit in place. Sometimes
the amount of labor required for seemingly simple jobs is staggering. Saturday,
in the rain, I worked again on the interior trim, and despite all the time so
far, I was still far from done. Each piece needed to be conceived,
measured, the raw stock cut to the appropriate rough dimensions, each piece test
fit and recut as needed, and then final milling and sanding operations could
occur--all this before the pieces could even be fit in place. Sometimes
the amount of labor required for seemingly simple jobs is staggering. |
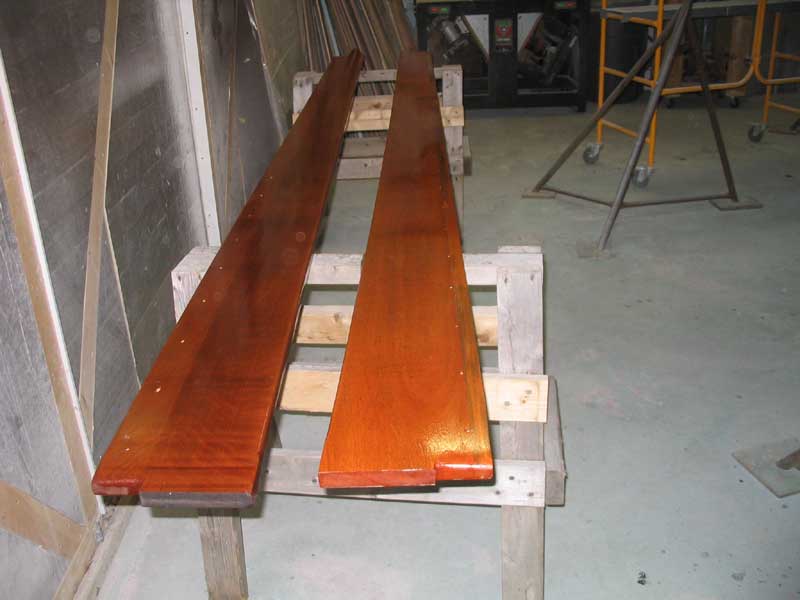 Throughout
the week, at the end of the day when the dust was down in the shop, I continued
the long process of applying 10 coats of varnish to the huge cockpit coamings;
painting and other significant projects in the shop in the weeks since I had
removed the coamings had prevented me from getting to this chore, but with
two sides, I was looking at 3 weeks' worth of work, one coat per day, before the
varnish could be completed. After several coats, though, the coamings were
looking great--at least on one side! Throughout
the week, at the end of the day when the dust was down in the shop, I continued
the long process of applying 10 coats of varnish to the huge cockpit coamings;
painting and other significant projects in the shop in the weeks since I had
removed the coamings had prevented me from getting to this chore, but with
two sides, I was looking at 3 weeks' worth of work, one coat per day, before the
varnish could be completed. After several coats, though, the coamings were
looking great--at least on one side! |