| Circe
| Tuesday, March 16, 2010 I removed the temporary screws and washers from yesterday's cabin sole efforts, and then trimmed the excess plank ends from the bilge hatch openings and the hatches themselves so the hatches could fit back in place. |
|
|
|
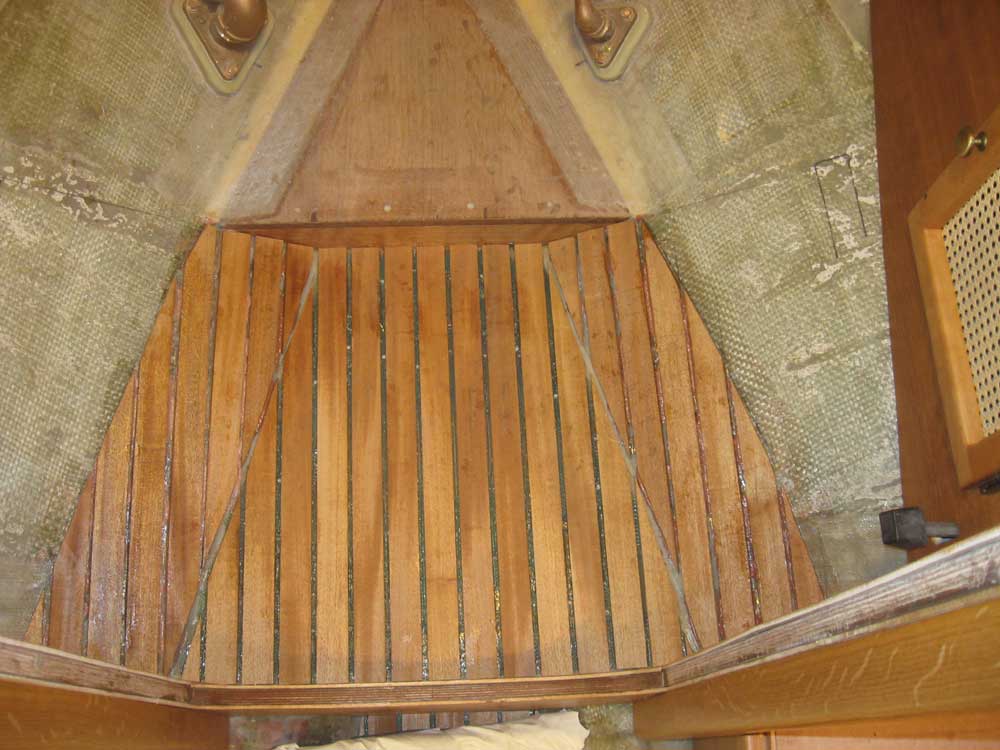
Stage two of the head sole installation could begin now that the main portion of the sole was set in place. Although much of the hull area here would be painted, I planned to wrap the mahogany sole up the hull to a level even with the height of the toilet platform--the forward raised platform. I'd already made a layout line to this effect, so I spent the morning cutting and fitting the small planks required to fill in the area as needed on each side, choosing a layout that essentially extended the plank and seam lines forward as they angled up the hull. Once all the pieces were cut and ready, I installed them in epoxy adhesive, using dabs of hot glue as needed to help hold them in place since I couldn't drive screws into the hull. With this, the basics of the head sole installation were complete; still ahead, I'd fill the seams with black epoxy, and sand and finish the area, but that would wait till all the work was complete on the main cabin sole as well. |
 |
|
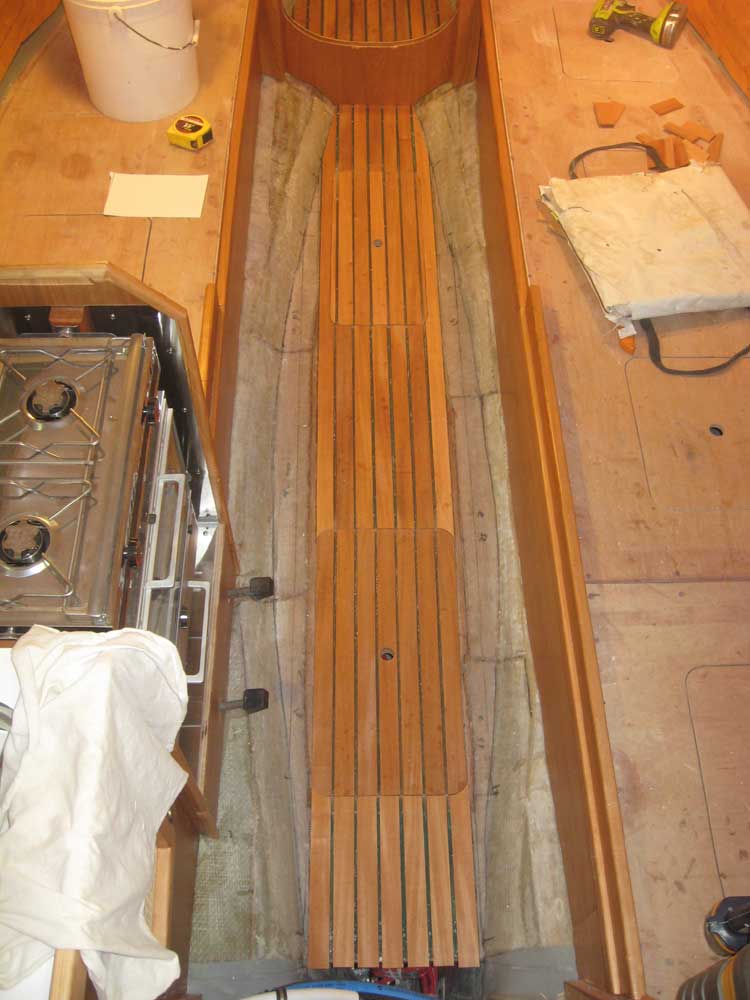
The main cabin would require two more separate days of layout and installation, simply because it was easier to do the task in stages. Today's task included laying out two additional planks on each side of the center section, bringing the planking out to the edge of the flat substrate against the hull. Each piece required long, angled cuts on each end to conform to the curve of the hull. As before, I installed the additional pieces in epoxy adhesive, using temporary screws and washers to clamp them in place as needed. Tomorrow, I'd complete the layout, cutting, and installation of the pieces required to cover the hull to the settees. As in the head, I'd more or less continue the existing layout up onto the hull to cover the remaining areas. |
 |
|
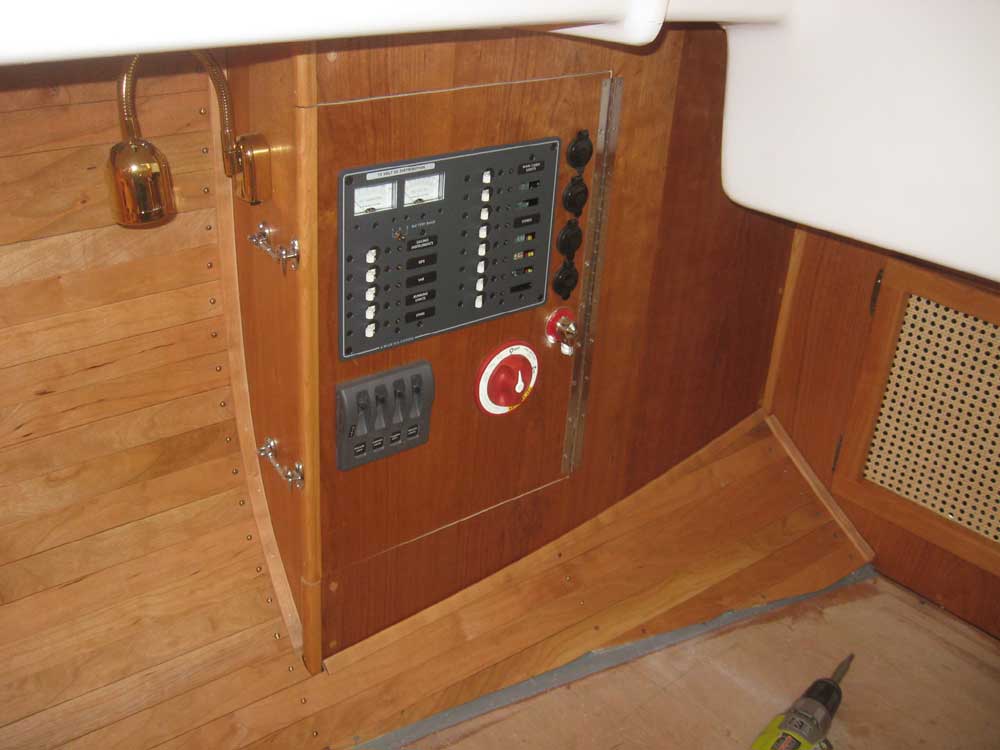
The cabin sole ate up most of the day, so I used up the remainder of the day with a few smaller tasks. After unexpected delays with an electrical panel order--the fault of the manufacturer, apparently--I canceled the order and found a nearly identical panel that I could get immediately--the only difference being that this panel featured analog gauges for its ammeter and voltmeter rather than the digital one in the panel I'd originally ordered. With the panel on hand, finally, I installed three additional circuit breakers to fill in the blanks in the as-delivered panel (why don't they just fill the panel from the factory, I wondered), and then installed the panel in its opening, and also installed the included shunt, which was required for wiring up the ammeter. I added several labels from the included selection, but since there weren't labels included that matched the function of several specific circuits, I ordered several additional, more descriptive labels for later installation. Later, I'd finish up the panel wiring, but I wasn't geared up for electrical work at the moment and preferred to refocus on it later in the week, once the cabin sole work was complete. |
 |
|
I rounded out the day with more varnish on the ongoing pieces, and also replaced small number of stainless steel screws in the ceiling strips with the correct bronze ones, which had also recently arrived. |
|
|
|